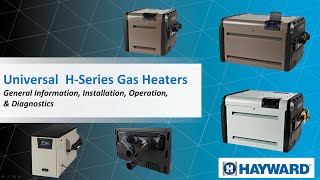
Manny Ixlawek walks through Hayward gas heaters: sizing by BTU, the H Series and Universal product lines, installation requirements for gas piping and electrical, how the igniter and safety sensors work, and what diagnostic codes mean.
Questions this video answers
1925 (founded by Irvin Hayward).
2017.
135,000 BTU; 115 V and 60 Hz only (not convertible to 230 V, not for indoor installation).
150,000 to 500,000 BTU.
Approximately 91,000 BTU per gallon of propane.
Chapters
Okay. Good afternoon. First of all, I want to say thanks for being with us. I know it's tough moments at the point, at this point, but let's just be faithful and we'll know that everything's gonna go away soon. So the best of luck for everybody and be safe. Today we're gonna talk about gas heaters. We're gonna talk about general information, installation, operation, diagnostics and more. More. So sit tight. To start, I just want to let you know that. Who's Hayward? Well, Hayward, as you know, it's a big, big international company. It was founded in 1925 by Irvin Hayward, then the family, the Davis family acquired it in 1964. In 2017, it was sold to a private equity consortium. We have 10 manufacturing and distribution centers around the world. As you can see, we have companies in the U.S. europe, China, Australia. We have more than 2500 people sales in over 100 countries, over 8 million pools with Hayward equipment. And also in 2009, as you know, the super pumps, while they reach or exceeded 3 million sales, so pretty big company, as you see, international. Okay, today, today we have heating gas, which is March 26th. Next week we're going to be having webinars on heat pumps on Tuesday, March 31, followed by lightning or LED lighting and water features on April 1 and then on Thursday. Next Thursday, we'll have anything that has to do with sanitation. For the third week of our calendar, April 7th to April 9th, we'll talk about automation on Tuesday, Omni Hub, Omnilogic on Wednesday, and then cleaners, robotic cleaners and suction cleaners. We are creating our next week of webinars, so sit tight. We're going to be talking about commercial and more stuff. Also, you will receive an email, which you probably know, since this is. This is several webinars already, but you will. You'll receive an email with the new events. And just make sure you sign up for each one individually so you get access to the specific one that we'll be taking that day. We'll be offering two different times. That way you have an option either in the morning or in the afternoon. So let's start with this. This is going to be the summary of what we're going to be talking heated introduction, BTU's calculation under our Universal H series, we're going to talk about specifications and advantages, our heat exchangers that are made out of Cooper Nickel, the bypass. Under installation, we'll talk about hydraulics, electrical gas and ventilation. And then components, functions and sequence of operation. And to end up we'll talk about our failure codes. So let's start by heating introduction. When we talk about this, we talk about differences between different types of heaters or different ways of heating your pool. Gas heaters and heat pumps is what we're going to be talking right now. What's the difference between them? Well, gas heaters are cheaper at the beginning when you first buy them or install them, they're cheaper than heat pumps. But at the long run in most of our countries, depending on the price of propane, but most of our countries, propane turns to be more expensive the usage of it than electrical. So after time, gas heaters become more expensive than heat pumps. The difference between both of them, besides the part of money, it's also that if we want to heat up something quick, gas heaters would do the job. Heat pumps are mainly or are better for maintaining temperatures. And another difference between them is that in places where it gets a little cold, we're Talking about below 10, 10 degrees Celsius or 50 Fahrenheit, heat pumps tend to stop working because what heat pumps do, they grab the heat from the atmosphere and they transfer it. So when it's cold, if we have no heat around the atmosphere, there's going to be no transfer. So heat pumps tend to shut down below 50 or 45 degrees Celsius. Sorry, Fahrenheit. Under Celsius, we're talking about 10, maybe 7 degrees. They just stop working while gas heaters can do the job no matter what because the gas is there heating. So that's. Those are the difference between both of them. BTU's calculation. First of all, what is a BTU? It's a British thermal unit. Those are the terms. A BTU is the amount of heat necessary to raise the temperature of 1 pound 1 degree Fahrenheit. So here we have an example of how how many hours it will take for a heater to heat up your pool. Certain degrees. Let's look at this example. We have a body of water of 15,000 gallons. That's the size of it. Okay, 15,000 gallons. If we convert that to pack pounds of water, we're going to get this number which is £125,250 of water. That's the weight. That's the same thing or it's equal to 125,250 BTUs. Remember, 1 pound 1 BTU, it's 1 pound per degree Fahrenheit. So 125,000 pounds is the same thing as 125,000 BTUs. So that's how much BTUs we need in order to get 1 degree Fahrenheit temperature rise on a pool of a size of 15,000 gallons. So if your customer is asking you, how long is it going to take? Well, as you see, we need this amount of BTUs, 125,000. So let's see, we're going to have to sell the customer a heater that is a little bit bigger than this to start. So in this case, we'll get the universal heater of 150,000 BTUs size wise. Okay, let's use this one as an example. Okay, so you ask the customer, how old, how cold does your water get during the night in the coldest month of the year? Oh, well, you know, the answer will be it gets down to 68 degrees Fahrenheit. Okay, and what are you looking for? What do you want your pool to be at? He's gonna say 86. Okay, that's a differential of 18 degrees Fahrenheit. That's a difference between both of them. Okay, so 80 degrees Fahrenheit, it's gonna be the same thing as ours. So on that day when the water is that cold, after we install the heater for the first time, to bring it to 86, we need 18 degrees. 18 degrees will be 18 hours. That's how long it's going to take for this heater, 150,000 BTU to get to that temperature. If we double the size of the heater, you can see that we divided the amount of hours and so on. The bigger we get, the less hour it will take. Or if we duplicate the heater, we put two of them, we're going to divide the amount of hours by two and so on. If you want to see it on a metric way. Body of water, 60 meters cubic meters. That's equal to 125,000 pounds of water. I'm sorry, 132,000 pounds of water. That's a little typo. To get one degree Fahrenheit. We do the same mathematics, but now in Celsius, the lowest, it's 20 degrees. We want to get up to 30 degrees. Difference of differential of 10 degrees, we multiply that by a constant that is 1.8, and that will give us the amount of hours again. So two different ways of seeing it. Now, if you have a question about, well, how much gas does a heater consume depending on the size? Well, here you have a, here you have a chart. If we Talk about propane. You see that one gallon of propane will give us 91,000 BTUs. That's how much BTUs we can get out of one gallon per hour of propane. So that means that if I'm going to put a, or install a gas heater of 400,000 BTUs, that heater is going to consume 4.4 gallons in one hour of propane. This is why it's really important to put gas tanks that are big enough to have a lot of propane in it. Now you can see here the numbers, how they're equal depending on how you like to see it, either in gallons, liters, pounds or kilograms. Different countries measure propane different ways. But here's the table that tells us that. Let's talk about the specifications and advantages of our heaters. First of all, we have three different. Well, we have two models. The one on the bottom, it's a unique model, 135,000 BTU. This is ideal for above ground pools or for spas or small in ground pools. But then we have our universal gas heater that starts at 150,000 and it goes up to 500,000 BTUs. We have it on residential, which is the brown one you see on the left. And we have it on commercial, which is on the right. The commercial and residential, the big difference between them, it's pretty much the header. The header is made out of bronze and the certification for commercial. So that's the difference between them. All of our heaters each, each one of those models are all tested and they're all make and the factory makes sure that they all work in all ways. Gas, electrical and in flow water. We make sure that there's no leaks in every single one of its parts. And after it passes several tests, then it goes to packaging so it can send be sent out to distributor distribution. If we talk about the H Series 135,000 BTU little heater. This is a great little heater. These are the features of it. Heat exchanger is made out of Cooper nickel. Every single one of them that come out of the factory, they come with Cooper nickel material. On the heat exchanger, there's no copper. So that means we have better heat exchangers, better material, inch and a half unit connections for this heater, digital control. But I want to make sure that I say this. There's two things about this heater. It's only made for markets with 60Hz and it's only for 115 volts. It cannot be converted to 230 and it is not for indoor installations. There's no kit for venting. It needs to be outside, outdoors. That's the recommendations by Hayward of this heater. Now, after saying that, now we go to our universal gas heaters. Here are the models from 150,000 BTUs to 500,000 BTUs. All of them have. All of them are between 83 and 84% efficient. You can see the width, depth and height of the. Of the heater. The only thing that changes is the width. The bigger and BTUs, the wider it is because of the heat exchanger. The units are two inch on the inside, two and a half on the outside. So you have both options of plumbing. Again, they all come with Cooper and NKO heat exchangers right out of the factory. So if you compare this with the competition, for the same price, you get the same size heater, but with a better heat exchanger. Here we can see it one more time. Just the sizes of each way and what I just said. Easy to use LED display, rotatable heat exchanger. And it is designed to be out on the open, no problem with the rain, no problem with the sun. Now, one other advantage. Do we have most heaters? All the heaters in the competition, actually. I'm sorry, the competition, the bigger they get with heaters, it's up to 400,000 BTUs, while we have one that gets up to 500,000 BTUs. So what's the difference? 25% faster. So that's a good thing for people that like their spa to heat up in 10 minutes instead of a 20 or so on. You know, if they want fast, this is the fastest heater you can get in the residential way. Besides that, it's got the same platform as any other universal gas heater of ours and as you can see, heats up 10 minutes faster per hour every 1,000 gallons. So what's the most common things we hear about the heaters? While heating is heating, they are all the same. No, they're not. All companies make the same sizes. No, we make. We make one bigger than nobody else does. There's no difference between manufacturers. That's a no. Also, we're giving Cooper nickel heat exchangers for the same price as the competition gives copper. And if you want to keep using the same, well, I can tell you that we have such a good computer or such a good programming inside of this heater that whenever there's a problem, it pops up codes that will Direct you to the part that is having issues at that moment. So they're very easy to troubleshoot, in other words. And for that, we'll show it right at the end. So you're getting something better for your money. Okay. You get something better with the heat exchanger and you get something better with the bypass that is inside of the header of the heat exchanger. Because besides the easiness of it, so all come with Cooper nickel heat exchangers. It's got a bypass, butterfly bypass, so that has less restriction on flow, less total dynamic head. So that's a good thing because you know that whenever we force a pump, whenever we have a pump, the more restriction we put in, the more or the harder it works. So the more energy they use. Well, simply by changing it, by having this kind of bypass, the heater saves up to 18% compared to the competition. Universal design for electrical connection. It could be either done on the right or on the left side for easy access. And forced draft by the Department of health. All heaters need to be forced draft, which means that the combustion is so much better for the environment. Cooper nickel heat exchangers, they're all built bent at our factories. What's a Cooper nickel heat exchanger? It's pretty much an alloy of copper and nickel. So if you have a heater in a house that has bad chemistry, that heater has a copper heat exchanger. And you put one of ours next to it, and the same water is flowing through both of them equally. Well, I can tell you that their heater, it's gonna break down. The heat exchanger is gonna have leaks, pinholes. It's gonna get destroyed a lot quicker than hours. So it's better against bad chemistry and also against salt water, it's more resistant. Here you can see we have a double bed Cooper nickel In all of our models competition, they are all copper. But again, they do offer Cooper nickel, but you would have to pay extra, and that's definitely above the price you're paying for ours. Our price is it's very competitive with their heaters that are copper only. So water chemistry, since we're talking about the heat exchangers, I wanted to make sure that, that we understand that water chemistry is something very important. Important for a heater. We have to keep our chlorine level always between 1 and 3.0 parts per million. Otherwise it will damage our heat exchangers. Ph, same thing needs to be balanced. 7.2 to 7.6 alkalinity. We have to have it balanced also. It's just like the PH So if we don't have it balanced, our PH will be jumping around from one side to the other one. And that's not a good thing since we don't have a balanced pH. So we need to have our alkalinity balance too before the PH and calcium harness. That's something important also because the more calcium there's in the pool, that could affect our heat exchanger. And we can see here why on the left bottom you can see that when the water harness is very strong, we start getting calcium buildup inside of the heat exchanger tubes. And when you start getting that the diameter, it starts getting smaller. So that means that less water is passing through those tubes. So it's a good thing to have that balance too. If there's a way that we can put some kind of softener or metal remover or something that will make our water less harsh or have less harness, that will be great. Also you can see on the top right and middle right how low PH and chlorine will affect our the material. Just look at the thickness. And also look how eaten up it is on the PH on the middle picture. Compare it to a brand new heat exchanger on the top left. Low water flow also will affect our heat exchangers. Any heat exchanger in general, and low water flow has to do a lot with. When you, when you install heaters below water level and somehow the water pressure switch never got adjusted. So the heater fires when the pump is not running. So there's no flow but the heater is trying to run. And in the bottom you can see bottom, middle, you can see a heat exchanger that has a bad mixture mixture of air and gas. So that will be related with gas pressure in the future. But just take a look and see how it's full with soot bypass. Like I said before, we have a bypass that we call butterfly. So the water pushes it, it opens up, so water flows around it easily hydraulically. This is 18% more efficient than any other gas heater that has a disc bypass. So you will save a little bit of money just by having this type of bypass in our heaters. You can see here on this curve how little of restriction or resistance our heater takes or uses depending on the water flow. So for example, at 80, let's talk about 70. At 70 gallons per minute, the feet of head just for the heater, it's only five. Other heaters can go up to seven at the same flow, eight or nine or even 10. Let's talk about installation. Let's Like I said before, our heaters are meant to be outdoors, so there's no problem with the rain, no problem with the sun. Just make sure that when you install it to keep distances from any window, door, or forced air inlet. We don't want carbon monoxide to go inside of a room or a house. So that's for our own safety. If we're going to install it inside of a room, we want to make sure that we create some kind of chimney so we can bent that heater. That hot air coming out of the. Out of the heater, we want to bend it out and at the same time, we need. We want to open. We're going to have some openings so we can have airflow going through the room. You got to remember that the gas heater, heater will be sucking air from the surroundings so it can mix it in the chamber with the gas and then do all the combustion. So if there's no air inside of the room, the heater will suffocate. Also, speaking about suffocation, we want to make sure that the heater never gets installed right against the wall or especially a corner. There needs to be a distance, as you can see here from the back, for example, six inches out of any wall or a plant or a tree or anything, or even a pump or a filter, anything that can block the airflow into the heater. Hydraulics. Let's talk about hydraulics. Hayward has this sweeps. This sweeps. When we talk about hydraulics, they use very, very, very resistance. These are a lot better than putting two 45s together flow wise and definitely better than a regular 90. So if you take a look into this, I mean, when you talk about hydraulically being efficient, I don't think there's a better plumbing than this. Right here in this picture, I'm showing you how we have several heaters in this case. This is a big Olympic pool. Not a. Not a big, but an Olympic pool. And this pool requires a lot of BTUs. Well, you have two options. You can put a big heater like a 2 million commercial BTU heater, or you can put several 500,000 BTU heaters. So what happens in the future if one of them breaks down? Well, you still have five of them backing it up. You still have heat in the pool when you have only one unit, when that one breaks down, then you're pretty much out of luck. You have no heat until you get it fixed. Not only that, want to make sure that whenever we install several heaters, even filters or chlorinators we need to make sure we install them in parallel. And if it's possible, it's actually recommended to put a flow meter so you can see how much flow it's flowing through these heaters. When we talk about hydraulics, I want to place a couple notes here. First of all, the chlorine generator that you see on the right, or it could be a tablet feeder. Well needs to be the last thing in line. The lasting plumb on the equipment pad. We don't want straight chlorine to go through to our equipment. One that chlorine to go straight to the pool where it can mix with a bigger, with a bigger body of water. Also if we have, if we have a heater, we want to install a check valve so whenever the pump shuts off, whatever chlorine was left in here does not back up into the heat exchanger and accumulate and start eating it up during the night. And a third thing, we want to put a bypass. If our pump is pretty big, the maximum flow on this heaters and that's the reason why I have this flow meter. So you know the maximum flow is 125 gallons per minute. But we know that a pump of two and a half horse will definitely give us more than that. So we have a 2.5 horsepower pump or bigger. We need to put a bypass in this case. In this picture we have a three way, three way valve as a bypass. Actually there is pumps, two horsepower pumps that have a flow of plus 100. So even if you have a two horsepower pump, I will still recommend you put a bypass and bypass a little bit of water depending on how much flow the pump has. Here you can see our minimum and maximum flow rate. The minimum is going to depend on the size of the heater. The smallest one will require 20 gallons minimum when the biggest one will require 40. If you have a variable speed pump and you have one of these flow meters and you can play with the speed so you can adjust it, never go down to the minimum. Try to go a little bit higher. That's what I recommend. Because the reason is when the filter start getting dirty, that minimum starts decreasing. So if you go down to the minimum, probably in about a week you're gonna be below it and maybe your heater won't even be working because there's not enough pressure to close the water pressure switch. Here you see the water pressure switch that I'm talking about. This is internal into its inside of the heater. Please keep in mind I said it before. I'm Gonna repeat it. If we install the heater below water, we wanna make sure that the weight of the the water does not closes this water pressure switch when the pump is off. If it does. If the heater tries to fire when the pump is off, then we need to adjust it. And you can adjust this from 1 to 10 psi. If you adjust it to the maximum, but still it's trying to fire with the pump. When the pump is off, then you may have to put an external flow meter. I'm sorry, flow sensor. This flows are a little bit different. Works out of flow when the internal one works out of pressure out of weight. So if the pool is a commercial pool and it's located on the second third floor and it's a big pool, that weight of the water, it will probably close this switch no matter how much you adjust it. Okay. After you adjust this switch, if everything was. I mean if you're adjusting the switch and it shuts off, then after that you just want to turn the pump on, make sure it works and then shut it off and make sure it shuts off again. To be safe, if you put a heater above water level. I'm talking about like if the pool is on the first floor and the heaters on the second floor, you will be requiring. Actually it's recommended to do a siphon loop. Okay. Because of the height. And also you may have to adjust the switch. Again, I had a question before where like this they said how much flow do I need? It all depends on your pump. So flow meter will be great for this to have up there to make sure that you have the correct flow going up to the roof or up to the heater. Now we have this new adapter kit. What is this adapter kit? Well, this adapter kits are something that Hayward came up. So if you have an existing heater made by Jandy, the model is JXi or the Pentair Master Temp. And that heater broke down and needs to be replaced. And customer wants one of the Haywards. So we have these adapters that all you got to do is pretty much plug and play. This is gonna give us a easier way less time consuming since you're not going to do too much plumbing and very easy way to install it. That will save us money when we talk about time. And also these are kind of designed with a very in a hydraulic way. They that the flow it's so much smoother. Smoother causes way more less restriction than having to plumb 490s. Instead of these adapters innovative low profile configuration. And it's greatly decreases heater pressure drop for better overall heating performance. Now let's talk about electrical. We're halfway done. So electrical our heater can be installed. I'm talking about the universal heaters. The ones that start with 150,000 BTUs up to 500. They can be wired for 120 volts or 240. Make sure that all the heaters are grounded perfectly and also bonded. That's why they have this bonding log on the left side. We need to bond it. On the bottom you have the connection either two wire or three wire for automation. That's all gonna depend on the customer. Customer or on the installation. This wiring cabinet, you will find it on the right side of the heater and also on the left side. You can use either one. Whatever has a better access for you. If we wire this heater for 120 on this, on this board which is a fuse board, there is a connector, a plug that comes from the factory connected to 240. If we're going to wire this for 120 we want to make sure we unplug this. Then plug the side that says 120. That's all on the installation manual. Just to let you know. By the way, you will receive this presentation. You will get some information and also diagnostics menus by the end of this week or next week, including this video. So you can have it handy for whenever it helps. Now let's talk about gas. Gas recommendations. 90% of the issues we have with gas heaters and not only us, but I'm saying this from a personal point of view, any company, it's a bad gas installations, wrong size plumbing, distance missing regulators. So there's several ways of doing this. And let's start with this kind of installation. This is when we, this is what we call two stages or two stage installation. This is when we have a first stage regulator or high pressure regulator for gas and then our second stage regulator. Okay. Now like I said before in gas heaters, since they use propane, we're talking about propane at this point. Remember that since we have, since they consume a lot of propane, we we need to have a tank that is sufficiently big enough to have enough propane for this heater. Well this heaters, the bigger they are, the more pressure they have. This first stage regulator is what we're going to install or actually what the tank needs to have on top. This is made by the gas company. This allows only pressure of 10 psi to go out of the tank, through the gas line all the way to our heater. Right at the heater, we need to install our second stage regulator. Second stage regulator. What it does is that restricts the flow so only half psi goes out of it and into the heater. Now when we get to that point, we read it normally in the US in inches of water column. I know there's places where they use millibar or they use psi. I tell customers, look, just look at our numbers 10 to 13 and just do some kind of translation or a translation or conversion. I'm sorry. And just in Google, just type it in, it will come up. I've done it before, just like I did this and then just base yourself out of your own numbers or your own way of measuring this. So very simple. Now here a couple rules on the installation in this scenario. For our heaters, the second stage regulator needs to be for it only. So in other words, one second stage regulator per heater. We cannot use one to feed several or other appliances. One per heater. Second, we need to use three quarter inch line. Third, the connection or the piping from the regulator to our gas valve needs to be no more than six feet away. Third, it cannot be flexible pipe. The more the straighter the better. And fifth, we need to have a sediment trap. You can see here we have a sediment trap. This trap is here also here you see it on this installation. The reason for that is because gas, especially propane, it's not pure 100%. It have little pieces of rock or something. So when it goes in, when it comes to this tee, that little rocks that we have on in the gas mix, they will drop and stay on the bottom of this instead of going inside of our gas valve and causing some kind of blockage. Pipe diameter here we see the pipe diameter for a second for a two stage installation. But let me go to one stage installation. Here's an example. Let's look at the bottom one which is propane. But natural gas works the same way. Let's imagine that we have a big tank out by the street or on the front of the house. And we need to feed a gas heater that's way in the back in this case. Let's see that. Let's imagine we sold a customer a 400,000 BTU. Well, the distance between the tank and the gas heater, it's about 250ft away. So we'll use this bottom part right here on this chart. Okay, so 250. So we're inside of 200 and 300ft distance between them. And we're using one stage regulator only, which is on the gas tank itself. This is the way of installing this, because this kind of installations, that regulator actually does both jobs. So in this kind of scenario, what we need to make sure is that we need to make sure we have the right size pipe between both of them so we can get the amount of gas to the heater. So as you can see by doing this kind of installation, we need to jump automatically to inch and a half plumbing. Okay? That inch and a half plumbing will give us the flow of gas, will give us the amount of gas we need. Okay, so there's two rules on this kind of installations or actually to consider how it works. There's two rules or two things. The diameter of the pipe is going to give us the flow, the amount of gas it gets to the heater. For a good combustion, the size of the tank is going to give us the pressure so the gas can get there quick enough. So one thing is to have the the amount of gas and the other one is to have the pressure. The heaters burn gas pretty quick, so we need to make sure that the gas is flowing really quick. Getting to the heater. I don't think there's a case here, but just in case of natural gas is pretty much the same. But this comes from the outside. They have a big, big regulator that feeds every single appliance. And in case somebody knows about this, the way that works is pretty much you add all of your house appliances plus the heater, you add a total of BTUs, whatever that total is, that meter needs to be big enough to feed every single one of those appliances. Appliances and including your gas heater. What tools to use if we want to work with gas heaters? Well, everybody knows multimeters, we need them pretty much for everything. But for gas heaters, it's going to be very important to use gas pressure manometers. Without this, we're not going to know how much gas it's going inside of a heater. Every single heater has a decal that show you the amount of gas that they need. Here you can see in propane, we can see that the inlet minimum is 10 inches of water column. Okay. The maximum of the inlet is it's 13 inches of water column. So this means that when the heater is off and the pressure coming in needs to be between 10 and 13 inches of water column. And also when it fires, it needs to stay inside of that range also. On the outside of the gas valve going to the burners. We need to have a seven gas valves come adjusted from the factory. So pretty much this 7 is guaranteed. But if it's not rectifying, I would have started looking first at the installation. The outside. Outside part of the heater. This same deco will show. Show us the model heater with the serial. If it's propane or natural gas, and the size of the. Of the BTU per hour that it burns. Here are the gas pressures that I just said. Static. That's. We measured that here on the inlet. Okay. The gas comes in from this side. This is the inlet connection. Here we'll measure our gas pressure like you see on this picture with our manometer. Okay. So static, that's when the gas heater is off. We want to make sure that we have between 10 and 13 inches of water column. And at the same spot at the same size. All we got to do is just turn on the heater and that number that we're at. Let's make sure. Let's suppose we have 12 inches of water column. It's going to drop a little bit when it fires. We still need to be between 10 and 13 on propane. 4.5 to 10.5 unnatural. Okay. So we got to be here on this range. A good installation will have maximum 1 inch drop between being off and being on. On that side manifold. That's the. That's this part. That's what goes out of the gas valve into the burners. And that's where we have. We would have to install our manometer. So that part, like I said, normally you shouldn't be touching it. We need to make sure the installation is correct. But for some reason, everything's correct. And we need to go inside and check it. We can do that. Now. Let me go back just one second. If you see this little cap, it's got a white sticker from the factory is intact. So we know that nobody has touched the gas valve. But in order to get inside of it, you will have to rip off or actually break that. That little sticker. And you can untwist this little cap with a flat screwdriver. Use the same flat screwdriver to increase or. Or decrease the pressure inside of the gas valve. If you go clockwise, you will increase the pressure. If you go counterclockwise, you will decrease the pressure that goes out of the gas valve into the burners. There's a side glass on this heater on the front of it that I'll show you later you can take a look there. Especially when it's dark, you can take a look and you can see what color the flame is. For natural gas, we'll have letter A as the color. For propane it will look like letter B. But if you look inside and you see something yellowish orange like letter C, then we have a problem with propane or actually, I'm sorry, with gas with bad, with a bad combustion. We need to shut off the heater and check your gas pressures and adjust them. Like I said before, do not use flex. This type of flex that looks like an accordion and not only being half inch but also looking like an accordion causes restriction. That means we're not going to get the proper flow of gas. And also when you do installations, like I said before, if you use two stage regulator, you, you cannot split. It will be one regulator per heater. And also try to avoid using so many turns. Every single turn causes obstruction or resistance or reduction. Ventilation. If we're going to put it inside of the room, we need to vent that combustion out. We don't want carbon monoxide inside of our room for safety. So just remember that part. And also remember that we need to have airflow going into the room so the heater can breathe. And how much airflow, that's going to depend on the size of the heater in square inches. But want to let you know that if you do, if you have a room, an equipment room and you have something like this, I don't think air is going to be flowing through those little spot places or spaces that well. And after time they're going to get full with dust and the amount of air is going to be even less. That's going to cause our heater to struggle and shut down. If you're going to install it inside of a room, you need to vent it out. And we have kits for two different types of installations. Positive, positive means, means you're gonna be going horizontal out through a wall. Okay. So we have kits for that. Depending on what size the heater is, it's gonna depend what kit. And here are the part numbers. And also you can read the catalog or the instruction, instruction manual. Every single one is going to tell you how far you can go and how many elbows you can use in what size diameter pipe you're gonna have to get locally to be installed. And if it has to be double wall or single wall, stainless steel and so on. For negative, it's a little bit different the look of the, of the kit, but it's pretty much the Same negative means you're gonna go straight up through a roof. Okay. And the part numbers are a little bit different, changes in couple letters. And again, depends on the size and depends how far you can go out before you can go. You got to remember, if you try to go past this length, we're going to have some issues. For example, if you're trying to go way up 100ft before the air gets out, it's going to cool down and it's going to cause condensation, and that condensation is going to go back into your heater, and the heater will get damaged quickly. So we need to make sure that we understand and read the instructions of how big the diameter has to be for the pipe to bend and how far you can go. The installation is pretty easy. You just gotta remove the top guard and then the rain guard, which is on picture top left. Install the new kit, which is new cover. Now, this kit, it's guaranteed by Hayward to have no leaks of carbon monoxide. So it's very secure. So highly recommend you use one of these for that installation, for safety. Also, our heaters come with this little vent or this little grill or fan plate. This fan plate needs to be changed on two different occasions, but most likely is depending on the height, depends on how high you are above sea level. And also if you're installing the heater indoors and outdoors, well, this little plate comes inside of the heater in the same bag as the instruction manual and the unions. So if you're installing this, this instead of a room at a certain height above sea level, you're gonna have to swap it. Now, there's a little sticker on the side, on the right side of it, and it'll tell you for what height and what height is designed for. So maybe you have to swap it, the existing one for the one that comes in the bag. Or maybe not. Components, functions and sequence of operation. We're almost to the end, so let's talk a little bit about the display. This new display has three buttons. The one on the right is a mode button that goes from off to spa mode, poo mode. And then on the bottom, we have two buttons to increase or decrease the temperature, the desired temperature. Two LEDs on the left. One is for, in case we have any problems with it, alarms or codes. And then we have an LED light that shows us that the heater is on, that it is firing on the right side. We have three LEDs, first one on top. It's the one that shows that it's that we have power, it's on and the other two on which mode it is. If it's on pool mode or spa mode, those are just two different ways of setting up temperatures. And then in the screen, the screen will show us three things only. Actual temperature, set point temperature. Whenever we're pressing up and down or plus and minus, and then any error codes we have. And whenever we're changing the temperature, this little icon will start flashing on the same control. If we want to install this to automation, we would have to press our button menu to go to standby mode. And after that we would have to press the menu button again together with the plus button for three to five seconds until you see BO on the screen. And if you see that, then now the heater gets controlled by automation. You have no need to go to the equipment room anymore. You can turn it on. If you have automation like ours, like Omnilogic, you can turn everything on from a cell phone, including your heater. Just want to make sure that if you do the wiring, you program it for that components. We have a vacuum switch on the left side. That's the one that tells the ignition control that the blower is working. Transformer we have our gas valve, the blower. We have that fan plate that I was telling you and you can see that white little sticker that tells you for what height this little plate, this little plate is recommended for. So the higher you're up in the mountains, you may have to swap it for the one that comes in the box. Then we have the ignition control. It's pretty much the brain that tells us every single thing or actually has control over all the process of ignition. Our fuse board, that's where we do our conversion from 240 to 110 volts or the one that has fuses to protect all the electrical parts here from outdoor power surges. That's a side view glass that I was telling you where you can see the flame at night or when it's dark to see if it looks blue or if it looks yellow. And then that will be the orifices for the manifold or the manifold with the orifices for firing. Just to let you know, if you have a heater that is propane and you want to convert it to natural gas or vice versa, you would definitely have to change the gas valve and the orifices inside of the manifold. Now we do have a kit that if you get it to do the conversion, comes with the entire thing. So all you got to do is remove Four screws and put the new one back in more components. This is the safety loop. Okay. On the. On the right side of the heater where the header is at originally, we're going to have the safety loop. What happens is that 24 volts go out of the ignition control and they start going into the water pressure switch. Here's the waterproof switch. If there's flow flowing through the heater, then that voltage goes out and it goes into one of the high limits. That high limit that you see right there. That one's the one that detects the temperature of the water when it comes out of the heat exchanger. So if there's a problem with the heat exchanger, with blockage or flow not being enough, that sensor will open, telling us that the heater, the water is overheating. Or same with the second high limit, which is on the bottom. That one's the one that takes the temperature of the water that comes out of the heat exchanger after it mixes it mixes it with the water that passes through the bypass. Okay. And then we have an exhaust limit. This is new to our heaters. This is right in this position where you have the chamber. That one takes control or detects the temperature inside of the chamber. So if that little sensor or limit opens up, there's no way to fix it. It's broken, needs to be replaced. But the reason for this is because if that happens, that means there is some kind of obstruction inside of the chamber, not allowing the hot air to go out normal like normally. And for that, the first thing we've got to do, make sure we have no blockage on top of the heater. And second, take the top off and inspect the heat exchanger. It could be packed with soot, and that's the reason why it overheats. So the reason is, again, to prevent something from happening. If it gets really hot on the inside, things can. Could melt or even the heater can catch on fire. So like, again, again, it's a very good safety. And last of the components inside, we have our flame sensor. This set up the chamber, the ignition, the igniter. And then we have that side glass that I said on the inside and our burners, which are made out of stainless steel. How does this work? Well, this is how it works. This is the process of it. Just so we understand, if you go to your heater, you turn it on and say, okay, I want to turn it on. The temperature is cold. I want it hotter then the heaters and say, okay, let's start heating it will turn on the blower and then the vacuum switch will have continuity, will close. By doing that, it sends a signal to the ignition control. So then the initial control says, okay, perfect, the blower did come on. Now let's make sure it shuts off. So it shuts it off, the sensor opens up and then and notice that the voltage or the signal doesn't come back. So it knows that the blower shut off. So right after that, it turns it back on one more time. And right when it turns it back on, it starts sending voltage to the igniter to start getting it really hot. And after it gets it really hot, opens up the gas valve, the heater fires up, and then we have the flame sensor. And the flame sensor will detect if the flame is in a good spot. So it will rectify by sending a signal of millivolts back into the ignition control. But it's pretty much telling it, you know what, everything's good. Stay on please. So after all that is done set, the heater will stay on. But if it wasn't successful, then the heater will try to do it two more times. And if at the third time it's not successful, then it will shut off and it'll give us a code. So now let's look at the failure codes. This is a list of all the fader codes the heater has. The reason why we have so many is because we want an easy way for you to get right to the point. So if it tells you, hey, there's a problem with the igniter, boom, you go straight to the igniter. So let's look at the codes. BD BT is telling us that the secondary high voltage. But I'm sorry that there's a secondary high voltage fault. So pretty much you need to check the fuse on that fuse board, which you see on the right on the red circle on the, on the right side. Okay. If the fuse is okay, then we got to check the wire harnesses. BE CE is telling us there is definitely a problem with the display board cable connection. It's a ribbon connection to the ignition control. So check that, make sure it's no corroded, not corroded, otherwise we're gonna have to replace it. And then we have EE which means the bad ignition control. Before you decide to replace that, just make sure that the fuse, there's a fuse car looking fuse on the bottom left. Make sure it's not open. And if it's good, then we're gonna have to replace that ignition control. IO the I O Means igniter open. That's pretty simple. You can just unplug the igniter and on the igniter itself we can check for ohms. Not only on the igniter but on the plug. Check for ohms. We should have about 60 ohms. If it's open, it's definitely bad. When you pull it out, either you can see that it's broken or maybe it's got a crack on it. We would have to replace it anyway. When you do, make sure you're very careful with that since it's very delicate. Then we have sb, which means the keypad failed. The buttons are stuck. Just press the buttons, check. I mean if there's definitely stuck, then the controller itself needs to be replaced. Not much to it. Sf, that's temperature sensor. Temperature sensor. Also you can check for ohms. There's a chart on the installation manual that tells you, depending on what the temperature is, how many ohms you should have. If you're not close to that, we have a bad sensor also another way to check it. It's a three wire sensor. So you can check the middle wire with the left side and then the middle one with the right side and compare those two numbers. They have to be pretty close. I'm talking about five ohms of separation. If it's not, if there's a big difference, that's another way to know that it's bad. And then we have hs. HS means that the water exceeded temperature, the maximum allowed. The maximum on Fahrenheit is 100 Fahrenheit. On Celsius it's 40 Celsius. Well, if it gets above that we need to check why it's doing it. Most likely we have a problem with heat exchanger tubes getting clogged with calcium buildup. For that we would have to take the header out and then inspect them with the flashlight or something. And the other thing could be that maybe the bypass is broken and we're not getting a good mixture of flow water through it. So those are the two things. HF means that the gas valve, it's energized when it's not supposed to. Most likely we have a bad gas valve. Just check the voltage, make sure there's no 24 volts going to it. If we have 24 volts steady when it's not supposed to, then we have a bad module. And then on the bottom we have lo. Lo means low flow. That's for the. That's the safety circuit that I was telling before. That goes from the water pressure switch to the High limit to the exhaust limit. Well, if you get in that code, that means that one of those, it's not returning the voltage. So 24 volts go into one of them and then it goes out and then it goes into another one and then it goes out and so on. So see that? See where the voltage is stopping and then, and then address that, that, that item also when the pump is off, you will get that code. But that's, that's normal because we have no flow going through the heater. You turn on the pump, that message should go away. If it's a problem with flow, then we gotta check, we gotta make sure that our filters are not dirty or we have a valve on the wrong position. And the middle one, bo, which is skip bo, means that it's connected to automation. We saw how to program that before. There's not a bad code. That's just telling you that no matter what you do, it's only going to come on with automation. AC and AO are air closed. Air open, the top one, air closed. That means that most likely the vacuum switch, it's stuck close. So check for continuity. Replace it. If that's the case. If the heater is off, it should be open, especially if the fan is not working. This has to be open, cannot be closed. And ao, it's air open. It could be that same switch that can close a fan that is not coming on or an ignition control that is not sending the right signals or the right voltage. But typically you will see that this little hose either got disconnected or it's got a pinhole or a crack or it's split or is cut. So I will start checking the little hose if you see this code before we jump into electrical conclusions. And last but not least, we have, I'm sorry, before the last one, we have pf. Pf. It's a polarity. That means that if you wire this heater for 120, you will not get this code if you wired it for 240, but if you wired it for 120, you need to make sure that you wire correctly. Your 120 volt line and the neutral, if you swap those, you, you, you will get this code. Also, you need to make sure the heater is grounded and it's bonded also. And another reason why you could get this code, even if your neutral is right in the middle where it's supposed to. By the way, there's a little plate here or a sticker that tells you for 120 how to wire it so you can you can't miss this. But another reason why this code can appear, that's when you use neutral ground out of the same line. There's a lot of places where neutral, they come out of the bar of ground and things do work. But I want to make, I want to make this sure that everybody understands neutral and ground are not the same thing. They're def. They're definitely independent. Okay, so if you go to a place and you just don't know if it's wired correctly, then just go to 240 connection to avoid this kind of issue. And last 90% of the times it's gas problems. Gas connection, bad installation. This is for the code if ignition failure. If you get this code, especially on brand new installations, the first thing you want to look at is your gas connection. If you have this problem and you need help, you can contact me. And the first thing I'm going to ask you with this code is for you to send me pictures of the gas insulation from the tank all the way to the gas heater. I want to see sizes, I want to see distances and where are the regulators and what size tank you have. So that would be a good way to start. So to finalize this, we have several heaters. I want to Repeat this part. H 135,000 BTU heater. This heater is. It was built for above ground pools or small pools in ground spas. Connections of 120. I'm sorry connections for 1.5 inches. The heater is for 115v only, not for 230. 60hz market only, not 60, not 50hz. Also to be installed outdoors, not indoors. Okay. Universal gas heaters. This universal gas heaters can be installed indoors and outdoors. They can be wired for115,230, but they are also 60 hertz only. Okay. If somebody is on a 50 hertz market, we make a special model is pretty much the same. It's a special. It's a different part number compared to all the ones that you saw today. Just let us know and we'll be happy to help you with that. So we do have something similar in 50 hertz. And then don't forget about this beautiful new adapters. For an easy installation, we're replacing heaters made by Jandy, which is the JXI or the Pentair Master Tip. These adapters will save you a lot of time fittings and struggle. So and one more thing. Our universal gas heaters, we have them in sizes from 150,000 BTUs all the way to 500,000 BTUs in size. And all of them come with Cupro nickel heat exchangers, which means it's a heat exchanger a lot more stronger than just regular copper for the same price as the competition and with a bypass that is hydraulically more efficient. Saves you money. Here's the schedule. One more time for the next seminars we're having next coming Tuesday, we'll talk about heat pumps. And then Wednesday we'll talk about LED lights and water features. And we'll end up the week with chlorination. And for April 7, we have Automation Omni Hub. April 8, Omnilogic. And on the 9th, we have Suction and robotic pool cleaners. So stay, stay tight. Look at your emails. Make sure that as soon as your emails come in, choose whatever time it fits. We have two different times on each day for you guys, so whatever fits better. Just go ahead and register. And at this point I would like to ask you if you have any questions, please type them in on the question section if you do. My name is Manny Exlewack. My partner, sorry, I started with myself, my partner, Roberto Sablon, regional sales manager for the Caribbean and Latin America. So if you have any questions, need any help with sales, you can always contact him. And then we have Rafael Acosta for South America, in case we have somebody from South America during this webinar. That's his email, his contact email. And then myself, Manny Ixlawek. I'm the technical manager for the Caribbean, South America and Central America. And my emails right on the page. So it looks like we have no questions. I think everything was pretty clear. If you guys have anything later on, just shoot us an email. We'll be happy to help you. Thank you very much for your time and stay safe and hopefully we'll see you Tuesday. Thank you. Bye bye.