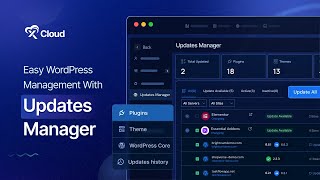
xCloud's Updates Manager lets you update WordPress plugins, themes, and core files across multiple sites from one dashboard. Log into Team Settings, filter by server or site, and run updates in bulk with optional backups. Check the history to see which updates succeeded or failed.
Chapters
We know keeping WordPress sites updated is essential. Using xCloud, you can manage all plugin, theme and core file updates from one dashboard. Let's learn how to manage websites effortlessly with xCloud. First, log in to your xCloud dashboard. Once you're inside, look at the top right menu. From there, go to Team Settings and navigate to Updates Manager from the left sidebar. This will open the Updates Manager dashboard where you can control updates for all your WordPress sites in one place. Inside the Updates Manager, you'll see an overview of all available plugins, themes WordPress Core you can see how many updates are required across all your sites. Go to each tab to check available updates, active plugins and inactive plugins. You can also filter by servers and sites to perform bulk updates. On the left sidebar you'll find options for plugins, themes, WordPress core, and update History. Depending on what you want to update, you can choose individual items or use bulk options to update instantly. Let's start with plugins. Go to the all tab. You'll see a full list of plugins and the sites where updates are available. You can select a single site, Multiple sites, or All Sites by clicking the checkboxes next to them. When you're ready, click Update Selected. If you want to create a backup before starting the update, check the Backup option and then click the update items button. XCloud will begin updating the plugins across all the selected sites. Next, go to the Themes tab. Choose the themes and sites you want to update, then proceed the same way. Updating the WordPress core works in the same way with just one click. XCloud ensures your sites are running the latest versions. After the updates are complete, go to the Update History tab. Here you'll find a detailed record of all updates. Click on the See Details button to learn more about each of the updates. You can also visit the Success, Failed and In Progress tabs to check the status of the plugin theme and core updates you've applied. Filter the history by time frame or use the search bar to quickly find specific updates and that's it. This is how easily you can manage WordPress updates using the Updates Manager in xCloud. Thanks for watching. If you enjoyed this tutorial, give us a thumbs up and don't forget to like, share and subscribe for more tutorials and tips. Happy hosting.