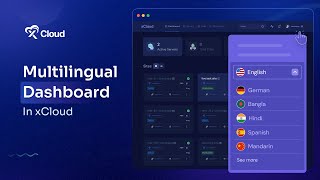
A short YouTube tutorial (by M Asif Rahman) demonstrating how to change the language in the xCloud hosting panel. It shows changing the dashboard UI language via My Profile or the top-right language dropdown, and how to set team-level notification/transactional email language in Team Settings so messages (email, Slack, WhatsApp, Telegram) arrive in the chosen language.
Chapters
Foreign. Today we will show you a quick and simple tutorial on how to change the language of your xCloud hosting panel. Let's get started. First, log in to your xCloud dashboard and head to the top right corner of your dashboard. You'll see an arrow icon next to your team name. Click on it to open the drop down menu. Now select My Profile. Here you'll find the language settings and click on the menu to access the languages. Choose your preferred language and it will instantly save and change the language to your dashboard. Now there's another easy way to change the language. Go to the top right menu again and find the language menu at the bottom of the menu. From the dropdown, select the language you want to set for your xCloud profile. Once you choose your preferred language, it will automatically save and update your settings. You can send notifications and transactional emails from the xCloud team in your preferred language as well. Click on the arrow icon in the top right corner, then select Team Settings. Find your team, click the three dot menu and select Edit. From there, change the notification language to your preferred choice and click on the Save Changes button to update your settings. Once you've saved your settings, you'll start receiving notifications through email, Slack, WhatsApp and Telegram in your chosen language. Let's have a look at an email in German that we have set up in xCloud. And that's it. Changing the language in the xCloud dashboard is simple. Thanks for watching. If you enjoyed this tutorial, give us a thumbs up and don't forget to like, share and subscribe for more tutorials and tips. Happy hosting.