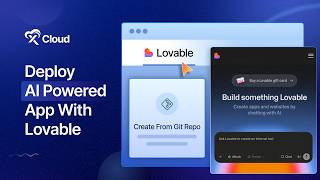
Deploy a Lovable app to xCloud by building it in the Lovable Dashboard, connecting your GitHub repo, then creating a new site in xCloud and selecting the Lovable option. The site goes live in about a minute.
Want to deploy a web app or website with AI? With Lovable, you can create applications by chatting with AI and deploy them on xCloud in just a few clicks. Let's get started. First, go to your Lovable Dashboard. Here you will find a field to start chatting with Lovable. Start a conversation with your requirements and click on the submit icon.
Lovable may ask a few questions about buttons and other configurations of your app that you want to build. Choose your preferred options and submit. Within a few seconds your website structure will be ready to be implemented.
Click Implement the Plan to Continue.
Once the project is ready, you will be prompted to publish the project and you will see the Lovable app has been created. You can preview it right from the Lovable Dashboard. You can update the site more by just asking for your instructions in the chat field. Once everything is ready, click the Publish.
Icon from the top right corner of.
The dashboard, enter the project URL and proceed to publish the project. Next, to deploy your Lovable project, click the GitHub icon and connect your GitHub account and allow access. Complete the full GitHub authorization and connection process with Lovable. Now go to xCloud Dashboard and click New Site. From the tabs, choose the Lovable option, select Clone a git Repository and go to the next step. You can create the site with a new domain for a production ready deployment or a demo site. If you want to proceed with an xCloud demo domain. Next Next you can adjust the Node JS version and the site user of the app. Now get your git repository URL from your GitHub project. Open the Code tab, click the green dropdown, choose the web URL and copy it. Go to the xCloud dashboard and go to the Repository Configuration option. As we are using a public repository, we are selecting a public repository. Then paste the URL that you have copied under the Git Repository URL section. Next, enter your Git branch and click Next. After that, review the details and click the Start button to proceed. Your Lovable site will deploy within a minute. Once the site is created successfully, click on the Site Dashboard. You can go to the Git option from the left sidebar menu.
Here you will be able to update or customize your git settings. Now finally, click on the Visit Site option from the xCloud dashboard and see your live site from Xcloud and that's it. This is how easily you can deploy a lovable application from xCloud. Thanks for watching. If you enjoyed this tutorial, give us a thumbs up and don't forget to like share and subscribe for more tutorials and tips. Happy hosting.