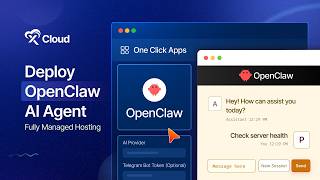
Deploy an OpenClaw AI agent on xCloud by creating a managed server, connecting AI providers like Claude or ChatGPT via API keys, enabling Telegram integration, and managing it all from the dashboard. The system auto-provisions your instance and includes built-in tools to diagnose and fix common issues.
Chapters
Want to create your own AI agent? xCloud provides fully managed OpenClaw hosting that lets you run real AI agents without any hassle, in just a few simple steps. Let's get started! To begin, open the xCloud dashboard and click the "Add New Server" button. From here, choose "xCloud Managed Server," as xCloud provides fully managed hosting for OpenClaw. Enter a name for your server in the server name field. Then choose the app type OpenClaw from the dropdown menu. After that, add a tag according to your preferences. Next, choose your server type. After selecting the server type, choose your preferred server size. Once you select the server size, choose the continent from the dropdown menu and server location. Then select your preferred Ubuntu version. You can also enable or disable automatic backups for your OpenClaw AI agent. Next, you will see that the dedicated Open Claw Stack is already selected. Before continuing, review the security warning section and confirm that you have read and understood the information by checking the confirmation box. Now it's time to connect your AI provider. From the AI provider dropdown, choose your preferred provider and enter your credentials. If you have an Anthropic API key, you can enter it directly. If you use a Claude account without an API key, you can connect using the Anthropic Claude Code CLI token directly from xCloud. Similarly, if you have an OpenAI API key, you can enter it. If you use an OpenAI Codex or ChatGPT account without an API key, you can connect using OpenAI Codex with ChatGPT OAuth. You can also connect other providers such as Google Gemini, OpenRouter, Zed.ai, and Moonshot AI using their API keys. Let's set up ChatGPT using OpenAI Codex. Choose OpenAI Codex from the dropdown and click the Generate Token button. This will redirect you to the setup page. Click Connect with OpenAI to begin the setup process. Once the setup completes, copy the URL from your browser's address bar. Then return to the OpenClaw Codex setup page, paste the URL, and click Exchange Code and Show Token. You will receive a token. Copy it and return to the xCloud dashboard, then paste it into the ChatGPT Auth Token field. You can also connect OpenClaw to a messaging platform such as Telegram. To enable this feature, enter your Telegram Bot Token and Telegram User ID in the respective fields. xCloud will automatically pair the account. Next, choose whether to keep the OpenClaw UI enabled or disabled, so the dashboard interface remains accessible. Once everything is configured, click the Create button, xCloud will start provisioning your OpenClaw AI agent. After deployment finishes, go to the Status section of the xCloud dashboard. Here you will find the URL and basic authentication password credentials to log in to your OpenClaw instance. Using these credentials, log in to the OpenClaw dashboard. Once you log in, you can start interacting with OpenClaw and begin using your AI assistant. Now let's check your AI agent from Telegram. Go to your Telegram bot profile and click the Start button to proceed. Ask anything you want and begin performing real tasks with your AI agent. After your OpenClaw instance is running properly, you can manage its configuration directly from the xCloud dashboard. You can access all the options such as status, settings, domain, SSL, updates, environment, and more under the Overview dashboard. To update your AI provider settings, go to the AI Provider option from the menu. Enter the new provider and API key, then click Save Changes to apply the update. If you want to modify the Telegram integration, open the Channels section. From there, you can add or update your Telegram bot token and Telegram user ID easily. To modify application settings, go to the Config section in the sidebar and update credentials or adjust configuration settings as needed. The Environment section allows you to customize environment variables for your OpenClaw instance. Navigate to the Updates section and click Check for Updates to see whether a newer version of OpenClaw is available. If you need to reinstall OpenClaw, go to the Reset option. This option lets you reinstall OpenClaw on the same server without creating a new server. For monitoring and troubleshooting, open the Logs section from the sidebar. This section displays detailed application logs that help you identify issues or track system activity. If your OpenClaw instance encounters issues or does not run properly, you can use the built-in repair feature to detect and resolve problems with AI. Click the "Repair" button to automatically diagnose and fix problems such as broken binaries, stale processes, service issues, or invalid configuration files. Once the process completes, your OpenClaw instance will run smoothly again. That's it! This is how easily you can deploy an OpenClaw AI agent with xCloud. Thanks for watching! If you enjoyed this tutorial, give us a thumbs up, and don't forget to like, share, and subscribe for more tutorials and tips. Happy hosting!