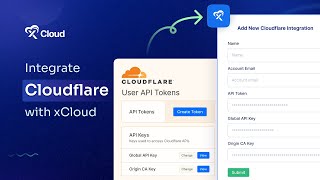
M Asif Rahman walks through connecting Cloudflare to xCloud so DNS and SSL certificates set up automatically. You'll create an API token in Cloudflare, grab your Global API and Origin CA keys, add the integration to xCloud with your email and keys, then enable the Cloudflare option when you provision a WordPress site. xCloud configures SSL/TLS in Full (strict) mode for end-to-end encryption.
Chapters
Hey everyone. Welcome back to the channel. In today's video, we're going to learn how you can integrate Cloudflare with xCloud to manage DNS and SSL automatically. Let's get started. Start by logging into your Cloudflare account. Then go to my profile and click on API Tokens. Here we're going to create a new API token. Click on Create Token and select the Edit Zone DNS template. Now make sure to choose all zones and follow through by clicking Create Token. Copy the credentials as we'll need it in just a few minutes. Don't forget to also collect your Global API key and Origin CA key. To access Global API Key and Origin CA key, go to the API key, select the View button of Global API Key, enter the password and copy the key the same way. Choose Origin CA key, enter your password and copy the key from the Cloudflare Dashboard. Now that you have your Cloudflare API credentials, it's time to integrate them with xCloud. Log in to xCloud to integrate Cloudflare with xCloud. From your xCloud dashboard, go to my profile from your team and click on the integrations. Then choose Cloudflare from the left navigation bar and click on the new cloudflare integration button. In the pop up window. Enter your Cloudflare account email and paste the API tokens and keys you collected earlier. Once done, hit Save. That's it. Your Cloudflare integration is now successfully connected with your xCloud account. You'll be able to see your API credentials saved and displayed here. Now let's provision a WordPress site on xCloud using Cloudflare. From the xCloud dashboard, click on Add New Site, select a server from the dropdown, then choose install new WordPress website. Be sure to toggle the option for add DNS and ssl certificate on cloudfl. Once your site is created. You've successfully integrated Cloudflare for DNS management with your xCloud account. XCloud will automatically configure SSL TLS encryption in Cloudflare for you and set the mode to full strict to ensure your website's data is fully encrypted and secure. Thanks for watching. If you enjoyed this tutorial, give us a thumbs up and don't forget to like, share and subscribe for more tutorials and tips.