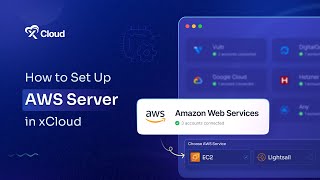
M Asif Rahman walks through connecting an AWS server to xCloud: sign in to xCloud, add a new server, create an IAM user with EC2 permissions in AWS, generate access keys, paste them back into xCloud, then configure your server name, region, and web stack choice.
Questions this video answers
EC2 and Lysale (or both).
Ginx or ols.
Chapters
Hello everyone. Today we are going to show you how to set up an aws server in xCloud. We will walk you through some easy steps to integrate AWS and get started with Xcloud easily. First, sign up or log in with Xcloud. Once logged in, click on the Add New Server button to create your aws server in xCloud. Here you will see a list of server providers. Select the AWS option to integrate AWS server in xCloud. Now choose an existing AWS account or connect a new account from the dropdown menu. Then select any aws services from EC2 and Lysale. Or you can choose both from the xCloud dashboard. Now, before going to the next step, you will need the credentials of your AWS services. To collect these necessary informations, you must sign in to the AWS Management Console as a root user with your details. Once you are in, navigate to the IAM Console that you will find under the Services menu or simply search for IAM in the Search bar in the IAM Dashboard. Click on Users from the left menu and then hit the Create User button. Give a unique username for your new IAM user and check in the AWS Management Console access option if you want to give access to the AWS console and then forward with clicking the next now let's set permissions for Amazon EC2. You will get three add the user to an IAM group, copy permissions from another user or Attach policies directly. Choose any one as your preferences. We are choosing here Attach policies directly as we are going to attach the policy directly. Now search for EC2 policies. Choose one and click next. After selecting your preferred policies, you can add tags to organize users. Review all details and permissions carefully. If everything looks good, click Create User to finalize. Now let's move on to the permission policies and click on Add Permissions. Then choose Create Inline Policy from the Dropdown menu. In the Policy editor, click on JSON and paste the JSON code provided in the documentation. This code will grant the required permissions for the AWS user. Click Next. Once you have added the code, give the name of the policy and hit on the Create Policy button. Now you can create and retrieve your user access key. Find Create Access key option under the Summary tab. Click on it, then select the Other option and click on the Next button. Add a description tag and hit on Create Access Key button. Once the Access key is created, copy these keys and head back to your xCloud dashboard. Here, connect your AWS account by selecting it from the Dropdown menu. And choose any one or both from of the AWS services. Then enter your access key and secret key carefully. Next, click on the Verify to connect with the AWS server. Now fill in details like server name, server region, Server zone, server size accordingly, and select your web server stack either in Ginx or ols. Click Next to create the server. Once your server is created, you can see it in the server's menu. From here, you can create as many sites as you need and that's it. You have successfully set up an aws server in xCloud. Thanks for watching. If you enjoyed this tutorial, give us a thumbs up. And don't forget to like, share and subscribe for more tutorials and tips. Happy hosting.