xCloud - WP Hosting Panel Everyone Is Talking About
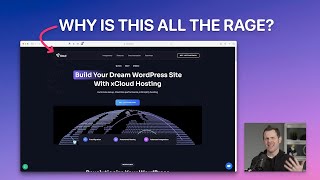
Dave Swift walks through setting up a WordPress site on xCloud, a new hosting panel with managed servers. He provisions a server, connects Cloudflare DNS, tests email, and explores features like site cloning, magic login, and team roles. The stack runs PHP 8.1, nginx, Redis, and MySQL, with pricing competitive against Vultr, though documentation and UI polish need work.
Questions this video answers
Dave Swift
PHP 8.1
3 CPU, 8 GB RAM for $50/month on xCloud vs $48/month on Vultr
$24/month (≈20% of server cost) for backups on that server size
100 free emails to start; paid email option cited as $1/month for 1,000 emails
Chapters
So There's a new WordPress host on the block. Well, it's not really a host, it's more of a control panel that also offers optional hosting and I'm going to be testing it out in this video. I've never tried it before. You're going to see my full experience from setting up my first server, configuring the website and even adding in email sending. Let's see what it's all about. This is xCloud, the newest WordPress host on the block and everybody is talking about it because it was created by the founder of WP managed Ninja in collaboration with the founders of WP developer they got together. Those are two of the most well known WordPress developers. They got together and made this hosting environment. So of course it's very exciting to everybody. Now I'm going to be going through and showing you exactly how it works as I deploy my first server and my first site. But I want you to know that I've never used the platform before, so these are just my honest first takes. If I get something wrong, you have to understand that it's a brand new platform to me as well. You. There is a special offer going on right now, so I'll have a link for that down in the description. If you like what you see and you want to learn more about xCloud, I recommend clicking that. That special offer is going to be ending shortly, so I'm not going to go into the weeds on it right here. But if you like what you see, act quickly to get the best pricing. All right, let's go over to the dashboard. I do want to mention that I was given temporary free access to this product to make this review, so that definitely will not influence my opinions. Just going to give you my straight take here. This video is not sponsored in any way other than I have my affiliate link down. All right, so the first thing that I notice about this dashboard is that I don't really care for the look and style of it. It's an early product so hopefully it matures a little bit. But just the overall style is a little bit dark to me and a little bit dated feeling for a brand new product. One thing I don't really care for is if you go over to the documentation, it's all in this dark mode. There's not a switch. Hopefully they add a switch to go into light mode. I understand that dark mode landing pages are very trendy right now, but if I'm reading technical information I always like to have white background with dark Text. It just is really fatiguing for my eyes to have something. Otherwise as you, as you scroll through here, you can see there's just the contrast is not fantastic. So that is my first opinion on it. Just kind of at a bird's eye view glance. But let's see how it actually performs. Now one thing I'm not going to be able to test is the stability of it, right? Because this is our first reaction and that's the most important things when it comes to a host is is this going to stay online and stay updated and be super reliable. But we'll see the overall user experience as we create our first server. And I'm going to click right here on the dashboard to add my first server. Now one thing that xCloud has going for it is it's a bit of a chameleon. So you can bring your own server if you want, but if you're not technical or you don't want to set up an account on a third party server, you can use one of their managed servers as well. So you can see up here, if you have your own account on Vultr, Digital Ocean or Google Cloud, you can connect it up right here, no problem. I noticed that DigitalOcean actually just has an OAuth authentication, so there's not even API you have to copy and paste. That is really nice Vultr. You will have to go with the API route, but still not terribly difficult, especially if you're just the slightest bit technical. Down below we have their xCloud servers. Now I don't know who is providing these. I'm speculating that it may actually be Vultr just because the pricing looks fairly similar. Let's click in here and I'll show you in a moment. So we've got two different types of servers, general as well as the blazing fast premium servers. So that's very similar to what Vultr already does. And if you look at the pricing, say a server that I typically spin up on a routine basis would be this 3 CPU, 8 gigabyte RAM server for 50 bucks a month. When I just happen to compare the pricing over on Vultr, it's very, very similarly priced. We've got three CPUs, eight gigabytes of RAM for $48. So not terribly overpriced. They're definitely not like some other providers where they're going to charge you twice as much and really make their margins on reselling hosting. But I can't imagine that they're, you know, have rolled out their own infrastructure over at xCloud to, you know, have all of the hardware available. But I think the plans are a little, you know, it's even the same ssd, a little too close that it almost has to be. And if you look at their server locations, I would say it almost has to be Vulture. But I have no inside information on that. If you do know, if you maybe you're in the company, let me know down below and just confirm if I'm right or wrong. By the way, I almost always recommend going for the faster CPU versions of hosts. So if you're using any provider and offers a fast CPU version, definitely go with that. For WordPress, it gets utilized and it makes the experience for both developers and users so much better. So I'm going to go ahead and spin up. Let's just do a personal premium server right now. I can choose my location. I'm going to go with Chicago and I will set this to be. Well, looks like I have one choice. It's MySQL 8 and we can turn on backups here. I think with Vultr, it's about 10%, so I'd expect this to be similar. Go up to maybe $22. Let's find out what it is. $24. So a little bit more expensive. That's 20% of the server cost. I'm not positive. Let me actually check that. Okay, so it is exactly the same as Vultr, which is a 20% higher base fee. All right, so for the purpose of this video, I'm not going to be testing the backups. I'm going to turn that off, save myself a few $4, and go ahead and hit next for you. If you're using this for production, I would definitely recommend turning on backups. You can never have too many. $4 is worth it. All right, let's hit next. Whoops. I forgot to give it a server name. Let's call it Dave's Server. There's a tagging situation here, so if you want to keep things organized, you can do that. I'll call this demo. All right, now let's launch it. All right. Even though I could create the tag, it's telling me that tags have to be lowercase letters, digits. All right, so let's get rid of this one. That's a little odd because now it's saved as my tag. But I don't like that because now I have it's. It's unorganized. I wonder if I can delete a tag later. All right, we'll find that out. I'm gonna launch this server. Okay, so I think the problem is actually the server name, even though it says tags right here, new product. So they probably just need to update the verbiage here. Bug report for you guys. Let's go ahead and just call this Dave. That'd be fine. We'll call it Dave. And next. All right. Fourth time or so was the charm. There it is. Setting up the server. It's 11% started. We've got a little play by play of everything that's going on. It says it's going to take 10 to 15 minutes. So let's grab a cup of coffee and I'll join you when this server has launched. By the way, this is fairly normal practice. Anytime you spin up a server, it's going to take a little bit of time and then they're going to install their management stack. So extra software goes onto the server so that it can be controlled by xCloud. That does take time. So this is all fairly normal and to be expected. All right, and just like that, our server is up and running and I can go ahead and add my very first site. Before I do that, let's take a little tour of the interface here and see if we can figure out everything that's going on. I can see that I have an IP address right here, so I probably need to connect that up to a DNS provider in order to connect a domain. I believe they also have, I think I saw in their docs they have an integration with cloudflare, so we could do that as well. Now I can see that my provider here is xCloud. My plan, my SQL version, as well as the size of the server. And over here under actions, I have the ability to view the sites on the server, add a new site, restart, restart MySQL so just kind of some commands here. Nice to see. I can also archive the server versus delete the server. I'm gonna have to figure out what the difference between that is, because every other provider I've ever used just deletes servers. There's no such thing as archiving it, so I'm wondering if they're saving a backup that maybe you can perhaps pull up at any point. That would be cool. Unfortunately, searching their documentation for the word archive, I only get one result back and it's not very helpful because if I scroll down here, it's just says that you can archive or delete your server if needed, but it doesn't explain the difference between the two. So maybe I can figure this out for myself. All right, let's continue to explore the user interface. One thing that jumps out to me is that this server is attached to Dave's team, which was not something that I created. So I'm going to assume that I can probably manage teams right over here. All right, so I'll figure out is unlimited teams included and exactly how does that work? All right, I paused the video for a second and I did search for teams in their docs. Nothing there either. I know this is a new product, so they don't have everything documented. So let's just go ahead and make a new team and find out whether I have any sort of limitation or if it asks for more money. I'm going to go ahead and create the team with the same email address. Hit save changes. All right, now I've got two different teams. You can see that this one has no servers and this one has one. All right, and then now it's asking for payment. So perhaps these are separate. That's something I'm going to have to find out if you are a part of the xCloud team or you know how teams work. Definitely. Leave me a comment down below. It looks like these are going to be completely separate, which is slightly unfortunate because it would be nice to have a team for each client that you manage. And that way they could still log in, access their sites as needed, but they don't necessarily need to have their own independent billing. So would you be too good to be true? If it was the way I thought it was, but it doesn't look like that's the case. Once you are inside of a team that has active billing, you can of course go ahead and add new team members. Clicking over here to add the team member. There are a lot of different roles and different types of permissions that you can supply. I'm not going to go through all of them here, but you can see that is very granular. You can probably dial it in exactly as you need. So as I select the different roles, let's say I did site admin, you can see that their roles disappear. I could also turn even like make it more customized to exactly what I need by turning off some of these checkboxes. Oh, and I can grant access to specific sites here, kind of mitigating what I just talked about before, needing multiple teams. All right, we're learning, figuring this thing out. Let's go ahead and get back to the dashboard, figure out a little bit more about the ui, and eventually I will launch that site. But We'll. Once we do that, the video is basically over. Right, Right. I clicked on Dashboard. It's not actually loading here. You can see it's going. There's a little green bar at the top. I don't know if it's showing up in the screen recording, but it just goes really fast. And then it leaves me on this same. Same screen. So perhaps I'm. Yeah, I don't know. Let's click over to all servers. I seem to have broken the software. I'm gonna Click on the xCloud logo that took me back here. Help. I'm trapped. I think they want money. Cause I created all those teams. Let me close those out. Oh, that's what it is. I'm stuck in the team that hasn't. Doesn't have a bill. So let me just delete these. There's no option to delete it. Okay, we'll go back to the team that has billing set up. So I'm going to go over here, switch to team, and now I can access my servers. I'm out of team jail. All right, so this is what the Dashboard looks like when it's actually populated with something. I've got an overview of servers sites and then the plan that I'm on, which is the WP Developer Free plan, they let me have that plan for testing. But I'm not going to be, you know, using this professionally. If it's a tool I end up using, I will pay for it. All right, so here we have two factor authentication. I did not set that up, but I could do that right now. Probably just going to give me a little barcode. Yeah, I can enable that right over here. And I'm back in this screen. So let's definitely go back over to the server management where there's some more interesting options. All right, so when I click on Active servers, it takes me over to the all servers tab. And I can see I only have the one server. I could deploy an additional one right here. I could launch a site from this screen. That is nice. And I can also see some statistics about my usage. So used about 8 gigs of storage so far, and I'm only utilizing a half gig of RAM now. There's no sites, so that's not all that surprising. One thing I'm noticing is there's not the ability to clone a server. That might be a nice feature to see in the future. I've seen that on other platforms, but I suppose you could. I was thinking you could do that over on Vulture or something. And then Just connect it. But I don't think that would work. So, yeah, maybe they can add that in the future. I'm sure there's a way to duplicate a site, so we'll find that out. Okay, so over here on the left hand sidebar, let's go through this. We've got our sites, none created yet. A database view so we can see the database that's been created for our sites. I don't. I would assume that each site gets its own database. That'd be the standard protocol there. We have our pseudo users. So these are people who can log in with super user access to the control panel. You do get root access, so you can do whatever you want. If you're highly technical, you can go in there. If you're not highly technical, you can still go in there. Except you can screw everything up, so don't do that. We have monitoring here. Let's see what this looks like. Basically a nice little view of our statistics, similar to what you might see on Vultr if you're logging there directly. This is an upgrade from something like Grid Pane, which has Monit built in. But. But it's a little bit tricky to get it to load and it doesn't have these nice pretty illustrations. So I like this view better. But it's. Well, I will say that Monit is going to give you a lot more information, but if you're looking for at a glance, like, you know, how long has my server been up? How much RAM am I using? This is probably a more palatable view for most people. That's not to say grid paint is bad. I'm not going to necessarily. People are going to ask which one is better. I've used Grid Pain for many years. I'm not currently using them. Um, but it's still a great platform. Definitely wouldn't hesitate to recommend people to use Grid Pane if that is the right product for them. We've got some access to logs over here. Obviously nothing really going on right now. Just one unknown error. We've got an event log, so I can see when my server was actually provisioned. We have our PHP configuration over here. It's running PHP version 8.1 and we've got the max file size and execution time. So very important things. All right. Under server management we are getting somewhere here. We can see which services are currently running on the server and actually reboot them independently. That is very nice. And if you're not using one of them, you could even disable it. So we can see the Stack here a little bit. We've got nginx, redis, php and openssh, all fairly standard, of course, with MySQL as our database, which we already configured when we launched the server. And down here, there's actually an explanation for what archiving a server is. Archiving a server will remove it from active use, but the data may still be recoverable. You can unarchive a server if you need to access the data later, but this can sometimes result in data loss or corruption. Please ensure you have a backup before proceeding. So I don't know the function of this. If you can't rely on it, I definitely wouldn't use it for any reason at all. Delete your server is going to be irreversible, as you might suspect. What they don't mention is if you're still billed when the server is archived. Is there any cost associated with that? I'm curious to find out. I kind of want to click this button, but I don't want to have to start over. But let's. Let's go ahead and try. All right, definitely get a warning here. I was seeing if it was going to mention that you're still billed, but you will not be able to access it or reconnect it to xCloud later. So, yeah, I'm still kind of struggling to see the utility in this. If I disconnect it from xCloud and it's managed by xCloud, what is the point of having it? So we will not do that. Let's just skip that step for now. Metadata over here on the left hand sidebar. This is going to be some data about the server. So basically, if you were to connect an API up to the server, you'd be able to pull in this information, but otherwise it's just showing up over here. I don't think this is editable. Editable, yeah. I can't type anything in here. I can leave some notes, nice little note section, and then we've got a settings tab down here. That's funny, I thought this was all settings. Um, we've got our IP address over here, the time zone. All right, let's go and change that. Oh, you can't change the time zone of your server. Well, that's unusual. Not the end of the world on the time zone thing, because you can typically set that up in WordPress, but for server logs and stuff, it's still nice to have it in your actual time zone, so you know what's going on. All right, let's get to the meat of the matter here and actually go ahead and launch a site. So I'm going to go ahead and click up here where it says new site. Now before I do that. Oh, it's just taking me to the same thing. I have five different options here. I can just install a new site, I can clone from a Git repository, I can migrate, or I can manually upload a WordPress site if I have a zipped file, or I can do a full server migration if I'm using Ubuntu already on a different cloud provider. So this is something that is worth noting. If you already have sites on, let's say, Vultr and you're trying to connect them up to xcloud and you want to use Vultr and you can't just have them linked together, you'll still have to spin up a new server and then migrate all of the sites over on other platforms. You have to do that manually. You have to move each site individually. It looks like they've got a way to do this here. I'm going to go ahead and click on this to learn a little bit more. Looks like they've got a way to do this so that you can actually just migrate all of the sites over. You'll still need to spin up that new server. And here are the different providers that they're currently migrating. Spin up WP Forge, Run Cloud, Ploy and cPanel. So you'll be able to just move those over directly all of the sites on your server. So that's pretty a nice feature. It'll save a lot of people a lot of time who are thinking of switching over to this platform. Now, they do have some pretty strict requirements in terms that you must be running Ubuntu and the specific version. So if you've got an older, let's say, 18.0 version of Ubuntu, you'll have to either upgrade your server before migrating it or just go the old fashioned way and move it over site by site. All right, but for the purpose of this video, I'm trying to be as comprehensive as possible. But really what we want to do here is install a new WordPress website. So I can do either live or staging. That's pretty cool. I'm going to go ahead and just move an existing domain that I already have. So I'm going to do brain revenue.com and let's go live. Enter the domain name in here. And this is cool. If you want to add additional domains, you can do that right here. So if you have multiple domains for your site, you'd be able to set that up. I'm going to stick with the singular one and I can add DNS. Looks like I have to go ahead and do a Cloudflare integration. Let's click over here. I'm going to open this in a new tab and we can see what it looks like. All right, so it took me into my settings. I presume this would be right over here. If we go to team settings, maybe. Yeah, team settings. And then under integrations, we've got Cloudflare right here. This is where I can manage all of my providers. So we've got the service providers that's going to be like Vulture, Digital Ocean. We've got Cloudflare right here where I can connect up to Cloudflare if I wanted to. Storage providers. This is going to be for like offloading storage. So It'd be like S3 buckets or digital ocean Spaces. And then we've got email providers. That's cool to see. So we can actually connect the email provider directly into Xcloud. Now, I know they have their own email service too, so let's see what we get here. Oh, it's just going to add their xCloud service. So it's not integrating with. Oh, there's that. I spoke too soon. We've got a lot of options here. We can do mailgun, sendgrid, Other, which I assume is just gonna be smtp. Yeah, great. What this means is you'll be able to set up a SMTP connection to any provider or use one of these API connections, which I'd recommend, or even using their managed server so that your emails will always go through and you don't necessarily need to, you know, purchase another service anywhere else. You can use what you're already using for emails. I wouldn't necessarily do that for bulk emails or marketing emails. This service might be fine and these services would be fine like Mailgun or SendGrid. But if you're using like your Gmail account, I probably wouldn't do that for bulk emails. Pricing here is reasonable and fairly standard with most organizations a dollar a month for 1000 emails. One standout that they don't include is Amazon SES as their API connection, which is interesting. I wonder if that's on the roadmap for a little bit later on. That's a very popular provider and it's 10 cents for 1,000 emails. So I don't know if they're trying to be these other providers. Very similar priced Amazon SES $0.10. So maybe they're just trying to keep things competitive. Most people don't use SES because it's so difficult to manage. So I don't necessarily. Not a conspiracy theorist here, but just throwing that at the wall. All right, I'm going to come back and do email a little bit later on, but that caught my attention. So let's go back to launching our site. Oh, and you know what we didn't do is we didn't look at the cloudflare integration. So if I do a new integration here, looks like I just copy and paste my API key in. I'm not going to bother with that right now. I'm going to assume that this works if it doesn't. If you're already using xCloud, leave a comment down below and let me know whether or not the Cloudflare integration works. Well, it probably will because it's, you know, it's a fairly standard API, well known, a lot of people connect with it and it functions perfectly. So I'm not too worried about that. But for the purpose of launching this site, it's going to be easier for me to just manually add the records. All right, nice step here. This is something that I know kind of bothered gridpane. They actually had posted several times like publicly how it was irritating that people didn't know to set up their DNS. But they're telling you right here, add an A record, use this domain and use this IP address. So I think that's a nice step. I also get the little copy, you know, commands here is definitely very helpful. So I really only need this IP address. And then I'm going to launch my cloudflare instance and set this record up. All right, so here I am over inside of Cloudflare. I'm going to create the A record. I will use the at symbol for the root. We'll paste in the IP address here and let's go ahead and turn the proxy status off for the purpose of getting that SSL certificate issued, which will happen after we verify our DNS. So if you're not familiar with all this terminology, DNS is what tells the provider to point over to xCloud. And then once that happens, it's going to basically issue a certificate. So you get the little lock on your website. You have to do that in order to get the lock. So I'm going to verify here and turn this on and it's just going to issue it directly from xCloud. If you need to bring your own certificate. A little more advanced you can definitely do that. It looks like my verification failed. I'll give that another try here. Sometimes it just takes a second for it to click over. Rookie mistake here. I had an existing A record. Let's delete that. Let's check the DNS again and this time it works correctly. So don't screw up your DNS records, kids, and everything will go just fine for you. All right, let's go ahead and down and check and see what our other options here are. Enhancing website performance. Do I want to enhance the website performance? Well, by default it's telling me I do. We've got full page caching as well as Redis object caching. It's not mentioning what the caching is. I'm assuming it's going to be the NGINX caching, but it could also be Redis has full page caching also. But we'll leave that on for now and we can inspect a little bit later on and email provider configuration. Get 100 free emails per month to kickstart your business. All right, so looks like we don't need to spend any money to get going with sending emails, so we can turn that on. We've got some advanced options down here where we can set up our admin username and password, set the PHP version on a site by site basis. Go up to 8.2 here right now. Kind of an unfortunate site username by default. They might want to, I don't know, put some censoring or something on that. It's just all over too. It's the username and the database name as well. So our options for database management is to create a new database or to use an existing database if you want to connect to something external. I'd almost never recommend that for WordPress. It's just going to slow things down in my experience. But others out there may know better. That's just what I've always done. You can deploy some scripts right here if you'd like as well. Looks like it's going to allow you to use the WordPress command line interface, so you can install plugins and things like that right as you launch a site. And that's very nice. All right, let's go ahead and go to the next page here. This is step three of three, so I'd expect my site is going to spin up on this last step. All right, there we go. It is spinning up the site. This is going pretty quickly. It's already at 27%. You can see it's progress right here. Installing the apps Looks like it can scroll down here. There's a third category which is a little bit longer. Currently setting up WordPress just configured the SSL certificate. Now it's doing the full page cache. Now as it's finishing this up, I'm looking through the list. It looks fairly standard. Setting up nginx, deploying any scripts that I had it run, which was zero install monitoring. So we'll definitely check out what the additional monitoring is like on a site by site basis. Got WP cronjobs that are being set up. And then this step right here is interesting to me that it's going to set up the managed email service. Now, it didn't ask me to add any DNS records for that email service, so I'm curious if it will after the site's been configured, because I would think that would be essential for deliverability, even for something like a transactional email, for a password reset or a receipt on WooCommerce. You definitely want to have those configured properly. All right, here we go. My site is launched. It says I can manage the email from this site from right here or I can add my own providers. All right, I'll probably do that first before we even look at the site, because I'm curious what that setup process is like. I am an email nerd. Oh, I see. By default it's going to come from xCloud email, which is just fine. But it says you cannot use your own domain name with a free email service. So if you pay that dollar a month, I presume you can connect your own custom domains at that point. All right, so let's just go ahead and go to the all sites. We can kind of get a feeling of what it would be like to be using this site professionally or this service professionally. We'd have all of our sites listed here. We've got a grid view as well as a list view. I happen to prefer the list view myself. I just feel like the information is easier to look at here. We can see what version of WordPress that is running. We can see the size of the database, the organizational tags that we've added. A little weird how there's a space after. It just looks wrong to me, um, to do that. But that's what it looks like. We've got no updates available, no backups that are currently active. Um, I don't know what this is supposed to be saying. It's maybe the name of, of the team. I bet it's the team. I don't know the server that's on that's what it is. Cause I named that server Dave. Clicking on that takes me into the server. That's a nice touch. Uh, we've got a magic login link over here which will take us right into the back end of WordPress. I presume we'll find out. And then over here we see some other options. Cloning site is there. I was mentioning earlier on that there was no cloning available for servers, but there is for sites, so that is good to know. We can also purge the cache from right here. That's a nice option, not having to go deep into the settings or anything. Just purge it right from our. Our. Basically our dashboard. And as I did that, I got a little animation that ran up here and then a notification down here. So that is nice. All right, so I'm starting to warm up to this user interface. My initial reaction to it was that I didn't like it very much. And I still don't care very much for the font choice or the colors. But the functionality has been solid so far and they've added a lot of features in a usable format. I think it just needs a little bit more time to get polished and just look like more of kind of a finished product. But to be honest, like, it's doing a lot of things that Grid Pane still doesn't do, and it's been around for years at this point. So I'm saying that lovingly because Grid Pane itself mentions that they don't have the best in the world. They spend more of the time on the backend, keeping things rock solid, fast, secure and all of that. All right, clicking into the site, let's take a look at a few more of the settings. And then of course, we will see what the site looks like and ensure that it's functioning. We can see an event log here. That's fairly nice. I like having just a quick view of what's actually going on on the site. I wonder if it'll also show things like logins. I have all my configuration options over here that I set up in the Wizard. I can connect additional domains right here. I can set up my. You know, the domain that is originally connected. See if I hit change here. Yeah, Basically the same screen that we saw previously. We can view our SSL certificates. We can add it. Our own certificate here if we wanted to switch later on. Oh, look at this. We can see all of the plugins that are available right from this dashboard. That's fairly handy. That might mean you don't need a product like MainWP because this could potentially replace it in terms of updating your plugins and I still can't do it, Bulk, I don't think. I mean, I. Maybe you could. Maybe they'll add that feature in if we could select the plugins. Yeah, probably not. So I would still keep MainWP on second thought, at least at this stage of the game. But perhaps that is on their roadmap to be able to go. The thing that's nice about MainWP is like if there's a update for a plugin, let's say Elementor has an update, you can see that you have it on 35 sites and you can update all 35 sites at once if you want them all to crash at the same time. That was some WordPress humor. All right, so we just looked at updates. I could update my plugins or my themes. I wonder if I can delete a theme. No, I can't delete a theme because that's always irritating to me that I have a bunch of themes that I'm not using and then I'll get a health check saying, hey, you have too many themes. It's like I didn't install them in the first place. So we can go down to backups here and see what our backup situation is like. Previous backups and backup settings. Now, I did not configure server backups, but the. Does that mean I can't use any sort of local backup from this provider? Add a new backup. Let's see what happens when I click this. Oh, I see. So that's what the storage providers were for from before. So I could connect. I thought it was maybe the offload images. That was my assumption, but instead I can go ahead and connect. Looks like DigitalOcean Vulture or other, which I assume is gonna be. Yeah, it's like any compatible S3 bucket provider. So your backblaze, B2, your wasabi, all of that will go through here. And the storage is actually for backup storage, not offloading of images to WordPress, which was my initial inclination. All right, so a fairly robust backup solution. It doesn't look like it's incremental in any way, which probably means that it's going to take the entire database and files every single time. So not ideal for performance wise because it's just going to be more stress on the server to copy all of those files. It doesn't say that, but I think it would call out it's an incremental backup if it was. So perhaps that's something else to Confirm. But essentially what you do here is if you're doing a remote backup, you'd select the bucket and then you can exclude certain files and you set up your schedule here, whether it is, you know, turn on automatic. Then you can set up a daily, monthly or yearly backup. Who's doing yearly backups of their site. And then we can set up automatic delete, which means that the backup is going to be deleted after a certain period of time. So don't set up your yearly backup to delete after, let's say 14 days. You're kind of hosed the rest of the year. We can also of course do local backups as well. Not a huge fan of local backups because it's going to. Especially with modern VPS servers that typically don't have a ton of storage available. And so if you're cloning your entire site over, if it's a big site, it can fill up your VPs rather quickly. It is nice if something goes wrong because then all of the files are backed up locally and it's a lot quicker to move them over. So just do this on a smaller frequency or keep fewer of them around if you do want to do local backups. All right, let's head over to the monitoring section. This looks a lot like what we saw on the server monitoring, but now we're seeing it on a site by site basis, which is kind of cool. So it's using zero of everything. Obviously the site just launched so there's no traffic to it. Not a ton of detail here, but enough of a bird's eye view that you can see exactly what is going wrong. That is something that I don't see on a lot of other providers. Offering is a way to determine, oh, is this site the one causing the problem? If you have multiple sites on a server, the server is pinned, it's going to bring all of those sites performance down. So finding out what site is actually acting up can be a bit of a headache sometimes. You can do that of course through services like Htop inside of the command line. But not everybody wants to open up the command line to troubleshoot things like that. So it's nice to have a good user interface for it. We can set up redirections over here, which is a bit of an interesting feature. So I can redirect, I assume this is going to be from a specific URL to another URL. So this would be like a server side redirect rather than doing it inside of a plugin. So if I want to do brain Revenue, slash xcloud and then I'm going to redirect that over to my affiliate link for xCloud. We'll add the redirection. Oh, got to choose a type here, make it permanent, add the redirection. There we go. It should work. Let's try this out. All right, so brain revenue.comxcloud looks like I need to put. Looking at the URL I need to put in the protocol, but otherwise it worked. So let's go ahead and edit this. That was my fault. Add that in update and let's try that again. There we go. It worked that time. So perfect. That's fairly nice. I like that. Every provider under the sun is going to allow you to do that. If they give you access to root, you can go into the server configuration and do it. But then you're inside of something like the nano editor in the command line and it's just not as intuitive for a lot of people. So this is making those server side redirects much more accessible to the general public, which is something we need more of in this society. All right, we've got our email provider over here. I'm currently using the free service. We already looked at this screen. Moving on to WP config. All right, that's a lot of boxes. Hopefully something's populating here. It's kind of a weird loading animation, but it definitely loaded. And here is what it would look like if I were setting up the redirections inside of the command line. So this is essentially looks like I'm in the Nano editor and I can see my actual WP config file, which is fairly cool. So you're getting all my salts and everything here. I'm going to delete this site anyways, so no problem. This is nice because sometimes you need to add stuff to the WP config and you don't have to SSH in and modify things there or open up an FTP client to get access to that file. I haven't seen it yet, but I'm hoping there's a way to configure the amount of RAM that WordPress is using. So let's see if we get there. Next up is Access Details. I don't expect to find it there. We've got SSH and SFTP access, so that is good because sometimes you will need that type of access. At least power users will want it. You've got our database info here. It looks like it's using Adminer. I've never used this. I Imagine that's what it's called. Adminer. I've never used this particular tool before, but it says, let's see, you have to enable it first. We recommend deactivating it when not required. Okay, so that's good to know. I assume this is going to be something like my PHP admin where I can go ahead and Server not responding. Maybe I need to give it a second to boot up. Oh yep, there we go. Now it's launched. All right, so here we go. We are inside of our database. We can see all of the tables and views go into any one of them that we want. Let's say we'll check out the posts table here. We can see what's available to us. Obviously not a lot going on on this site, but there you go. Very similar type of editor like I'm used to. That is nice because not everybody has that built in as well. So kudos to X Cloud hosting. I almost want to call them X Host, but I think that's probably a different service. All right, we've got our caching options here. I assume there's going to be toggles for those too. Oh, this is fairly nice. All right, so we've got. It is using the NGINX cache, we can integrate WP Rockets, WP Supreme Cache or WP Total Cache here. So that's one thing that I see a lot of people make mistakes about is that they will have multiple layers of cache and they're trying to clear the cache and they just can't figure it out because they've got server side caching, plugin caching, object caching, cloudflare caching and it's just. It's this mess. So very cool that they have all of these settings built in. There are links for documentation, but there is not actually docs right here for a lot of these settings. So I assume this is something that will continue to be developed. But I like the concept, just have to see how the implementation actually is over time. For now, the nginx cache is going to be just fine. We can toggle those on and off with these switches. Here's our log section, currently populating. Not much going on here. One error doesn't really tell me a whole lot. We've got our event logging which we saw earlier inside of that main dashboard, but you can see all of the action that I've taken over the last little bit. So I looked at a log of this site. Pretty solid. And finally we've got our settings. Hopefully this is where we can set Our amount of memory because that is something that almost always needs to be changed though I don't see that right away. So we've got our PHP version, our tagging. Then over here we can enable some nginx options that are kind of related to security and frames and things like that. We can turn on basic authentication so you can put a password on your site so that if you're developing it, you need to enter a password to view it. It's good to keep Google and other prying eyes away. I kind of skipped over here we've got WP Cron and xcloud Cron. So it looks like by default it's going to disable WP Cron and enable a server side Cron which is going to do the same thing as it says right here, but it's going to do it automatically with the WP Cron. If you're not familiar with what this is, I'll give you a quick synopsis. Basically, if you need things to happen automatically on your website, let's say like a post to go out on time, you schedule it to go out at 8am on Monday morning and you log into your website at 11 and it still hasn't posted and you're like what the heck is going on? That's because WP Cron didn't run because typically WP Cron only runs when you get a visitor to your site. So sad tears. You didn't have any traffic that morning so your new post didn't go up. So your site is stale and then no one ever visits. It's a vicious cycle I believe they call it. So with a lot of third party providers will do this thing. I mean Grip Pain was kind of the first one that I know of that coined it as GP cron. Well we've got xCloud cron here which is going to be basically run the Cron at a server level. That's a standard practice. Crons are built into all Unix type servers. It's going to run it automatically for you. You can set up to be every minute, every five minutes, every 10 minutes. Hourly random is kind of a weird setting. Typically on a e commerce site. I will set this to run every minute. If it's a little more just like a blog or something you can get by with every 15 minutes. It just means that it could be up to 15 minutes late I suppose depending on when the person scheduled the post. But this is good, you should leave it on unless there's some reason that you have to change it but having a server level cron is highly desirable and over here we can actually delete our site. So a little warning, a little brown box to let me know that this is irreversible, it will be gone forever. All right, but no memory settings and we still haven't even visited the site. Right now the only thing that's going on in the back of my mind is that maybe it's syncing the PHP limit with the. The site limit inside of WordPress. Some providers give you the option to do that, so I'm not sure if that's what they decided to do here. Let's go ahead and figure that out. I'm going to go ahead and visit the website and we'll be able to see how much memory is allocated by default once we do that. So we'll use the magic login link here, since I didn't grab the login credentials when I was launching the site. All right, and there we are, logged in perfectly. First thing I'm going to do is go over to plugins, see what was installed. By default. We've got fluent smtp, as you may suspect, is kind of the default option here. Go into settings. It's got Elastic Email configured, so they're actually using Elastic email as their xCloud default provider here. So that's very interesting. Basically using that as a way to white label Elastic Email and resell it makes the pricing make a lot of sense because that's essentially what Elastic Email charges. All right, now let's go ahead and we'll find out what's going on with the site. We'll go over to Site Health and Info and it does look like it is coinciding with the PHP memory limit set to 512 over here. Under PHP max memory, the memory limit is actually at 40, but the max memory would allow that to scale up if it's needed. So I think this number is a little bit low. I'd probably change it, but those are the default settings. All right, so for kind of the grand finale of this video. I know, super exciting. I want to find out if the PHP memory limit is actually synced up to the WordPress memory limit or the max memory. So I'm going to go out to my server here, which is where I believe the PHP settings was located, and then we'll just click into that server, go under PHP settings, and we'll set the memory limit here to be something like, I don't know, we'll do 10, 24, we'll double it. Save the changes. Now what's interesting is this would be shared amongst all of the sites. I guess on this server there's not a site by site basis because of course you can add unlimited sites to a server just until you max out the sites the server's resources. So what if I go under sites here? Does this doesn't have any configuration options? No. So let's go ahead and check back on our actual WordPress website. I'm going to reload the health info here and you can see here the PHP memory limit has increased and the max memory limit on WordPress has increased as well. All right, so that's very interesting. I wonder how that would work if I added a second site. Not going to try it for this video, but I do wonder how it'd work if you know again, leave me a comment down below. A lot to learn about this new platform. So that is xCloud hosting. I hope you found this video informational. I learned a lot just by making it. If you have any questions about xCloud, definitely leave me a comment down below. I'll try to find out the answers to everything I missed in this video and just the uncertainties that are currently still out there. And I'll be responding to everybody who leaves me a question in the comments. I do appreciate you watching. If you want to pick up xCloud once again, I've got my link down below. You can check out my website to join my email list or head over to the community to interact with me further. My name is Dave Swift. Thank you for watching and I'll see you in the next video.
More from M

How to Deploy EmDash CMS in One Click on xCloud: A Fast, Lightweight WordPress Alternative

Self-Host OpenPanel in One Click on xCloud: A Privacy-Friendly Google Analytics Alternative

xCloud September 2026 Release Notes: Site Security Pro, AI Caching, Docker Backups & More | xCloud







xCloud August 2026 Recap: App-First Deployment, 250+ One-Click Apps & DeepSeek Harness Hosting

Deploy Vaultwarden Password Managed on xCloud (Self-Hosted Open Source Password Manager)