Dry Fire Practice Day 4 - Draw
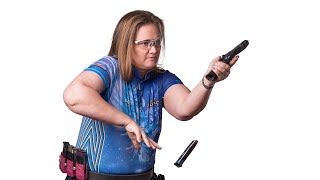
Brooke Cheney breaks down the draw stroke into five components: hand placement, reaching for the gun, grip, sight picture, and re-holstering. She covers the drop-offset holster allowed for women in IDPA, timing drills, and why logging your practice data matters to find your most efficient draw.
Chapters
Ah, ta-da! You are live, says so right there in the little box that you all can't see, but I can see it. So anyway, hi everybody, welcome to day 4 of dry fire practice. We got a bunch of stuff to go over tonight, um, review as always. And first, I would like to thank my sponsor Icarus Shirts, because quite honestly, if I weren't on a shooting team I'm not sure I would be practicing to get back into competition this year. But due to the fact that Icarus sponsors me, I must show up at matches and show off their awesome shirts. I have lots of shirts that I could show you. That is not for this evening. That will be another time. Um, hold on though, I do want to say who said hi. PN Woods already said hi, so I'm going to say hi back because he did that before we actually started going live. So as much as DJ is here to help me, I'm, I'm, I, I I just have to do that one thing. And now I will ignore all of the chat so I can stay focused. And if anything is good, DJ will put it up for you so you can hear from me. So Icarus Shirts, I've been a sponsored competitive shooter for quite a few years now, uh, and I love their shirts and I think it's awesome. And if you have a shirt need, any kind of shirt need, go to Icarus. So what else? So that's my thank you to my sponsors. I figured I should do that for sure. DJ is here in the background, so when you have a comment, he will pop it up here if I need to pay attention. This way I will maybe actually get done in our 10 to 15 minutes. All right, we're at the end of week 1 of actual dry fire. What have I learned? Because the way we learn is to look at our history, learn from it, and then figure out how to go forward. So day 1, sight picture trigger squeeze, right? The bump drill really works on your trigger squeeze. The white wall drill that we did works on your sight picture with your trigger squeeze because you have no time limit and you are just really working that trigger. Day 2— wait, I lost my notes. I forgot already. What did we do on day 2, DJ? Do you remember? I don't remember. Anyway, last night we went over reloads. Which I have to say, life does not always go according to plan. I showed up here for you guys at 6 o'clock Thursday night, and I was supposed to do my reloads when I was done with you because, you know, last night was the introduction of the Pop-Tart gun so we don't get TOS problems on YouTube. Um, unfortunately I did not get to my reloads. That being said, I can't tell you what I learned because I didn't do them. On the other side, it shows that, like G-Webs has said to me in the past, I am not a machine. I am only human. And if you have your dry fire planned and you miss it, just make sure you don't miss it the next day. So let's talk about draws. That's what tonight's subject is going to be. However, because I'm a girl, oh, we need to talk about pants first. Women, we have the biggest pain in the neck because of women's clothing when it comes to draws. And why is that? Well, because we have high-waisted pants, we have mid-rise, and then we have hipsters. Here's the thing, before you start practicing your draws, you need to find the right pair of pants that fit you where you want to be fitted. And this is a huge pain in the neck. I happen to have my shorts on that I got from Icarus, and it's, it's just above my hip. The problem with if you have— ready, I'll do the granny pants thing— if I have it way up here, which are where the high-waisted, because this is my belly button, when you have a gun, you're— you have to come very, very far up in order to get that draw. Regular pants— sorry, this is so lovely— um, just sit, allow your belt to sit just on top of your hip, make it so it's a little bit easier. Now if you're a hipster, then you're even a little bit lower, and I actually prefer that. I just don't have any of those currently, so I'm at my happy medium. So ladies, if you're going to practice drawing from a holster that's on your belt. First thing you're gonna have to figure out is which pants am I actually gonna compete in and which pants fit me the best for what I'm doing. Now I have to tell you, when I started shooting, I said there is no way in heck I would ever wear hip pants, and then I really like having that little bit further down when I'm drawing. So it's more of a girl thing than a guy thing. You guys can all just ignore it. All right, drawing, are you ready? Like everything else we've done so far, we want to break it out into little tiny pieces. So when I was first learning how to draw, I would just do this and pull this up and push this out. And hold on, let me go to where you get to see all of those pieces and parts. Then I started getting training from a gentleman by the name of Jay Hershberg, and he got training from other really cool people like Max Michel. And so first things first, each piece can be broken down. So first, your hands are relaxed at sides for most competitions depending on how your holster fits you. Um, oh yeah, this is also a girl thing in IDPA, which is what my first competition is. As a woman, I'm allowed to have this space here between my holster. It's what's called a drop offset holster. This holster is not legal for guys in IDPA. USPSA is a different thing. So for IDPA, only women can have this drop offset, and what that means is just that the gun is not squished up against you. We have a little bit of space. All right, so starting position, generally hands relaxed at sides, shoulders relaxed, hands down. A lot of folks will actually— let me get away a little bit further— sometimes when you're putting your hand down, you want to find that touch point on your holster. So when you come up, you kind of have an idea of All right, pantalactic sides. And then the timer goes off. First thing we do is get our hand to the gun and get our other hand ready to receive the gun once it clears. So to break this up, this is the first piece. Beep. And I go here. Notice I had to fix that, right? So beep. Ah, that was better because I actually found where I wanted to go. Okay, so you do like 5 or 10 reps of this, right? Now the next piece of this, again, you start where you left off, and, you know, if you're doing this with a par timer, um, you'd have it set. Right now I'm just giving you the examples. Uh, Ben's book, Ben Stover's book, um, The Dry Fire Reloaded, He's got a lot of part-times in there. And for those of you who don't know what I'm talking about, I'll get the book. No, um, it's just you have a timer set, so it gives you 10 seconds, you know, a tenth of a second, two tenths of a second. And what you're doing is trying to figure out from here to here, how long, how much time do you have. Ben's book breaks that down if you want to become like one of the best shooters in the world.. But he says, for us mere mortals, just start somewhere, right? So once we're here, this is your next rep, is grab and go. And actually, I'm, I'm going a little too fast because this is not the correct holster for this plastic gun, but it's all I got. So here to here, once you have got it in front of you, this is where you want to check in because the most important thing is you create that same grip every single time. So the first set you went to here, now your second set you're starting in this position. And like I said, you got a part-timer or something like that— oh, here's my other thing— make sure this trigger finger is attached to your frame as you clear the holster, get parallel as quick as possible, as you build your grip. And so this is your next, next piece. You're here, just go to here, check in that grip, make sure you really got it. Then your final piece is just looking at your target and then seeing your sight picture. Now once you've done 5 or 10 reps of each one of those pieces, then you're going to go ahead and do the entire thing all together, and that will be how you'll finish your finish your practice. So it's like you broke down little pieces. So you're like, all right, here's the first set, here's the second, there's a third. And one of the things when I was practicing, it was 1, 2, 3, bang, bang, bang, right? 2 or 3, whatever your shots are. So breathe. Because when they say make ready, are you ready, you say yes or you say nothing, beep, and you do everything all together. Now there's lots of discussion over slow is smooth, smooth is fast, no, fast is fast. Don't care what your mindset is on this. For me, I want to do it slowly and properly, and then get the muscle memory in there. Once I have the muscle memory in there, then I start pushing and try to go faster and faster and faster. But I don't want to be like, okay, let's see, ah, you know, and have all this garbage happening to get as quick as I can because I'm not going to be smooth that way. I want to make sure I've got each piece smooth and controlled. And do the same thing backwards actually was the other thing that we would practice. Is this way you get 2 reps for every rep that you do. So up, finger on the frame, push out, sight picture, bang, bang, bang. Oh, sorry, bang, bang, bang. So, and then you're coming back in. Always look into your holster when you are putting your gun away. I know there are tactical people out there 'We gotta look for—' Yeah, okay, dude, competition, competition. So when you are done, guy says unload and show clear, you've unloaded your firearm, it is clear, you're not looking for bad guys, look into your holster and go ahead and push it in. I will tell you, I have some of my girls who have larger tops, and yes, you have to move the girls aside to be able to see into your holster. Nobody cares. They want you to have safe gun handling skills. So there we have it. That is how to draw. Ah, all right, question: do you pick a draw style method based on what is fastest or what is best for your body or some other criteria? So the answer to that question is you don't know what's best until you practice it. It's one of those things where I know some will look into their holster while they're drawing versus looking at what they're shooting at. Some people will be stay focused. As far as whatever style you are using, it's a matter of figuring out what works best for you. What I was taught, like I said, is we go here first, than here because we want to make this grip as soon as possible so we're on target as soon as possible. So this is the grip that— or this is the draw that I use for IDPA or USPSA. It doesn't matter. Only difference in IDPA is often we'll have a cover garment, so the first thing I actually have to do is get the COVID garment out and then get to my gun. So that'll probably— actually probably see that next week. So what's fastest for you is figuring it out. Ready? Another one of my favorite books, uh, Brian Enos, um, because one of the things he talks about is the journey. As you learn how to do stuff, you're going to have that aha moment where like, oh, this works really well, and then you're going to go grow past that. So this is why Dry fire. Actually write down what you're doing and what your results are, because you're just not going to know what the best draw is for you until you've done it 500 or 1,000 times. Don't just try it 10 times, be like, oh, that doesn't work for me. It's just like the grip that I was taught, that I teach all my students. It's one of those things, it doesn't feel comfortable at first and it sucks, but you have to get comfortable with it. At the B, I see your offhand is rising to chest level. Why is that? All right, because One of the things we're always looking for is making sure no body part is ever in front of the firearm, right? So if I have my hand up here already and then I'm going to parallel, I am not going to put my hand in front of my muzzle. This actually is a very good question also. Because when I say you may have to move body parts, whether it's your larger part or maybe you've got a larger belly and you have to bend over, you want to make sure when you're reholstering it stays up here unless you're moving a body part. Because unfortunately you'll get disqualified as soon as the muzzle goes over any part of your gun. So that's kind of it. So one of it is the safety part is I'm up here, but it's also because the shortest distance is from my holster to my hands, and now I go. If I just have my hands down, so from the safety officer's point of view, am I muzzling myself or not? It depends. And I have a better chance— it's, it's a slower thing to have it all the way down, at least for me, like D-Web said. You have to work with what works for you. For me, this is what I was taught by people like Jay Hershberg, Max Michel, um, those guys. So I just do what I'm told is a little bit of it, but it is a lot of safety as well. All right, DJ, do you have any more questions or are we done? Because I have a cocktail party to get to after this. So anyway, I will see you all back on Monday. Again, thanks to Icarus, my sponsor, because if it weren't for having— being a sponsored competitive shooter, I would not be a competitor. I would probably— I'd probably give it up. But I do love my shirt company and, well, their clothing too. Like I said, I don't want to show you my fish belly white legs, but I got my shorts on right now. Very nice, very comfy, all that sort of thing. And after this weekend of Saturday, Sunday dry practice, I will then let you know what I'm doing on— probably I'll put up a link for this Sunday night and let you know we're going to practice Monday, Tuesday, Thursday, and Friday of next week. And then poof, that's it. We will be at the competition on Saturday. Not sure I'm gonna do any live on that, but, um, I'll let y'all know how it goes. All right, talk to y'all later. Oops, if I could hit the button right, that'd be