A short tutorial demonstrating how to record and edit a screencast using ScreenFlow. The speaker shows the recording interface, chooses audio sources, records a live example (navigating to a website and narrating a requested UI change), demonstrates basic editing actions (scrubbing, zoom video actions), and exports the final MP4 file to the desktop.
Questions this video answers
Shift + Command + 2
100% (full size)
MP4 (exported to the desktop)
Chapters
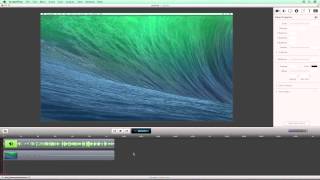
So this is actually a screencast on recording a screencast using ScreenFlow. Let's talk a little bit about ScreenFlow, the screen that you're gonna see right away when you start a new recording. So I have screenflow open. We have this really simple window, and I'm gonna run down what each one of these is, and then after that, we're gonna jump in and do an example screencast. So right now it's saying, record this desktop screen. And basically what that means is that I have two monitors. Right now I'm recording my main monitor, and I'm not recording any video, so you can't see me because I just want you to see the screen. I'm using my nice mic, which is the USB audio codec, instead of the built in mic. And then I'm recording the computer audio. So if you hear any of the audio on the computer, like a beep or any noise that happens, you're going to hear that as well. So all I have to do is click that red button. I'll get this nice little countdown to prepare me for my screencast, and then I'm going to start. Let's say that we want to create an example video, or we want to create a video that points something out to our designer. So I'm going to open up pinch of yum.com and I'm going to go pinchofum.com and that will open up the blog. And let's say that I wanted to send a note to our developer and say, we want this sidebar to be green. And I was having trouble communicating that over text and email. And I was also having trouble communicating that via screen capture. So what I'm going to do is I'm going to create this little screencast. So I'm going to say, hey, there, I am creating a screencast for you. I just wanted to show you that we want to turn this whole sidebar area from the top all the way up here, all the way down to the bottom. We want to create that as green. And I want to put together this screencast. So you knew exactly what I was talking about. So thanks for doing that. All right, we have finished our screencast. So now I'm going to use a shortcut shift command and 2. And that stops the recording that we've done, and it opens up screenflow. Now, this is really slick because all of the information, the audio and the screen recording is right here. So what I can do is I can just press go, or I can press spacebar, which will start the screencast and you can see the recording. Now start. Let's say that we want to create a. An example video, or we want to create a video that points something out to our designer. So I'm going to open up pinch of yum.com and I'm going to go pinch of yum dot. Now you can see how slick that is. Now that we have the audio, what we can do is we can scrub through the audio and video. At least we can scrub through and we can do something like add a video action. So right here I might want to zoom in. So I'm going to say add a video action and I'm going to zoom in to this area right here. So this is what that looks like that. I wanted to send a note to our developer and say, we want this sidebar to be green and I was having trouble comm. I wanted to. I could also zoom back out. You don't have to know exactly what I'm doing. Just an example here so you can see what's possible via screen capture. So what I'm going to do is I'm going to create. So pretty slick. That's how screenflow works. Once you're done, all you have to do is say file export. I'm going to export this as 100% so it's full size. I'm going to change the name to sidebar change and then I'm going to click export. This will send that to the desktop. Now, with ScreenFlow, there's a lot of different ways that you can use it. You can use it to communicate with a designer or developer. You can use it to help somebody troubleshoot an issue. You could also use it to create tutorials. Maybe you want to create some type, of course. And you want to sell that information. You can use screenflow to do that. So it's been an app that's really helped us grow Food Blogger Pro, obviously, because we do a lot of tutorials, but it's also helped us grow Pinch of Yam as we've used it to communicate with different people. So that's the quick overview of ScreenFlow. You can see that it's almost done exporting now it has reached the end. If I shrink this down and then shrink this down, you can see now we have it on our desktop and it's an MP4 file. You can use different files for ScreenFlow, but that's the default. And if I click on this, start. Let's say that we want to create an example video or we have our screencast so that's the quick overview of how screenflow works.