A Walk Through Fall - Painting Session #1
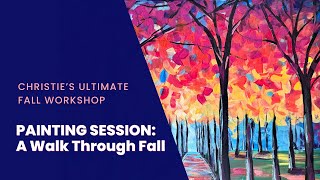
In this 10‑day online painting workshop, Christie Renee Hawkins (the founder of The Social Easel) welcomes a large group of new and returning participants, celebrates 12 years of teaching, and introduces her VIP community, Tribe. She outlines the structure of the workshop – a nightly live painting session, daily mindset talks, and a replay hub – and walks viewers through the first painting, a fall‑themed landscape titled “Walk Through Fall.” She demonstrates how to set up the canvas, select and mix acrylic colors (listing specific DecoArt swatches and brush numbers), and apply loose, impressionistic brushstrokes for sky, background, and foreground. Throughout, she emphasizes mindset principles such as “progress over perfection,” encourages participants to trust the process, and offers practical tips for overcoming fear and perfectionism. The session also includes a Q&A about supplies, the Tribe membership (pricing, benefits, early‑bird bonuses, and how members can monetize their art), and community engagement via a private Facebook group, live contests, and future meet‑ups. The video ends with reminders about the next live session, the replay availability through September 7, and a call to action to join Tribe.
Chapters
Hello, everybody. How's everyone doing tonight? So I don't know about you guys, but it has cooled off a little bit here, and it actually is starting to feel like fall. So I'm excited about that. And I thought it was perfect for what we are painting tonight. So we have lots of new people here this week. I'm so excited to have all of you. Let me know really quick. You can see and hear me good. We're good on that front, and, and then I will jump in and get started. So for this, First night, I'm going to do a little bit of intro since we do have so many new people here. I want to introduce myself, share a little bit about me and The Social Easel, and we are celebrating 12 years. So that is so crazy to me because I have been teaching women just like those of you joining me tonight for 12 years now. This all started— The Social Easel started 12 years ago on my daughter Kylie's 10th birthday, and it is just crazy to think about what has transpired in that time. For those of you who are new to the Social Easel and new to me, I have been painting since I was a little girl. My mom is a painter. My grandpa was a painter. So I grew up with a lot of creativity in the home. And then, of course, I studied art while I was in school, and then later went back to finish my degree in graphic design after I had my 3 children in my 30s. And as I was finishing my degree in graphic design is when I started The Social Easel. So that is a little bit of my history. And when we started, it started with her birthday party, and it was just a group of 10, 10-year-olds and taught them how to paint. And when the moms came, they were like, this is awesome, you need to do it with us. And so they were the beginning. They were my guinea pigs and the first people I attempted to teach how to paint. And, and it worked. And so from there, I started doing like small paint parties with people I knew, and it eventually grew to me being the biggest paint night in Springfield, Missouri. I was in all the restaurants restaurants in this area, and then we transitioned online 7 years ago. So 7 years ago is when Tribe started, and Tribe is my VIP membership. You're gonna hear all about it tonight because doors are open. We always do a big, huge celebration when doors open to Tribe. We celebrate our anniversary, and it's a chance for you to learn more about how you can paint with me, how I can be your art teacher. And how you can be a part of this amazing community. So we're going to be talking about that over this 10-day painting workshop. But my hope and goal for each one of you is really for those of you who may be new to painting, or maybe it's been a while since you have painted, is that you join me over these next 10 days, jump in with both feet, have fun doing this free workshop with me, and just trust me along the way. So you see my hat says Trust Your Journey. And I want you to trust me as your teacher during this week. So I know whenever we start to paint, especially if you're new to it, there can be a little bit of nerves. So we're going to talk through those things. We have mindset sessions scheduled for you guys throughout this 10-day journey too, and your mindset is a really important part of painting. So we're going to be talking about all those things. And of course, tonight Let me grab the original over here. We are going to be doing a walkthrough fall. So this was a painting, the original one. I'll actually show you this really quick, is right over here. This is the one I painted 12 years ago, maybe 11, maybe it wasn't quite 12. And then I changed it up a little. But this was so popular at my paint nights, um, I ended up teaching this, I don't know, probably 12 times, um, to a room full of ladies. And now I'm teaching it online to you, but I wanted to go in, change it up a little, add some deeper fall colors to it. So we are going to be doing this one tonight. Is going to be night 1. So, um, there is no template for this. I'm painting it on a 16 by 20, and you can also paint it on an 11 by 14 if you want to, an 8 by 10, really whatever size you want, um, you can paint this painting on. So I'm going to be walking you through everything step by step. I'm going to prove to you that you can paint, even if you think you're not creative, even if you've never picked up a paintbrush before. You're going to walk away from this workshop with hopefully new inspiration and new confidence and belief in yourself. So I'm going to set the original back over here. And like I said, tonight we'll try to keep the session to about an hour. It might be just a little bit longer than that, since I'm doing a little bit of intro too, and going over supplies. And then tomorrow we will be here for a live Q&A. That is going to be your chance to come back and ask me any questions that you have about tonight's painting, what we've done so far, and also if you have any questions about Tribe and you want to know what Tribe is all about, what is included in in that. So, real quick, right off the bat, I already see a couple questions about, can you watch this later? And replays are available through September 7th for the entire workshop. So, make sure you're checking your emails because we send you emails every single day, and they are going to have a link to your replay hub. I'm going to show you this really quick. Let's go here. Just a second, I'll get to the top. Okay, so this, um, that I'm showing you on the screen right now is your replay hub. And again, all of you, if you've registered for this event, um, you are all getting emailed this link and it will come to you every day. And this is where you can go and watch the replays. If you haven't been to the hub page, I highly encourage you to go. Because there is a welcome video from me on here as well, where I'm going to kind of walk you through everything you can expect from the workshop. We talk about your paint colors and supplies. You can download your workshop packet. We have a link to Tribe, so you can check that out. We have a link to supplies, and this is our early bird bonus. So if you do become a Tribe member from now until Friday, we have a huge mega bonus of 12 bonuses to celebrate 12 years, and this is the biggest bonus I've ever given. And it is not just more painting tutorials, but it's also some studio sessions for me that are going to help you with your artwork, how to photograph and edit your paintings, how to price your artwork, and even giving you my mock setup of how I teach paint parties. So there are lots of ways that you can make money with your art, even if you're just starting out. So this is where you also had your bonus. We gave you a bonus little quick pumpkin painting to just get you going before we start tonight. The mindset session from this morning is going to be here for you. And then you can actually click right here on this hub page and watch it live from here too. So this is where the replay will show up, and then it'll just keep going. So each day as it goes on, all of these replays will be in order. So you have access to all of those that you can watch with us. Let me pull that off really quick. Brenda said, I'm not getting the emails. If you're not, make sure you're checking your spam, promotions folder, your updates folder. So we send them out, but sometimes email providers will just kind of send those to junk or updates, and you can always, like, search, use your search in your email and type in the Social Easy easel, and you might be able to find it that way as well. Lynn said, can we post our paintings? Yeah, you can post your finished work online. Carolyn said, is the bonus available to those who joined prior to tonight? Yes, ma'am. So one of the perks of being a Tribe Sister is everyone who is a current Tribe Sister gets the same bonuses as everyone who joins us during this early bird open cart. So, um, extra perk for you guys too, and those will be added to your library. I'm just going to make a quick note here just so I don't forget things as I'm going along. So, um, I think that was all I kind of wanted to prep you guys with. Oh, one more thing I want to say. Um, okay, so as we are painting tonight, you are welcome to paint along with me, but I'm going to give you my best advice, my best tip, and all the tribe sisters in the comments are going to agree with me on this one because they've been where you are. If you are new to painting, even if you're not, I recommend actually just hanging out and watching tonight, not trying to keep up step by step. And you're probably wondering why in the world I would say that. It's because I've learned this from teaching both in person and online. That when you are working on your painting, you're not actually watching me, and you're not paying attention to the next step, right? So you're going to be looking down, and you're going to be busy painting away, and then you're going to be like, shoot, what did she just say? What color is she using? How many times has that happened, right? And you're like, wait, did she switch brushes? I don't know what's going on. So my tip for you is to hang out, watch, paint. Practice. Okay, so one of the supplies that I recommend— I talked about this in the welcome video— is a mixed media pad. Think of this as it's just a heavier weight paper that can handle acrylic paint. So think of this as like a sketchbook for painting. As I'm showing you steps tonight, I'm going to show you particular brushstrokes that you can practice in your mixed media pad. This is also going to build your confidence. So when you do go to canvas, you're not going to be as nervous about it because you're going to practice on here first. So if you want to paint tonight and you're itching to paint, definitely paint, practice, practice blending, practice the amount of paint you have on your brush, but don't stress yourself out about worrying about keeping up with each step that I'm doing. So I say hang out, watch me, take notes, ask questions. That's the benefit of you joining live is that you can ask me questions along the way. And then as soon as we are done with the video Tonight, it will be immediately available for replay, and then you can go back to that replay. And then here, if you don't want to listen to me talk about something, or you're like, okay, I heard that step, you want to fast forward, you just pull that little, that little dot across the bottom of the video, and you can fast forward. You can pause it, rewind it, go back if you missed a step, and it's going to make it so much more enjoyable for you, and it's going to be more fun. And less stressful. Okay, so yeah, you can see in the comments, the ladies who have done this with me before agree it's just going to be a much more calm way to do it. So if you are having nerves right now, if you're a little bit nervous, I want you to just shake them off. I want you to take a deep breath because this is all about having fun. So we talked this morning about progress over perfection, and I really want to get that message through to you, because painting is really more about just your finished product. It's more about, more than how it turns out, right? So I asked this question a few months ago while I was doing those mindset sessions, and I asked, and I would love to ask you guys this same question tonight. What is the one thing that holds you back from painting? And I'll give you guys all a chance to answer that here in the comments. But it goes along with why I wanted that to be our first mindset session, why I talk about progress over perfection. Because when we have that perfectionism in our heads and kind of stopping us, it's telling us this isn't worth doing unless it's going to be perfect. This isn't worth doing if it's not going to turn out exactly like Christie's, right? Instead of giving ourselves grace and saying, hey, I'm learning a new skill, just as if you were learning how to cook. You can't expect to cook a 4-course meal the first time you cook, right? It's steps. This is just steps. Okay, so just reminding yourself that, that you are making progress and being proud of the progress that you're making, being in the moment, not thinking about how it's going to turn out. Right. So let me just read a few of these. Karen said fear that it won't turn out. That's a very common one. Some of the other ones, Catherine said perfectionism and procrastination. Michelle said, I doubt myself and my skills instead of just having fun putting paint on the canvas. And the reason I'm asking you this is because I want you guys to see that you're not alone. These, these are all fears that most of you have when you're starting to be creative, right? Whether you're new, whether you've been painting for years, whether you're someone like me who's literally been painting for 40 years since she was a little girl, I still have those tendencies where I start thinking about the end and I'm not enjoying the process. And do you know what that does when we focus on perfectionism and we're trying to control the end of the project? We're losing the joy in the midst of it. And what I want you guys to find this week is finding that joy and connection with just being creative, falling in love with just putting the paint on the canvas, and that you're learning something new and like celebrating and being proud of each step. Along the way. Okay, so that's, that's really going to be what we focus on this week. And I see some of you saying, I'm my own worst critic, like almost like 3 in a row. We're saying that same thing and worrying about what other people think about your finished painting. Don't worry about that. If you don't ever want to show anyone your painting, you don't have to, right? This is for you. So I really want you, if you you start to feel those tendencies and that little Type A inside your head saying, what if it's not going to turn out right? If that fear and that evil comes in and starts kind of messing with you— fear can be polarizing, right? And it can like freeze us in our tracks. So I always say the one thing that can stop fear is action. If we stay in our head about it and we don't actually put the paint to the canvas then we let fear win. So we're going to overcome fear this week. We're going to overcome perfectionism, and we are going to enjoy painting together. Okay. Alright, so I am going to get my other camera ready. So you'll have to give me just a second for this, and then we will switch views, and I will be doing an overhead view so you can see me step by step. Let me know in the comments while I am getting this together too, um, let me know if Maybe you're watching tonight and you are a brand new, brand new newbie. If this is your first time painting ever, I would love to know. Maybe you've painted a few times. Maybe you've done some workshops with me. Okay. Mary says she is brand new, never picked up a brush. Fun, fun. Number one, I'm proud of you for being here and trying it out. We got a lot of first-timers here, Mary and Carol. Bonnie. Becky said, first time with acrylic. Carol's done a few workshops. Elizabeth said, first time here. I've dabbled at a sip and paint. So also, for those of you that have done like the paint sips, like what I used to do, the paint nights, like I said, I did that for 8 years before I transitioned online. And I will say, one of— they're fun, right? It's fun to like get together with your girlfriends and do that. But if you're really wanting to like learn painting and build your skills, it can feel obviously rushed in those situations, and it's more of like a fun night out. You're still learning and you're still gaining experience. But one of the benefits of learning how to paint online is that you can go back to the replays and you can watch it again so that you can really work on your technique and continue to grow your skills. Okay, let's switch gears here. All right, how's that view for everybody? Awesome. Christine, she said, in October I will have my 1-year anniversary as a Tribe Sister. I love it. Yeah, let me know in the comments, um, for the— you Tribe sisters that are here, let me know how long you have been in Tribe. I think I'm gonna go out just a little bit. Okay, so I'm going to go over, um, the paint colors. Obviously all this was on, um, your supply list, um, and we just recommended that you get my Social Easel Art Kit from DecoArt, because we use a majority of the colors in there. We use a lot of these paint colors over these two paintings that we're going to be doing in these 10 days. So I'm going to go over specifically what I'm using. If you can't purchase DecoArt, not everyone is from the US, so we teach women all over the world. So some of you are watching from Australia and Canada and the UK. And so that makes me so happy. And we love to have you here, but you may not have access to these colors. So on your supply list, we provide color swatches where it's just going to be all these swatches down the side of the page. So don't feel like you have to have these exact ones, this exact brand. This is— we'll provide these color swatches for you so you can match and find something similar. Don said, will be a tribe sister for 5 years. I love it. Oh yeah, I forgot Canada does now have DecoArt. You are right. That they just opened it up to Canada. It used to only ship in the US. Juliet's asking what color if I don't have the specific one. So again, just use the color swatches. You can pull it up on your phone and just hold bottles next to it, or you can print it off and take it to the store with you. Peggy, you received the supply list in an email, and it's also on the hub page. So if you missed the beginning, I kind of showed you the hub page, but It is emailed to you guys every day where you can watch the replay links, the supply list, everything that you need is there. Awesome. Thanks, Jen. She said, I've been in Tribe several months. It's wonderful. Tony's been in for about 4 years now, so it's so fun just to see all our community hanging out and being a part of this with you guys as well. So I'm just going to go over these really quick. Black and white, just always good to have on hand. That's why I have them in the bigger containers. And then out of my kit, black and white come in the kit, by the way. Bittersweet, Chocolate, Tuscan Red, Tiger Lily, Cadmium Yellow, Hauser Dark Green, Sour Apple, Bahama Blue, Blue Raspberry. And again, you don't have to write all this down. It's all on that list. So all the colors in that set: Ultra Blue Deep, Purple Iris, and Berry Cobbler. So like I said, we have quite the assortment of our paints here. And then the brushes that I'm using are from my brush set. You can shop my supplies and purchase the 15-piece brush set. I'm going to try to quit letting my hat hit that light as I go. So the 15-piece brush set comes in this canvas bag. This is a new set that I just pulled from today. So these are some of the other ones I'm not using for this particular painting, but those come with it. And we are going to be using a large flat. That's the number 14 out of my set. We are going to be using an angled brush. So I'm going to hold that up so you can kind of see that, that angle on here. So we have a flat and an angled, and then we're going to use a variety of rounds. So these come obviously big to small. Some are skinnier, but out of my set, these are 1 through 5, are the numbers on these. So if you have my set, that's why we put the numbers on, so you can kind of follow along. If you don't, you just want a variety of different round tips as well. Um, if you do not have my brush set and you're looking in the store, what you want is synthetic bristles, not like natural hair bristles. So synthetic is going to give you a smoother application and be similar to what, what you see here. These are on sale right now though, um, just for this event. So they're normally $40 and they're $32 right now, and that sale will run through September 7th. Um, Julie said— I'm going to pull your question up, Julie, because I know you're not going to be the only one to worry about that. She said, if we don't have the exact colors, will you give us tips to mix it? So here's the thing, like I said, orange is orange. Okay, Tiger Lily is orange. That's it. Tiger Lily is just what DecoArt named it, right? So if you have orange, that's all you need to know. I will be sharing color mixing tips throughout this, but again, as long as you have something similar, similar color, but like literally all of these, find a red, find an orange, find a yellow. It does not matter. Okay, your painting's still going to turn out and look the same as mine. Scott said, is Tribe women only? Yes, it is a women's only group. It's a sisterhood community of women, but we are glad to have you here painting with us this week, and you can also join Painting of the Month Club, which is not like a a female community if you would like to continue painting as well. Betty said, do you use gesso? I don't. So if you're buying— this is a 16 by 20 canvas. I just buy in the value pack at like Michaels or Hobby Lobby. These are pre-gessoed, so you do not need to— you do not need to gesso them. Allison said, do you teach palette painting? Yes, I do. I teach palette knife painting as well. Okay, so let's jump in and get started. So the first thing I'm going to do is start with my flat. So again, this is the Number 14 out of my set. It's about 3/4-inch flat brush, and that's just gonna— we want something bigger so that it's not taking us a long time to fill up the canvas. I'm gonna raise this up even just a little bit more, just so you can see the whole thing. I don't know why sometimes these cameras just start being glitchy for no reason at all when I move my hands. Someone said, what's gesso? It's not something that we use, so I wouldn't even worry about it. But basically what it is, is it's just something that you put on canvas if it hasn't already been pre-gessoed to stop your paint from soaking through the canvas. Thank you, Karen. She said nice navy blue color. So my daughter We just moved her to Auburn, and before she moved down there, Auburn's colors are navy and orange. And I thought, well, we're going to Auburn, so I'll just have some navy nails for a while we're down there. All right, so I'm going to grab my palette really quick and we're going to start putting some colors on here, and then we will jump in and get started. So if you don't have— this is just like a tearaway paint palette, okay? This just is what I like using in the studio. You can use a paper plate, a foam plate. It does not matter, just something to put your paints on. And we are going to actually start with our blues. So I really, really love teaching this painting because it comes about in a very unexpected way in how we start this painting. So we're actually going to start with this blue section in our background. So this beautiful variations of blues right here, that's going to be the very first thing that we put on there. And then from there, we're going to build our base coats, um, from top to bottom, the background of our trees, and then we're going to add in our foreground. Okay, so this is the Blue Raspberry that I'm starting with, and again, just a variety of blues if you don't have these exact colors. And this is like a— would be called like a cerulean blue. This is kind of like a dark— it's called Ultra Blue Deep, so like a really dark, like cobalt blue. And then I'm going to get some of my Bahama Blue, which is more of like a teal color, and a little bit less of that. And let's see, I think I will mix in This is the Berry Cobbler. I'm going to put it over here next to my dark blue because we are going to mix those a little bit to kind of make like a purple violet color. Try to keep my hat out of the way. I'll try to keep glancing up and making sure that I'm not blocking the view here. Okay, so I'm going to put those 4 colors on here initially, and then I'm going to get some white. Because we are going to have a mixture of these colors. So I'm going to hold the original up again just so you can— and again, you have a reference photo you can print off at home, but I just want you to see all the different variations of blues inside the sky. We're going to have it lighter towards the middle. That's where our light source is going to come from, and then it's going to get darker as we go out to the edges. All right, so first things first, I'm just gonna move this over here. We want to kind of divide our canvas up. I'm just going to go into this cerulean blue for right now, and I want the bottom part probably like 4 or 5 inches. We don't want to split our canvas directly in half, right? It's going to be more interesting— the composition is going to be more interesting if we divide it more into thirds. So I'm just kind of eyeballing it, and I'm just going to give myself just a quick horizon line here. I don't want you stressing about this, worrying whether it's like perfectly straight or anything. We are just starting to build the structure of our composition. Okay, so keep in mind this part that you're doing right now, you're not going to see this at the end. Okay, this is— think of this as more of like a guideline for you right now. And then I'm going to come up a little bit up here, and I'm going to do the same thing again. You can see mine is not perfectly straight, like none of that is going to matter. And then I still have this in my brush, right? I'm going to pick up some of my white with it. So I like to show you guys my palette as I'm going to— I've got a little bit of that like Blue Raspberry, picking up some white. Again, doesn't matter what kind of white, doesn't need to be a certain name or brand. And we're going to start just filling in So I want you to think of this as kind of like making like little swash marks. I'm going to show you one here really quick. This is what I would practice in your mixed media pad. If you joined me later on and you're just jumping in live, I recommend taking notes, practicing on a mixed media pad or scrap paper tonight, and then waiting to paint step by step when you can watch the replay. So you're not feeling rushed and you don't feel like you have to keep up with the steps. So I'm going to show this a little bit darker. Just so you can see what these brushstrokes look like. And this is going to be for the whole top half of the painting. It's going to— these are going to be the same brushstrokes we use for the sky, and also the same brushstrokes that we are going to be using up in our trees. So think of it like these little, like, rectangular shapes, right? So I'm purposely separating them just so you can, like, see what these brushstrokes look like. But you're basically just taking the brush and just doing these quick pulls. Now, as we start filling in, I'm going to pick up more white here so you can see some variation in here. We're going to start overlapping and I'm going to move quicker. I want it to be messy. We don't want it to be perfect. What we don't want to see is like all these— you're slowly putting down each brush stroke and thinking about each and every single thing you do. That's going to look like that in your finished painting. So allow yourself to, like, like I said, shake it off. Loosen up a little bit. Let it be messy. Let them blend together in some areas, but you're still seeing these layers of paint in here. You're still seeing individual brushstrokes. Okay, so this technique is going to be what we do across that entire blue section. So I'm going to grab a little bit more white here because I want it the lightest in the center, and you're going to see me overlap these lines. I'm not worried about staying within that perfectly. Okay, I'm also going to take this really dark blue. Oh, also, do you see what's happening here? See how my paint is like Try, if you're doing this at home, to pay attention to how you hold your palette. If you tilt it a lot, your colors are going to run together. So I need to pay attention to what I'm doing. I'm going to pull some of this white over here and just a tiny touch of this dark blue. It makes the prettiest sky blue color. And we're just going to start working some of that in. So again, this is all about variation. We're going to be doing lots of layers in this painting. We don't want these to all blend together. Okay. It's okay for them to overlap and blend like where they meet, but what you're not going to do is stay— this is what we're not doing. Okay, you're not going to stay connected. Notice how my brush is not leaving the canvas now, and if I keep doing that, it's just making one big blob of color, right? Versus if I'm picking up and putting down, so my brush is coming off the canvas. You don't want to stay connected, and you'll see me kind of almost make like X brush strokes. You're just kind of stacking these on top of each other, but see how much prettier that is with all the different brush strokes. Showing, right? You can pull in some of the white and teal. Again, this isn't about it being exact. We're just playing with all these, all these different variants of blue, and we're going to start lighter here, and as we get out further, there will be less white and more vibrant color. Here's the great thing about this and just acrylic painting in general. If you're new to acrylic painting, Anything that you do on your canvas, if you put it down and you're like, oh no, I don't like that, it doesn't look right, don't stress about it. This is what makes acrylic painting so amazing, is because once it's dry, you can paint right over top of it. Okay. But we're just going to keep building. Your goal is to not see any white canvas showing through. So I'm going in with just a little bit more white in the middle again, just to kind of brighten that up. I think I'm pretty happy with how that looks. Now I'm going to start doing a little bit darker. I'm still mixing white with them, but it's a darker version. See how much darker that blue is than in the middle? And then we'll pull in some of that cerulean, and I'm just going to keep going back and forth between these colors. So as you're practicing at home, I really want you to just have fun learning, practicing this step, practicing these types of brushstrokes and just getting more comfortable with it. The trick is to not overthink. Okay, again, if you start seeing that like perfectionist come out in you and you start overanalyzing each brushstroke you're taking, just remind yourself it's just paint. And there is no right and wrong to your transitions of blues. It doesn't have to be exactly like mine. We're just going to get darker the further away we get from the center. And you will probably have to reload your paint as you go. I'm going to have to get some more white here and just a little, little bit. And I'm carrying the paint around the edges of my canvas too, so go ahead and carry those around there. You will notice with blue also, when we get to the darker colors out on the edges, you may be like, wow, that's really transparent. Like, this looks nice and solid in the middle, right? And then you're gonna come and start making some of these, and it's going to feel like a little see-through. Okay, that's normal. The reason this is so opaque and solid in the middle is because we've added white to it. So it doesn't mean there's anything wrong with your paint or that it's too thin. A lot of paint, they just need second coats. But when you're working with acrylic paint, you don't want to keep loading up a bunch of wet paint on wet paint. Okay, so what I mean by that is, as I get over here, And I, if I start seeing streaks and I think, oh no, it's not covering enough, I need to keep adding more and more to it, it's actually not what you want to do. You want to get like a base coat down, and then if you look at it and you still see some areas where it's a little thin, you wait for it to dry and then we'll come back and add more. So do you see what I just did here? I took some of this Ultra Blue Deep and this Berry Cobbler And I'm just kind of mixing them together and it's making this really pretty like violet purpley blue color, a little bit darker over here. And we're just going to keep, keep going. I'm going to use what I have here on the palette, but I may pick up some additional colors here shortly. Maybe a little bit more of my teal blue in there. But notice how this is all just kind of like a hot mess on the palette, right? That's what we want. We want a mixture of colors. You're not going to get any ugly colors by mixing these together. All of these are cools. All of them are going to be different pretty shades of blue, so you really can't go wrong. I like pulling in a little bit of this Berry Cobbler out on the side, even to where— I don't know if it really shows up on camera, but like some of that berry color is even showing up back here in our trees. That's going to be pretty, and again, just kind of reflect some of those burgundy leaves that we have up in our trees in our background here. But isn't this fun, just painting this part of the sky? This is like so relaxing. Becky said, can you use watercolor paper for acrylic? No, you cannot. It's not thick enough. Well, I mean, technically, I guess you could, but it's not meant for that. It's meant for like water to soak into, so you can buy acrylic like a paper pad of acrylic, but what I recommend to people is what's called a mixed media pad, and it's a heavyweight enough paper to hold— it's meant for acrylic paint and watercolor and pen and marker and everything else. Okay, so we got our first coat down here, and I'm sorry if I sound a little raspy today. I was telling Sophie, my daughter, I was like, I don't know what's— I haven't talked a lot today, but my throat is like— I think it's just like allergies. Seasonal allergies this time of year. So my throat's a little bit scratchy and raw. Gonna get a little bit more of that cerulean. But it's fun to even just come back in with these different colors, like once you get some down there. And like, these are starting to dry, right? And we can keep building it and adding layers onto it. I'm going to get some of that Bahama Blue and that Blue Raspberry, kind of create a light bluish teal mixture here. The other thing I want you to keep in mind as we're doing this, remember, this is a background, so I'm going to show you the original again. Just to remind you how much of this you're not going to be paying attention to. In the end. Look how little that you see through here. Okay, so if you catch yourself starting to overthink, don't. Just remind yourself, this is background. I'm going to be putting trees over top of it, so these brush strokes do not need to be perfect. There's nothing perfect about these. They're fun, random, quick, and it kind of gives that, you know, the impressionistic feel. So even right now, I didn't even add any more paint to my brush yet and was just kind of using what was extra in there. It's even okay for there maybe randomly to have some little lighter areas out here, just like if you were looking in the woods, you'd have different areas where light is kind of shining through the trees. So it's, it's not about it being like a perfect transition. You can have variation all through there. I'm going to get a little bit more white. So how many of you, um, right now are kind of practicing painting along, or how many of you are just watching? Let me know. In the comments. Either way, it's just fine. There's no right or wrong answer. Okay, I think I'm liking the variation here. Add a couple more little lighter ones out here, maybe a little bit more of this Berry Cobbler and that dark blue, just make ourselves like a nice rich kind of purpley color. Couple of those out here along our edges. Watching and doodling, watching and taking notes. I love it. Okay, so I'm gonna pick this up and show it to you up close so you can kind of see that color a little bit more. Yeah, don't be afraid of the paint. Don't be afraid. You're not trying to ration your paint. Okay. One of— and I will say this, I forgot to mention this in the beginning, but for those of you that are new to painting, a lot of times when I was teaching paint nights and people were like saying, like, I'm struggling, I don't understand why my brushstrokes don't look the same as yours, right? 90% of the time it was because they didn't have enough paint on their brush. So as you're— if they start looking like this, that's like, that's not enough paint, right? Like you barely have any in there. When you're making your brushstrokes, they should be— let me grab the burgundy— they should be nice and more solid. Okay, and then you're going to keep building on that. So don't be afraid of your paint. Don't feel like you have to ration it. My brush, I went into my paint completely dry, so I don't add a lot of water to my acrylic. You don't want to water— it's already thin paint because it's craft acrylic, so you don't want to water it down. Much more than that. Like, a little bit damp is fine. Okay, so now we are going to do the top half of the canvas, and I'm going to lift this up a little bit. There's not a ton of detail here. I'm going to give you guys a little cheat, okay? And it just helps us get our canvas filled in faster. So obviously the top part of this is a lot of these warm fall colors, right? I do want to let some blue peek in through every once in a while, right? But we are going to kind of cheat and do some reds and burgundies and orange, and it's just going to kind of look like solid block of color. It's not going to be anything pretty. It's not going to be all these beautiful brush strokes that you see here. Then we are going to jump down to the bottom and we're going to do our path and the grass. Same thing. This is what I like to call the messy middle. How many of you have heard of the messy middle? It's that part of the painting where you're like, oh, is this going to turn out? Because it's looking really ugly right now. That's where you just have to trust me and trust the process. There's a rhyme and reason to all the layers that we're adding to this, and they're building the base coats of what we're going to paint on. Okay, so I'm not even going to rinse this blue out of here because I don't care if there's a little bit like showing through, if it mixes with red. It's going to turn purple if it mixes with burgundy. So none of these colors are going to like interfere or do anything crazy. So I'm going to start with red and burgundy, and then once I get a base coat of that down, then I'll come back and add— mix some orange in. But we're not ready for orange yet. Does anyone know why we would not want to use orange right now while I still have blue? In my brush. There's going to be pop quizzes throughout the whole thing. Um, Tara said, do you unload every time? I'm not quite sure what you mean by that, but I usually just use my paint in my brush until it's pretty much run out. So like, you can tell this is like just barely any paint in there. I could rinse this if I want to, but it doesn't really matter, right? Because I know that blue with the colors I'm getting ready to load into the brush, they're still going to make pretty colors. All right, you guys got it. I'm seeing it makes mud. I'm seeing brown. So now you guys know what will happen, right? If we mix blue and orange together, it's going to make an ugly brown. It's going to make a, like, a neutral. Color. Okay. The reason why that is, if you had a color wheel in front of you— you see, if I have mine over here, okay, so if you have a color wheel in front of you, and I teach all this stuff inside Tribe, every, every lesson that you teach, I don't just teach you step by step how to do the painting, but I'm actually walking you through the steps and walking you through color theory and color mixing. So every lesson you do with me, you're building skill upon skill. Okay, and we talk about all this stuff all the time, but it makes a brown a neutral color because they're opposite on the color wheel. So blue and orange are opposite, purple and yellow, green and red. These are called complementary colors. When you mix them together, you get a neutral. They desaturate each other. So that's why we don't want to put orange on our canvas right now while the blue is still wet. Once it's dry, we can add some over top and it won't turn brown, but we don't want to do it while it's wet. Okay, so I already have my burgundy on here. I'm going to get a little bit more. This is the red. I'm going to get a fair amount of this because we have a big section to cover up there. This is Tuscan Red out of my set. Any red is fine. Then I'm going to get more of this burgundy here. Now you could also, if you wanted, if you have my 3-piece brush set, you can see this flat is about an inch big. It's a little bit bigger than the one out of my 15-piece set. So obviously you can use either one. They're both flats. The bigger one will just make it faster for you to fill in that space. Okay, so I'm just going to start here. I'm going to start— this is the Berry Cobbler that's going to go towards the top. And again, if some of my blue goes into this, that's perfectly fine because I want you to look at the top of the original. See that blue and that burgundy, right? So it's okay for us to have some blue up there too. I may even dip back into some, but these brush strokes really, really don't matter. Okay, so down here it mattered, right? Like, we know that's going to be the top coat, that's going to be what shows through. Right here, it wouldn't matter if you just went in and just filled it all in solid. You could do that too. We're just getting a base coat on there. We'll come back and add some more brush strokes to it. I just like this quick motion of doing it, so I tend to just kind of do it that way. I know that little, um, thing at the top of the video is covering that, and I'm just going to pull this around to my edge. And you don't have to carry your paintings around to the edge. Some people don't do that. Some people paint it black. You can paint it a solid color. Color. On most of mine, especially if they're like this, I just carry whatever design is on the front around to the sides, and then they're just ready to hang on your wall. This is Berry Cobbler. So now we're kind of like— it looks like an American flag right now. Um, now I'm just going to go into red again. Still no, no need to rinse or anything. Keep reminding yourself these are just base colors. I'm going to overlap my blue a little bit because that— not that much of my sky is going to show. But really, like, use this time in the painting and doing this— these background areas where technique doesn't matter a ton. Like, really allow yourself to just kind of let loose and just have fun watching the paint mix together, watching it overlap with the other colors. You don't really have to worry about what you're making right now. It doesn't have to be anything. This is where we really want you to just kind of Trust the process. You'll hear me say it a lot, and just get used to playing with paint. Get used to like the amount of paint you have on your brush. Again, you should never have to fight it and force it into the canvas. Okay, so if it's tugging, if it's pulling, anything like that, that means you do not have enough paint in your brush. So you're going to want to just dip over, grab some more paint. But now we've got this nice kind of base coat of our reds back there. Now, since I still have some of my cobalt blue over here on my canvas, and I know I want that worked in around my edges, I'm just going to come back here again, not rinsing. My reds and burgundies are fine mixed with this blue. And just Every so often I'm just going to work in— can even pull in some of these other blues if we want, just here and there. Let there be some little areas. And again, don't worry right now what it's going to look like in the end, we'll get to that. But we just want to kind of throw some of these random colors of blue in here. And again, I'm staying darker around my edges because our light's kind of coming from here. So obviously we're going to be adding some orange and some yellow to this, but we're not going to do that right now. Okay, so I'm scooting that up. Don't worry about that top part having, um, the wording over it because we're going to come down to the bottom down here. So just kind of staying with whatever mixture of color I have in there, I'm going to start on my path. So again, we kind of want it going here in the center, and I'm going to come under that, like, lightest part of my sky back here, and I'm just going to kind of drag it across, just make myself like a little horizontal line there. So maybe like an inch, inch and a half. And then on the left side, we're going to kind of swoop it out. Okay, we're gonna have it pull our path over here. It's gonna have a slight curve to it again. This does not have to be exactly like mine, but we want it to kind of like feel like you're standing at this part of the painting. So that's where the path is going to be the biggest, and it's going to get smaller as it goes back towards the horizon line. Um, Susie, just whatever color you have in your brush, it doesn't matter. We're just putting the lines on there because this is all going to be covered up with other color. Okay, so I'm going to start on the left side, and I'm just going to kind of swoop it down, just a curved line here. Okay, just like that. Now this side is not going to curve quite as much. Okay, it's gonna be shorter, obviously, and it's not going to have that same curve. It's going to end like right here. So just about like that. Think of it almost like a little triangle. It's not coming to an exact point back here. So now this will be fun for those of you who may be new to, like, color mixing and how we're going to play with these colors. Obviously, I still have, like, the burgundies and the blues and stuff in my brush. I didn't rinse any of that. But we talked about complementary colors, right? And what's opposite on the color wheel? Red and green are opposite. So I'm going to get my Hauser dark green, and I'm going to put it up here next to my reds, next to my burgundies and blues, because I'm going to show you this with a different brush so you can see what this looks like. With my big brush. If I just did green straight out of the bottle, it's just kind of like— it's just, there's nothing to me too exciting about this green. I want to change it up a little. I want it to have a little bit more variety. If we add burgundy or red to it, just going to mix that in a little bit, it's going to tone it down a little bit. It's going to get a little bit darker. Can you see the difference? Let me hold it up. I don't know if you can see the difference, but it just kind of tones it down. It makes that green a little bit darker, not so like green, more natural looking. We want it to be more like grass color, natural grass color, not like bright green straight out of the bottle. So we want there to be some variation. So again, I'm just taking that Hauser Green, mixing it with just not equal amounts. You want your green to be the dominant color, but we can mix a little bit of that red or burgundy into it. You could even mix some blue into it, and it's going to be more of a, you know, a darker bluish green color. Any combination of those is fine. And then what we're going to do is we're going to come across and kind of clean up our horizon line here. So I'm going to start from this side of the path, and I have enough paint in here, and I'm just going to pull this straight across, trying to keep it straight anyways. All right, to kind of clean that edge up, that's an easy way to get a nice clean edge. So plenty of paint and try to just pull it all the way across. I'm going to stick this in the water because I'm done with that one for just a little bit. And then we just want to keep filling this in. Again, nothing pretty right now, just blob green. Your brush strokes don't matter on this. You're just filling in this section. How we doing so far? Everyone good? Having fun? I think it's fun just to see the process of how the layers start coming together. And again, I'm just going to go ahead and go around my edges. I'm not worried about that path right now. I'm going to do the green on both sides first. So again, just not pulling out. Doing right now is just mixing dark green mixture. Okay, so now I'm going to do the same thing on this side. I've got plenty of paint in here. See how I can do these big sections of paint when you have plenty of paint in your brush. You can— area at the same time. I'm going to load it up again and I'm going to— across here. Make that nice clean edge for our horizon line again. And just fill in that base color. Oops, somehow I got some green there. So sometimes we have little happy accidents like that. But we can just touch it up. I'm just going to grab my angled brush because it's clean. I don't have to rinse something. I'm just going to do a quick couple of brush strokes to fix that. So no big deal, right? You do something like that in your painting, don't stress about it. So it looks like, yeah, we had some kind of, um, there was like some break in the video, but it should be— mine's working fine again. Okay, for our path, we'll go ahead and fill that in. I'm going to grab a little bit of my Bittersweet Chocolate. And I'm just going to kind of pull this over here. I still have some of that red and green in my brush too, right? So I'm going to add white to it. I think I want to add a touch red. We're just going to play with it. I'm just going to kind of make my own neutral here. So this is kind of like a, almost like a mocha brown color. It doesn't matter too much for this path. We're going to be adding so many colors on top of it, but whatever kind of neutral you want, that's just a little bit of that brown with white, and then I put just a touch of red in it. Now if that was like— let's say you don't want it to be like kind of like that mocha color, you could do— just going to go ahead and put orange on here because we're going to pull it back up there— a little bit of orange mixed in here will kind of warm that brown up a little, almost more of like a burnt sienna brown. More of a tan than a mocha. So again, any, any kind of neutral is fine. This is just going to be base of our path. All right, so we got our path in there. So again, you can see when this is just kind of very basic down here, right? So don't worry, we're not going to leave it like this. It's going to have a lot more layers, a lot more interest to it later, but for right now we're gonna leave it that way. So before we end tonight's session, again, you know, we're not going to finish the whole thing tonight, um, we'll kind of stop in the middle. I want to get some of this— is dry up here now, so we're going to start incorporating a little bit more of the oranges and maybe even the yellows up here in the top part of our trees. And then I'm trying to decide, do we want to, do we want to add any trees tonight, or should I wait until the next session to add the tree trunks in? So I'm going to put my big brush in my water. So I'll go ahead and give you guys a little tip on— you can see my paint cup, right? So this has all that brush that I would use for the majority of the painting, has a bunch of blue and red and everything in it, right? Don't be afraid to push your brushes down on the bottom of your water cup. You should start seeing most of that color get out of there. Don't worry, you guys see the color of my paint water, right? It's like this grayish purple, purplish color. You do not need to constantly rinse your paint water. A lot of people used to think that when we were doing paint nights, but I'm going to show you why it doesn't matter. All right, you have your paper towels, whatever you have. Again, just making sure I rinse that off before I go to my paper towel. This is loaded with water right now, right? So I want to wipe off all that excess water off the side on my water cup, and then I'm going to take it and I'm going to squeeze it, and it's going to get all this excess water out of here. So now this brush is like clean again. There's none of that leftover color in there. There's no blue or red or purple or anything in there. It's just like a clean brush. Don't let the color— like, even this is not that dirty, but even if this was like a mucky, yucky color, it doesn't matter. It's not going to stay. This is like pretty much dry right now, right? Okay, so I can reload it with new colors now and not worry about those previous colors I had in there. The overall consensus is we are going to wait on the trees, so we're going to make the top part pretty. We might add a couple little brush strokes down here just to liven it up a little bit. It's just so yucky looking on the bottom right now. So we'll get our background done today. Okay. So I'm going to come and put more orange over here. I don't want it to mix with my green though, so I'm going to try to be careful with that. Do a little bit of yellow. So I'm going to start with my red and pull some orange into it, so I'm kind of making like a red orange color. And this is all dry now, right? So now we're going to make these brush strokes, and you're going to see them start standing out a little bit more. I'm also going to go down a little bit further Picking up more orange as I go and less red. So pretty random, right? I'm still just doing these quick— like I said, same brushstrokes that we've been doing. The further down I go, the more orange we're going to pick up in here. Let's do a little bit more red. Again, we want to have lots of variation in it. So you don't have to stick with one color. I'm kind of bouncing back and forth between my red and orange right now. Julie said, if I covered up too much blue sky, should I go add blue over it or just continue? I mean, it really depends, Julie, on how much you have. You don't need a ton. Like, this is actually a lot more than what I have in my original, and I'm going to keep coming down. So if you look at this, I lay these kind of side by side. See how little amount of blue sky I have there? So I'm going to keep coming down. I'm just kind of laying in these. Look at this that I just started doing this, like pouring orange and yellow paint. I tilted it too much while I was talking all over my canvas. So Now I'm going to mix kind of like an orange-yellow mixture here. Look how pretty that is, that transition. So we're going to kind of keep coming down again. It's okay for a little bit of our blue to poke through. We don't have to cover that 100%. We want there to be some little peaks of blue. Breaking through. And I don't want even this— I don't want it to be like a straight line across. So keep in mind what we're doing right now, these are the leaves, right? So it's not going to be— we don't want a crisp edge here. We want there to be some like variation, like maybe some brush strokes come down a little bit more than others. So I'm going to go more in yellow again. I'm not rinsing, there's still some orange in there, but I'm transitioning to more Yellow. This is still the flat brush that I'm using. I am getting ready to switch to the angled. but I wanted to get some more of this base color down first before I switched to my angled, angled brush. My angled brush is going to give me a little bit smaller brush strokes, and they are going to have a slightly different look, um, just because of the angle instead of it being flat. So I'm going to add just a couple more lighter ones kind of randomly up a little bit higher. But so just keep in mind, this will be kind of like, as we wrap this up, this will be where I leave you tonight. But don't— just remember, this is the middle of the painting, right? So don't feel like you have to— this is not finished, okay? Let me say that. So don't overwork this. Make sure that you have like that transition from, you know, we've got like darker burgundy red at the top, then red, then orange, then yellow. So you're going to have transition down But if you catch yourself wanting to overwork it, or you just keep adding to it, don't be afraid to just like say, okay, I'm going to be done for the night. I'm going to take a break. You would be amazed what happens when you come back to a painting after you've gotten away from it for a little bit. It's good for us to step away from our paintings, get away from them for a little bit, get fresh eyes. The other thing I recommend you doing is taking pictures of your progress as you go along. So when you're staring at it with the naked eye, and also like, keep in mind how close you are to your canvas, right? You're going to overanalyze everything. I have like, because I'm teaching you online, I'm looking at my painting on the screen in front of me. So that helps me kind of see what it's going to look like when it's hanging on the wall. When you're at home doing this, you can do that by taking pictures. And when you take pictures, it just allows you to see things differently. It's just a different vantage point. You'll see where you like something, maybe where you want to add a little bit more. So I'm switching to my angled brush again. If you have my set, that's the number 7 out of my set. I'm still going to work in my yellow, but I'm going to add just a touch of white to it to lighten it up a little bit. So I'm just making a little bit paler yellow, a little bit lighter. And I'm going to want that here in the middle. Again, this is where our light source is coming from, so that'll be the lightest part of that tree there. I'm going to zoom in on this part just so you can kind of see my brushstrokes a little bit more. You'll notice that they're smaller. They're going to start looking kind of, um, messier, blended together a little bit more at the base here. Okay, so loading up the brush again, and we're just going to Still do these quick movements. I love the way it's kind of mixing a little bit where that orange is still wet, so it's going to pull some orange in. We're not trying to avoid that. That's perfectly fine. Maybe have some kind of fall down a little bit more. Some of these leaves go lower. A little bit more white. And that's going to kind of give us the effect of like a glow. It's going to feel like that light is really coming from that center part. Maybe just a few quick little random pulls of yellow up a little bit higher. And I'm going to jump back to my orange. So we, we're going to keep going kind of back and forth with this. And now I want to work a little bit more of my orange in. So now we have like this orangey kind of yellow mixture here in the middle. So remember, it doesn't have to be like, okay, here's red, here's orange, here's yellow. You can have a mixture and variation as you're going along. So I'm just going to use up the rest of the paint, my orange and yellow here that I have on my palette. The messier the better on this kind of style. See how those really, really pale sections just almost feels like it's like illuminating off the canvas. All right, so I'm going to scoot this up. We're gonna— just so we don't have to like look at an ugly foreground until we get to, to day 2 on here, let's at least make this a little bit prettier. But our top half is like a great stopping point, right? We've got that transition. Again, it doesn't mean we're completely done with it, but this is a great start to what our trees are going to look like. We'll still come in, add some more burgundy back in. We're going to be adding branches up there and more layers, but this is a great start for the upper part. So now I'm just— for simplicity's sake, I'm just going to stick with the same angled brush that I have. I'm going to pick up a little bit more red, red-orange. And I'm just going to start doing some— I'll zoom back in for this. You don't need to see my legs. Okay, so we're gonna add in some of these colors in here, right? I'm just going to start doing some streaks of different colors. This path is going to have a bunch of different colors in it. And it's— think of it kind of like the reflection of like the, the, um, the oranges and the reds that we're going to have up above are going to kind of reflect down into this path. I'm going to add in even a little bit of like— now I'm going back into my dark green just to even add in dark green and red. So I want some like darker areas, but you see I'm just doing these quick like horizontal pulls. So it's not just one solid path. Let's get a little bit more orange if I've got any left here. And again, we'll be coming back and finishing this on the final day, but we can at least start adding some color in there. It already looks better, right? Um, Lynn said, what makes a burgundy if you only have basic red? Yeah, you'll just take a touch of like a darker blue and it will give you a beautiful, um, like berry burgundy color. Okay, and so I want to kind of show you what— see all these? Look how that looks up close. The reason I show you that is because if yours looks like that back home, you probably couldn't tell that from far away that mine looked like that, right? So I want you to see what it looks like. That's just a base coat there. We're going to make it prettier than that. I am going to get a little bit more of my Hauser Dark Green because I'm almost out, and I'm gonna get just a touch of this Sour Apple. I still have this like red-orange in here, right? Because again, I want this to kind of be a dulled down version. I don't want it to be that straight green out of the bottle. All right, and we're going to start just kind of adding in some green. If some red comes out in there too, that's perfectly fine. Again, I'm going to show you the original so you can see all the different colors we're going to have in this grass in this foreground, in addition to the shadows that we're going to create from the tree trunks. So it's kind of just getting like our second coat on there so it's not so streaky. We at least create some variation here in our grass. But you don't have to worry heavily on detail right now. You do want to start kind of doing like the horizontal brushstrokes. You can obviously do it like skinny where it makes more of like a line. You turn your brush this way, it's going to be wider brushstrokes. I'm going to streak just a little bit of some red here and there. Okay, so this is kind of what we're transitioning to. This is what it looked like before. So, as we're wrapping up tonight, I'm just going to finish kind of putting some of this green in here. Um, let me know if you guys have any questions about Tribe. I am going to go over the bonuses that we have for this week only. They end on Friday. So this is what we call early bird bonus. and I am giving you $450 worth of free material when you become a Tribe Sister, and we will go over what those bonuses are. So for those of you that are new, you may not know what my Tribe is. This is my VIP membership, and I have been teaching them for 7 years, and this is where if you enjoy painting with me, you like getting to, you know, paint live with me and interact this is how you get to continue to do that. I do not teach live on YouTube or Facebook on a regular basis. Any of the new paintings that you see, if you follow the Social Easel and you like some of the new stuff that I'm doing, all of my new paintings are created for Tribe. That's the main part of my business. That's where I teach all my new art, um, and I'll share with you some of the new paintings that we have coming up in September, share with you what we have done in August. But to become a Tribe Sister is $47 a month, or if you want to do the yearly plan, if like, you know, you want this in your life and you need, you need that escape, you need that, that community, that group of fun creative friends to come and paint with. Then this will be what you will want to be a part of. So you get 2 new paintings with me each month. In addition to, as I mentioned, I've been teaching Tribe for 7 years. So we have what we call the vault, the Tribe Sister library, Tribe Sister vault that has over 200 additional paintings in it. So you get immediate access to the vault as a Tribe Sister. And then you will have our private Facebook community and also get to paint live with me each month, 2 new projects each month. I also do a monthly devotional inside there. We have Tribe Sister Zoom paint parties where you get to come on Zoom and meet some of the other Tribe Sisters in a group. This is some of their favorite parts of Tribe. It's not just about painting, but it's about the friendship and the community as well. And this is your chance to meet women from all over the world. And build relationships with other like-minded women like you. So there's a lot of fun to be had in there. Let me pull up really quickly, and then I will answer any questions that you guys have. Of course, it signed me out of my website. Ah, okay, give me just a second. Not helpful. And we have several tribe sisters here in the comments. So, if you guys have questions, I encourage you to ask them instead of just taking it from me. I like you to hear from the ladies, and you're going to have an opportunity to hear hear from more Tribe Sisters as the week goes on. We have some Tribe Sister interviews where you get to hear their stories and what they love about Tribe and how much it has transformed and changed their life. So just like most of you watching right now, um, most of you earlier when I asked were new to painting, right? And these are the people— you're my people, right? Like when I used to teach paint nights, when I teach online, The majority of people I teach have had zero to no experience. So if that's you, or maybe you've painted a few times, or maybe you've, you know, took certain kind of lessons, but you want to expand your knowledge, right? You want to try some new things. This is an opportunity for you, no matter what stage you're at, whether complete beginner or been painting for a while, or maybe you even teach paint parties, but you want to better your art skills. A little bit. There's something for everyone inside a tribe. But until Friday, we have this big early bird bonus. It's the biggest one I've ever done. Um, we are celebrating 12 years, so I'm giving you 12 bonuses. You are going to get the, um, Joy to the World and Let It Snow. This is a double painting, um, door hanger workshop that we did last year. You get access to that. Um, our Rustic Santa, our other Christmas paint party. These are done on ornaments and small canvases. You are going to get our Fall Chapel, very similar style that you're learning tonight with these trees behind the chapel here. You are going to get my Among the Wildflowers. This was my poppies painting. I'm going to zoom in on this a little bit so you can see. You are going to get the What was the name of this one? Sunflowers Galore. You, in case you missed the Go to the Pumpkin Patch, that is included. Um, this is our pumpkins and sunflowers. What am I forgetting over here? And then our little fall owl. This guy is so cute. This one's great for kids as well. And then in addition to all of that, sorry, my Screen is messing up on me. There are 3 new sessions that I have added that I've never given away for a bonus before, and these are some of the top things that I get questions about from those of you out there. And so I thought, why not bundle these up, put them with the bonuses, and you will get immediate access to these bonuses when you sign up. So if you have struggled with photographing your artwork to make it look good, editing your paintings. If you want to know how to do that so you can feel confident when you share them online, you are going to get a session on how to properly photograph and edit your paintings. One of the biggest questions I get for those of you, and I know it may not seem like something you would do right now, right? You're like, selling my artwork? I'm just getting started. But you never know what's going to happen when you're willing to just step out of your comfort zone and keep moving forward, keep making progress. So many of the women inside of TRIBE started just where you are now. They are teaching paint parties, they are selling their artwork, they're doing commission work. So I'm going to give you my guide on how to price your artwork. And then I am also including, for the first time ever, my mock setup for how I do paint parties. So again, prior to me ever teaching online, I taught sold-out paint parties. For over 7 years. So this is going to be my behind the scenes of how you can start setting up paint parties. And this is such an amazing way to make money on your artwork. There's so many different ways you can do it inside a tribe. You do have permission to, and you have rights to use my designs that I teach you and teach local paint parties with them. You have permission to sell your original artwork that you create from my designs. You can sell those online, you can sell them in a local place. In your area. So there's so many opportunities for you to make money with your artwork. So this entire bundle, um, again goes to all current Tribe Sisters and anyone who signs up before Friday night at midnight. You are going to get this mega 12-package bonus here. Um, and then we're just going to kind of go over, um, what all you get when you become a Tribe Sister. So again, this is my VIP membership. I have Painting of the Month Club and I have my Tribe Sister membership. Painting of the Month Club is one pre-recorded painting that is sent to your library on the first of each month. It's $20 a month for one painting. Tribe is the VIP membership, meaning they get everything right there. They get all the perks, all the goodies. They get live lessons with me. So not only do you get Painting of the Month Club, that's included in your Tribe Sister membership, but you get immediate access to over 200 painting tutorials in all different categories. Um, and I'll show you where you can kind of look and check out what those are. You get 2 new paintings taught with me live each month. You get monthly devotionals where I share my faith. I share mindset encouragement because it is— I talked about this at the beginning, but what we say to ourselves is so important. So my goal inside Tribe is to create this positive environment, this this safe haven for you where you do not feel like you're doing this alone, right? We may be all spread out over the world, all over the place, but we're doing this together. And you have me as your guide to help motivate you, to help give you devotionals, to help give you encouragement. But you also have the other tribe sisters, um, and it makes such a big difference to have community rally around you and cheer you on instead of you trying to do this alone. If you are discouraged, if you are frustrated, you can come and post in the group and you can share that. And I guarantee you, you're going to have 20+ tribe sisters jump on there immediately and give you some positive words of encouragement. We have access to technique videos that are going to help hone your skills, help you become a better artist. I mentioned our private Facebook community. This is where we get to share our artwork, share our progress. And just be together as friends. As I mentioned, as a Tribe Sister, you have permission to teach my designs at in-person paint parties. You can earn extra income. You could easily earn an extra $250 to $750. This is just lowballing it a month teaching paint parties this time of year. Fourth quarter for creatives is like the gold mine, right? This is where everyone wants to go out with their girls. They want to do— have a fun night out. You're going to get to learn these lessons step by step, learn how to do them yourself, and then you will be confident enough that you can have— maybe you start with 3 to 5 of your friends, have a guinea pig party like what I talked about, invite them over and do a little test. But you can, you can make money while enjoying your painting, enough to pay for your entire year of membership. In addition to that, Tribe Sisters always get exclusive VIP discounts. They get fun bonuses throughout the year. We do contests where you can win prizes from me. So all of this is included for $47 a month or $470 for the year. So, and it's really— Tribe is about a whole lot more than just painting, right? It's about you. And this is what I love so much about this week. And when we open the doors, it's because we get to share stories from our Tribe sisters. So the women who have said yes to Tribe, they are building their confidence. They're not doubting themselves anymore, and they're starting to learn to like create for joy, right? Instead of the finished product, they are embracing their creativity. They're learning step by step. All these lessons continue to grow on each other. So your skills are going to grow with each painting that you do with me, and it's going to give you that calm and that peace. So turn on some of your favorite music, relax, step away from the world and our struggles and everything we do as moms and wives and women. We are always putting everyone else first. We're always taking care of everybody else's needs, but it's important that we take care of our own as well. And getting away and painting, even if it's for 30 minutes, even if it's for an hour, this is going to be your chance to Spend some time with you, spend some time with God, and just reconnect. Have that calm, have that peace. And then the last C is the connection. You are going to discover friendships that become feeling like family. We have had— we do some meetups. We have a local meetup coming here in my studio in September too. But even if you can't meet in person, you're still going to build that connection online. Through those paint parties and just through cheering each other on inside of Tribe. So let me scroll down here. And you guys, when you click the button to learn more about Tribe, you're going to be able to look at all this. I'm not going to go over everything. I just want to show you some of the newest paintings we've done. These are the new ones that I just taught this August. You will get immediate access to those when you become a Tribe sister. So we do lots of different styles. Inside. I teach palette knife. I teach impasto style painting, which is like this floral that you're looking at right here. So that's really thick-bodied acrylic. I teach landscapes. So all different techniques. These are some of our new summer paintings, and then these are our 2 new ones that are coming in September, and I'll actually show you this lazy Susan in person. Remind me when I'm done here, and I'll actually show it to you because I have it here. So we're going to do this fall lazy Susan template is going to be provided for that. And then we are going to do a fun abstract. If you follow me over on Facebook, you may have seen this painting. I did 3 abstract paintings for my daughter Emma's college apartment and got so many compliments on them, and so many people saying they wanted to learn this style that I'm going to teach that next month. In Tribe as well. And these are just some of our pictures of all of us together here in the studio at our last few meetups. You can read some of the other Tribe Sister stories on our page here from our Tribe Sister April. She said, I'm selling enough paintings to pay for her entire year in Tribe. And just all the different techniques that you can learn. This little video on the page is going to be a sneak peek inside our vault, sneak peek into access to what your library is going to look like. We like to call this like Netflix for painting. You're going to have a chance to browse, search by category, and find exactly what you want to paint. And then we have our new amazing lookbook that Megan created. When you click on this, I'm going to see if I think it opens into a new tab. It does. Okay. So when you click on this, it is going to open up and it's going to be like a digital magazine. You can literally click through it. Let me see if I can— Nope, that's not what I want to do. Where did it open? Here we go. Let me make sure you guys are seeing this. Okay. I know it's a little small. Let me see if I can zoom in. So you can just flip through here with each click, and this is your sneak peek at all the different styles of paintings you're going to get. We got so many seasonal fun fall and winter and Christmas paintings. It's enough to keep you busy all season long. This is one of my favorite times of year, so you get access to all of that when you become a Tribe Sister. So I'm going to put the camera back on me. Give me just a second here. Now I want to switch. Sorry. I guess I'll say all that over again. I forgot when I took my overhead off that it took my audio. Off too. Apologies. You guys can hear me now, right? I'm going to make sure. I'll take a drink while I'm waiting. Yes. Okay. Sorry about that. So I was just showing you kind of our finished— where we're at so far, right? So just kind of our base colors down on the bottom. We've really filled in our trees. We've started layering with our dark values and then our brighter, more vibrant colors on top to start building that depth in the trees. So hopefully you start seeing how all these different layers are going to start coming together for you. So tomorrow we will be back for a live Q&A, same time. Again, check your emails. It's going to— you get a link to the live stream to join me at 6 PM again tomorrow night. It's going to be a live Q&A. So what I would recommend is write questions down. If you were taking notes tonight, jot those questions down so that you can come back and ask me tomorrow. If you had any questions about Tribe, about the painting and the techniques that we learned today, and then on Wait, Thursday. Tomorrow's Wednesday. On Thursday at 6, we will do night 2 of this painting and finish it up. So we will do the trees and the shadows and the branches and all these finishing techniques that are going to pull this painting together. So I hope you guys enjoyed night 1. We have another morning mindset for you at 10 AM, so don't miss out on these. I know a lot of times people think it's all just about the painting, but you guys don't miss the mindset, because really getting your head in the right headspace is going to help you on your painting journey so much. It's going to help you enjoy things more, and they're just those gentle reminders for us to give ourselves a little bit of grace, right? And just really enjoy our creative time together and enjoy making this time for you. So If there are no other questions tonight, I'm going to go ahead and jump off so you guys can get back to the replay. And then again, just a reminder, all the replays are on the hub page. So the hub page has everything, your supply list, your agenda. If you need to mark down in your calendar the schedule, which I highly encourage you to do. So you're making time for you during this 10-day workshop. And it's going to have everything that you need. It's going to have a welcome video from me. It's going to have our first mindset session, our first night of painting, and that's going to be your resource to come back to during this entire thing. Sorry, that's my TV. Yes, I was going to show you the lazy Susan. Thank you for reminding me. Hang on. Sorry about that. So I'll show you the 2 newest paintings that I have here. So this is one that I just taught last week that people have been asking me for, for years, um, ever since I've done it. And this is using a special kind of heavy-bodied um, impasto style paint to make these amazing flowers. So that is already ready for you inside of Tribe. And then did you guys notice I redid my wall? I reorganized the wall today. Um, and then this— I love this. This is my new fall lazy Susan. I love it, these little pumpkins and flowers. So I got this last year from Hobby Lobby, or— yeah, this was from Hobby Lobby. So they may have them this year too. You never know what you're going to find there. I always look at their wood stuff and see what they have. But I will provide a template with this lettering of the words and obviously the shape of the flowers. So you can do this painting on a lazy Susan like me. You could do this on a round door hanger. You could do it on a round canvas. So this is the other fun thing about Tribe is everyone does their own type of projects. You don't to do exactly what I'm doing or exactly what I paint the surface on. So, um, I'm so excited about this. I think you guys are going to love it. I had so much fun painting this one. So that one is coming in September. I can't believe we're in September. That just seems like summer just flew by in like 2 seconds. Okay, thank you for reminding me to show you that. Hope you guys had a great time. Get to painting. We will be sharing a post over— if you're not on our Facebook page, go to the Social Easel Facebook page, and we will be sharing a post tomorrow where you can share your progress. So we're going to want you guys to post your unfinished work. And, and this is just to kind of give you an idea of what our tribe community is like. This is how we share and cheer each other on, but we're going to do it over on the Social Easel Facebook page instead. Um, so I had this idea. I'm just going to throw this out there and tell me, tell me what you think. We were thinking about doing a live contest on our last night this week. So on Thursday night, when I finish up this painting, I'm thinking I'm going to do a giveaway for those of you who show up live. You're going to get entered in for a chance for a giveaway, um, when we finish up our painting on Thursday night. And I am going to mail someone a goodie box of some of my art supplies, like my paintbrushes and maybe a signed original painting. So let me know if you guys want to do a contest on our final night of painting this week, um, and we will pick someone at random to win some happy mail from me. But you gotta show up live, so that's one of those perks of being live is, uh, you getting entered in for a chance to win something fun from me. So make sure your dates are on your calendar. Join me for the next two nights, 6 PM both nights. Then we'll have Labor Day weekend to continue working on your paintings or relax with your friends and family. And then we'll be back next week for— you guys remember our second painting for our Funkier Fall Flowers? So this is going to be what we paint next week. All right, you guys have an awesome night, and I will see you tomorrow. Bye.










