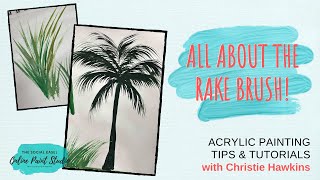
In this instructional video, Christie Renee Hawkins introduces wisp (rake) brushes, showcasing the various sizes available in her Amazon store. She explains how these brushes differ from traditional fan brushes, offering greater control for painting foliage. Hawkins demonstrates how to load multiple shades of green onto a brush, apply a base layer, and use a flicking motion to create realistic grass, emphasizing continuous strokes, pressure control, and blade orientation to achieve both wide and skinny grass blades, as well as taller seagrass effects. She then applies the same brush to paint palm trees, mixing black and green for trunks, and using brush strokes that radiate like fireworks to form fronds, adjusting curvature, overlap, and thickness. Throughout, she offers practical tips—avoiding clumped paint, using light drag rather than heavy pressure, and preventing unnatural V‑shaped grass patterns—while directing viewers to purchase the brushes via her Amazon store.
Chapters
Hey guys, today I wanted to show you one of my new favorite brushes. These are called wisp brushes or rake brushes is how you'll find them. I have the link in my Amazon store that you can check out, and this particular set— I'll just show you some of the different sizes— comes in several different sizes. So depending on the painting that you're doing and the size of the painting you're doing, you may pick a different size brush, but they come in different sizes. But today I want to show you how you can do, um, some different grass with them and how this is different than a fan brush. So just to compare, it's different than a fan brush. It's much easier to control than a fan brush when you're wanting to do grass and like palm leaves. So those are the two things I'm going to show you today. So I've just got a couple different colors of greens on here. I'm actually going to get like a little mixture of them. I like to get different colors on my brush at the same time. So you can kind of see what that looks like once it's got paint on it. You want to have plenty of paint on there, but you do want them to be separated like that, not clumped together. And then let's just do like a little base here. And then I'm going to take this, and you start at the, the, um, ground, and you're just going to pull up in like a flicking motion. Let's grab some of the darker— this is why I like having different colors on there, because you get that variation in the grass. So see how that just kind of fans out for you and you get all these little pretty wispies? And when I do grass, I do recommend going continually across if you're doing something like this, because sometimes I see people come and they want to like make this V-shape with their grass and they only fill in like that. And it doesn't look natural because they would just keep doing that along the line like little pockets of grass. So instead, you want to take this and continually go across so it's thicker at the bottom, and then as you pull this brush stroke up, you get that separation with your grass. And you can go back and forth. I usually start at the base and go up. You can also turn it— we were doing it wide so you get all those grooves, but you can also do skinny blades of grass if you turn it vertically. So I'm holding it straight up and down versus this. So if I hold it like this, let me get some more paint on there. If I hold it like this, we're getting these kind of brush strokes. Okay, if I hold it like this, you can get some skinnier ones. And you can even start like, if you want a really long— let's say you're doing like seagrass, you know, by the ocean, and you want some tall grass, you don't have to always start at the base down here. You can start up a little higher and keep adding. And it's about the pressure you put down, so I don't want you pushing down hard. You're just lightly dragging these bristles across. So if we were to push down hard, it looks like this. Same thing going this way. You don't want to drag your brush like that. You want to have like a flicking motion. See what a difference that makes? So this is just a really, really simple, easy way to make grass. And then I told you I was going to show you palms. So if you're doing palms. Let me grab a little black. I'm gonna do black with a little bit of green in it. Let's have a palm tree right here. I'm going to make my trunk, and I can use the same brush to make my trunk depending on how wide you want it. You can obviously switch to a round, but for simplicity reasons, I'm just doing this. And then our basic shape for a palm, we're going to have— think of it like little fireworks coming out. Okay, now watch how we add these brush strokes here. You can make the palms as long as you want them. So just keep playing till you get it the way that you want it to look. You can decide how curved, maybe you want some of these to come down. If you want them to overlap, maybe add another one in here, maybe one that kind of sticks out at the top. So you can just keep going and going. And that's more separated. You could have some where they're a little bit thicker, just kind of keep going over with those brush strokes to get them to fill in. So again, this is a rake or wisp brush, super easy way to make grass, all different sizes. And you can check out that brush inside my Amazon store along with all my other favorite paint brushes.