Beautiful Sunset Painting! || The Social Easel
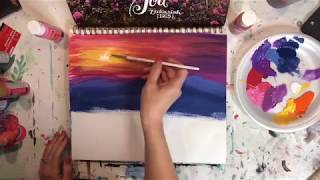
In this 2019 live YouTube session, Christie Renee Hawkins guides viewers through painting a sunset with foreground flowers using basic craft acrylics on a mixed‑media pad. She demonstrates core techniques such as loading the brush heavily, wet‑on‑wet blending, managing warm versus cool color zones, varying brush angles for different stroke widths, and building depth with layered mountains and flower fields. Throughout the lesson she interacts with participants, answers questions about supplies, brush care, and workflow, and promotes her Spring Florals Boot Camp and the free Social Easel Facebook group as avenues for further learning and community support. The tutorial emphasizes accessibility—using inexpensive paints, encouraging experimentation, and reassuring beginners that mistakes can be painted over once dry.
Chapters
Good evening, everybody. I wanted to jump on here with you guys tonight and do a little sunset. So while you are hopping on here, I'm gonna start getting our paint colors together and get you pulled up on my iPad. So just let me know when you're on. I've got a variety of pinks and purples. I'm gonna start with some warm colors first. Get some more paper towels here. Okay, let's see if Facebook wants to cooperate with me and pull you up. I had a little trouble doing this this morning. This morning inside my membership and it wouldn't show my live feed, so I'm hoping— okay, good, I can see you guys. Hey Sonya and Judy and Linda and Susie and Robbie and Rainey and Ramona. Hi Lynn, made it fine, made it live finally. Hey Teresa. I've got a little background noise on here. Alright, I'm gonna set you guys over here. Alright, how many of you have painted sunsets before? Is this something you're comfortable with? Have experimented in at all? So I'm gonna show you— I've been talking to you guys about having kind of like inspiration pieces, right? Kind of where to get some of your ideas from. So I found this— this is another calendar that I had saved, and someone had mentioned wanting to do a sunset the other day, and then I found this picture. And I'm not going to do the flowers and everything with it, but I want to show you how pretty this is and a great verse. So we're going to kind of use this as our inspiration tonight for our sunset. I have you guys backwards. Here, let me flip that around and then you'll be able to read that. How's that? That's better. So I'm just propping that over here. Never painted one. Oh, this will be a good lesson. This will be awesome for you guys. I love sunsets, and this is something you can do if you've got kids or grandkids who want to paint with you too. This is a great one for them to start with as well. I'm gonna go ahead, I'm gonna get some of my cools on here too. Find my navy real quick. Have you guys caught the first two lives this week? There's some good stuff in there. If you didn't catch the first two that I did, be sure to go back and, go back and watch them, because you'll learn some good tips. See, do I have this one already? I don't think so. I'm gonna get a little bit of this pink, and you do not have to use this many colors. I'm just doing it. These are just the bottles that I had here, and they look like fun sunset colors. So that's what I'm going with. And if you hear all the jingling in the background, that's my dog being crazy right now. So sorry for that. So we're just gonna start, just a big 1-inch flat brush. What were they? Oh, I'll have to go back and let you know the colors. I want to jump into the painting, but just some— a lot of ones that you probably already have, Sonya, from Tribe. So when you are doing a sunset, this is just a very basic one. You're gonna really load your brush up. That's kind of the key to getting your sunsets to work for you, is getting plenty of paint on your brush, because I want this to be nice and smooth, minus my dried paint that came off there. So see how even with those two colors initially, it's a lot of blending. So if you like to blend, you will probably really enjoy doing sunsets. So the first— I'm gonna grab a little purple up here— the first lesson I taught this week was with a palette knife, and we did an ocean. And then yesterday we did— the subject matter was shadows and how to make those work in your paintings. And we kind of went off on a tangent, but it's actually a really good lesson for you guys. It ended up being longer than my 20 minutes that I said I was gonna do. But I ended up showing you how to work with opposites on the color wheel and how to do some color mixing as well. So it's a really good lesson if you want to go back to that. Thank you, Judy. Painted Sunsets on rocks. Oh, I'm sure that's pretty. So if you guys are enjoying the lives and you want a little bit more, or you want a little more in-depth, and you're really wanting to kind of expand your painting journey, so to say, I do have my boot camp open right now. This is our floral boot camp. You may have seen the pictures. I've got 4 floral paintings that are exclusive to this boot camp. It's the only place you can get them. And it is open right now. We are open for registration. So if you want more information about that or to see what the paintings are, just comment boot camp and my messenger bot is just going to send you a message and it's going to have all the information there for you. If you have any questions, just let me know while we're painting. So do you guys see what I'm doing so far? I'm going to back this light off so the, um, glare is not so bad. You did the ocean one? Awesome. Yeah, and if you guys are not already in the free Social Easel Facebook group, that's where you can go in and share all your work with other artists that are working through some of my paintings, whether it be through the live tutorials. You can sign up to get a free dandelion tutorial sent to you when you join. That free Facebook group too. So if you haven't done that yet, I would definitely recommend doing so. So yeah, we've got all of our kind of cool colors over here. Now I can get away with blending these, this kind of bluish purple with the pinks because the pink can still blend into that and just make it another shade of purple. But if I already had orange and yellow in my brush, I would not want to go to these cooler colors. So you want to do all your warm colors at one time and all your cool colors at one time so they don't mix and you don't end up with brown or green in your sunset. Are you using the tip of the brush? I actually kind of bounce back and forth. It depends on how wide you want your lines. So if I'm wanting skinny lines, we're gonna come down here and I'll show you, like, let's have this kind of mountain come up in the front. So I'm using the skinny side. If I want some of those bigger— kind of pull this down over here— if I want some bigger sections filled in, then I'm gonna turn it where it's wide like this so you can cover more area. So when you're working in your sunset. It just depends on what kind of brush strokes you want in there. The main thing you want to remember when you are doing sunsets is to keep blending and move quickly so that your colors are still wet. You want them to be wet on wet. If your other color dries and then you go back to try to add to it, then you're going to end up with those, um, really like stiff looking stops in the paint. If that makes sense. So I'm just kind of blending this in and playing. We'll come back and add some more dimension to it, but just kind of getting down a background color there. Thank you, ladies. Yeah, Lynn, um, when you join the free Facebook group, um, it asks you, asks you a few questions when you join, and it'll say, I think it says like, what is your email address if you want a free tutorial or something like that, something along those lines. And then you'll just have to check your email. It sends automatically when you do that, so I don't manually go in and do that. Once that's entered into the system, then give it about a day because I have my assistant add you guys to that list, and then you will get an email from thesocialeasel@gmail.com. So that's the— what you want to look for. So we're just going to kind of pull that down and blend it in. And I'm gonna jump back up here in my sky again. And because I, I'm working on a mixed media pad, which you guys hear me talk about this a lot if you follow follow me. But this is kind of like a sketchbook for painting. So this is really awesome to have. It can handle the paint. It's not too thick for it that it warps. You'll get a little kind of waves in it, but then when I'm done with the painting and it's all the way dry, if I end up wanting to frame it, then I just lay it in between something really heavy to kind of flatten it before I put it in a frame, and that works perfectly. But what I was gonna say is it dries super fast on here, faster than it does on canvas. So this top section is already dry, so I can actually go back over and start working a second coat in. So this is kind of see-through. I'm not sure if you can tell that. I'm gonna get a little bit of my purple and navy. So again, don't be afraid to color mix, make your own colors by mixing your bottles of paint together. You don't always have to use what's straight out of the bottle. And I just want to add some variation in here. So I'm using kind of the skinny side now, and you can kind of streak that out. And then I can come back underneath that, maybe make another shade of pink here. We'll test it and see if I like it. The thing you have to remember when you're painting, if you mess up or you do something you don't like, just let it dry and it's not a big deal. You can come back and fix it. You just let it dry first. You can paint right over top of it and you'll never know it was there. So I'm gonna add a little bit of purple back here, kind of like a faint mountain in the back, and I'll pull these blues back over top again. Kay, when you— I can't get the link right now— when you go to the top of my Facebook page, there should be an area where it says Facebook groups by this page or something like that. And you should see that as an option. You'll see other ones, but those are paid groups. The one that's free says the Social Easel Free Facebook Group. But if you're interested in the boot camp, just comment boot camp. You'll get information about that. It starts next Monday. And then the other one I think is for— there's a few challenge ones that are closed, and the other one is for my membership. So those are closed right now, but you can do the free Facebook group And then if you want more information about the boot camp, just comment boot camp and you'll get all the information about that. But that is gonna be 4 floral paintings that I picked out and kind of revamped some, and some are brand new, and they're exclusive to the boot camp. So that is the only place those are going to be taught, and I'm super excited about it. So you guys will get a mini lesson on every Monday where I'm going to kind of break down techniques that we'll use in the painting later in the week. And then on every Thursday is when I come in and teach you the full painting from start to finish. So I'm just going back in and just adding some streaks of color where I want. It doesn't all have to blend perfectly. You can have some lines that kind of stand out a little bit more if you choose. I mean, think of all the different sunsets that you see. Obviously none are alike. Everyone is different. So just make it your own and just have fun kind of playing with these colors. I love this warm pink that I'm kind of working in right now. I'm going to come in with a little bit more purple over here, kind of streak that in. So we're kind of darker over on this side because the sun is over here, so this part of the sky is going to be darker. And then I'm gonna rinse my brush and pull in some of the warm over here. Lynn, I have not named the winner of the boot camp. I need to do that tonight. I need to go back in and and announce that. So I will make a Facebook post announcing that. I have my reminder set on my phone. Alright, so we're gonna grab a little bit of yellow here, and I'm gonna start kind of streaking that in. I may pick up a little bit of white with this. I want to tone it down just a little bit. Danielle, I don't know when I'm doing another boot camp, but here is something, and I'm kind of glad you brought that up because she said she's kind of busy right now, she doesn't have time for it. The boot camps That is the only way they are available. But when you join the boot camp, you do not have to watch me live each week. You don't even have to watch me in the group any of that time during that 4 weeks because you have lifetime access to the videos. So if you sign up for boot camp and if this is a crazy time but you love the paintings and you just can't commit the time to it, go ahead and sign up for boot camp. Even if you don't— aren't active in our Facebook group, that's where all the videos are going to be posted and they will stay available to you. And at the end of each week— excuse me— at the end of each week, you will also get an email with the links to the videos, so you can access those whenever you want to, 24/7. You don't have to watch me live and you don't have to do it on my schedule. That's the beauty of the about the boot camps is you can do it whenever the time works for you. Yes, I love, I love adding the yellow in there. Thank you, Lynn. That was a fun interview with Stu. He is awesome. One more day to join Tribe. If there's any business people on there who are still debating, he closes the doors tomorrow night. So I'm gonna switch to my skinny brush. Boot Camp is $127, and that includes 8 lessons, so 4 mini lessons and 4 full paintings. So, which is a steal. When you come and paint with me live, they are anywhere from $40 to $50 per painting, and you are getting 4 full paintings for $127, plus the technique weeks and the free group where we're going to be sharing with all the other members, where you get to share your artwork, and then I'll be in there kind of coaching and guiding you guys if you have any questions along the way. So I'm using a littler brush just to kind of pop in here and add a little bit more concentrated yellow here where the sun is going to be. And just kind of pull that in. And you can decide how much you want that to fade out. Maybe gonna put a little baby pink kind of around it in some areas. So again, you can mix your pinks and yellows because those are just gonna make like a coral color. So that's still considered warms. Pink is one of those colors where it can go either way, so you can kind of work that in. And then right in the center of my yellow, I'm just going to come in with a little bit of white, just kind of make that pop just a little bit there. My paint's still really wet there, so I'm dragging it in a couple, couple areas. So I'm just coming in really light. I have a lot of paint on my brush, so I'm just kind of laying it down and leaving it kind of thicker like that. And then you could come in and even add like a couple little streaks of yellow kind of drifting over this way. Or you can wipe your brush off and maybe do the same thing with some purples that you want to kind of pull out a little bit further. I really like this, it's Cranberry, that's the name of this one, and that, that's an Apple Barrel brand. Isn't that fun? So you can just keep going with this. Well, you can leave your brushes in the water while you're working. Is that what you mean? You don't want to leave— I mean, I'm a terrible example. I do leave my brushes in the water. It's not great for them. It'll bend your bristles and it'll damage the handles. But yeah, so don't follow my example. Yes, you should not leave them in water overnight, but you want to, you want to leave them in water while you're working. If you leave them out with paint on them, it'll dry on your bristles. So I'm just going to put in some background mountains here. Maybe get a little bit of white with this one. Kind of tone it down a little bit. And then I'm gonna pull this front mountain. Let's add— I want to add another layer. Let's do another Another color of mountain right here. Just small little peaks. It doesn't have to be anything too extreme here. And then this one in the front is a little bit darker. I'm actually gonna grab a little bit of— just a tiny bit of like a hunter green color to mix in that, and it'll kind of change the warmth a little bit too. I want to go in and make that a little sharper. I'm going to pull this one back over the top so it's pushing those other ones behind. So I'm just getting lots of paint on my brush again. I'm just going to blend this in and pull that back over top again. When you are starting to paint, number one reason people struggle is they do not have enough paint in their brush. So make sure you get enough paint in there. Now we'll pull this one over, overlap it a little bit here, pull it down over top. So the color is starting to get a little more saturated, a little deeper the closer it's getting to us. So these mountains in the back are a little more faded, and you can just keep going with this as you get closer to the front. Thank you, guys. You can even add like a little bit of yellow, and then we're gonna have like maybe pull this down, and this is where it's gonna start getting closer to us. It's getting warmer because we're adding the yellow to it. And this foreground is a lot closer to us. Maybe a little bit of that sun kind of hitting the top of that hill there because it hasn't set all the way yet. Danielle, I just use basic craft acrylics, so nothing fancy— DecoArt, Craft Smart, Apple Barrel from Walmart. You can get these on Amazon or in your craft stores or Walmart or anywhere. I mean, so they're like, they start at like 50 cents a bottle, so not very expensive at all. You can definitely spend more on paint, but a lot of people think you have to have really expensive supplies to start painting, and you don't. My goal is to get people painting and getting creative and not spending a ton on supplies. I actually have a blog post that that is going to go up on Monday that is all about this. So the blog post going up Monday is all about my favorite supplies, what I recommend, what I use. So if you guys are interested in that, make sure you're following me, visit the website, and you'll get to see all that. Don't you love this transition of color here? We could even have this kind of swoop in. Oh, got a little bit of pink in there. That's okay, I'm just gonna leave it. Happy little accidents. Just kind of pull that down, maybe add just a little bit of more yellow warmth in that, that section. And then you can bounce back and forth between your dark and light greens. Hey, Deb, thank you. So you could just keep going down the page here, but you kind of see what I did there. So we've got our beautiful sunset in the back. We've got some mountains. Now we've got our front area, and then you could just come in— like, again, this is my kind of inspiration piece, what I'm going off of as an idea, and that's just my quick little version of it, but it's got all these flowers in the field in the front. So I'm just gonna come on really quick And I start bigger in the front, and these are just little blobs, nothing too fancy. And you could just start adding those in, cluster them together a little bit, and then as you go back, they get smaller and smaller because they're further away on the field. So does that make sense? Smaller back here, just little dots all around, maybe a few over here. So just tiny little dots, and they get bigger the closer they get to us. And I'm just coming really heavy with my paint right now just to try to get that feeling of that being filled in, because these flowers are really close to us. Maybe we want some purple ones mixed in there too. So I'm not gonna go the whole way across here because quick little videos with you guys this week. I'm fitting them in into our crazy schedule, but I'm getting ready to go pick my daughter up from church. So we're gonna leave you with a partially painted flower field, but I want to teach you the ideas of it and how your flowers are getting smaller and just becoming little dots the further back they are, and see how that starts making them look like they are further away. Oh, thank you, Theresa. Donna, it will— it warps just a little bit, but once it's dry, you just lay it flat and then put heavy books on top of it is what I did, and then it flattens it out, and then I frame them. So yeah, this one was super fun. I can't wait to see your version of it. So hope you guys had fun tonight. If you joined in late and you want to know more about painting with me and kind of having me as your personal little coach, comment "boot camp" You'll get all the information about our Spring Florals Boot Camp that starts next Monday. So anyways, comment "Boot Camp," you'll get all the information sent to you, and I am gonna hop off here for the night, and I will be back on with you guys again tomorrow. So I will see you then. Bye. I say bye, but I can't see my, my button to finish. Just kidding. There you are. See you guys later. Bye.










