Brushstrokes 101
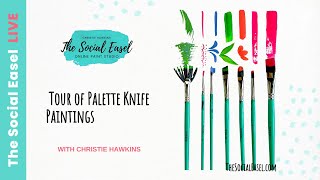
Christie Renee Hawkins teaches acrylic brush fundamentals: how to load paint without dripping or leaving gaps, how pressure and speed change your strokes, and why a loose grip makes wispy, impressionistic marks. She covers filbert, flat, angled, fan, round, and liner brushes.
Chapters
This is just going to give you a quick overview of how to properly load the paint in your brush, how much pressure to put down when you are making your brush strokes, how to play with different brush strokes and speed, and how speed can be your friend sometimes when you're doing your brush strokes. And then we will link in the comments down below where you can download my free brush guide that is going to not only show you this on printed form and show you what brushes you need for this, but also how to properly take care of your brushes. So right now the doors are open for new members of Tribe. We are open from now until October 10th, and then we close doors until next fall. I will not be doing another public launch until next fall. So if you are looking to be a part of a group where you're going to have support and accountability, where you're going to have me as your teacher to continue to help you overcome your hurdles in painting each month, this is an opportunity for you to join us. We've got some awesome bonuses going on that you can click the link to see, and this will give you a chance to become a part of our community of over 1,500 women that paint with me each month. You'll get 2 new live lessons with me each month, as well as guest artist or speaker. And then you also get instant access to the, uh, vault. Our Tribe Sister Vault has over 175 video tutorials that are ready for you, and you can access those 24/7 anytime you want to. You get instant access to that when you become a member. Let me grab my palette really quick. Thought I had it right next to me. So for today's lesson, we are just going to use some basic craft acrylic. So I'm just going to grab some paint here, and the first thing I want to go over with you is the different brushes. So this is my 15-piece set, as I mentioned, um, Some of these are different sizes of a style of brush. So for instance, this is a filbert. A filbert has a curved tip at the top of it. This is great for making flowers and flourishes and clouds. I love it for clouds and skies because you don't have a straight edge that's going to leave marks in your sky. That rounded edge is really useful for when you're doing clouds. And then we've got our flat brushes, which is just a super universal brush that you can use for washes, for getting nice straight edges, and just a basic good for filling in and blocking in areas. Then I've got a couple different size angle brushes. I love these for doing leaves and petals. That angled tip is really helpful for that. And I also love it for when I'm doing the style that I call the art of not blending, when we're layering brush strokes over top of each other. Then we have our fan brush. You can see here, this is how you can make like evergreen trees. You can also use this to do grasses and that type of thing. And then lastly, we have our rounds. So I've got two different size rounds here, probably the most universal brush of all the brushes. When I used to teach in-person paint nights, this is what we used. We used majority round and one flat, a big flat to cover large surface areas, and then rounds. You can use these for everything. And then last but not least, some skinny rounds or liner brushes. Some of these have longer bristles that allow you to make more delicate lines. So that's kind of an overview of the different brushes that we're gonna use, and I'm gonna start with a round, and we're just gonna go over how much paint to have in your brush. So this is a really common mistake. A lot of people, when they start out painting, it's almost like there's some fear about the amount of paint that we use. So I'll see a lot of people just barely getting any paint in their brush, and then when they go to try to make brushstrokes, they see that they don't have anything super solid. It's because there's not enough paint in those bristles to make a full brush stroke. So you don't want to be scared of your paint. Don't be afraid to load it up and get plenty on there. Then you'll be able to make long brush strokes without running out of the paint. So my general rule of thumb is you want plenty in there. Your paintbrush should glide back and forth very easily for you if it has the right amount of paint. If it starts pulling and looking like this, then you know you don't have enough paint. Don't be afraid to just keep reloading so that you can cover an area so you can get the brushstrokes that you want. So too little paint is not going to give you enough paint to give the brushstrokes that you're looking for or to fill in what you're looking for. You don't want —so much that it's dripping, but you don't want just a tiny little amount at the end. You want to be able to do full brushstrokes. So if it glides, you're good. If it starts pulling—I'm going to wear some of this out of here so you can see that—and you start seeing some of that white behind there, that is your cue to put more paint in your paintbrush. Um, so the next thing I want to show you—let's just go ahead and stick with this brush. I'm going to load it up again. Is the amount of pressure that you put down when making brush strokes. So if you put a lot of pressure down, you're going to get a big fat line, right? Okay, so you can see, watch how these bristles flare out. Okay, so that's a lot of pressure on there. Same amount of paint, just because you're doing a skinny line doesn't mean you need less paint. You still need lots of paint in there. The difference is you don't want to press down as hard. So same brush, same amount of paint, less pressure. Okay, then that's just barely letting the bristles go across. We push down a little bit harder, we get a little wider. A little harder still, So you kind of get the idea. You can just practice these brushstrokes and practice the amount of pressure that you're putting down with them. So I have people ask me all the time how in the world I'm making skinny, you know, brushstrokes with such a big brush, and it is all about the pressure. So I can do skinny little lines with this big round or I can do fat lines with the same brush. So same round used for multiple things. This is why it's such a universal brush to have in your kit, and you can use it for almost everything. Um, now let's talk a little bit about speed. When you saw me doing the little wispy brushstrokes. Probably notice this flicking motion. You want to make sure that your arms are loose, your shoulders are loose. You don't want to be tense, you don't want to be holding on to the brush tightly. You want a loose grip on it so you're not squeezing it to death, and you want to be able to loosen up and move. So kind of— I do— it's almost like a ghost move where you're doing the motion before you actually touch down. And this is where we get these fun little wispy lines, but you get that look by quickly doing it. If I try to do that slowly, it looks heavy-handed and it doesn't have the same look, right? So with speed, a little faster, light touch, just barely running across the tip. Okay, remember how I showed you how this was flared out? A lot of pressure down, little pressure, just the tip running across the canvas, and you get these wispy little lines. And then same thing for when you are using like the angled brush. If we're doing— let's get another color on here. Hmm, I'm in the mood for purple. So same thing, we want to have plenty of paint in here. And a lot of times I tell people to paint with a little bit more speed because it takes that, that part of you that's like the perfectionist and wants everything to be perfect and it has to be just right. We're trying to step away from that a little. We want something a little looser, a little more abstract, impressionistic style. So sometimes moving quickly and not overthinking allows you to do that. So you can see I'm just quickly moving back and forth. So you see how that looks versus if I think about every single brush stroke and where I'm laying it down, it looks too planned. It doesn't look as natural, right? And then same thing with adding a different color in. I mean, you can do that, but I want you to see the difference of the two versus quickly, where you get some mixtures of— while that paint is still wet, has a little bit of the undertone, this purple kind of acts like a glaze over top of it. But that's how we get those fun, more abstract style brushstrokes. And we're not staying connected to the canvas, right? Like, you don't see me over here— let's get some red that's wet, and then let's get our purple. If I stay connected— so I was picking up, putting down, picking up, putting down— if I stay connected, what happens? I'm not lifting up, doing the same motions, same directions with my brush, but I never picked it up. So instead, I just get one big blob of color instead of stacks and layers of color over top of each other. So sometimes it's just learning, depending on the style of painting that we're doing, how to make those brushstrokes. And I'll tell you in those lessons, okay, so this is going to be a faster speed. Or if you're doing something more delicate, or like the shape of a leaf, where you're going to slow down to make that leaf, but then even inside of it do some quick, loose brushstrokes. So hopefully that helps give you a little overview of what the different brushes are used for and the amount of pressure that you need to apply to them and the amount of paint that you have in your brush. So just to follow up, your brush, when you have enough paint in it, should be gliding smoothly and fill in with no white coming in behind it. It should go back and forth smoothly. You're not fighting it. If it starts tugging and pulling, that's your cue to load up and get more paint. Now, and then the next major thing is the amount of pressure you're putting down. One brush can make multiple widths of lines, so it's all about the amount of pressure that you're putting down. If you tend to be a person that you're listening to me and you're like, that's great, I still can't get it, here's the thing: practice makes progress. So the more you practice— this is a mixed media pad, that's what this is meant for, for you to practice in. Keep doing those brushstrokes over and over and over again until you get comfortable with them. If it's uncomfortable at first, that's okay. That is just part of the process. So I hope that was helpful and enjoyable for you guys. And, um, just click the link below for more information about Tribe because we are accepting new members, and you have until October 10th to sign up and join us. Talk to you soon. Bye.










