Caribbean Beach View- Happy Cinco De Mayo!
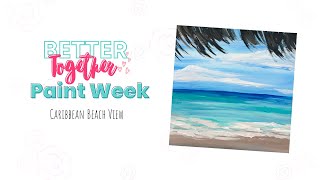
In this live YouTube session, the host welcomes viewers to Better Together Paint Week, celebrating Cinco de Mayo with a simple Caribbean beach painting. She outlines the week’s schedule, supplies (mixed media pad, craft acrylics, specific brush numbers, palette knife), and demonstrates step‑by‑step techniques: color mixing to create sky, water, sand, and clouds; using palette knife for impasto palm trees; controlling brush pressure for wispy strokes; blending versus non‑blending; and avoiding over‑working. Throughout the tutorial she emphasizes mindset – encouraging viewers to let go of perfectionism, embrace play, and view mistakes as learning opportunities. The session also serves as a promotional deep‑dive into the "Tribe" membership: a community of women artists offering daily morning mindset videos, live painting sessions, devotionals, critiques, a vault of over 200 tutorials, bonus paintings, retreats, and a fast‑action bonus for new sign‑ups (four exclusive paintings and a contest entry). Pricing ($47/month or $470/year) and access details (hub page, replays, supply list PDFs) are explained. Viewer comments are highlighted, reinforcing community engagement and the value of the Tribe’s supportive environment.
Chapters
Hello everybody, welcome to our Better Together Paint Week. I thought I would wear my Better Together shirt while we are all here this week together. I am so excited to have you. I'm excited to welcome you to learning painting with me this week. We're going to do some simple and fun paintings, and I'm excited to share all about my tribe with you because Doors to Tribe are officially open. It's our first public opening of 2025. And so I'm so excited to be here with everyone. So, okay, Megan said we hear and see you. Woohoo! All right, so happy Cinco de Mayo. I thought it would be so fun since it's Cinco de Mayo. I'm usually celebrating with a margarita. Tonight is no different. So I'm celebrating with you guys, have my little margarita here. In my festive little cup, and we are going to be doing the Caribbean beach scene tonight. Hello, hello, hi from Greece! How fun! I was in Greece last summer, absolutely loved it. Um, so for this one tonight, I wanted to make this workshop super simple for everyone. I didn't want you to have to go out and buy a bunch of supplies. Um, I wanted to share the different ways that I teach inside of my group. You can see some examples behind me, and we're going to work through those this week as well. But I wanted this to just be super simple. So one of the number one art supplies that I recommend people having in their space is a mixed media pad. Now, this is the one that I have in my store, but it's just— I love the size of this. It's like an 8 8.1 by 8.5, so pretty much an 8-inch square. Um, and this is what I'm going to be painting in all week. So sometimes I think it is helpful for people to also learn to paint in a mixed media pad, not always feel like you have to have a canvas. This doesn't have to be frame-worthy. If it is, fantastic, you can take it out and you can frame it. But I really want our focus this week to really be about the creative process. I really want it to be about the enjoyment of painting. I want it to be about the joy that it brings you, and I want it to be about community and how much better it is to do it together with a group of ladies surrounding you and supporting you. And that's what we're going to be doing this week. So in case you missed it, I'm just going to give you a quick recap of what to expect this week. Each morning I'm going to be doing a morning mindset. So we already did the first one this morning. Everything, once it is filmed, is then placed on our hub page, and the hub page is going to have all the replays on it. So you only have to go to one spot. Super easy peasy. Like I said, we want to keep this, this week simple and fun. I don't want any distractions. I don't want anything to stop you from painting with me. So, um, That's where you can access those replays. So if you missed this morning's session, you can go watch the replay there. Tomorrow we're going to be talking about the importance of play, and I'm going to be talking about that a little bit tonight too. I kind of talk about all these things, all the subjects that we're going to be discussing this week, just in general when I'm painting with you, because our mindset is so important. It's honestly a bigger hurdle for you to get over than learning how to paint. And I know hearing that sounds crazy, and you're like, what is she talking about? Like, not everyone knows how to paint, but that's just a skill set. Every single one of you watching right now is capable of painting. I believe that every single one of you has creativeness inside of you because we were created in God's image. He is the original creator, and so he put creativity in each— inside of each one of us. So my hope and my goal is to help bring that out of you, to help you have fun, to help you learn how to let loose and just enjoy the actual painting process. So that's what we're going to be focusing on this week. That is where you can find all the replays and everything that you need. If you come in late, if you want to start this over from the beginning, you'll be able to jump over to the hub page as soon as this is over. And then all those replays will be there for you, as well as the supply list and the reference images. That whole PDF pack is there for you as well. So like I said, we're starting tonight with the Caribbean Beach. Tomorrow we're going to shift gears a little bit and we're going to do these simple florals. And tonight we're using craft acrylics. Tomorrow we're going to be using heavy-bodied acrylics, but whatever you have, that's okay. I'm just showing you some of the different styles that I teach inside of Tribe so that you can get a feel for what it's like inside of there. And then I'm so excited about— I'm just in love with this, and I honestly can't wait to paint it on a huge canvas now that I've done it on this little 8-inch piece of paper. But these are the palette knife palm trees. Just who doesn't want to be sitting here right now? I just got back from Jamaica with my husband. It was our 24th anniversary. And this is what we looked at for 6 days, and it was beautiful and lovely. And so I love being able to paint it if I can't be there. And this one is going to be with the heavy-bodied acrylics as well, but we're going to be using palette knife. So if you've never used palette knife before, I'm going to be walking you through that later this week. And then the last piece that we're doing is this. It's called— this is like a watercolor version of acrylics. So we're, we're still using the craft acrylics, and my DecoArt set is what we'll be using all week. I have a partnership with them, and so all the colors that I have used in all these paintings you can find in that DecoArt set. And we're going to treat them like watercolor, though. So you're going to learn how to not only use acrylics. You're going to learn how to make impasto style, which— impasto only means like thick body. It's creating that texture that you see. You're going to learn how to use palette knife. You're going to learn how to do the simple florals. And then of course we're going to do the Caribbean seaside tonight. So we're going to do blending. I'm going to teach you how not to blend. I'm going to teach you how to do palette knife, all kinds of fun things. Are in store for you. And this is just a glimpse at what it is like inside my tribe. So one of our favorite things to do is a big paint party, a big paint week, so that you can hang out with me, see what it's like to learn to paint with me and learn kind of my style and my way of teaching. So I'm thankful to have all of you here. This is the tribe's— gosh, how old are we now? I think this is tribe's 8th year. This is our 8th year as a membership, which is crazy. I have been teaching painting for over 13 years. So it all started on my daughter's 10th birthday. And so it has just been an amazing journey to be here, and I'm thankful to have all of you here with me tonight. So I am going to jump in and get started. I'll be talking more about Tribe as we go along, but feel free to drop any comments down below, and either myself or my team will be in the comments to help answer those questions for you. And then we do have also a fast action bonus, and I have another surprise that nobody knows yet that is going to be another perk if you become a Tribe Sister this week. So we do have, like I said, the fast action bonus. If you sign up today or tomorrow by midnight, you have tomorrow at midnight to sign up. You are going to get 4 bonus paintings. I have 3 of the 4 here. The 4th one is actually framed in my home. Um, but you will get the lovebirds. And I haven't included this as a bonus in a long time. This is, um, a secret stash painting. You can't get it anywhere else. Um, you are going to get Spirit Not of Fear, for God gave us not a spirit of fear but of power, love, and self-control. And then you are also going to get the spring bicycle. This was just requested not that long ago. So all of these are like, um, we call it the vault. They're in a secret vault locked up. They're only available as bonuses when you become a Tribe sister. And the 4th one is the spring chapel. So I don't have the spring version here, but you can see this fall chapel I have up here on the wall. It's similar to that, but picture it spring. I could show you a picture later. Um, and yes, of course, Tribe Sisters, if you are already a current Tribe Sister, depending on how long you've been in Tribe, you may have some of these bonus paintings. If you are newer to Tribe, you may not, and so you will also be granted all of those. So Tribe Sisters are the VIP, so they get it all. So that is all going to be included for you guys as well. Okay. All right. I'm going to flip down and we're going to switch gears here and we're going to get to painting. Let's see. All right, let me get the camera situated and then we will be ready to go. Sue said the vault is like Christmas on steroids. Yes, so access to the vault, the Tribe Sister vault, is one of the perks of of becoming a Tribe Sister. And when you sign up to become a Tribe Sister, you get immediate access to the vault, and it has over 200 painting tutorials step by step, in addition to devotionals, technique videos, live Q&As, behind the scenes. Like, there's so much information packed in there. And the, the reason we do that is because we want Tribe to be your one-stop shop for everything that you need when it comes to painting. You're no longer going to have to be searching all over the internet, looking up YouTube videos, looking on Pinterest, trying to find the inspiration that you need to paint. You're going to have access to everything that you need right here inside of Tribe. Sabrina said, so, like, the bike, is there a template? Yes, there is a template for the bike, and all that information's inside Tribe. This week we're doing no templates, and I did that on purpose because I want to prove to everyone that you don't need a template sometimes with something like a bike or an animal. Absolutely, they're essential and very helpful, but I also want you guys to learn to loosen up and maybe try something outside of your comfort zone without a template. And you may find, like a lot of my members have, is you actually like it more not having to worry about staying inside the lines. So, um, let's go ahead and I'll get started with the supplies that I'm using tonight. So obviously my mixed media pad. These are my brushes out of my brush set. If you don't have my brush set, I recommend synthetic paintbrushes, not natural hair. They just do better with acrylic paint. They do better with blending, with all the techniques that I teach. And we also have several hundred of Tribe Sisters here. In the comments as well. So again, if you have questions, don't be afraid to jump in and ask them. They will probably answer you before I even look up at the screen to see it. So we're all here to help you. So if you are using my set, I am using the large flat. That's the number 13 out of my set. I'm using my number 4, if I can pick it up, my number 4 round. It's just kind of like a medium-sized round. And then my 2 detail brushes. This is a 1 and a 2. One, you can see, is a little bit longer. One is shorter, and we'll use those for some of our details. So this was a re-inspired painting from one that I did years and years ago when I taught local paint nights, and it's still one of my favorites because it's just so simple. And again, this was the view that I looked at all last week underneath one of those huts on the beach, and just see these little wispies up above you and ocean out in front of you. And I thought that was the perfect painting for Cinco de Mayo. So happy Cinco de Mayo if you're drinking a margarita, whatever. Maybe you're having wine, coffee, soda. And you are welcome to paint along with me step by step while we're doing this. But what I typically recommend inside Tribe, and then my workshops with, you know, more— I don't want to say complicated, but paintings with more steps in them— is to watch first, take notes, and then use the replay to actually paint along with. The reason I recommend that is because I don't ever want you to feel pressured like you have to keep up with my steps. I want you to be able to take it at your own pace. Painting is supposed to be fun and peaceful, not stressful. And so that's just one of those things, not feeling like you have to catch up. Or be done when I'm done, all those things. I want you to be able to take it at your time, which is why we provide the replays, and those are available for you through the 10th, so through Saturday. Let me throw my apron on really quick because I can guarantee you I will probably get paint on myself. Okay, so those are the brushes we're using. Um, whatever palette you have, I'm using The tearaway palette that I have in my store, it's kind of like waxy paper on one side, and I just love the convenience of them. And then we are using craft acrylics. So out of my set, I'm using Blue Raspberry, Ultra Blue Deep. I just have a bigger bottle of it. Bluegrass Green and Bright Salmon. And you may be asking yourself, where in the world is this color going in this painting tonight? I'm going to teach you how to mix your own brown neutral that we're going to use for the sand. So inside my lessons, you are not only going to learn step by step how to create what I'm showing you, but I talk through with you why I make the choices that I do, how you mix colors, why, you know, how to blend, how to not blend, how to get wispy brushstrokes. So you're learning a lot of technique in addition to just learning a step-by-step painting. So I definitely think it is valuable to take notes if you want to. Okay, so what I do if I paint inside a mixed media pad, when I remember— I'll say that you can tell there's some little leakage of some dried paint colors here— I'm taking one of my sheets from my palette, and I'm putting it in between these layers so that I don't get paint on the next page. Okay, so if you don't have one of those, even just a piece of paper. I usually don't care. Like, you can see a little bit of paint along my edges here, but this is the fabulous thing about acrylic paint is you can paint over anything, and we're just going to cover it up and you won't even know it was ever there. So we're going to start with getting our paints on the palette. I'm going to scoot this over while I do that. So I'm not going to get a ton of each one of these colors because we're going to be using a fair amount of white with them to get all these variations that you see in this painting. So it's kind of amazing that this painting comes from so few colors to begin with. I'm going to start just by putting my 3 cool colors down, so just my 3 blues, and then I'm going to grab the white. And the white we're going to mix with everything, so I'm going to put a fair amount on there, and I usually kind of pull it into my colors. Yes, I love this size of mixed media pad too, Jennifer. It's just so handy, and it's great if you want to take it on vacation. It's not massive, and you can paint in it, you can draw on it, you can do anything. Okay, let's get started here. I'm going to scoot this back over. Go up a little higher here. I think I might tear a little bit of this off just because I want you guys to be able to see the original. Since these are a little smaller, I think I can fit them both on the screen for you. Okay, how's that? The dark blue is Ultra Blue Deep. But here's the thing I want you guys to realize is like, so we provide these color swatches on the side. These are examples of colors, but any blues that you have, you can make a beautiful beach scene like this. They don't have to be those exact colors. So if you have a dark blue, perfect. This Blue Raspberry is like a cerulean blue. And then the Bluegrass Green is like a really dark teal, which we're actually going to end up lightening up a little bit too. Yeah, if you're painting along with me, Linda, you can go ahead and get your paints ready. I'm going to go ahead and get started. Um, so for this type of painting, we don't need to add any water to our paint. It's okay for your brush to be damp. Mine was already sitting in water from earlier, but I've dried it off. Um, I've got my paper towels handy. And that I'll be using to clean my brushes in between colors. But you don't want them like wet. It's not watercolor, so you don't want this like watering down your paint. Not for today's lesson. I'm going to show you more about that later this week. So I'm going to start with some white, and I'm just going to pull a little bit over here, and I'm just going to take a touch of this dark blue, and I want you to see how immediately now Instead of that really dark blue, I've got this really gorgeous like sky blue color. And of course, the more blue you pull into it, the darker it's going to be, but we don't want it too dark, just a pretty light blue. Okay, and so try to hold that so it zooms or focuses. I mean, so that's about how much paint I have on my brush right now. So the number one thing that I see from people just starting out to paint is that you tend to be a little bit scared of the paint, like you're having to ration it. You don't have to ration it. It's craft paint. It's— these are not expensive supplies. Don't skimp on it. If you don't have enough paint in your paintbrush, then your brushstrokes are not going to turn out the way that you want them. So you want enough paint that when you put it on the paper, see how easily that's gliding. Back and forth for me, right? So when I— I'm going to kind of wipe off the rest of that in there. Now let's say I tried to keep painting and I'm really having to like force it into the canvas. That's my cue that I need to reload my paintbrush. Okay, so I'm going to go ahead and pull some more over here. And the first thing I'm going to do is go ahead and decide where my horizon line is— I think I'm going to go a little bit higher than I did on the original. And it doesn't really matter, you can pick that to be wherever you want. Um, typically, just like design, design-wise, um, you don't want it to be exactly split in half. You want it to either go above or below that halfway line. And I'm just going to start kind of spreading this paint out that I have. But I'm not only going to use that color, I'm going to scoop up Again, some of that white. This time I'm going to pull some of this blue raspberry color into it. And of course, there's no need to rinse because we're mixing blues and blues and whites. You're not going to get any ugly colors here. Now I'm going to throw in some of this. So when you are working with blending, which obviously is what we're doing right now, we want this pretty blended sky. We want variants of these different blues in here. You want to move fairly quickly, because especially if you are painting in a mixed media pad, because the paint will dry fast because it's just on thin paper, right? So you can hold— again, I'm just using a large flat. You can do big brushstrokes back and forth this way, or maybe you want some skinny accent marks. You could do some skinny lines in there. And I'm just going to keep blending until I get it the way I like it. I'll just pick up white with my other colors on there and look, it's just making— because that blue is still wet, so we're just making lighter versions of that. But my goal here is to not have everything perfectly blended. I, again, I want there to be variation in the sky. You don't see one solid block of blue up here. You see all these different lights and darks and different shades of blue, and then we're going to come back and add the clouds over top. Okay. So this is really preference for you. What, what do you want your sky to look like? And maybe you want to do a sunset instead of blues. You could do that too. You could even mix. See what I'm doing now? I'm going to mix both blues together, get a whole new blue. Add some white to that. See what kind of color we get here. So just a little bit lighter. And that's it for step 1. That is step 1 of our painting is we've got the base color of our sky down before we add any clouds to it. All right, pretty simple, easy way for you to follow. Now, if you want to, you could rinse your brush. I'm not going to because again, we're still going to be transitioning with blues. So we're not— I know I'm not going to end up making any yucky colors by leaving these blues in my brush. So I'm just going to add this extra down here. This is going to be my water, and then I'm going to come back on that horizon line with my darker blue. And I'm just going to kind of loosely lay down about where I want that to start. And so see, even here you can change your mind. Maybe you started a little higher before, but now you can come back and you can decide where you you want that horizon line to be. Now, if you're someone who struggles with getting straight lines like this, I'm right-handed, so I'm going to start on the left side. I'll start on the left and then you can just kind of slowly pull it across for your horizon line. And don't— again, don't worry about it being perfect. We have a saying inside a tribe. You're going to hear me say it all the time that we are focused on progress, not perfection. Perfection. My goal is to help break you from perfectionism, especially when it comes to creating, so that you can really just start to learn to enjoy the process and just have fun playing with your paints and seeing what's going to happen. Okay, so I've got my darker blue back here. I'm going to add a little bit more I like that contrast back there. And then I'm going to transition into kind of like my teal water. Sorry, I'll move that back down there. So I'm going to go straight into the Bluegrass Green again. I still have some of those other blues mixed in here, so I'm just kind of pushing my brush down into that, mixing all those colors together. And I'm going to go a little bit— it has a touch of white in it, but not much. And we'll come in with some of these darker colors back here. And again, I'm not— it's not a ton of paint, but it's enough that it's gliding smoothly. I want you to kind of remember that tip. That's how you know you have enough paint in your brush, is if it's gliding nice and smooth for you. So as we transition down, I'm going to get a little bit lighter. So I'm going to pull more white into that. Now we've got— look at that pretty teal. I'm going to call that Jamaican teal water. It's beautiful. But even in the water, we have variations, right? You have some dark patches of water. You might have some that are a little bit more blue than teal. So we, we can have all this variation down here. As we're transitioning down. This is a great painting if you really just need to focus on— I'm going to see if I turn this light off, if that is better without the glare. I kind of feel like it is. You let me know really quick if you guys like it with the light on. I'll turn it back on, but it's kind of glaring on the wet paint. Um, yes, okay, I agree. I think it's better now. I lost my train of thought. What was I saying? I bet it'll come back to me. I was talking about the variation in the water coming back and forth. You guys can let me know in the comments if you can think of what I was saying. I'm just going to pick up some different blues here and kind of work them in. But again, this is a very simple Ocean scene. So I'm starting easy peasy for you guys. There's not a lot of detail to this. Oh, I think I was saying it was good for blending. Good for blending. So, and again, do this in blues, do this in pinks, and I mean, just practice and play, even if it's not a scene, just learning how much paint to have in your brush and learning You know, the speed at which you need to paint so they blend well together. You can always pick up a tiny bit of water, but I would not go heavy on water with acrylics unless you're going for kind of like that watercolor style. The other thing to keep in mind, you kind of see me doing it right now, is when you're working with acrylics and you want to add layers, like I wanted that a little bit darker. If I would have kept adding that dark blue on initially, right after I did it, I just kept adding dark blue on because it wasn't dark enough. It would have just kept moving the paint around. It wouldn't have achieved my goal. So with acrylic, you want to let a base color dry first, and then you can come back and add more detail to it. See how much brighter that green is when I throw that in there. Let's get a little bit more white with that. But it can really make your colors stand out a little bit more if you add some more layers in. But you get to decide. This is just also very peaceful. You get to decide when, when you like your water, and then you'll stop from there. So we're going to keep transitioning down to the sand. Sabrina said, do you suggest a spritzer with water to help? I never do that. I know some people do that. I am a fast painter, so I don't usually have a problem when I'm blending with that. I usually just get more paint if one of my colors has dried and I want to blend that transition better together between those two colors. I'll just pick up more paint. Of each one of those colors to blend them instead of, um, adding water to it. So I'm going to add a couple. I'm getting some whatever light mixture I have here, and I'm just going to come in and just throw a couple little idea of waves in here. And this is almost like I have very little paint in my brush, so it's almost like dry brushing. Dry brushing means when you don't have a lot of paint and you're just kind of letting it drag over the surface. But sometimes it can give you a really cool effect when you do that too. Let's add just a little bit more. All right, how's everybody doing so far? Do we have any questions? Before I move on to the color mixing. Sabrina said, it looks like you're painting with this. So I'm not using the side, I'm using— I'm going like this. So I'm using the bristles, but you can change the direction. Like, if you want wide brushstrokes, you're going to go that way. If you want skinny ones, you're going to go the way that I was going. So it's just me against the canvas like this. So you can turn it that way for wider or this way for skinnier. Okay, so I'm just going to take this crazy, crazy mixture of teals and whites and blues that I have in here and just gather up some of this excess here, pull it over here. And I'm going to take a touch of my Bright Salmon. And I'm just going to drop it in that blue. Pick up a little bit more of the Blue Raspberry, and we're just going to mix these together. So the reason I know this is going to give me a brown— let me see where my color wheel is— is because they're opposite on the color wheel. I don't know where my other one is. This one's still in the package. But whenever you're wanting to make a neutral, a brown, a gray, anything like that, you can mix colors that are opposite on the color wheel and you'll create a neutral that way. Depending on which colors you pick, they're obviously going to have a different look to them. So this kind of has, I would say, more of like a, like a mocha type of brown. Color. If I wanted it to be more tan, I could add some yellow to it. See how it's kind of like a grayish— it's always hard to tell on camera— so that's kind of like a grayish brown, which means it has more blue in it. So I can change that up. I can add more of the salmon in there. And then when I add the white to it, you can see we kind of get more of like a sandy, dark sandy color. So again, you can decide how light you want to make that. Of course, you can use brown out of a bottle too, but I thought, why not show you how to mix your own while we're here? And then, if you want, this is a touch of yellow that I had over here. You can see how that changes the tone. It kind of warms that up, more of a tannish color. So it's amazing the colors that you can create once, once you learn all about color mixing. We have those lessons for you inside A Tribe. So there are those fundamental lessons. You get access to the Jumpstart in Acrylics when you become a member. So if you need to, you know, touch on some of those, if you never learned any of that, those lessons are part of Tribe as well. So I'm just going to take this color that I mixed, and we're just going to go across the bottom here. I'm actually very happy with that brown. I like that mixture. Let me know in the comments how many of you have created, or maybe on a regular basis create, your own browns or neutrals, or do you always paint from a brown paint color that you buy? Be interesting to see. And then even with this, I could come back in with the white, kind of change that up. So now we've kind of got the sections. We've got our background, our middle ground, and our foreground. In our beautiful little scene here. And you could add palm trees to this if you wanted, um, if you didn't want to do like the top of the little umbrella like I have. Um, Karen said please say the colors, so we're using Blue Raspberry. They're on your supply list too, Karen. Blue Raspberry, Bluegrass Green, Bright Salmon and the Ultra Blue Deep. Awesome. Melissa said, I would say half the time I make my own. Judah said, I didn't know that trick about mixing brown. And it's fun. Like, it's an experiment, and I'm going to talk about that tomorrow in the morning mindset, especially when it comes to color mixing. It's one of my favorite parts of painting, because you don't really know. You have an idea of what you're going to get. You know, they're going to— if you mix colors opposite on the color wheel, they're going to desaturate each other, meaning they're not going to be vibrant colors anymore because you're mixing its opposite color. But like I said, each one— if I mix yellow and purple, that's going to be a different color of brown than this. If I mix orange and blue, if I mix green and red, each one's going to have its own unique look to it. And I feel like you can really see those colors stand out more when you add a little bit of white like I did. Then that, that nature of that brown really comes out. And it's the same with like grays and stuff too. Sandy said she would rather mix and have less colors on hand. Miss Michelle said, I'm trying to learn how to mix colors, but it's a big fail. So here we're going to talk about failures this week, mistakes. Here's the thing with art, nothing's really a fail, because if you maybe fail at the color you meant to mix, but it just means that you don't have the knowledge yet to mix the color that you want. So I want you to replace with saying, that's a big fail, or I can't do this. Instead of saying those things, I want you to say, I can't do this yet, or I— it's a big fail right now, but I'm going to learn. These are all things that you can learn. Okay, so anyone can do this, but you have to understand how the color wheel works. You have to understand how colors work together in order to mix the colors that you want. When people say, I don't like muddy colors, you can avoid ever having muddy colors in your painting as long as you know which colors to avoid mixing together. Exactly. I didn't fail. I learned something. Every mistake is a learning lesson. Every oops, sometimes, just like Bob Ross said, they're happy little accidents. So my goal is to try to get you to just keep moving forward. Don't let a little thing like that stop you from continuing to learn, because the more you do, the more you're going to learn. The more you mess up, the more you're also going to grow at the same time, the more progress you're going to make. Okay, so we're going to jump back up here into the clouds. I am going to start with my bigger round. This is my number 4. So if you don't have my set, again, a synthetic, I would say like buy a number 2 or number 3 in the store. And I'm just gonna go into my white paint. So again, enough to glide for me, and I typically hold my brush kind of loosely like this when I'm doing clouds. I'm not trying to get a super specific shape. We're not trying to paint clouds like we did when we were in kindergarten. You guys all know what I'm talking about. I'm sure that image just popped right into your head. The amount of drawings I have from when I was a little girl of what clouds and rainbows look like, they all were the big curvy clouds, right? So we're, we're not really going for that. We're going to come across and I'm trying to keep in mind where this is going to hang down, right? So I don't need to mess with putting a cloud up at the top, but I'm just going to kind of Drag it along, and yes, that is just a line right now. That's how it's going to start out. I'm going to pick up a little bit of these blues that I have over here, and I'm just going to start kind of moving my brush almost like you're kind of wiggling it. And if you want to, you know, look at reference photos of clouds when you do this, I kind of just— these are kind of my go-tos where they kind of like taper off a little bit, and then they come up here and they're a little bit bigger. So we want to create that look. So it's kind of bright white down here on the bottom, and then it's still white, but it's got blue in it now, right? Because all the clouds have depth in different layers. Where the sun's hitting them the most, that's going to be more white. So I'm going to come in with a little bit brighter white again. And not everywhere, but just kind of, just kind of dragging it around some of these edges. So you still see some areas of light and dark in here. And that's all I'm going to do for this one right now. I'm going to let that dry. I'm going to see what I think about it. This is how you avoid overworking. People will say that a lot. How I just overwork my paintings. I don't know what I'm doing wrong. That can happen when you are, you know, hyper-focused on something, or you're trying to make it perfect, right? Like, we're trying to avoid perfectionism. This is me fixing a little brown dot that was up here. So you've got your cloud in place. If you don't like it right now, that's fine. Don't think about it. We're going to come down here and we're going to create another cloud. So for this one, I'm going to kind of same thing, start with like a little line down here, maybe a secondary one over here. And this one I'm going to kind of come up in the middle and taper back down. So almost like, think of these as like little rounded mountains. And then same thing, let's pick up a little, some blues in here to add some of those shadows in our clouds. I do feel like if this is hard for you, sometimes when we're painting straight on, it's— we're making a very specific brushstroke, right? If you hold it loose like this and just kind of drag it, it's going to have a more natural look to it. It's not going to look so forced. And here's the thing, if you mess up Pulled that down a little further than I meant to. You just grab some of your paint. Pull it back in. We've got to remember that acrylic paint is really forgiving and that we also need to be really forgiving for ourselves, especially if you're learning a new skill, especially if you're not super comfortable with painting yet. You're learning something new, so I want you to give yourself grace as you're doing that. But just remember, this is just paint. We can paint over anything that we're not happy with. If I feel like I got too much white there and I'm like, I don't like that, that's too much white, it's fine. I'm just going to jump over here and just work some of that blue back in there. So not too hard. I'm going to come back up under this first cloud up here. You can see there's a little bit more of a shadow under this one, so we're going to add some of that in, just kind of lightly dragging, not a ton of paint. If you get it too dark, Just come back. Okay, where else? Sorry, jumping up in the comments, making sure I wouldn't miss anything. I'm going to pull a little bit. Of this, that blue grass green and my teal together. Here, I'll show you guys what I'm doing. I'm going to pull a little bit of this color over here with this one. I feel like my original has more variation in the sky and I like it better, so we're going to add that in here. Look at all these beautiful blues we can create, and that's just from 3 colors. And you can just keep playing with it until you like it, although I will warn you. We talked about overworking. If you catch yourself really focused or hyperfocused on an area for too long, probably best to move on to a different part of your painting. And sometimes I purposely do that in my tutorials to stop people from fixating on a certain area. We, we do move along faster, and you'll hear me say that in some of my lessons, like, I, I want you to move at the speed I'm moving right now to prevent you from becoming fixated in an area instead of just like letting it be. What do you guys think? You like the clouds? I'm liking them. Got a little bit of variation there. All right, so now we'll transition down a little bit. Um, again, if you want to— if you wanted to add some breaks of waves in the water, um, you could do that. I'll add just a few in here just to kind of show you. Mixing my teal. Let's see what this— a little bit more white than that. So very lightly, just kind of pulling, gently glide. I'm barely touching the canvas, just like this. Okay. Just creating those little highlights throughout, and then as we get down here, we're going to get a little messier. I'm going to leave that blue, whatever mixture I had in there, whatever mixture you have in there, leave it. And then we don't want this to be a solid line right here. I want this to be broken up. This is where the waves are hitting the shore, and we want some transition there. And when we transition, and if you like have been to the beach and you can look through water, if it's really clear like teal water like it is in Jamaica, you see a little bit of brown and teal at the same time. So I'm trying to kind of recreate that look. So we're going to come in with some lighter brown here. You'll see it mix with a little bit of even my blue in there. Now I'm going to pick up some more white And we're going to start this kind of transition. And you can decide how much— going to wipe off some of that. Again, you can rinse if you want to, but if you look at this, even that's not like pure, pure white out of the bottle. It still has a little bit of tint of those colors to it. And then again, I'm just kind of lightly touching here and there. I'm picking up and putting down. You're not staying connected to the canvas this whole time. This is where we're not blending, right? So up here we're blending, blending, blending. Here I want you to do a brushstroke, pick up, do a brushstroke, pick up. That's going to create those spaces in between the waves hitting the shore. Now, if you felt like you got too much white, again, you can always come back. And keep playing. I'm just going to add a little bit of that lighter teal kind of mixed in some of these spots. If I'm getting quiet, it's just because I'm thinking about when I'm going to be done. So I'm not going to overthink it. I'm going to say this is good. A lot of times I'll take whatever is left in my brush and just kind of drag it and add some little fun accent marks wherever. All right, so I think that bottom half of our painting is done. So now we are going to move on to our little wispies up here, and for that I'm going to be using the two skinny brushes. Nicole, don't worry about it, you're just practicing. Remember, you may have to do it more than one time. If you don't like your clouds right now, when you go back and watch the replay— I mean, this is the beauty of a mixed media pad, and I can't flip the pages in this one because everything is wet. But the point of a mixed media pad is literally for you to play and make messes in. Okay, it's not about you being perfect. It's about you practicing. So maybe you, you know, paint Like, see, these are just practices of brushstrokes, practices of blending. So maybe do a couple pages where you are practicing doing the clouds and getting that technique down. That's the beauty of having access to the replays, is that you can go back and you can test that out again. You can try it again. Now, one of the other perks when you become a Tribe Sister this week, you get continued access to these. These lessons are going to be added to the Tribe Sister vault. So they will not lose access to them. Um, for the public, the replays will go through the 10th. If you become a Tribe Sister, you can keep these replays as long as you are a Tribe member, that you'll have access to them in the vault. So that's another perk in addition to the bonuses. And of course, everything else I'm going to be sharing with you guys. Um, okay. So for the next part, I'm just going to grab some black. We're going to make this super easy. Remember me telling you I didn't need much paint for this? Look how much paint I still have left. I could do a whole other painting with that amount of paint. And that's the thing I think we all have to get comfortable with. I see some of the comments saying I need more practice with the clouds, and we have to be okay with that. We need to— and I talked about this. If you didn't watch my mindset lesson this morning, I encourage you to go back. And watch that one and then listen to them each this week because we're going to keep talking about these things. But we put these expectations on ourselves that are so unnecessary. Like, again, this is meant to be a joyful, fun experience. But if you expect yourself to be perfect, which none of us are, then you're not going to meet that goal, right? That's an unattainable goal. So instead, I want you to come into each time that you paint and I want you to tell yourself, I'm learning something new today. I'm practicing a new skill I haven't done before, but if I keep practicing it, I'm going to get better at it. And I compare this to, you know, learning how to be a cook, learning how to fish, learning how to bowl, learning how to throw darts. That sounds really random to you guys, but when COVID happened and prior to COVID, my husband and I have never thrown darts. Ever, maybe once when I was a little girl and we got a dartboard for our basement. And guess what? During COVID I learned how to be a really good dart player, and I love throwing darts now. When I started, I was terrible at it and they flopped on the ground and I couldn't hit the board. Everything that we learn, these are just new skills. There's no pressure. There's no need to be perfect. No one's over your shoulder judging your work. So try to remember to give yourself Grace, this week and always though, I think in general when we become adults, it's like this new level of you have to have everything figured out and you're not allowed to make mistakes. What kind of BS is that? That's not true. We can't learn if we don't make mistakes. Like, this is where the learning comes in. If you don't join Tribe, the replays are being taken down on Saturday. Megan said, I can attest to Christie's dart throwing expertise. So Megan obviously is on my team, and I take the team on a couple retreats a year, and I had them to my lake house down here, and all the other girls were on the couch chit-chatting, and Megan and I are like, We want to do something. I love games. She loves games. We love sports. And so I was like, you want to throw darts? So yeah, we threw some darts together. It was fun. Maybe our next place will have a dartboard too. Okay, so before I do it on here, I've just got some white craft paper underneath this. I think it's helpful for me to— I'm going to put the light back on for this— show you kind of like my movements. And again, I highly recommend practicing this in your mixed media pad fill a page with learning brushstrokes. It's so important, and it will help you so much. So I'm gonna start. I'm holding it kind of loose, right? I'm not death gripping it. I'm not holding it real tight down here. You're not holding it like a pencil, because if you do, it's going to be way heavy-handed. It's not like— look, like, it's just gonna— even if I make them skinny, they're forced. They're not wispy like this, right? The thickness is all about The amount of pressure. If you're barely dragging it, then you're going to get a thin line. If you're pushing down really hard, look how much my brush is fanning out, you're going to get a thick line. So that is learning pressure. Again, you learn these things by practicing, right? So for this, I want you to get in the motion of doing— watch my wrist, see how it's like curving. Right, so that's giving more of that like wispy look. But I want to start— let's say this is the top of my picture right here. I'm going to start at that top and I'm going to quickly— see how I'm quickly pulling down? This is when I say sometimes I want you to paint fast. When I say paint fast, there's a reason why. This is just black. Um, so you're going to start like this, right? And then you seem like the quick pulls, and then as you're going down, you're also coming back up. I'm going to try to do it in like slow motion to kind of show you, but you're starting off and then you're coming back up, and that's how— obviously not that slow. See, I did that one slow, so it's not wispy and pretty. But when you do it quickly, and you can have maybe a few coming back this way. Practice which way is easier for you. That's the direction yours are going to go on your painting. But do you see what I mean? So quick little movements. Keep reloading your brush. A lot of times people think if you're using a small little brush like this, then you need a very tiny amount of paint, and that's not true. You still need to load your brush up with the appropriate amount. It shouldn't be dripping off or anything, but you want to allow yourself enough paint in there that you can make several brushstrokes at a time before having to reload them. The one I'm using right now is the number 2 out of my set. This is just a long skinny like liner brush. You can also try it with the number 1, which is just a shorter liner brush. It's really just preference. I mean, I'm making the same brushstroke with both of them. And this would be the one time I would say, if you need to, if you, if you are struggling with this, if you water down your paint just a little, not a lot, then it makes it a little bit more fluid and it might make it easier for you to get these little wispies. But you can even see, like, I added water to that, so that's not as opaque. It's more transparent. So that's why I don't really like adding water to it when I'm doing this style of painting. Okay, helpful to see brushstrokes before we go straight to the canvas. And again, I want you— it's not even a canvas, it's just another page. But see how practicing first is going to make you feel more confident when you come to your painting. And that's exactly what I want you to learn. It's like each skill that you learn with me is building confidence. Each new technique that you learn, you're going to carry with you from painting to painting. And then the more that you do them, the more solidified they're going to be. And you also are going to build, you know, muscle memory. Like, your hand's going to be like, remember what to do in that wispy movement. All of that comes with practice. All right, so here we go. I'm just going to start. I always start on the left because I'm right-handed, so you can do whatever is easier for you. So I'm going to start at the top. I can see my little perforated edge right there. So I know I'm just going to come off that, and I purposely, you know, left some spaces in between. Let a little of the blue show through if you want to. We're just creating a vibe here, right? This is not— it doesn't look exactly like the straw hanging from one of those umbrellas, but it's the idea of it, right? If you want some longer, start your brush stroke down a little bit further. You can pull some longer ones out if you want. All right, so as I'm going along doing this, I'm just going to briefly kind of talk over what to expect inside a tribe. What do you get when you become a tribe sister? So this is the only place that I teach live on a regular basis. You may have done like paid workshops with me. We just did the Bold Blooms Reimagine, and I've done Among the Wildflowers this year. So I do those workshops usually 3 to 4 times a year. And I teach those live in a paid group. And then other than that, all the new art I create Everything that I do basically for the Social Easel is all for Tribe. Any new painting you ever see me post, all the paintings you saw behind me, those are for Tribe sisters. So I'm constantly coming up with new ideas, fresh ideas to bring them. They get 2 live sessions with me each month. So 2 new paintings, and then I do a devotional as well once a month, and we talk about mindset, we talk about Jesus, and we share from the heart. And I mean, I'm 100% real in those, and sometimes you may see me crying, and sometimes I may be ecstatic about something, but that's, that's where I want to be able to share God's truth with you and how that can apply to your life, how that can apply to your artwork, what he wants for us, how we can start separating truth from lies. So we have devotionals in the group. You have access to all the past ones that I've done for the past several years. Inside the vault. And then I also either do a live Q&A where you guys can ask me whatever you want, or we do Kristi's critiques. And critiques are one of my favorite things to do inside the group, because it's your chance to submit a painting and ask me specific questions about it. If you're struggling with something, if you're not sure what to do next, and then I'm able to pull your image up on the screen. I'm able to talk through those choices with you. I'm able to show you exactly what you need to do in your painting, and they're so incredibly helpful. And I will let the tribe sisters in the comments speak to that because it's also some of their favorite things, and you learn so much, even if it's not your painting that I'm talking about. You learn so much from just dissecting a painting and understanding the different steps, and it creates all these like aha moments for you. So those are the 4 things that you get every month. Devotional critique or Q&A, and then 2 new paintings with me. And then as a Tribe sister, you also get immediate access to our vault, which we've talked about. When you go to the link to learn more about Tribe, we have this amazing lookbook on there. You can literally flip through a digital magazine and see all of the, all of the paintings that are included for you. And then I also included a video on that page. I actually take you inside the vault. It's a sneak peak. You can actually see the real library that the tribe sisters have. Everything is online and it's accessible 24/7. So whether you're a night owl or a morning person, we have women from literally all over the world. We are a global community, which is so amazing to me. And this girl from Springfield, Missouri, if you would have told her 10 years ago she was going to be teaching people in Australia and Greece and the UK how to paint, I would have been like, what are you talking about? And it's real. So all of us are on a different time time zone, and that's what makes it so great is you have access to these videos whenever you want to. Then we do fun contests, which we are getting ready to do. And what else? Bonuses. Tribe Sisters get all the workshops that I do throughout the year included in their membership, and they get discounts on some of my bigger events or master classes. So there are so many perks perks to being in TRIBE that I am so excited to share with you. The cost is $47 a month, or you can do the annual option for $470 for the year. Sorry, I just want to pick that up before it sticks to that any more than it does. If you do the yearly option, you are committed to that one year. If you do the monthly option, you can cancel at any time, so you're not You're not stuck in anything, and it's not one more thing, you know, to be added to your plate. This is a chance for you to really come in, and if you've always wanted to really know how to paint and make these gorgeous paintings, you may see them and think, I don't know if I can do that. And I'm telling you, you can, and Tribe is going to help you reach your goal faster with ongoing support wherever you are in your art journey. We have complete beginners, and we have women who have been painting for years. We have women who teach paint parties, and we have women who sell their artwork, and we have women who are just doing it because it brings them peace and joy, and it's their therapy. So no matter where you are in your journey, there is something inside a tribe that's right for you. And I'm telling you, the community— you're probably kind of getting a feel for it here in the comments— the community is the best part. We asked some tribe sisters this last week what their favorite part of being a tribe sister was. And so many of the responses were about the community. It is— you're learning how to paint, but it is about so much more than that. And it's about these friendships that we build along the way and being surrounded by like-minded women. It's just a special, special place. Okay, so look at that. I just got pink. Where did that even come from? Pink on my painting somehow. Hold on. Guess we're adding another little wave here. There we go. All better. Okay, before I move on from the painting, I'm going to flip the camera back up and I'm going to answer any questions that any of you have. I'm going to go over the fast action bonus and I'm going to tell you one more perk that you will get if you sign up to become a Tribe Sister this week. But any questions about the painting? And everything. So you guys will have access to that through the week. I can't wait to see them. We will create a post each day on the Social Easel Facebook page. So if you're not following me over on Facebook, it's just a page. It's not a group. It's just my public page. Our social media manager will be making a post and then everyone can share their work underneath that. So we always loved for you to share your work with us. Okay, I don't see any questions. If there are— I'm— Tara, just send that into customer service, please. I'm going to pull myself back up here. Okay, sorry, the cameras have to jump around a little bit. I've got to have— my audio is connected to my phone, and then my computer obviously is in front of me, so I have to get the screens right. Okay. Replays are available in the hub. Everything— if you guys signed up and got the supply list and all of that, you should be receiving daily emails from us. We send an email out 15 minutes prior to each lesson, and then we send an email out later with the replay hub link, but it's all one. It's one link. So one link is going to take you to the page here. I'm going to show you what it looks like right here. Is— let me get to the right page first. Hang on. Okay, so what you see here is what the hub page looks like. Okay, so everything for this entire week is going to be here at the very top. You can download your supply list and schedule. This is a link to my shop. I have some special kits that I have put together that I think are just super helpful. You have the basic one, or you have the I want it all, and then you will see day 1, my morning mindset. The data set is already here. As soon as I'm done with this live, you'll see that, um, oh, actually, you can click it and watch it live right now from this screen. So that will be available for you to watch on replay. And then we've already got the placeholders for the rest of the week. So everything in one easy peasy, convenient spot for you to go back and access. So everyone has the same link. There's no special link for tribe members or people not in tribe. The hub page is for everyone. Kathy, if you are in tribe, Megan has posted it in the Tribe Sister Facebook group. Okay, so I know what I was going to do. Let me see. Hold, please. Since I didn't have all the paintings here to show you, I wanted to pull up the fast action bonus for you to see. Anita said, do you do summary sheets on how to mix colors? I don't do any kind of sheets like that. I have a color mixing guide that you get when you purchase my kit from DecoArt, but we do have color mixing lessons inside of Tribe. Okay, so I'm going to pull up what our fast action bonuses are. Again, Tribe is open through Friday at midnight, but we have a fast action bonus that ends tomorrow. At midnight. You get 4 bonus tutorials. If you're in the US, you also get a little Tribe Sister swag bag with some gifts from me. And then there is one extra perk. I'm so excited to share it, that you will be entered into a contest if you sign up for Tribe this week. And don't worry, current Tribe Sisters, we have something in store for you as well. But you may or may not have seen that I do retreats here at the paint studio, and we have done 2 so far, and they are absolutely amazing. Amazing, and I love them. And we have another one coming up in July. And, um, when you join Tribe this week, you will be entered in as a possibility of getting a free spot at my next retreat. This is a $350 value, and I am giving one spot away to one lucky new Tribe sister. And then all current Tribe sisters, you are going to have an opportunity to get entered into that drawing. Megan will be making a post about that very soon. So I'm so excited. I thought this was going to be such a fun way to bring you in as a new tribe sister, give you an opportunity to come here to the studio, meet some of the other members. And like I said, the, the whole point is there's nothing better than us doing it together. So I thought that would be a fun extra perk that I wanted to throw in for you guys, and I'm excited to another studio full of ladies here. We have a welcome evening where we get together, take pictures, you get a tour of the studio, and then the following day is a full day in the art studio with me. During the last session that we had in the spring, I let them help me start a mural downstairs, and we did 3 projects, had lunch together. It was so much fun. So that is going to be another perk is that you will get entered in to do that. So, here I'm going to show you the 3 that I have here, Fast Action Bonus, and then I'm going to pull up the screen. So if you weren't on earlier when I showed you these, these are the bonus lessons that you get when you join. These aren't available anywhere else. They're locked up in our secret vault, which you get access to. The Lovebirds, I love this one. Um, you get access to Spirit, Not of Fear. You get our Spring Bicycle. And then the fourth one that you get is the Spring Chapel. And I was mentioning I have that at home, um, but you can see it's one of my favorite paintings still, and I painted that one years ago. But you can see the Spring Chapel here. So you get all four of those bonus paintings. They will go in your member library online, and you log in to access everything from there. So those are your bonuses if you join by tomorrow night at midnight. What else was I getting ready to share? Let me go back here. And when you go to the— hold on. Okay, when you go to this website, this is the link. To join Tribe. Okay, so this is going to be what it starts out like. Tells you everything you get when you join. Okay, it's a quick video for me, but this lists everything you get as a member. And then down below— oh, I'll show you these two new paintings in person. These are some of the most recent floral paintings that are included for Tribe Sisters. This is what is coming in May. And I already know what I'm doing in June with you guys. Maybe I'll share that later this week. And then if you want to see a sneak peek inside the entire Tribe Sister Vault, how it's organized, what it looks like, this is your chance to do that. We've got the sneak peek to the vault right there on the website for you. Okay, you guys want to see the bigger versions of what we're going to be doing in May. The first one is our new hydrangeas painting. I actually did this one with the ladies that came to the spring retreat in person, and we had so many requests from all the Tribe sisters that saw it, and they're like, please tell me that's coming to Tribe. So this will— yeah, we can hopefully get rid of that, the troll that's on here. Um, so this one is coming in May. Um, so fun, so fun to paint. Megan, I really am going to mail yours, I promise. Um, it's on my list this week. Megan had to leave hers here. She was here at my retreat and she couldn't pack it in her suitcase, and I promised I would mail it. And then this is our new ocean scene. So you got to paint one version with me tonight, right? It was a very simplified version. Um, this This is impasto style. Again, all that means is thick paint. I did this in palette. Now, if you can see a little bit of that texture on there, I'm going to try to hold it a little bit closer. Look at those clouds, so fun. Um, of course you don't have to paint them this big, by the way. Um, I always want to make sure that people understand that I will, like, whatever the size of canvases— these are all different size canvases that you see behind me— um, if it's a square, you can paint it on any size If it's a rectangle, any size rectangle. So, and a lot of these you can make your own, like this one. This would be beautiful on a tall skinny canvas like this, right? This could be pretty on so many things. So you've got options. You don't have to paint something as big as I paint it. You don't have to paint something as small as I paint it. You have a lot of freedom in the choices of what you do with the painting. So hope you guys are excited. Excited about that. If we didn't answer any of your questions and you still have them, please don't hesitate to reach out to customer service. I am going to throw that email up on the screen. And my team will get back to you with anything that you need. See if there's any other questions. Thank you guys, glad you are excited. It's going to be a fun, fun month. I know, aren't the lovebirds so cute? They just make me happy every time I look at them. Okay, Megan has posted the link to join if you've missed it. Of course you're going to get an email with it as well, and if you're following me on social media, you're going to see it all over, um, in our stories and, um, in our post. You can tell my brain is getting tired now, so I'm gonna jump off for this evening. Happy Cinco de Mayo! Thanks for hanging out and painting with me today. I hope you guys had a ton of fun. Tomorrow, 10 AM Central Standard Time, we are going to do another mindset lesson, and this one's going to be all about play. I want you to get comfortable with playing. I want you to take what we learned today about perfectionism, and I want you to keep rolling with that as we go into tomorrow. And we talk about learning how to let yourself play again and really embrace the creative process. And then tomorrow night we're going to come back and do some simple florals. So I can't wait to see you. Thank you everyone for being here, and I will see you tomorrow. Bye.










