Chalk Board Count Down (on canvas!) || The Social Easel
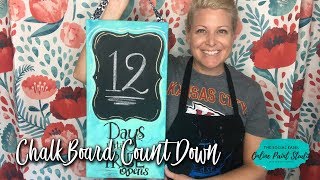
Christie Renee Hawkins shows how to make a DIY canvas chalkboard countdown calendar using black craft paint, chalkboard paint, and Posca pens. She hand-letters numbers, adds gold accent lines, and builds a simple hanger with hot glue or a staple gun.
Chapters
Hey guys, it's Christie with The Social Easel, and I am working on my own countdown calendar today, and I did a quick little time-lapse for you. If you missed that, you can kind of watch me do the lettering on here, but I am going to show you how to make your own today and what supplies I used to do that. So let me get my Messenger bot set up, and as you guys are hopping on, just say hi. Let me know where you're watching from, and as soon as you comment, you will get a message from my Messenger bot once I activate this. Let me make sure I've got it ready to go here, and it will give you all the links of whatever I talk about in, in our live today. And then if you want to make sure that you catch my other lives, you can reply yes to that and it will remind you because I send out broadcast before I go live and it will tell you when I'm going live. So I am going to try to pull you guys up on my pad. Let me see if you let me know, leave me a comment if you will. This is acting weird right now and I'm not seeing any. So let me know you're here if you don't mind. And I just want to make sure this is working right. I may not be able to— okay, good. Hey, Jesse! Just want to make sure I can see your comments on here. And hopefully I can get this to go right for me here so I can see comments. All right, it's not working on my iPad. Hey Diane, Lisa, Jan, Robin. How's everybody doing? All right, I brought a backup just in case I couldn't get my iPad to cooperate with me, because I'm not sure why it's not letting me see the comments. So I have Kylie's laptop in here to, to check on that. So let me show you what I'm doing today. I'm making my own countdown calendar. This is for you guys. So this is what I am going to hang behind my backdrop, and I'm going to show you how to make your own. And this is just on canvas. This is a 10 by 20. Canvas board, and right now I just did black paint and black lettering. This isn't the chalkboard paint, so I'm going to show you that first. I like to put a coat of regular black craft paint down first, and then I'll come back over top of it with chalkboard paint, and you can turn it into basically a chalkboard surface. So you can make these for whatever you want to. You could do Christmas, birthdays, all that good stuff. So I'm gonna fill this in. This is my countdown until my Tribe opens. So if you're new, that means my painting membership. So if you like learning painting from me— hey, Caitlin, she said she can't wait to join. We're excited to have you. But if you like painting with me, this is kind of a more exclusive VIP level of that, and you get 3 paintings per month with me the first 3 weeks, and then The fourth week you get a bonus instructor, so an art teacher that teaches a different medium like watercolor, mixed media, hand lettering like Casey, so you can learn how to write like this, and/or a business coach. So if you're doing this as a business and you want to learn more about the business side of being a creative, we have those intermingled in right now also. So that's what we're gonna do today. I've got a canvas. You can use any size canvas board. I used this as my— this is another thing that I did. I've got it upside down. It says "Choose Joy." I was practicing my hand lettering this morning, but you can just use this shape. You can get these at Hobby Lobby or Walmart. This was a pack of like 60, like craft paper in this shape, but they also make these in in like that hard cardboard stuff, and I just laid it down on here and traced over top of it so I could get that pretty shape. And these come in all different sizes. You could do a circle, this pattern, there's smaller ones that look similar to this that are more of a square shape. So I use that as my template. This is my new favorite thing that I learned about from Miss Casey Hope from Pizzazz Art Studio. This is a Posca pen, and that's what I used for my lettering on here, and then I've got chalkboard paint. This is Americana. I am gonna post in the comments here— let me see if I can get you pulled up really quick— a link to, to my store, and I put the links to all of this stuff so you don't have to go searching for them. They're all gonna be in my Amazon store. So I'm going to post that in the comment. This is going to have all the links and then these will also be emailed to you as well. So let me see if this will work. Okay, that should be posting. Let's see if it hops up. Hey Diane, thank you. Miss Diane is in my tribe and she won all kinds of goodies last month, a $100 gift card Amazon to get herself some supplies for a contest I have going on in there. Okay, what else was I going to show you? I'm going to use a gold paint pen today as finishing touches, and then I just have an assortment of craft paints. I think I'm going to use— this is Sweet Mint and Peacock Teal, so I'm going to kind of use a combination of those on my background and And then I brought some different colors here. I'm not sure if I'm using these or not yet. So I'm gonna do kind of like a teal minty background first. So let me move that out of the way. And then I just have whatever ribbon you want. This is just some I had. And I am going to make a little hanger on the back of this. And I'm just gonna hot glue it on. You could do hot glue or you can do a staple gun. So I'm just going to make a little hanger on the back of this. So that's what we're doing today. If I can get my, all of my tech to work, this would be great. Teresa, yes, this is on canvas. You could do this on a wood board as well. So whatever, whatever you want, you can do it on a door hanger, you know, like a wooden door hanger, just a sheet of plywood. But I had this extra canvas and so I decided to do it on canvas. All right, so we're just gonna start. I'm gonna go ahead and do my background first, and I'm just getting some of my mint— got a little clog here, hang on. So let me know if you guys have any questions while we're going along. It can be about the membership, or you can let me know what other things you want me to paint over the next few weeks. My goal is to go live with you guys every day until the doors open so I can be here to show you how it works and answer any questions for you. So if you guys— I have a list of ideas that I want to go live with, but if there's something you want to see or something you want me to go over, you can let me know that too. And then Corey, my husband, if you don't know, he does all of like my frames and my pallet boards and all that stuff for me, and he's agreed to show you guys how to make the frame that he made for my big farm animal paintings. So if you missed those, it was the cow, the pig, and the rooster, and he made me frames out of old white picket fence, but he's going to show you how to do that just with 1x4s from the, from Home Depot or your hardware store, wherever you get that, and then you can paint them whatever color you want to. So that will be one of the lives one evening when we don't have volleyball to go to. Trying to keep up with your comments here. Hey Denise, we look forward to having you. I have stuff all over the place here, so I'm just gonna start painting, and I'm not too worried about going over my lines. Now you do not have to do it in the order I did it. You could trace your shape on there and not fill it in yet and then do your background. Same with lettering, you could paint your background first and I kind of get excited and just start just deciding. I just want to get it done. And so I just decided the letters straight on here, and then I'm gonna paint around it. But I think what I'm actually gonna do is leave a little bit of white outline around my letters, and it will kind of act as like a, like a backdrop form, if that makes sense. So we'll have little white highlights around them from the canvas showing through. But when you're doing this, you can put your lettering on after you put your background paint color on if you want. And mine is obviously, you know, customized to say when Tribe opens, but you could do, you know, until your birthday or until Christmas, and you could even do a separate section down here, like another little black rectangle of chalkboard paint, and then you could write on there with chalk and change it for whatever occasion you wanted to make it for. But these would be really cute if you just like made a Christmas one you pulled out every single year. I did one a few Christmases ago, like a countdown with that was red and had this shape on it and then had polka dots all over it. I haven't decided if I'm adding polka dots or anything to this or if I just want to leave it these two shades. So I'm kind of getting a little bit— can you guys see that? I'm getting a little bit of both colors here. I'm just going around the edges. And again, I'm not worried about covering up my black because I'm going to put another coat back over that. That's going to be the chalkboard paint. And what that does is it basically creates a chalkboard surface. So you can go in and write on it with chalk and erase it and go back and do it again. Now I do recommend, from my experience using the chalkboard paint, let's see, you can't really see that. I did another one and you can use those pens that are made for chalkboard, but I don't think they work as well with chalkboard paint. They kind of leave a shadow left behind. Caitlin said, I'd love to see you do some landscapes. I love landscapes. Awesome. Teresa said she did exactly what I said. The bot is not working, so you're not getting a message. Okay, hang on. Let me check here. It says it's active. Oh, you know what? Thank you for commenting that. I picked the wrong post. So we're gonna try this again. Okay, now if you comment, you can just comment, hey, or links, or whatever you want to, and now you should receive a message from me. So thank you, Denise, for letting me know that that did not go through. All right. So we got that. Hopefully— this just keeps showing me my pinned post. Okay, sorry, we're a little tech challenged today. So I'm using my big brush right now, just using a big large flat, and I'm getting ready to switch to a smaller one just to kind of work around my lettering. And let me know if you guys would like— this is what I was gonna say earlier before I got distracted by the tech stuff— if you would like my lettering, like the days until, even just this part, I can make you a template for that and upload it after we get off of here. And you could go back and print that off and transfer that onto your canvas if you wanted my exact lettering. So maybe if you're worried about your lettering or don't think it's going to be quite what you want it to be, if you guys want me to do that, I can make a quick template of that so you can transfer my lettering on there. So I'm just getting a quick base coat on here. Hello, Dawn. I think I got it. Okay, good. Sandy said, can I watch this from beginning? Yes. Yeah, so Sandy, this will, this will be on the page afterwards. You can go back and watch from the beginning. So what I'm doing right now, if you guys were late joining, I— we are opening my Tribe Painting membership. On September 15th. So this is gonna say today— later today I'm gonna paint on or write on the number 12 on here, and this is just going to be my countdown calendar. And this will change every day, and I'm making this to kind of hang behind when I'm doing lives with you guys so we can keep up with the countdown. And we've got all kinds of fun stuff up until the doors open. So if you're new here, I pinned it in the comments. I've got 2 things going on right now that you can take advantage of. The first is my 4-part video series, and this is going to teach you all kinds of painting techniques, and this is going to be sent straight to your inbox in your email. So that's the 4-part video series. Video number 1 goes out this Thursday. So that link is pinned in the comments, and if you comment on this live, you will also get it sent to you in Messenger so you can sign up for that free 4-part video series. So that is the first thing. And then the second thing ends this week— sign up for it ends this week— and that is my Fall Chapel Painting Challenge. And what this is, and I'm getting ready to show you the picture in just a second, second. If you haven't painted before or if you have, it's, it's for everyone regardless of your level, but most of the people I have taught have never painted before. So if that's you, this is for you, but we are learning how to paint my Fall Chapel painting inside a private Facebook group over the span of 4 days. So I'm going to break it down into 4 mini lessons for you to make it easy to digest and take time to do. So each lesson will only be like 20-30 minutes. So it's just trying to get you in that, that mindset of allowing yourself to take 20 to 30 minutes a day, do something for you, a little self-care, because when we we do something for ourselves, we're usually better for those people around us. And that is something that has been very hard for me, and I'm trying to be a lot better about doing it. And that includes just painting for myself instead of painting to teach. For me, that's yoga and working out. So whatever it is, you guys let me know in the comments. What's your thing that you do to relax. Give yourself a little bit of me time, a little break from everything. But the, the Fall Chapel Challenge, it's going to be in those mini lessons so that you can break it down and do just a little bit at a time. So you don't feel like you have to have, you know, 2 hours straight to, you know, get something done. You can break it up into mini many days if you need to. And that Chapel Challenge starts on Monday, so I'm ending registration for it on Saturday so we can get everyone in the group. Your supply list, your color list, how to build a palette board, all of that stuff is inside the group when you go in there, and it's only $15. To learn how to paint the Fall Chapel. So this is a really good deal because if you are local with me, I charge $45 per person for my palette nights, and you're getting to learn it for only $15. And that will give you a really good idea of kind of how I teach inside my membership, so you can see if that's something that you think would be a good fit for you. So I'm being really messy here going around my lines because I'm going to come back over top of them with my pen, I believe. I kind of did this a little bit backwards. Normally I would have already painted the surface first. I just kind of got ahead of myself this morning. You ever do that? You're just ready to go and I just kind of wing it. It's usually how most of my creative process works. This is what it's looking like so far. Thank you, Miss Lisa. Vicki says template. Diane says template. Diane, if you get Canva, is an online That's how I do all of like my graphics and stuff, and it's free. So you can get— you don't have to download it either. You just go to canva.com and create an account, but they have a ton of awesome fonts in there. And then you can type out whatever you want to, and they will let you download it as a PDF or a JPEG. So you can just save it to your computer as whatever you want to. I think it's gonna be easier for me to read these comments over here. So yeah, Diane, that's what I would recommend, and then you don't have to worry about downloading a new program on your computer. Yes, Cindy, so the cost for all 4 mini lessons, which is the complete painting, is $15, and that link is also in the comments. Again, as long as you comment on here, all of these links You don't have to worry about trying to go to them right now. They're all going to be sent to you in Messenger so you can go back. And all the supplies that I'm talking about today are also in those links in my Amazon store. So if you don't have chalkboard paint and you need to get some, there's a link for it in that store, and it's a DecoArt brand. I believe it's Deco— maybe FolkArt. Either way, they're all pretty similar, but I have that in the store. Store. What else did I put in there? I'm trying to— oh, I put the Posca pen in there, my gold pen. These are two of my favorites. Those are all in my Amazon store, and there's a couple different lists in there so you guys can look and, you know, figure out what it is that you want. But yeah, all my favorite stuff is in there. There's a getting started list if you're new to painting. That is all like kind of like my must-have supplies for you. That's in my getting started list. And then in my favorite things, that's where this Posca pen is and the chalkboard paint and some of the things I'm using today. That's going to be where I start adding from all the lives that I do. I'm just going to add all those into that list on my store of my favorite things so it makes it easy for you guys to go in and figure out what you want. And you can of course get all this stuff at Michaels, Hobby Lobby, whatever. Some people like Amazon. It's a little easier. Even if you don't shop from my store, it's a great way for you to go and look at what it is that I use, and then if you'd rather get it at your own local store, you know what it is you're looking for instead of trying to just figure it out from a list. Shows you the images and pictures. Lisa, yeah, you just— everything on Canva, like I said, you just download it and print it. So I'm just like you would everything. Hello, Miss Tish. Canva.com, C-A-N-V-A. Let me see if I can type this real quick. Alright, so I put that link in there for you guys too. And I don't have any kind of affiliation with that. That's just what I use, and it's super user-friendly and easy for you guys. So I'm just going around my letters here. How many of you have signed up for the Fall Chapel already? You can let me know in the comments. I'm gonna grab that painting real quick. I've got it. Let's see if I can just aim this up. There you go, hanging on my wall right here. So that's the Fall Chapel painting. Linda, you can hear me now? Hey, Kathy. Trying to get that where you guys can see. Okay. And something else new that we are getting ready to add to our members area of my membership too is templates. So like this month, I'm teaching my first lesson inside my membership on Thursday this week, and we are doing my Truck Full of Pumpkins. So I don't know if you've seen that one. I posted it last week and kind of showed you guys a sneak peek of what we've had in my membership and what we are doing in my membership this month. So all the paintings like that will include templates, and they are included with the membership. And then I think we're also gonna have a public store to where if you just want to buy templates, they will be available too. But this month inside my Tribe, we are doing the Truck Full of Pumpkins, and we are doing the Witch's Kettle, which is super cute. You've got some witch boots kind of sticking out of a kettle. And then what is my— oh, my third one is the Fall birch trees. So all a little different, and I try to make whatever it is that you guys are learning in my membership— I try to make each painting different so you're learning some different skills with each one that you're doing. Thank you, Kathy. Namely, that's a good idea. This would be a cute sign with your Wi-Fi password. I've seen that in some people's homes where they have a cute little sign up So again, I'm getting a little messy here because I'm gonna go— I decided I'm gonna go back over with my black pen once this is dry, and I'm going to show you kind of how I go in and letter it too. But this is what we're looking like so far, and I'm gonna come in, I'm gonna go ahead with my angled brush, and I'm gonna get a little bit of my mint and and a little bit of my teal. And this is one of my— if you watched, I've done 3 lessons so far of different brush techniques. This is one of them I do. You can use an angled brush like I'm using here or a large flat just to make these messy backgrounds where you get a mixture of these colors, but it ends up looking really pretty. And this is one of my go-tos, a quick, a quick background that you can do to put a vase of flowers on or whatever you want. If you guys remember last week, I did the, I did the live with you guys where I showed you how I did my floral centerpiece. So later today, I'm gonna go in and snap a photo of my centerpiece and kind of give myself an idea of what I want to paint for my still life. So you're actually gonna get two lives today. I'm gonna take a little break and get a little office work done, eat some lunch, and then before the kids get home from school, I'm gonna jump back on and with you guys and show you how I take a painting from a photograph, from a real-life still life that you make. You can do this with all kinds of fall stuff or flowers, whatever you want to, and how to turn that into a painting. So that's going to be later today. So if you want to make sure that you're getting notified, just comment "notify" in the comments. And then when you get the message from my little Facebook Messenger bot, just reply back yes, and it will notify you when I go live the next time. Colette, yes, so you do not with the Chapel Challenge— well, cutting my head off here— you do not have to watch them live, they stay in the Facebook group. So if you're moving right now, you will be able to go back and access that later. The group will be archived at the end of September, and that doesn't mean you lose access to it. It just means it turns commenting off inside of the group, but you'll be able to go back and view those videos whenever you want to. So I just— this is some chalkboard paint that I just squirted on here. I should have brought myself some paper towels over here, but this is why I love these tablecloths. I get these at Sam's and they have like a paper towel top part that you can use to wipe your brushes off with. So if you don't have paper towels, you can get that and just clean them off on here. Tish said, or somewhere that you can— interesting. I don't know, Tish. I would have to look that up, or someone can Google that and let me know what— if someone's done it before. Tish was saying you can bake the chalkboard paint onto wood. I haven't read that on the bottles. I don't know if that's a special kind. So yeah, let me know if you guys figure that out. Okay, so this is again, I just did a base coat of black paint and I like to do that just because it makes it nice and solid. And then I'm going to go back over. I'm actually going to show you guys this. If you lose your lines, take your template, lay it back over top again. I had this the other way. I think I went a little outside of the lines, but you can see that it doesn't really matter. So I'm just going to draw my lines on here again. Get it somewhat centered. So if you lose them— and this is what I would do in the beginning to just kind of trace your shape on here. And then I like to use an angled brush when I'm going around edges like this. I just think it's easier to kind of control your shape and get these nice rounded edges and to come up to a point here. So again, this is chalkboard paint that I'm using right now, so I'm just putting a nice solid surface of it on here. And I really load my brush up, so lots of paint. It's just going to make your life easier so you can spread that paint nice and easy. So I like to go around the edges and then go back and fill that in. So what do you guys think of this angle? I'm trying some different things out. Because it's a little hard in my studio for me to talk to you and look at you and show you the project that I'm working on. So I'm testing this out to see if maybe painting with you from my kitchen table might be a little easier for you guys to see what I'm doing. I'm sure Corey's really gonna love that. He kind of likes me being able to be shut in my office and leave my mess in in one place because I may not be the best at picking up after myself. But for Facebook Lives, this might be easier. So let me know if you guys think this view is okay, or if I need to angle it a little bit different, or if you like when I teach you from my studio, if you've watched some of my other videos. Now for the technique videos, I'll be on tomorrow And we're gonna do round brushes tomorrow, and that includes like the liner brushes, so I can give you really good tips on how to get those fine lines that everybody struggles with. So that's going to be tomorrow. For those, I will do the aerial view, so you won't see my face. You'll just see my hands and the canvas, so you get a really, really good view of what the painting looks looks like, and so you can master those brushstrokes. That is the same way I teach inside my membership. So it gives you a bird's-eye view, which is really, really easy to learn from— the easiest way to learn painting from. And if you haven't painted before and you're thinking this sounds fun, but it's probably not going to work for me, I teach— I have taught thousands of women. So I've been doing this for 6 years, most of them local, local paint nights, but I've had the current membership for over a year and a half now, and most of the women who have joined my membership have never painted before, and now they are producing stuff left and right. So it's really, really exciting. To see the progress of what some of these ladies are doing in here. And I know Linda's on here. I'm not sure who else was on here who didn't have painting experience before and is now teaching kids paint parties. And this is in— Linda, remind me if you're still on here— I think this is only after 4 or 5 months of painting with me. So regardless of what you want out of it, it may just be to relax and have fun. Or maybe you want to make some extra money on the side too, and you'd love to do your own paint parties and stuff. You can do that with what you learn in my membership as well. All right. So this is going to dry. This is chalkboard paint. I'm going to check to see how dry I am down here so I can go back over in my lettering. Tish said she had never painted and she started her business in August, and I'm so excited for her. Linda said 8 months. Okay, I couldn't remember how long. Okay, the lighting's good. Making sure I'm not missing. And we are getting ready to do our— we're doing a local meetup too. So I'll be posting pictures from that this Friday. Our tribe is getting together for dinner and drinks and pictures and a fun little project for us to do together. And this is just a really fun time for the women to meet in person instead of just online. But it's really cool because this community of women is awesome and they've become friends outside the membership as well as in the membership, and it's just super supportive. So, you know, you can definitely go and find techniques and paintings on YouTube, but there is something about having a community of women to paint with you that makes such a big difference. The encouragement, having a place to share your work or your struggles if you have questions. I'm always in the group to answer your questions. So that kind of gives you an inside look of what our membership is like. Yes, we are Tribe Sisters. So it's called my inner Christie's Inner Tribe and the name of our ladies is called Tribe Sisters and they are just amazing and super supportive of each other. So I'm going to try to do this to where you can see. Lisa, yes, it's this Friday at the pitch, and all the details are in the event in our group. I honestly can't remember off the top of my head whether I started— if I have it starting at 6 or 6:30. So go inside of our Facebook group and all the details are there. So I hope you're coming. That's exciting. So I'm just going over my lettering again, thickening my lines, covering up where any paint kind of covered my letters. See how that's starting to look Super pretty. These pens are awesome, so thank you, Casey, if you're watching, for the recommendation. She uses these for all her lettering, and they write on glass and wood and canvas and everything. See how that's starting to come together there. Lisa says she's so behind. That's okay, you can catch up. Linda, that's awesome. I love our group. It's an awesome community of a bunch of support and love in there. All right, so what other questions do you guys have for me? Are you excited to watch me do a still life later? And this is a really good learning experience for you guys too, because if you struggle with coming up with original ideas, you can make your own still lives, take a picture of it. I like to take a picture of it because it puts— takes a 3D form of just looking at flowers and trying to figure out placement, but you you take a picture of it, it makes it 2D obviously, and it's a lot easier for your brain to process where composition-wise, where everything is. This is a Posca pen, and it's— the link to this is in my comments also. Oh, Becky said to treat your chalkboard area first to prevent ghosting. Ghosting is what I was talking about when you use the chalkboard pens. I don't like them. Even after treating them, you can still see through there, but you can treat your surface by covering it with chalk and then wiping it off before you put your words on there. That way you— and what she means by ghosting is it doesn't leave the image behind. Of your letters. Alright, I'm gonna get done with this letter here, and I'm gonna check back up and see if I've missed any questions or comments from you guys. And when you're lettering, don't worry too much about it being perfect. If you look at mine up close, you're gonna see it's not absolutely perfect, but it still looks pretty. Yes, these are super fun. Yes, Cheryl, I will be done in just a little bit, and then you can go back and watch from the beginning. Oh my gosh, Lisa said she sold 24 paintings. Was that last— did you say last week? Last week she sold 24 paintings to 2 boutiques in town. That is amazing. Okay, I want photos of that in our group. Share that in the group for sure. Thank you, Miss Becky. Yes, this is all my learning from Casey. So Casey Hope is my friend who teaches lettering. If you don't know how to hand letter, I can show you a little bit, but Casey's the pro at it, and I believe she's opening her membership shortly after mine, but it's Pizzazz and it's P-Z. There's no I in it. I think it's just Pizzazz Studio, and you can find her, and I think she has some free downloads available right now for lettering also. So this is what it looks like. I'm loving it so far. Okay, so I told you I was gonna add gold. I love adding gold to everything. This is another one of my favorites, absolute favorites, the best gold paint pen you can get. This is Deco Color Premium Gold, inside my Amazon store as well. So I like to outline lots of things in gold, so I'm gonna go around my shape here. and just quick little lines. So I'm not necessarily connecting all these, but it's going along my shape. Real similar to— this was some lettering I was playing with earlier, and I did the same thing, these little lines around the edges, just fun little accent marks. Super easy to do with pens. I definitely recommend doing it with a pen instead of a paintbrush. It's a lot easier to do. So I think I'm going to do a little around my letters too. And if I don't like it, and this is something, you know, just a good lesson. If you do something on canvas and you're not happy with it, just let it dry and you can paint back over it. But I think I'm going to do kind of like a drop shadow on my letters. See if I like it. You guys like the gold? I think I like it. These pens are so smooth and give you the best crisp little lines. I love them. See how that's got that little bit of shimmer on here? I think I might come underneath and add some little gold lines over here. So that's what it looks like with the gold accent marks, and I did bring some other colors in here, but I think I may I think I may leave it simple. So what do you guys think how that looks so far? I was gonna add like some maybe polka dots or flowers or something, but this is gonna hang on my, like, my new floral curtain background. So that's already busy as it is. So I think I might leave it simple. It's in my signature color. I've got my mint teal on here. And then we are going to make a little hanger for it, so you can just decide however long you want your hanger to be. Hey Paula, hey Pam, thank you Tish for posting her link. I don't want my hanger too big. I'm just kind of eyeballing it here. You can tell I do not have the Type A personality when it comes to creating. I'm kind of more of a wing it and see what happens, and you can redo it if you need to. So if I made it too short, we'll come back and do it again. Thank you, Linda. They're fun. They're fun curtains. Okay, so all I'm gonna do for the back— make sure this is dry enough before I flip it over. I've got my hot glue gun over here, and I'm just gonna simply hot glue it on my edges. Now you could also use a staple gun if you wanted. I wonder if this will reach. Hang on. Oh yeah, it does. And I'm going to put the printed side down. So what'd you guys think? Do you think you could do this for whatever occasion you have? Super cute for Christmas, or if you've got kids or grandkids who love Halloween, you could do a Halloween countdown. So you may want to make a really generic one that you can use for a lot of stuff. Or you could have some custom ones, custom colors for different holidays. But with the chalkboard paint, it makes it super easy. Look how cute that is! Let's scoot back so you guys can see that. Now I kind of think I want a little bit of gold on the inside, and I smeared a little bit of my black paint. It wasn't quite dry. It's hard for me to quit. I kind of want to add more. I like the gold on the inside though. I think I'll just leave it like that. Yes, definitely doable. And like I said, this is a 10 by 20 canvas. You could make it small and do like a 5 by 7, 8 by 10, whatever size you want. And you can even use this, you know, most people do plywood for door hangers, but you could easily do a skinny little canvas and put this as a door hanger or something too. So just kind of thinking outside of the box. It doesn't always have to be plywood. You can slap some string on there on a canvas and turn it into a door hanger also. I'm just touching up a little up here. All right, so I think I have— no, I didn't, Colette. Do I have one at C? This is the good thing about painting live is you have people to help you if you missed something. And this is why I love this kind of background that I do, my messy style, because you can easily go back and touch things up like this and you don't have to worry about it being exact or matching because we've got a mixture of this mint green and teal green on here. There we go. I think I've got all my edges now. All right, so the last thing to do, I'm gonna show you— oh, Julie said she didn't even think about canvas for door hangers. Yeah, you can, and then, you know, you can get a little bit more creative with canvas sometimes. I think I've got my chalk over over here. I'll be right back. I'm going to grab— this is just some basic chalk and I'm going to grab a paper towel really quick. Oh, awesome, Julie. I haven't gotten mine yet. She said she got her FabFitFun box. I should be getting mine soon. Then you guys can open that with me. So what I'm doing right now is— this is chalkboard paint. So if you were late joining, this isn't just regular black paint. And I'm just kind of prepping the background a little bit. So when I go and put my numbers on, you won't see the shapes of those numbers left behind. Where did you get all your— most of mine are DecoArt, so you can get these at Hobby Lobby or you can go to their website and get them. It's Americana DecoArt, or I mean, it's just craft paint. So you can go to Walmart or Michaels, wherever. I use all different brands. But DecoArt is what I used today. So I'm just getting a little bit of water here. Isn't it cool that you can put this chalkboard paint on anything to create that chalkboard surface. I'm not sure, let me see if I can angle this. This is one, my give thanks board back there, another thing Cory made me that I just put chalkboard paint on so we can put what we're thankful for on there or to-do list for the week. You can do so many things with it. All right, so I prepped that. I'm gonna let that dry just a a little bit. This is, Cheryl, I think this is what you're talking about, my template. Hold it the right side. I got these in a pack. I want to say this was Hobby Lobby. This is just craft paper, but you can get this shape of template at Hobby Lobby or Michaels, but whatever template you want for your shape, and I just laid it on there and and traced over top of it. I'm just cleaning the surface off, so you can leave it chalky if you want to, but just like you would a, you know, a chalkboard, I usually wipe it clean before I write the letters on. So, you know, as I'm moving forward, I probably won't do that every day. I'll just kind of wipe off my number and change the number down. Okay, so that's the template, and then you guys asked if I would do my days until. I'm obviously not going to do the Tribe Opens because you guys can put whatever you want to down here or another little like rectangle of chalkboard so you can change it out. But some of you wanted my lettering, so I'll trace this and put this as a template you guys can download. And if you want to, I can even— I should be able to trace this and maybe even give you a template of this that you can download also. All right, so there you go. We've got 12 days until the Inner Tribe opens, and I've got my countdown calendar done, so you guys will be seeing this in the back of my Facebook Lives when I'm in my office showing you guys some stuff. Or I can prop it back here when I'm painting with you. But you can do this for all kinds of fun things— birthday parties, all that good stuff. So I will get the templates up for you guys shortly, later today, and I'm hopping off. I'm gonna get a little bit of work done, and then I am gonna jump back on live again, and I'm gonna show you how to paint from a still life. So I did a flower bouquet last week. I'm going to show you guys how I'm going to take that and turn it into a painting. So this is just a really good lesson for you to kind of learn how to take something around you and use it as a base for a composition for a painting. So we're going to do that this afternoon. I'm guessing in probably about an hour and a half, but just comment notify below, and then when you get the message from me, just reply back yes, and it will add you to my Messenger subscription broadcast, and you will get notified when I go live. So that's it. I usually give you guys about a 10 or 15 minute notice before I go live. So I hope you guys enjoyed that and have fun creating your own. If you do them, I would love to see your pictures, so you can post them in this feed below. And if you have friends who you think would like this project. If you want to sprinkle the love and let them know about this Facebook Live so they can make their own, and then I'll put in the comments the links for the templates once I get those up and ready for you. So hope you guys have fun, and I will be back on this afternoon. Bye!










