Come paint with me! The cutest Valentine's Day Breadboard Craft!
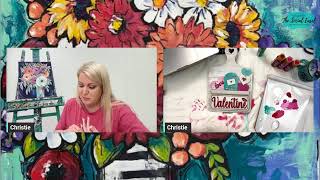
Christie Renee Hawkins walks through painting a Valentine's breadboard kit with DecoArt craft paints, covering brush loading, dry-brushing, color mixing for pastels, and adding glitter accents. She shares tips for painting wood versus canvas and shows how to assemble the finished board.
Chapters
Christie Renee Hawkins with The Social Easel, and we are going live today to do a cute little Valentine's craft that I'm going to tell you about. And I also wanted to tell you about, um, our first paint party of 2023 is going to be the Bold Blooms painting right behind me here. Um, so the link for both of these things are in the description up above of the Facebook Live. So if you want to sign up and paint this with me, we're doing this at the end of February. All the details are in that link. It's only $15 to sign up and join me for this. This is what I taught when I did the Social Easel Live in October, and I've never taught it online yet. So I'm really, really excited to do it with you online because they turned out so good at the live event. And when you go to that link, you'll get to see some of the pictures of the ladies and their piece of art. But for today, we are gonna do— it's a breadboard, right? My friend Stacy is here with me, um, on the other side of the camera, and she is the one who does all the product in my business. But she also has her own business, um, SB Creations, and she has these fun little kits that you can order. We've put it in, um, the Social Easel Shopify store, so you can just go to the link up above if you want to do one of these for yourself. So we're going to paint this today. It comes with all these— pull these over here— these cute little pieces. Stacy creates all of this on her machine. So all these pieces come inside your kit, and then they come with adhesive on the back. So once you're done painting all the pieces, you're just able to stick these on. And, um, do you have a picture on your phone? I can show them like a finished. She's going to show us a finished one, but you can do this in any kind of style that you want to.
See the best way to—
see how cute that is? Can you guys let me know? I'm seeing no comments yet, which always makes me a little bit nervous. Because usually by now you guys have said something. Oh, thank you, Amy. Amy said something like, makes me think something's not working or you can't hear me. So let me, let me know in the comments, please, if you can hear me or you're just looking at me with my mouth moving. So these are all the little pieces that we're going to paint separately today. Okay, good. You guys are here. They said super cute. I might turn that a little towards you. You can see the comments too, that way if I don't catch something, um, you can. Hey Sharon and Joanna and Tona. Um, okay, so that is what we are going to paint today. Um, you can, like I said, you can do this however you want. In the example that Stacy just showed you, that was kind of a brown wood-like background, which you can do super easy just by painting a thin coat of brown on here and then wiping it off. I think I want to do like a whitewash version instead and then add some of the fun Valentine's colors on top of it. So, um, that's my plan. So I'm going to show you guys how to do that. So I'm just starting, I'm just using DecoArt craft paint. For this project. And I'm just going to dampen my brush, wipe off the excess water, and I'm painting this whole thing right, like, through the grooves and everything. I'm still getting used to painting on— I did a door hanger for Tamara Bennett with Southern Adornments this last month inside my group, and it has the etching in it, and I just have to get used to that. I'm not, I'm not used to painting with the etched lines, so I'm just going to do like a thin coat, almost like a dry brush. And can you guys see that? Okay, um, this doesn't have to be super thick, so I just kind of keep dipping into the paint. I don't have a ton of paint on my brush. And whenever you're painting on wood, it dries super fast. So you're just going to keep going back and forth until you get the consistency that you want. I purposely leave a little bit of the wood board showing behind, so we'll start like that, and then if I get done and I feel like I want to add more, you can always come back and add more to it. But I think this will look cute either way. You could do it with like a brown stained look, or you can do it with like a whitewash.
Even like farmhouse black. Yeah, style.
Yeah, black would be cute too. Honestly, even gray would be cute, or teal. I could have done teal. Teal looks good with Valentine's colors because, um, they're opposites on the color wheel, so the teals and reds always look good together. Now I'm probably being super messy because, you know, that's how I paint, and I'm getting it on the edges. Normally, do you try to avoid the edges, or does it not really matter? Oh, there you go. Did you hear that? It sands right off if you get it on the edges and you didn't want it there. I'm going to even get a little bit more water in my brush, and that is just going to allow this to spread on even easier. Because like I said, the wood, it's different than painting on canvas. How many of you guys have painted on wood? Um, Canvas allows your paint to stay wetter longer. The wood is— just soaks it right up. So I tend to get a little bit more water in my brush when I am painting on wood, just to thin the paint out just a little bit. As we're watching, let me know if you guys have any questions for us. Is anything going on the top part, or this part's what goes up here?
Um, the insert, the Valentine. Okay, this, it will sit on top of this.
Okay, that line is only there just to show you where— okay, yeah. So, um, Stacy has all kinds of cute little kits, and we're thinking, um, we wanted to do a Valentine's one with you guys. And maybe come back and do an Easter one. What were some of our options? We have the Easter garland.
Yeah, the, like, the banner, the Easter garland banner. And then there's a bunch of different inserts for this board.
Oh yeah, that's right. So with this one that we're doing right now, we're obviously doing it Valentine's at the moment, but you can take these pieces off and then order the additional pieces from Stacy for each holiday. So I'm thinking this would be really cute set on your like kitchen counter in the corner, maybe over by your coffee pot or something, wherever. If you decorate in your kitchen, you could set that. And said, where did you get the kit? I love it. And you can buy the kit, the link is up above in my description. We added it to the Social Easel store. So when I do these with Stacy online, we'll be adding links for you guys to purchase your own kits in the store, and they're just seasonal, so they won't be there forever. So if you know you want one, go ahead and grab them because we will take them out of the store and kind of retire that design once we're past that holiday. But the other big thing today— you guys notice that I'm somewhere different? Our first, uh, Facebook Live from the new studio in our very open, empty space upstairs. So this is kind of what it looks like right now. Hey Judith. So I, I recommend to you guys when you're painting at home to kind of take pictures as you're painting so you can kind of look at your progress because you see things differently from a photo than you do with your naked eye. When I'm teaching you though live, I can Obviously look at the video and I can see what I like and don't like about this. So right now I'm just going back and adding some more white in a few spots where I feel like I want it. But that is just good practice for you when you are doing any kind of art, art or craft at home, is to take pictures of your progress as you're going because it just gives you a different perspective. And allows you to see what you— what changes you want to make. But see how little paint I use? Was that probably like a dime size, maybe a nickel size amount of paint is enough for this board. So let us know in the comments if You want to see more fun little things like this for the holidays, and then Stacy and I can start picking them out ahead of time and prepping for them.
You want to paint these two to match?
Okay, paint. Okay, I'm going to set this over to the side. Comes with this cute little stand, by the way, on the back, so it will just set up like this on your counter. So I'm painting this and this. Okay, so you guys can go back if you order this kit, you can use kind of my video as like a step-by-step. Do they get any kind of instructions in the kit? Okay, you'll have instructions in the kit as well. Hey Cheryl. Hey Renee, glad you loved the little impromptu projects. They're fun. It's a nice change of pace for me. It's fun to do these little crafts because I don't have to put a whole lot of thought into it and you can kind of just relax and enjoy the process of painting and making things pretty. Okay, what's next after this?
Then you'll paint each individual piece.
Okay. And this is where I have to start making some color choices, right? How many of you guys decorate for Valentine's Day or Easter or St. Patty's Day, all the upcoming winter and spring holidays? Oh, I keep putting my thumb right on that. There we go. Pick that up from the bottom, and I'm just setting these aside too, right?
If you would give them to me, I'm gonna—
oh, okay. Yes, you guys decorate. Oh, Mardi Gras, I didn't even think about that. Linda said every season. Thank you, Amy. Yeah, we're testing the lighting. I got a new, um, loom— what is this called— a loom cube light that we just set up to test out for this, but we have pretty good lighting in here too. I'm super thankful for all new LED lights, so nice and bright and should last a long time. Okay, so, um, I am going to look at her reference photo really quick just to get some ideas on what they did. So they painted the back of this white and then did the lettering red and the little lips were red. Then you've got this cute little mailbox that comes with the X and O that goes on top of it and the little envelope. And then you've got your heart. And so this goes— all of this, it's so cute how it is all put together too. And again, they all come When you buy the kit, it comes with the adhesive already on the back. So once all your paints dry, all you have to do is stack them together. So you've got these little grooves where it shows you the outlines where you put your pieces. Look, isn't that so cute? And I love it. When she first showed me, I was like, do I have to paint around each one of those little things? Because that's going to be so time-consuming. And And then when I saw how they come in all these little pieces, I was like, oh, that's perfect. Much, much easier that way. Um, okay, the final product, it's called a breadboard, but it's just basically like this cute little sign. Um, it's interchangeable so you can change it out for the holidays. Um, we're doing a Valentine one obviously right now. Oh, look at this, the carrot patch with the little— I always pull it the wrong way. Can you guys see that without the glare? Like, that's like an Easter version. So again, your board that I already painted would be your base, and then you can just order additional little kits that we will put in the store when it's that time. So now I'm going to pick out what colors I want. I'm probably gonna go bright, as if that's shocking to anyone. So these are some of the newer DecoArt colors. Um, not this one, that's Tuscan Red, but this Strawberry is newer, this Fuchsia Pop. Trying to think what else I want to put on there. We've got red and pink. Maybe— I feel like this one might be too muted, but we might try it. No, I don't want that one. Changing my mind.
Here's one. Okay.
I think I'm going to grab these two colors and then of course white, and I'll do some different tints of these. So maybe turn some of these into some pastels. So just remember, you can always add white to your paints if you don't have like a baby pink that you love. Just add some white to the pinks that you do have. And the same with all of these colors. So I'm going to set these up here for now, but I'll kind of let you know what colors I'm using. And you're really not going to need a ton, so I'm just going to do little dots of each one. And then I'm going to get some more white on my palette again, but I think I might use the teal and bluish color maybe as an accent on one of the hearts. Oh, hey, Cheryl said she hadn't painted since September. Finally sold her house, moved, but still unpacking. Oh, thank you. It is time to start painting again. I was talking this morning— I do a devotional inside of my Inner Tribe, my VIP membership group, and I was talking about just winter is hard. Winter is especially hard for me. Um, and so I wanted to fill February with like a month of very joyous this things and making sure that I set some time aside to do fun little projects like this that bring me joy. And that is why we are doing this. If you came in late, you can sign up for this for only $15. We're doing it at the end of February, and it's called Bold Blooms. I thought I'd wear my bloom shirt today from Sarah, but I just wanted this month to be filled with vibrant and fun things, um, kind of lift you out of that winter funk. Does anyone else get that? I love painting flowers this time of year because they just make me happy, and, uh, it's something to kind of bring some light, um, while it's still kind of dreary out. Sorry, I'm trying to pull this up and my mouse just keeps moving it back down every time. Okay, so I'm going to paint the back of this. That's white in your example. Hey Jill! Marcy said teal mailbox. I was kind of thinking the same thing. I think that would give it some good contrast on there. We'll see. But here's the thing, if you don't like something, you can just paint over top of it. So if we get it on there and I'm like, I don't like that at all, we'll just paint right on top of it. So I think I'm going to make this a little bit more solid white. And then again, it really doesn't matter that I'm painting right over the etching because that is just a guide for us to place the word Valentine back on top, which will be the contrasting color. Thank you, Cheryl. Said she loves the colors and the bold blooms and can't wait to paint it. It's a fun one for sure. I may even do like a little challenge in that Facebook group too. We always do these paint parties. Again, the link is up in the description if you want to join. It's only $15. I am doing— I think I left that downstairs— my watercolor painting. Was that on the table? Okay, Stacy's gonna go grab mine. I'm gonna do a bonus inside of the, um, the pop-up group too. So I'm going to teach you how to paint this over the span of 2 days. We'll do 2 sessions to complete this painting. And then on the last day, um, those are at 1 o'clock each day. You can always catch replays, you don't have to catch them live. Um, and then on the second day, that evening, I'm gonna do a live Q&A while teaching you a watercolor version of this painting, which, by the way, is so much fun. But what I was going to say, when we did the live event— and I think that picture is actually on the sales page for this when you sign up— but you'll see a picture of me kind of standing out in the crowd with everyone, and they've just done like the first step of this painting, which is painting all the greenery, and then all the blooms are white. and it's so pretty. So it would be a fun challenge inside the group once I teach you how to do it the bold colorful way, to maybe do like a mono— or not monochromatic, but an analogous version of that, meaning colors that are next to each other on the color wheel, because they'd be really pretty together. But look, this is the watercolor version. What do you guys think? So fun. And this is on— I use this at my live event as well. This is like watercolor paper that looks really cool. It's rough edged and it looks really cool when you frame it in one of those floating frames. Okay, so I'm going to leave this white leftover white in my brush, and I'm going to go into my red and kind of load it up on both sides. That little bit of white in there is just going to add a little bit of opacity to the red because red's really see-through and transparent. Hmm. Yes, if you add— yeah, there's two ways you can do it. You can add a little bit of white, as long as you don't add too much that it like turns it pink. Or you can put a base coat of white on there and then paint red over top of it. But a lot of times it also just needs two coats. And when you're doing something that needs two coats of paint, you always want the paint to dry in between your layers. So if we do end up needing to, we'll let this dry and see what we think. I'll set it aside, let it dry, and then I'll come back and do another coat of red over top of it. I don't think I'm going to need it though. This is actually covering pretty good. This was Tuscan Red, is the red that I use from DecoArt. I really like that one. It's just a good true red, not too orangey and not too cool. So after these dry, Stacy will kind of put those on top of each other. So I'm going to hand those over to you and we'll let those dry. Thank you, glad you like the watercolor. Welcome, Pamela, said it's her first live. Okay, let me look back at my picture, maybe Oh, that's cute. They kind of did on this one, since I have red in here, they did a little bit of red, and then I'm gonna make myself a pink. Just grab a little white, and they kind of did like an ombre. So I have the whole thing pink right now, but if you wanted to do something like that, then you could just come back with your red. Over top. So you have that little bit of a transition from the pink to the red. I guess I could do all my little pieces for— I'm trying to do all my reds.
The ring has totally turned around backwards.
So that one turned out more pink, but I like that color.
Oh no, it's fine.
All right, lips, the little part. These are all red. Okay, I do think I'm going to do my mailbox my teal color, so I'm going to leave that one. I need to decide on my color of this heart. The envelope will be white. That's white. Let's do— we haven't used either one of these pinks yet. I'm going to make it a little bit lighter. So I'm going to start with my white and grab this one's Fuchsia Pop. That's really pretty. And you can decide if you want this all one solid color, or maybe you want some of the streaks and a little bit of white and pink. Coming through together. That's good enough like that, right? Because the rest will cover that up. Jill, yes, I am in the new studio. We are upstairs. Our first Facebook Live from here. So I'm going to go into this other pink Still mixing a little bit of white with it and do this bottom part. Do you go ahead and paint this whatever color you're doing that, or do you leave it wood?
It covers it completely, so—
Oh, it doesn't? Okay. I love this color with— this is Crystal Blue.
And you can go over with a paint pen.
Yes. Yeah, remind me of that because I actually set them out over here. She was saying at the end, for any like detailing and stuff, we could go over with, um, paint pens. So I have my Posca pens handy here. Okay, so we're leaving that one blank. I'm gonna do these—
what?
Oh, I didn't mean to put that in water yet. I'm gonna go straight into my— I think I'm going to take a mixture of both of these. So this is Paradise Green and the Crystal Blue together. Aren't those colors pretty together? The teals and the pinks, I love them. So I do kind of want to keep my brushstrokes all the same way, just in case you can see them when they dry. They're all going the same direction. Maybe add a little darker on this side. Okay, then I think these last pieces we're going to do white. I'm just going to pick a different brush so I don't have to rinse that out. But look how quick and easy this little craft is, and then you have something to set out and decorate. Look really cute next to the Valentine's gnome that we have for sale right now. I have our Valentine's gnome downstairs in our kitchen down there. So I will give you guys another tour of the progress so far. Um, if you didn't see, I posted in stories and kind of showed you a preview of how things are coming along here at the studio. So right now I'm upstairs. This will be my actual studio space where I do all my painting and can get super messy and all the things. But then downstairs is— Stacy has her own office area. Um, we have kind of like an open area, kitchen area where we can do packing and all that kind of stuff. And then I have my office office. So I had posted in my stories that I was debating on what color to do my accent wall because I did this really fun, crazy wallpaper that was an absolute nightmare to do because of the pattern, but I'm really happy with how it turned out, so, um, it was worth it in the end. But I'll be posting progress pics so you guys can see what color I chose.
I'm keeping it a secret for now.
So I'm putting a second coat on my white pieces just because, like I said, that wood really soaks up the paint. So once it's dry, which doesn't take very long for it to dry at all, you can put a second coat on if you really want it brighter white. Um, someone said, are you painting the edges? I am messy, so it is going around the edges. Um, you can wipe it off with like a baby wipe if you want to. I personally don't think you're really going to be able to notice it that much. Once we have it all put together. Um, but you could go in and paint all the edges if you wanted to, or they kind of have like that darker edging on them if you'd rather have it look like that. Then you can just wipe off if you're messy like me. So since I started with this one, we'll go ahead all the way around the edge.
Okay, what's next?
I have all the pieces painted. Do I need to put—
it just needs to dry now.
Okay. Oh, Tammy, that's a good idea too. She said you could go around the edges with a black Sharpie too. You definitely could. Oh, you know what I just thought of is I've got this fun glitter paint right here. Maybe I want to add some glitter. I'm putting glitter on the hearts. I really love the Holographic Illusions. It's really chunky glitter that's super pretty and picks up a ton of light. Thank you. Hey, and no, the link to join, um, this painting is in the description of this live. Let me see if I can get you link really quick and post it. But you can sign up to paint this with me. It's only $15, and we are doing it the last 2 days of February. Okay, so I just posted the link in the products. If you are— and if you are a Tribe Sister, you do not need to sign up for it. That was your very next thing. So if you are a member of my tribe, this is included in your membership. There's no need to sign up for it, um, and we will be providing that link for you in our Tribe Sister Facebook group. Is it going to mess you up if I put glitter on this? I mean, like, letting it dry. This is just gonna go on.
Are you putting it on that one?
Yeah.
Okay.
I don't think it'll take long to dry. So this is the glitter that I'm putting on right now. I'm gonna hold that up. Can you guys see that? It's always kind of hard to see when it's wet, but it looks super pretty when it's dry. I believe this is the same one I used in the painting behind me. I'm going to add it on these other little hearts too.
You can add it to your mailbox.
I am not. I thought I'd just let the hearts sparkle. Maybe this one. What about— okay, I'm gonna add it to the— actually, I may leave that matte and then just make the heart in the center of it sparkle. That'll be cute. Yes. And on the envelope. Okay, so those little guys are going to dry. Yeah, I was going to say, I don't have a blow dryer up here. That's one thing I haven't brought up here yet. So you guys know I normally keep a blow dryer at my station and quickly blow dry things when I'm too impatient to wait for them to dry, but I don't have that at the studio yet, so we're gonna have to let it air dry. So while we're waiting, I'm gonna give you guys a close-up of this. And this is actually the— this make me big. Okay, hold on. I don't know if that took my audio away. This is actually the version that I painted at the live event, and I was noticing as I was looking at it earlier, it has all my gold accents on it. You can see that when I'm turning it, but it doesn't have my glitter yet, so I need to come back and put some glitter in my flowers. But this is really, really fun. It's different style than some of the other florals that I have done before. And we have a lot of fun with all this bold multicolored leaves and vase and the different flowers. So I think you guys will really enjoy this one. It's a very happy painting. So while we're waiting, let me know if you guys have any questions. About anything.
Do you want to assemble it yourself?
Um, I can, or do you want to?
I don't care. I think this is ready to go on. Okay, it's super nice adhesive.
Okay, so she puts adhesive— this has sticky adhesive on the back of this. And then this is— well, it's still a little damp. Should I wait? Okay, so you're just going to use your— I'm blind, I should have my glasses on right now. I'm using the lines on there. Look at that. I like the addition of the sparkle too. That's super pretty. And then do we go ahead and put the white heart on here or this next?
It doesn't matter.
Okay, so same thing, this sticky material on the back. Now with this, hold on, before I put this down, it's going to show a little bit of the edging.
Go all the way up to the top. Okay, because that bottom of the edging will hide behind this.
Ah, gotcha. Uh-oh, what about this line? Hang on, before I put that on there, part of that— the— I didn't cover the pink all the way, so I need to put it—
okay, yeah, so don't—
yeah, that will stick to the paper. Uh, that was this color.
Almost messed it up.
So I'm just touching up where there was a little bit— that little slot in the mailbox. Just make sure I'm covering up where that's going to be. I'll let that dry for just a second. I can put this one—
if you want to show them what the back—
oh, okay. So this is what it'll look like inside of your kit. It has that 3M, you just peel that off. Look how cute that is with the little sparkly heart on there. Oh, same thing there, I need to come down to that shape of that heart. See, you guys are getting to learn, so when you do it, you don't do this. I'm gonna have to add a little glitter to that so it matches the other thing. Okay. This is fine though. So with your mailbox, she said you're going to want to go to the very top edge and line that up. So you have some wiggle room, you can kind of adjust it just a little bit and then push it down.
I need to touch up on this side. Is that right? Yep.
Okay. I mean, my mail.
Yep.
And that is just like sideways, however you want. Okay.
Yeah.
Oh, that's really tiny.
Yeah, it's even stuck to me.
Does that go, uh, like the envelope seal?
Okay.
Look how cute that is.
And then here's this piece.
It's already done, so this is going to be on the bottom. But like, here's what you could do with like a paint pen. Let me get this one primed. If you wanted to like just add some detail work to it, maybe add some like little polka dots down one side of the letters or line. You guys can't even see that. So if you haven't used Posca pen before, You never push down on your project while you're using a paint pen. You always prime it off to the side first and then come over on your project and do it. If you were to push down on here with this, it would leak white paint all over. So just adding a couple little polka dots on there. Okay, what's next? We're just doing this.
Yep.
Oh, sticking to my finger. All right, so we've got our pieces and now we're gonna put the whole thing together.
And there's a hole on the cutout so you can pop out your pieces easily.
Gotcha. Did you guys hear that? The hole is so when you want to change it out, you can just pop that out.
But don't, don't do that. Don't stick it.
Don't stick it. Oh, okay. Not if you want— I don't want to change it, so it'll just stay in here. Oh, there you go. It'll just stay like that.
Same with that piece.
Same with this. Oh, it sits inside.
Gotcha.
I might— maybe I need to scoot it over some.
There we go.
Like this.
Yep.
I don't know why I'm holding it upside down for you guys. Trying to fit the whole thing on here. And that's fun how that's put together. And that is really super fast for a cute project, especially one that you can change out every single month. Now if you are a little OCD and you really want to not be messy like me, I would say be cleaner when you're doing your edges, or you can come back before you adhere them together and go around the edges with like black Sharpie or paint pen, um, whatever you want. But yeah, you could even, even at this point do other accent marks if you wanted to on some of the different things. Like on the example, like it has a couple little like dots around here.
And trace the engraved words if you want them to pop out.
Okay, she's saying if you want to, you could trace over the lettering if you want it to stand out a little bit more. I want more. I'm just going to go a little crazy here with my polka dots. And you could do black too. So like if you want to do accents in black to make things stand out a little bit more, you could do that as well. So if you guys want to do this kit, the link is up above. This is what it looks like when it's standing. It's just got this little kickstand on the back, and then you can change it out for all the seasons. All right, so let us know if you had fun doing this, and we'll do some more throughout the year. They won't all be like to replace this, but we will put those seasonal kits in the Social Evil store so you can order those if you want. But Stacy and I will come up with another cute— like Easter one, um, is coming up. Is that the next one? What we're doing is Easter. Yeah, yes, yeah. But I love how easy it is. When I first— you know, sometimes when you see this stuff online, you're not sure how easy it's going to be. And I thought, if I have to paint around all those edges— you guys know how messy I am anyways— there's no way I could do something like this because it would take forever with the finest detail little brush. But I love how you can do each one of these pieces individually, and then you just stick the adhesive together to put the whole kit together. So super cute, and we'll be back, um, with another fun one for Easter. I'm also going to go live later this week. I haven't done it yet. Um, because last week ended up being a snow day for us pretty much every day of the week, and it was insane. But I promised I would do some winter evergreen trees, and even though I am over winter, I still love snow, especially on trees. So I'm going to come back later this week and just do a quick live with you guys on how to do that. Um, and then you can get the full tutorial to my Winter Chapel, which I use those trees on. So thanks for joining me live today. If you are new and, um, you want to get live alerts whenever I do go live, let me find it here. This is if you don't want to miss any of the Facebook Lives that I do. You can just text LIVE ALERT to the number on the screen, and then every time I go live I'll tell you where, like if you're a Tribe Sister, we have a Tribe Sister group where I teach my paid lessons to them. But if it says join me on the Social Easel page, that means on Facebook and you just go, you just go to the Social Easel on Facebook. When I send you one of those live alerts and refresh it until you see me pop up. Linda said, I don't see the link. It's up in the description, Linda. But I'm gonna see if I can—
I'll pop it down into the comments again really quick before we jump off here.
Oh, awesome, Jill! I can't wait to see them. Yeah, and when— if you guys paint these, you can text me your finished painting to that same number where you get the text alerts, and then you can show me your finished project. All right, you guys have a good rest of your Monday. Bye!










