Day 2 of Paint Week with Christie
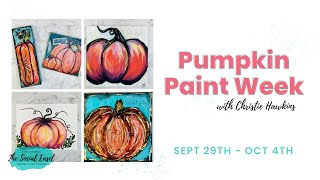
In this live‑style YouTube session Christie Renee Hawkins moves to a new studio table to focus on watercolor painting a pumpkin, while simultaneously engaging with her online community (Tribe). She demonstrates watercolor fundamentals—wet‑on‑wet, wet‑on‑dry, using mixed‑media pads, and how to treat craft acrylics like watercolor. Christie answers a stream of viewer questions about supplies (brushes, paper, brands, masking fluid, modeling paste), offers practical hacks (taping paper, using graphite transfer paper, mixing water ratios), and shares personal tips for controlling brush pressure and achieving desired values. She previews the next day’s impasto pumpkin project, showing how to apply modeling paste with palette knives and prepare canvases for a 3‑D effect. Throughout, she promotes the Tribe membership, highlighting early‑bird bonuses, replay access, giveaways, a painting planner, and ways members can monetize their art. The session blends instructional content, community interaction, and marketing, creating an engaging, supportive environment for artists of all skill levels.
Chapters
Hello everybody, how are we doing today? So we're on a little different setup. I've moved to my other table up here at the studio so I can leave all my acrylic stuff over there and focus on watercolor today. So this is obviously the original, um, that I'm going to show you guys. And then I also wanted to just show you this. This is inside of Tribe. So if you like this one and you become a member, you'll have access to this. But someone had asked me earlier last week if I was going to do any blue pumpkins. So I was like, yeah, maybe I'll change it up a little. So I'm not sure if I'm going to do a blue pumpkin today or this one, but I wanted to show you both together just to kind of give you, um, a different view of some different creations you can make with watercolor. So I'm loving all the paintings I saw yesterday so far. If you haven't already, um, we have a post on the Social Easel page. Um, it's just a picture of me yesterday teaching, and you can share your photos underneath there if you would like to share those as as well. So, um, let me know in the comments, um, how many of you are comfortable with watercolor. If you are new to watercolor, let me know where you're at. Um, I'm going to show you the technique that I use with watercolor, and then I am also going to show you a technique in my mixed media pad where you can use your craft acrylics like we used yesterday, and you can water these down and treat them like watercolor. They're not exactly the same, but I guarantee you no one's going to be able to tell when you have it hanging up in a frame. They're not going to know whether it's watercolor or craft acrylic watered down. So it was just kind of a hack I came across one time when I was playing, and I was like, this is fantastic. And it's a great way for you to use your craft acrylics in a different way if you don't want to go out and buy watercolor. Stephanie said, I own a bunch of watercolor, but I've never opened any of them. So hopefully we'll change that. So we've got kind of a mix here, some experience. Peggy said watercolor is her nemesis. Man, this camera is really shaking. I'm noticing that on the screen here. I'm not sure what's making it so shaky. Then we've got some who haven't tried it before. Christina is asking— actually, I'm really glad you brought that up, Christina, because that reminded me I need to do that with you guys today at the end. Hold on real quick. She's asking about the modeling paste and if you can use spackling instead. I have never done that, so I'm not going to tell you yes, you can. There may be some people in the comments that have, and they'll tell you that'll be fine. I have no idea if that's going to crack, what the finish is going to be like. So I'm not sure. Let her know in the comments if you guys know. I'm gonna grab my pumpkin really quick. So at the end of class today, I'm hoping I will remember, Megan or Neve, whoever's here with me, if you guys can help me remember, when we get done with the watercolor today, we actually want to go ahead and start on day 3, which is our impasto pumpkin. So this is one I already have an example of, um, that's already dry. This was from last week, um, but depending on the modeling paste you get, sometimes it takes 24 hours for it to dry. So if you guys have your materials today, you can go ahead and prep your pumpkin today, and I'll show you how to do that. And then tomorrow we'll actually do the full thing. But if I start tomorrow, um, with the, um, pumpkin, or if you start tomorrow with the pumpkin from scratch, you won't be able to actually finish it tomorrow. So I'll show you guys how to do that today. That way you can still finish your day 3 project tomorrow on day 3. Let me know how that sounds. Um, Dawn, I'm gonna throw this up here. Um, Cindy Manley, she's actually one of my best friends, um, she owns Art Shattered, and she said she was talking about spackle yesterday and she advises to mix Elmer's glue with it. We actually talked— I forgot, she mentioned that when we were in Florida together, and something about the Elmer's glue with it helps with it bind and not crack so much. So that may be something that you can try. Bonnie said, can you do watercolor on canvas instead of watercolor paper? No, it won't soak it. So canvases, they're already pre-gessoed and they're not meant for watercolor. They're meant for acrylics or oils. So watercolor needs to be done on watercolor paper or in your mix media pad. Okay, so we're gonna jump in and get started, but, um, I'm glad we had that little conversation at the beginning because I meant to set that out earlier and I forgot that, um, I was going to do that with you guys at the end of today. So this is the watercolor paper that I'm using. It's a 9 by 12. You don't have to use this kind. I've have different ones, but that is, that's what I had from the store last time. And so whenever I do watercolor, I like to tape it down to the table just so you don't have any movement. And then if you do want a border around your design, you can have one. So I just use some painter's tape here that I'm going to grab, and we're just going to tape this guy down so he doesn't move on us. I can get the tape to cooperate with me. Now, if you're doing this, like, if you— I'm leaving white background in here, so I'm not worried about taping down all my edges. If you were doing a watercolor and you wanted to fill in the whole background with paint too, then you would just want to make sure when you tape down your edges that they're even all the way around, so it creates a nice clean border. Yes, Tori, you can use mixed media pad. Or watercolor paper. Watercolor paper is going to be a higher quality, but you can definitely use both, and I've done a ton of watercolor in my mixed media pad, and I've even taken them out and framed them. Again, it's not something that is going to look different once the finished product, but you'll— watercolor paper has a different texture to it than mixed media paper does. So it, it treats the paint a little differently. I feel like you get— like, this is done on watercolor paper, and I feel like you get more of this kind of wash look. I can't even tell what this was done on. This was also watercolor paper, but I went a little heavier with the paints on here. So watercolor, I will tell you, I believe is less forgiving than acrylic, and that may be because it's not my— not completely what I'm used to. It's not my main medium that I use when I'm painting. And a true watercolor artist who does that for a living may be able to tell you different, but I feel like it's not quite as forgiving as acrylic, because anything you do with acrylic, you can let it dry and paint right over top of it. With watercolor, you don't really have that option quite as much. You can fix mistakes, But it's, it's a little different. Hang on one second. Charlene is asking if she can use a sketchpad. Charlene, that it should tell you on the sketchpad what mediums that's meant for. Usually that's only for dry mediums. Sketch pads are not meant to hold water. And Vicki said, what's the best brush to use for watercolor? You can buy a specific set of watercolor brushes. However, they're, they're synthetic, just like the ones I use for acrylic. So my brush set that I created, I use for both my watercolors and my acrylics. I don't have a separate, separate set, and I like to use I see if I have it over here. I might, I might have to go rinse it because I was just working on another painting. Um, this is one of my older ones, but I like to use some of the bigger, like, round brushes. You want them to be a little bit fuller. Let me go grab my— I thought when I grabbed this big bundle I would have enough in here. I'm going to grab a couple different size rounds is what I'm going to use today. So I always like to have like my skinny one. And then I get the— this is the number 5 out of my set, so which I think is actually the same as that older one. So my 5 and 4, and I have so much paint on this, my 1. And then I would do— let's see if I have that one over here— the skinny liner one as well for details. So this is 1, 2, 4, and 5. Are the brushes that I'm using out of my set today. Um, Michelle said watercolor tubes versus pans. You can use either. I am using— this is an older set. I don't think it's available anymore, but I have a couple in my Amazon store marked that I like. But just these cake ones, the pan ones, work great. Now, next to me, I have a ceramic plate. So if you're working with watercolor, you can just use a porcelain glass plate from your kitchen if you don't have your own palette for this. Again, I got this one on Amazon. It's just nice because it's got these bigger wells where you can do some color mixing if you want. You can see I've also just mixed here in the top of my— like, I use this when I travel sometimes, and I'll just mix right here in the top of the tin. As well. So that is going to be paints that I'm using today and the brushes. Okay, so next thing we are doing is putting the template on, and same thing as we did yesterday. So we're doing the shiny black side down first and then our pumpkin over top of it. I've just got to check my placement here. I think we're good, so I'm just gonna— I'm gonna lightly do this. I'm not pressing down super hard. I just want those faint lines for my shape. If you push down too hard, then it might be a little bit difficult to cover up with your paints at the end, so Just a very fine line is all you need. So, and just a reminder, as we're painting today, those of you that are interested in joining Tribe, my membership Today is the last day that you can get that early bird bonus, which is over 11 bonus painting tutorials and workshops that you are going to get, and they will be granted to your member library, and you'll be able to access those as long as you are a member of TRIBE. And that ends today, and you can join TRIBE for $47 a month. And we have a 14-day money-back guarantee, so it gives you a chance to come in, jump in, try things out. If you're not happy with it or it's not quite what you thought it was, then you can get your money back. But we think that you are going to love it, and we are so excited to keep welcoming members. We've had over 200 ladies join us so far, so We are so excited to have you guys, and I was going— I'm going to adjust my lighting just a little bit. I'm getting kind of a shadow here, and I'm trying to figure out where it's coming from. Um, is that better? It's like right in the middle of my pumpkin. I think maybe it's just the arm. It is just the arm of this. Okay, I think that's a little bit better. Is that better to you guys without me? Moving it too much. I think it's throwing me off because of these fainter lines right there, and that's from the pencil, not the lighting. Um, Linda said to use regular tracing paper. So this wasn't tracing paper, that's graphite transfer paper, and then that's a print off from the templates that were provided in your PDF pack. Um, Don is asking, do the replays expire on Friday? Yes, they do. So the— this paint week is only up and live, um, for the week that Tribe is open, and then the, the videos will go away after that unless you become a Tribe sister. So Tribe sisters will have continued access, um, to them as well, in addition to the Jump Start into Acrylics and this week, as well as the Go to the Pumpkin Patch workshop. So you're getting several bonuses when you become a Tribe Sister and continued access to all of these. Okay, so we're going to go ahead and get started. Obviously, you are going to use water with your paints when you're working with watercolor. I'm going to show you in my mixed media pad before we get started on the actual pumpkin. I want to show you some technique first. And again, you're going to hear me say this all the time, but I highly recommend you have a mixed media pad if you do not already, because this is where you get to practice. And play and learn how to use your paints and your brushes. And Terry said, do you use graphite paper when working with your monthly projects? If we use a template, then yes, you'll need graphite paper. But not all the paintings that I teach use templates. I'll be showing you guys a little sneak preview of what is coming in October in Tribe. Towards the end, so I'll show you one that we will be using a template and then a bigger one that will not be using a template. And that bigger one is not completely done yet, but I'm going to show you guys my, my work in progress on there. So this is a mixed media pad. This is from another lesson that I've done, but I'm just going to kind of walk you through this and then we'll actually put some paint on here too. But when you're working with watercolor, the more water that you add to it, the lighter the value is. So that's how you create value change with your watercolors. If you want white, if you want the very brightest highlight, you actually leave the paper showing and the paper itself becomes your highlight. So the less water, the more pigmented it is. The more water, the more translucent it is. Okay, so stronger pigment, and that's where, like, if you're comparing this one and this one, this one is a lot heavier pigmented watercolor than this one. I was a little looser and used more water with this, and I'm going to show you guys some different techniques that you can do as well. So these are just some brushstrokes that you can practice. They're kind of like loose flower shapes that I have on here. But what I want to show you is the difference between wet on wet, which this is an example of, and so are these, versus wet on dry. And this uses— this one uses a lot of the wet on wet, which is where you kind of get those more like a spotted kind of look. Okay, I'm gonna— I'm having a hard time reading the comments. I'm gonna switch my computer around here. That's much better. My poor eyes, I can't see. Um, Lindsay, graphite paper and carbon paper are pretty much the same thing. They're just two different names for it. Some people say graphite transfer carbon, but they're all the same thing. Okay, so let's play a little bit. Um, I'm just going to start with some plain water. I wonder if I can actually— here, this will give me more room to show you some experimenting. So you can tell this is me already kind of just playing with watercolor in my mixed media pad, but we're going to start with water, and I'm going to show you the wet on wet technique, which I think is really cool, and it's just fun to watch, and you kind of let the paint do its own thing. So you can come on here, and hopefully you guys can see this reflection a little bit, but I'm kind of just painting like a little leaf-like shape on here. You see where that's wet. If not, you will momentarily once I add color to it. So that's just straight water. I put in kind of a leaf shape to it. And then I'm going to grab some paint. I'm just going to pick any green. I'm just showing you this for example. Okay, so getting my green on my palette. The more I keep coming back to it, the richer that pigment is getting. And then again, the more water I add to it, the more translucent it's getting. So while this leaf shape that I did on here is wet, I'm going to come in with this green color and I'm just going to start kind of dotting it down. The cool thing about watercolor, when you do this wet on wet and you just have the water shape already on there, the watercolor will only go wherever that shape is that you painted on. So I can just come in and touch down inside this, and it's staying in that shape of that leaf that I created. I'm going to grab some yellow just to show you some contrast. That mixed with my green already, so we'll have some nice limey, limey green in here. So see how the colors just kind of mix together? I can kind of keep dabbing, pull it along if I need to. Of course, this paper's a little bit warped, so that will happen in your mixed media pad, especially if you don't have it taped down. But we shouldn't have that happen as much with the watercolor paper. So that is kind of a wet-on-wet technique. I feel like that's not very clear for you guys to see, and I'm not really sure why. Can you guys see that okay? I wonder if maybe my brightness is not— oh, that's part of it. My computer automatically decides to dim the brightness of my screen and it drives me crazy. I'm like squinting and I think everything's dark and then I realize the brightness turned down again. So that is kind of a wet on wet. Um, the other way you could do it is just going in with whatever mixture you make in your watercolor. And just simply paint on the color, get more pigment if you want that stronger. And you can even add water directly to your piece of art as well. So if you get it on there and you're like, well, that's much brighter and stronger than I wanted it to be, you can come in and add a little water on there as well. And then once that's dry, then we would do like layers, kind of like what I was teaching you yesterday with acrylic painting. Sometimes you've got to let that bottom layer dry first so you can add additional layers on. And so that was more of like what I did here with some of these different colors. So I just wanted to show you some examples first, and then let's do like a really pigmented blue just to kind of show you the difference. So this is just going in, lots of color. It's really vibrant. And then the more I dip into my water and add to that, you can see it gets fainter and fainter. So that's how you change the value of your watercolors, is just by adding more water to them. Debbie said, I love the green and lime green color. I do too. I love those two colors together. Okay, so that is with watercolor. Now what if you're using acrylics? You really can treat them almost the exact same way. So I'm just going to put a little dot. You don't need much at all when you are doing it with the acrylics. And then you're just going to water them down. And you get that translucent look of watercolor. And you can build on that as well. So the, you know, the less water you have in it, the more pigmented it's going to be, the stronger that color is going to be. And the more water you add to it, the more translucent it's going to be. So same thing. And you can just practice little brushstrokes and swooshes and just get comfortable kind of playing with your brushes and seeing what different brushstrokes you can get with them. Seeing, you know, like, like a bigger fatter brush is going to hold more water and paint than a smaller skinnier brush, and you just kind of start experimenting. So that's Why I think the mixed media pad is just invaluable when you're— not just when you're learning to paint, like I use this every single week of my life. I'm always using my mixed media pad for something. Because I think so many people think you have to, like, you're not really painting something unless you're painting on a canvas, but canvas can intimidate. You can most definitely paint inside your mixed media pad. And like I said yesterday, even do full paintings inside of there, but you know, I use mine to just practice some of these different brushstrokes with palette knife or whatever. So that's what I want you guys to get comfortable with doing as well, even practicing your colors and color mixing. All of this is just a great way to use your mixed media pad. Oh, I think this is going to be a similar design to what I work on for my nativity this year. I forgot that was in there. Okay, so was that helpful? Does that help you guys kind of see some different ways you can work with your acrylics to treat them like watercolor and then also play with watercolor itself? But I do highly recommend having this practice time when you're in there. While this is dry, this is dry enough that it's not going to— I'm going to show you what I mean by wet on dry. So now this leaf right here, this is dry. So when I add watercolor over top of it, it's not going to mix with that. So I'm going to get very little water and my pigment in this skinny liner brush. This is the 2. Out of my set, and then I can go over top of this and create details. And now it's not blending the way that did, right? Because that was wet on wet. Now, if I wanted to add some little fun designs inside of there So that's wet on dry, um, still watercolor. One is heavier pigmented than the other, and then I let that base color dry first so I could come back and add details to it. Um, someone's asking about like on Amazon. Carol said she looked it up and some say heavyweight. Uh, the weight of mine is 98 pounds, so I, I would just look at that. Okay, now moving on to our actual Project here. I am going to scoot out a little because— let me know what you guys think, but I think it's helpful for you to see my palette and my mixing in addition to just seeing the painting. I like to be able to kind of show you both. Okay, how's that look? Angela said, do you factor in more dry time when using watercolors? They dry pretty fast, so I mean, it's— I don't ever I don't ever think about the time of the paintings because I don't limit myself on that. I mean, if I have obviously something I have to do, I just stop wherever I'm at and pick up the next time I sit down. So, you know, like today I have to be out of here at a certain time. That's why we're doing this class at 4 o'clock, because my middle daughter has volleyball tonight. So we are going to a volleyball game. All right, so I think I'm going to start. I think I want to do orange on this one. Maybe I'll do a blue pumpkin later this week, maybe for the impasto style one. So I'm going to start with, um, actually I don't want that acrylic. I'm going to turn this around. I'm going to start with just the regular orange right out of here. Whatever orange you have is fine. And I'm going to water it down pretty good. I want it to be pretty faint. And I'm also going to be using that wet on wet technique, so I like to work on a section of the pumpkin at a time so I can kind of play with those colors. A little bit, a little bit more. So we've got this little section back here, and again, remember, same thing with the pencil lines. Um, wherever you put the water or the pencil lines, that's where your watercolor is going to stay. So I'm going to— you're going to see me leave a little bit of space where these grooves of the pumpkin are. I'm going to leave a little bit of just plain paper showing because it's going to allow me to keep each section of my pumpkin from bleeding into the next section. So this is just really translucent light orange. Now I'm going to pick up more of like a reddish color to mix with my orange over here. And since this is still wet, I can just come in and just tap down and like, look how fun that is. You just kind of let the colors kind of do their own thing. I'm going to go darker around my outer edge, so I'm just kind of touching down. And again, it kind of does the work for you. You can see how dark and bright that is on the side, and then it's a little fainter as it goes in. So I'm going to leave it like that for now. When I'm working with watercolor, I like to like slowly build, so I like to get like a base down and then decide what else I want to add to it. But isn't that fun? Um, Susan said, is modeling paste required if you would like to do the impasto pumpkin that we're doing tomorrow? Yes, you will need modeling paste for that. Don said, do you use 2 cups of water? I never do. You know, I know a lot— probably if I was a professional watercolor artist, I would use a clean cup of water and a dirty cup of water. I've never done that, and I feel like my paintings turn out fine. I'm definitely not always a rule follower either, so I'm not You're not going to hear me say that there's only one way to do something. I'm sure there are artists out there that would cringe at some of what I do with my art, but here's the thing, everyone does their art in their own way, so I'm just giving you my tips. So with this next one, since it's such a bigger section, I have a little bit of orange in there, but I'm mostly going in— I'm more worried about my my water and making sure I get this big section nice and wet so that I can get that cool color mixing. So if you are just joining for the first time today, Welcome, number one. But also my recommendation for you guys, and it's the same way I teach in Tribe, is to watch live with me first and then go back and paint on your own with the replay, just because it's going to make your experience a lot less stressful. Because if you're trying to listen to me, take notes, keep up with what I'm doing, paint at the same speed as me, it all gets kind of overwhelming. So, um, I would suggest hanging out and watching, playing. Like, if you have a mixed media pad, do some of those practice brush strokes like we talked about, and you, you know, be playing with that kind of stuff. But, um, I think you're going to learn more and enjoy the process more just kind of watching and seeing what I do, and then you can go back and do it at your own speed, on your own time. I'm really liking these colors. And just remember, we can always go back and add to them. So less is more right now. Shelly said, I feel like I need to focus and be patient and slow down when using watercolors. So here is— I'll tell you this. When, when I work with watercolors, I usually do it when I am in a mood to relax and I'm not in a rush. I feel like it's a very calming and relaxing medium to play with, and I think I love the play part of it. I love watching what the paint colors do and kind of just experimenting and seeing what happens. So don't, don't be afraid to just play. I think we all need to learn to loosen up and play and, you know, be a little more free than we are. Try to let that perfectionism go. You don't have to show anyone your painting if you don't want to. You're learning something new, so just enjoy learning something new. So I'm getting a little more pigment here. Jennifer said, how do you know how wet to get it? Just wet enough that it's not going to dry before you put the additional colors in there. You don't want it like sopping wet. It'll start, you know, wrinkling your paper and stuff. So while I've got these colors here, and some are partially dry, some are not, I'm going to grab a little bit of yellow. I love adding the yellow in with the wet on wet. And adds that little bit of brightness to it. And you don't have to go everywhere with it, just a few touches here and there, just again adding that, that variation. I mean, think about like when you go to a pumpkin patch or when you buy pumpkins for your front porch, look at all the variation in a pumpkin. I mean, very rarely do you see like even a whole section of a pumpkin all one color. There's so much variation in them, and I feel like watercolor is a good— when painting pumpkins, I feel like it almost looks like a real pumpkin does, if that makes sense. Can you guys see that little bit of yellow added in there in those spots? I like the way that looks. Um, Robin said, do you like to wet your brush or spray your paint? I always wet my brush. I don't really use a spray bottle that much with my art. So you can see there how, because I touched those two together, that— now I'm not worried about it, I'm just going to show you what it does. Um, now these colors are going to start bleeding into this next section, but again, because this is all going to be the same colors anyways, I'm not really worried about that. So I just want to show you, that's why I left that, um, extra space in between each one of those little grooves of the pumpkin so that these colors would kind of stay where we want them to stay. So kind of like we did yesterday, I'm gonna, you know, start having more saturated color, darker colors around my edges and the bottom. I'm gonna pull in some more of my yellow over on this side. Yes, Jennifer said it looks blotchy when you first do it, and then it's like magic and they all like start blending together. That's what I love. I think it is like magic. I think it's so fun. Yay! Gail said, I got my brush set today and I can't wait to use them. Awesome. So see, you can just kind of keep going back and layering in if you want some of those darker colors. And if they're not blending the way you want, you can kind of pull them together. You can kind of guide the paint as well. Oh, that's awesome! Terry said, I bought my twin grandsons, 8 years old, watercolor paint sets and love showing them how to use— they're so fun. Yes, it does kind of look like a peach so far. I feel like I'm also quieter when I paint with watercolor. There is just something, probably because I love water. I am such a water person and and it is just so relaxing to me. So if I'm not as talkative today, I think that's why. I think I'm just like so calm right now. I need this. I need the calm. It's been a little crazy lately. What are your guys's favorite colors of pumpkins? So I'm one of those people that you can probably tell I really love fall based on the amount of paintings I have for fall, but I love decorating for fall and I like my front porch to have as many pumpkins as a pumpkin patch does, if I could have it. And, um, but I love all the mixtures. I love the green ones and the— I love this, like, the color I'm doing right now. That's what that made me think of, the ones that almost look like bright neon red orange. I think those are so pretty. Awesome. Kirsten said she decided to paint along and so far she is loving it. Good, good, good. Coral blue. Yes, I love the coral pumpkins too, Deborah. Nancy said the blue pumpkins, the sage green. From Brenda, yep, I have them all. I have them all already. I love the white pumpkins. I think it's kind of funny when you think about it, what in the world makes us so obsessed with fall and pumpkins? Like, it's such a funny thing, but it's, it's my favorite season. I love summer because I love travel and I love the beach and all that, but man, I love fall. There's just something about fall that is my favorite. Oh, I should have taped it down on the sides. I forgot about— that's the other reason why you can tape it, because sometimes it'll start bowing up and the tape will help keep your paper flat. Debbie said it's meditative. I agree. Should have done that earlier. Learn from me. Also, this tape is not sticking to my table. No wonder it's bowing up. I don't know what's wrong with that. I love how soft the watercolor is too, Lori. Here's another thing we do inside a tribe sometimes too. So I talked about like we do challenges and contests and all that kind of stuff, which by the way, I know tribe sisters who are watching are anxiously awaiting for me to announce the winners for our last contest, and we will be announcing those tomorrow. So stay tuned for that. But one of the things that we do in some of those challenges is like you guys saw all the paintings that we have in the vault. Well, sometimes we have people take an original painting from the vault and do it in a different way. So for instance, let's say this one, say this one's in the vault. Instead of doing it in watercolor, do it in acrylic or do it in mixed media and vice versa. So if there's a watercolor, you know, painting tutorial in the vault, It's fun to switch it up and do acrylic, but we have so many acrylic ones, and sometimes even just for like an exercise, even if you're not ever going to frame it or do anything with it, to do a mixed media— or I'm sorry, a watercolor in your mixed media pad, that's what I was trying to say— of an acrylic painting. It's just a fun exercise to learn how the different mediums work together. And how different it can look. I've done that on several different challenges that we've done, like Bold Blooms. I did a watercolor version as well. Um, the Fall Sunflowers that we did last year, I did that. So it's fun to take the same composition, same design, and do it in different mediums. So I'm just coming in with some yellow. You'll notice with this, you know, it's not as much about me constantly telling you every brushstroke that I'm doing. It's the same thing all the way across, but just kind of learning how to work with watercolor and be patient with it. So you won't hear me constantly be instructing, which I think is also why I'm not talking quite as much. Um, today because I'm doing the same thing in each, each section. But I'll let you know as we start coming back, we're going to start adding some of those darker colors in. But like, even the way this looks right now, when you look at like watercolor clip art and stuff, a lot of times you'll see just these really, um, kind of primitive looking, like it's not all outlined perfectly and there might be some specks of paint around it or some of the white showing, and you can decide to leave that instead of filling it in and doing it dark like I did on this. You could have a completely different version of a pumpkin, and it's still going to look really cool. That's kind of what I mean when there's like— there's not a right or wrong. I'm just showing you the way that I'm doing this particular piece of art, but there's lots of ways that you can do it. Um, Nancy, the blue pumpkins were watercolor also. What's the question, Megan? Hang on, I'm trying to find it. Yeah, I think someone was asking, can watercolor go on top of acrylic? And no, you would— watercolor is not going to do anything on top of acrylic because it's translucent. So, but yes, you could add acrylic on top of watercolor. Yay, Martina! Thank you for letting me know. She said she just joined Tribe. Woohoo! Okay, so yeah, I think I got that question. Okay, so let's go in. I'm gonna take some burgundy, and I've switched to my little liner brush, so you can see that's skinnier. And I've got this kind of burgundy berry watercolor here, and I'm going to start kind of going in along our edges. Now, in some places— and again, I'm just experimenting— I'm gonna let it mix wet on wet, and in some it's going to be wet on dry. And then I can always come back as I'm doing this if I feel like, oh, that's way too dark, or I don't like the way that looks. Then I'll just grab some of my orange over here and you can kind of pull that in. And then see how up here this is kind of like— that's like a really stark difference, and I don't like the way that looks. So I would come in with one of my bigger brushes and just some water and just touch a little down there, and we're just going to make it wet on wet again and soften up that transition. Switch back to my skinny brush. Now if I want some more pigment back there to have that a little darker, can add that in. I may even leave a little bit of that white edging. I kind of like the way that looks. So you can tell kind of by the way I'm holding this brush too, I'm further back on the handle and I'm just kind of lightly dragging it. So I'm not pushing down hard. You don't need a lot of pressure when you're doing this, just kind of gently lay in some of those brush strokes. Debbie said, how does one become less heavy-handed? Practice, practice, practice. So don't hold on, don't grip your brush. Tight. Number one, don't hold it down here like a pencil. You're trying to control your brush stroke too much. It's all about the amount of pressure you put. So pretend this is a piece of paper. Your bristles should barely be moving if you have light pressure. If you're pushing down hard, your bristles flare out and you're going to get a big thick brush stroke versus if you lightly drag it. So it's all about the amount of pressure. Don't push down hard. Make your bristles flare out. Just kind of lightly drag them for that light look. Um, Angela said, do you wipe the brushes off between colors? Not for this because they're all warms. Now when I transition to doing greens, then I'll make sure that my orange is not in there. But for colors on the same side of the color wheel, and for a pumpkin especially because I want them to have the mixture of all those colors, I'm not worried about rinsing my brush in between. So I think I'm gonna come in— I even added some purple in that original, and my berry to make it even a little darker. So can you guys see the difference between this line and these lines? So this was already dry, and so when I went back and put that line over top of it, it's just very stark, right? And again, that doesn't mean it's wrong. What are you wanting though? Do you want it to all have that faded watercolor look? If so, you would want to go in after doing that and add more water and color around it to soften it up and kind of pull it back into that style that you've already got going on. And then I can come in with more pigment up towards the top. It's going to be darker towards that center. So you can kind of just keep layering it in there. So what I would say for the, you know, those of you that a lot of people are new to watercolor, don't expect yourself to just like get it all right the first time. Just have fun. Experimenting and playing with it. And, you know, that's really what my focus is in Tribe. This is not about us all becoming professional artists and who's the best in the group. This is about you finding joy and finding time for yourself and exploring new things and finding something that you can be passionate about. And yes, you're going to get good at it, but I think so often when we start something new, we just expect like we're supposed to just get it immediately. And I feel like you're always learning as an artist. You're always growing. So allow yourself that. Don't put pressure on yourself for it to be a certain way. Whenever you put pressure on yourself and that perfectionist side of you starts coming out, what happens? It steals the joy. It steals the joy away from the process. So try to, you know, watch your mindset. Pay attention if that starts creeping in and just give yourself a reset. Remind yourself that you're learning and you're experimenting and you're trying new things. Awesome. Welcome, Donna, just joined Tribe as well. Yeah, let us know in the comments if you are a new Tribe sister. If you're a current Tribe sister, let us know. We would love to welcome you to the group. And if you're not yet, you definitely can be. It is not too late. Doors are open till Friday and then we close doors. But tonight is the end of the early bird special. So if you want all those bonus tutorials, I know we had some women, you know, just in love with certain ones are like, I have to have that painting. If that's you, make sure you get signed up before midnight tonight. That's when that deadline ends. And that's how we keep track on the back end to know who gets granted those in their library and who will not. So that's why we create those deadlines. Oh, I think it's looking so cool. What do you guys think? I don't know if I want to make it as dark as I did this one. I'm liking it more these natural. It's still got those dark, like the burgundy in it, but not so much, not as much as I had in that, that first one. Teresa said, when the, the darker colors dry, they seem to lose their intensity. Do you go over it again? They do, Teresa. With watercolor, I do think they lose their intensity, and I think that's just kind of the look of watercolor. So unless I really— like on this one, I had to go over quite a bit in these really dark areas for that heavy pigment. So I think it's again just one of those, like, it's preference. Like, what do you want it to look like? I'm really liking the way this is coming together though. Welcome, Liz is a new tribe sister. Okay, I'm gonna go in with some of my brown now and a little bit of black. We're going to start this stem. So watch me right now, those of you— I'm going to zoom in a little bit— those of you who are struggling with being heavy-handed, and I want you to pay attention to the amount of pressure that I'm putting down with my brush. Awesome. Sue said, me too. Welcome, welcome to all the new tribe sisters. So look, I'm barely dragging this tip. That tip is almost not moving, right? So that's, that's light pressure versus if I was pushing down hard and making these big brush strokes. So just using the tip of your bristles. Then I'm going to come in with a little more black towards the bottom, and then I think I'm going to let this dry a little bit before I decide what else I want to add to it. What do we think? Looking good. Now, if you wanted to, you could even pull some of that, that brown out a little bit. I'm going to go back with my skinny brush so I have a little bit more control with that. And I don't want the brown to go, you know, like far down, but I do kind of like it being darker at the base of where that stem is. See, it starts making it look real. It starts making it have that rounded— that creates that depth by adding that darkness in there. If I sound raspy, it's because I am, because of these stupid allergies in Missouri that are just so lovely. I've woken up with a raw throat for the past several days. I think I want to add a little purple in there. A lot of times I use purple in my paintings instead of black too, just for something fun and different. Maybe on these back sections of that pumpkin, make them a little darker. So I don't really have anything in my brush right now. I'm just kind of dragging some of that color out. Yvonne said, do you ever use masking fluid around those intricate areas? I have not. I do actually have some masking fluid, and I just need to experiment with it more. I'm not super comfortable with it quite yet, and I may feel like I've got like a dud bottle because it— when I did play with it, it didn't work very well. So I don't know if it needed to be shaken up more or what. Teresa said, can you go back and add white highlights with a paint marker? Yes, you can. That's a really easy way to add white highlights if you don't have any. Marcy said, me too, the ragweed. Yeah, I'm— oh my gosh, it's just been so bad. Poor Sophie, my youngest, has just been miserable, and she's like, Mom, what do I do about these bags under my eyes? I was like, there's nothing you can do. Just welcome to living in Missouri. Okay, I'm loving it. I hope you guys are too. Now it's time to add in our greenery. All right, and Megan is going to be doing our happy mail giveaway again today. So if you missed day 1, I showed you what the, um, the giveaway was. We're doing the same giveaway today, so one lucky winner. Be commenting, be engaged, you might get chosen to win. That's her cue to start picking names. All right, so I'm just going to come in with green on these. And I'm going to— you're going to notice I leave a little bit of white in there. I'm going to do that so I can come back with some lighter green just to give them some variation. So you can get these fine, delicate lines. I know they intimidate a lot of people, but once you keep practicing and consistently, you know, working your mixed media pad with your brushstrokes, again, the more you do it, the better you're going to get, the more control you're going to have. And it will all start coming to you. All right, so this is— while this is all still wet, I'm gonna quickly transition to some of my yellow, and that's going to look really probably crazy vibrant at first, but it's going to kind of fade as it dries too. Can you see that variation there? I hate that I can't lift it up and show you, and I can only get the camera so close, but you can see that kind of yellow and dark green mixed together. Okay, I have to start paying attention to the time, but we're almost done here. Um, we're gonna finish up the greenery, um, and the berries, and I'll add some curly Q's on at the top. Um, Peggy asked what brand of watercolor. I have a couple different ones in my Amazon store that I like. They don't have this set anymore that I'm using today. I don't have a certain brand, um, I mean, any that you get in Hobby Lobby or— I mean, not— I don't— I shouldn't say any, not like— you can still do this with Crayola, actually. I was going to say not Crayola, but you can, um, but just an artist level instead of kids' watercolor paint. You're going to have stronger pigments in it. I think I use this other yellow on this side. All right, done with our leaves. I like all the bumpy looks of the pumpkin too. Brenda said, I like the bumpy, uh, like looks of like imperfections on the pumpkin. I do too, because I think that's what they really look like, Right. Uh-oh, hold on please. I just knocked myself out of The studio. Okay. Devona says, do you prefer the cake watercolor or tube? I always use the cake. I have tube watercolor at home. And to me, that feels very similar to using the craft acrylic and watering it down. It is super pigmented. I just think— I think it's just preference. I just like using the cake ones and adding water to them and just kind of playing with them that way. Okay, so I'm going to let this dry down here a little bit before I add the berries. So I'm going to come up and do curly cues. I'm going to use my long skinny, which is my number 2 out of my set, and I'm getting kind of a brown-black mixture on here. And here's another thing. If you don't like curly cues, or maybe you're— it's going to be kind of hard to see because I hold my hand pretty straight up and down when I do this, but practice these in your mixed media pad as well. Even practice these with a pencil just to get used to the movement. You create muscle memory the more that you do the same thing. So I've done so many curly cues in my lifetime that it just kind of comes naturally to me now. But that doesn't happen automatically. So again, that's just one of those things you just have to practice, and you can decide how many you would like to have. Let's do one. Let's do one that's going to kind of curl down. I'm liking those. Oh, thank you, Yvonne. She said this tutorial has been epic and I can't wait to do one right away. And Angela has been practicing her curly cues. I love it, I love it. All right, we have a winner. Let me see if I can throw this up here. Oh, Angela, you won! Practicing your curly cues. And Angela is also our lucky winner, so she's gonna be getting some brand new paint brushes from me and a palette and some other goodies. So if you guys want a chance to win. We have two more giveaways, um, right? My brain is like so tired right now. We have two more giveaways tomorrow and Thursday during those two paint sessions. Okay, I think I want to add a little darkness to my stem here. All right, so tell me, um, so far between day 1 and day 2, if you've been able to join us for both days, which has been your favorite so far? So see how I can go back over and make those thicker if I want to? Once you have the line on there, it's easy if you want to come back and add more details in. I usually don't do anything on the ends because I kind of like those to just lightly drift off. So many today. Yes, Peggy, there is a replay. They're, they're emailed out to you every day. So if you guys are not getting emails from us, make sure that you check your spam and junk, junk mail, because they could easily be going there. But we send out replay links. Each and every day. And then Megan has also created, which she will be sharing later, a hub page. So as we continue throughout the week, we're going to add them all to one page where you can view the Tribe Sister stories and, and the painting lessons, and they're all going to be in one place. I'm so surprised so many of you loved today too so much, but right, Donna said it's so peaceful. That's what I think too, Donna. I just love the peacefulness of painting with watercolor. And I think for a lot of you, maybe because it's newer to you and less familiar, so maybe it's more fun or entertaining to watch. Okay, so I'm kind of getting my like medium round, my 4, and I'm pretty heavy pigment, so there's not a ton of water in here, and I'm going to start just adding in these little berry circles. Try not to make them too perfect. We don't want them perfect circles. We don't want them all the exact same size or in the exact same places. Have some closer together, some further apart. So I'm just using kind of berry, that berry burgundy color, and then dipping into my purple as well. And I'm trying to be pretty quick and random about where I put them so they don't look— you don't want them to look like a pattern, right? You want them to look more natural. Debbie said, can you go back and paint the background? I would not advise that. If you are wanting to do the background, I would do it first, unless you're purposely wanting that white edge around everything, because it would be very hard to get into all those, you know, the small areas. Vicki said, I liked watercolor more than I thought I would. Good. Peggy said, it's freeing. Marie said, I love all your classes. Thank you so much. Sally said, I'm better at watercolor than acrylics. Wow, I'm not leaning forward like that again. Did you guys see my nose just come straight into the camera? That was terrifying. Okay, so we are gonna let this one be. Um, I'm glad you guys enjoyed that. I'm gonna carefully I'm going to lift this up so I don't— just for these wet spots, I don't want them to like drip the, drip the paint. And then before we leave today, don't leave yet because we're actually doing homework for tomorrow today. Okay, I'm going to set this aside. So tomorrow, if you're going to join me, we are going to do this impasto style pumpkin. But if you start tomorrow, then you're not going to be able to paint it tomorrow. So I'm going to go ahead and show you guys. It takes like 2 minutes to do this part. And this is what I was— I think I was sharing with you guys yesterday. The Tribe sisters and I were doing— because I did another impasto flower one in this same style inside of Tribe, and it becomes super addictive to do these, I think, because they're so fast and fun. And you guys are going to have so much fun doing this tomorrow. I already know because the Tribe Sisters have had so much fun doing it. So we're going to put some modeling paste on a small canvas. I've got to go grab a blank one really quick, and then we're going to let it dry. We're going to let it dry until tomorrow's session tomorrow night. So what I would recommend, if you have a couple extra canvases and if you dig doing the first one, then do several canvases. That's what the Tribe Sisters were doing. So now they have multiple pieces that they can paint. You guys, these are going to sell so well. Well, if— let me grab the blank and the finished one to show you. Okay, so, um, this is what the finished one looks like. How fun is that? And it started just like this. Um, so we're gonna do modeling paste on our canvases, no other prep required. That's what we're going to do today for our home homework so that it is ready for us to make look this beautiful tomorrow. So if you wanted to make money with your artwork, these are fantastic and will sell so well. This would be super fun, like, workshop to do with your girlfriends. So lots of fun ideas. And then, so that's the pumpkin one. And then I just want to show you the one we did inside of Tribe. This was my original. And then this was the other one that I have prepped that I haven't painted yet. So we've already had so many Tribe sisters doing these in all different fabulous colors and styles of these flowers and vases. It's so fun once you get used to it. So palette knife, impasto painting, all of that is just another style that I teach inside of Tribe. So that's why we're doing that. And I think the Tribe Sisters will speak for me that it is completely normal if you are a little nervous about palette knives because it's, it's a new thing, right? But those in the group that have overcome that fear and decided they're just going to do it and they're not scared of failing and they know it's all going to be okay have ended up falling in love with palette knives. So I highly encourage you to do it, even if you don't think you're going to want to. So let me grab— I've got 2 of my palette knives here. I need a couple different sizes. My other small metal one that I was going to use currently has dried paint on it because I'm working on another painting, so I'm grabbing my— you can grab like a set like this off Amazon. Or aircraft store, just a variety of different palette knife sizes. Um, I actually need to put these back in my store because we have a whole bunch of them. So if you're wanting like just little plastic ones to play with— okay, so I already have multiple canvases done like this. I have like 3 that I still need to do, so I just want to do something different. I don't like doing the same thing all the time, so I'm going to use my 4x12 instead of my 6x6 and do a tall skinny pumpkin like I did my mixed medium one. So, um, this is the modeling paste from US Art Supply that I got off Amazon, and it's fine. It worked great for everyone's. It just took forever to dry, and that could have been the humidity in my studio. But compared to the Utrecht brand that I had been using, that I have a huge tub of, this just seemed like it took forever to dry. But like I said, it works fine and it works for this project. So I think that's what I actually have linked in my Amazon store. But just Google modeling paste or search in a store for modeling paste, and any of them are fine. So, um, you may want to sketch out your design first if that helps you. And a lot of people said when they did this the first time, it looks like an apple. It will, it will look like an apple until we turn it into a pumpkin. Okay, um, Shelly, these long skinny ones. Um, actually, this last set I got, these are from Amazon as well. I had been getting them at Michaels, but the ones on Amazon were even cheaper, and I added those to our store as well. So for— I'm just going to show you guys this. There is a template here, um, in your pack if you want it, but this is the basic shape I am going to do in my modeling paste. But I'm just going to try to draw it on instead. So I start with that like middle kind of overly wonky section, and then you're just coming in on the sides and adding those other little curves. This is just giving you kind of like a base where your modeling paste is going, and then you can decide how you want to do your stem if you want these two little extra bumps back there, and then I'll have my stem kind of come up and curl around like that, I think. So now let's go into our modeling paste and think of this like— if you haven't worked with a palette knife before You've probably iced a cake, right? It's like icing. Now I'm just kind of wiping off the excess here, but you want to use the backside. You're not digging in, you're just kind of pulling that backside across your canvas. I'm not going to worry about those lines. It's easier for me to do it without lines, but I wanted to show you if you needed to sketch on there first, you can. So I just scoop a bunch of— the thicker you make it, the longer it's going to take to dry, but it'll be dry by tomorrow evening when we do this. So a lot of times this is what I do. I just scoop it right on there. I know that's making some of you panic. All the Type A's out there are cringing right now. I'm going to move this guy out of the way. I think it's easier to hold the canvas, but I just want all that modeling paste on there, and then I can come back and make it look the way I want. And I love all these different grooves that you put in there. That's all just going to be cool texture that you're going to be able to accent when you put the paint over top of it. Um, Carol, we will be using acrylic paints tomorrow. I don't know why there is something that is just so fun about this, but it just is. So now if this size of palette knife isn't working for you, you can switch, and I've got like these different skinny ones. I do sell my metal palette knife set in my store as well if you're ready to get metal ones, but you can also go to the store and just get one of these little variety packs of these smaller plastic ones too. And if you get some somewhere on your canvas that you didn't want it, just wipe it off. I don't have an apron on today, otherwise I'd be wiping it on myself. So I like to really build up the edges I think this one's gonna look really cool. All right, so I've got my basic shape of my pumpkin in there, and then I can kind of dig in to create those grooves, and then you can add as many lines or pulls of your palette knife as you want to create that texture that you'll see with the paint. There's really not a right or wrong to this. Everyone's just going to look completely different, and they're all going to look cool. Sandra said, yep, I'm a Type A. Martina said, can you use that in your pad? It's, it's a pretty thick to use on paper. I would recommend doing it on a canvas or a board. Um, Vicki said, how thick do you want the paste? It's really preference. So I'm just going to kind of show you from the side so you can kind of see. These little gel packs keep falling out of there. What it looks like, you could even have it hang off the edge of your canvas because then you can paint right over it. So you can kind of make it as 3D as you want. I'm going to still add the stem in. Betty said, does the paste left in your jar dry up fast? No, not at all. This will stay fine as long as you seal it. Like put the lid back on and close it. Okay, I can't wait to paint this tomorrow. I love how funky and crazy it looks. It's going to turn out so cool. Maybe I'll do this like a teal pumpkin. Maybe I'll do the opposite of what I did on this one. I'll probably actually do two tomorrow. I'll do the small one with you guys. Class in addition to doing this one, because this is the other fun thing about this. These kind of super cool paintings that you probably see in stores and you look at them and you're like, I could never do that. Then you do it and you're like, wait, that was really simple. Like, that wasn't that hard. And you're going to see tomorrow the actual painting part, part of it is like very fast. So like I said, these are Fantastic to sell, make for gifts for people, like the possibilities are endless. You can do these on canvas or board. I like to do these— both of these that I have here are the thicker, like 1.5-inch thick canvases. I call them shelf sitters, so you can just kind of tuck them into your fall decor. And they're just fun little pieces that are going to make you happy every year that you pull them out. Jennifer said, how about recycling wall art that you've grown tired of from Hobby Lobby? Can you just prime? Absolutely. I actually have some old canvases like that in my storage room that you'll put gesso over top of the art itself, and then you can paint it and make it anything you want it to be. Susan said, I haven't used modeling paste yet, but I've iced a lot of cakes. I hope that serves me well. It will, Susan. It'll probably feel super natural to you. Liz said, always wanted to use— or always wanted to try palette knives. Do you ever paint with them? I paint with them all the time. Okay, so I told you guys I was going to give you kind of like a sneak peek of what is to come in Tribe, and so I'll show you one of the pieces that I'm working on with palette knife right now. It's not completely done yet. I was really hoping to have it done before I taught class today, but it's a really big canvas. It's a 24 by 24, so it's taken me a little longer. So don't judge it, it's not done yet, but I'm still going to show you. So these are— every, every month inside of Tribe, I teach two brand new paintings. I do a devotional inside and I do a critique. So these are the two paintings that I'm going to do. The first one, I hope you guys like this. And yes, you can resin this. We did. I'll bring my resin one and show you guys tomorrow. So how cute is this? I'm kind of obsessed with it. This was an idea that I've had for a while. One, I love my fall coffee, and, um, I love the cappuccinos and all that, all that stuff. And I've always wanted to do a fall one, so this is my fall cozy cappuccino that we're going to be doing in Tribe next month. Um, and of course I had to make the mug teal. All of my mugs are teal— not all of them, but most of them. They're my favorite. Okay, so now I'm going to— I'm Let's see if I can swing you guys around here. It might be easier. Hold up. Oh, can you see it? Oh good, I'm glad you guys like the coffee cup. I can't zoom in. I can try to move this a little closer, but I'm having to hold my camera holder straight up so that you can actually see the landscape. So this is just the beginning of it. There's going to be a bridge in front of at the forefront, the foreground of that painting. And so that will be done in all palette knife. So those are the two new paintings that are going to be in Tribe in October. So if you're still on the fence, that gives you a sneak peek of what you can expect to learn in October in there. And then we are also doing— I had mentioned yesterday, but in case you missed it, we are also doing a Tribe Sister Zoom paint party where we are painting pumpkins with designs from Tribe. So we have all kinds of fun activities going on this month, and we are also going to do a— in addition to my regular teachings and devotionals and the critique, I'm adding a bonus lesson this month because we have so many new members coming in. I wanted to do an extra session that is going to be all about organization, like how to organize and prep for your different paintings that you're working on, how to store your supply lists. And, and we're going to work on like creating a planner to help us take the time to help us look at the progress that we've made as artists. And so that's going to be a new session that we do inside of Tribe where I give you guys the new planner that I am creating right now, and then how to use it and how to use it with your artwork. And the goal in this planner is we're all busy, right? Like, and it's, it's hard if we don't carve out the time to make painting happen. It won't happen. But my hope is by giving you guys this painting planner and giving you something to take notes on about your artwork and what you learned, and you know what colors you used or what you loved about it, and you're going to have like a notebook where you can keep and store all of your stuff. And it's going to come with a monthly planner that you can write down when the tribe classes are, and then you can write down which ones you want to do and when you want to do them. So, super excited about all of that. I think you guys are going to get so much out of the organizational session that we're doing. So, this is a last reminder. I won't say it again. You guys are probably like, we get it, but, Tonight by midnight. Sign up tonight by midnight if you want those bonuses. Um, let me see if I can pull that up really quick for those of you that may have not seen it yesterday. Everything you get inside of Tribe: 2 new painting lessons with me, um, 1 monthly critique each month. Just making sure you're seeing what I'm seeing— one monthly devotional with me. We do Zoom paint parties. You get immediate access to 6 years' worth of lessons, over 195 tutorials to choose from, in addition to the bonuses. And you can make money with your art. So you have permission to take my designs, like the cappuccino or the landscapes, whatever it is you want to do inside a tribe. You can teach those at local paint nights. You can sell your artwork that you create with them. And then, of course, we have our amazing community. So you're not going at this alone. You're going to have me as your personal teacher every single month to help you continue to grow in your artistic journey. But you're also going to have your tribe sisters who are going to lift you up and encourage you, and they're going through all the same feelings and emotions that you're going through, and the same struggles and the same wins and You know, I joke all the time, like, we're gonna, we're gonna geek out together over art because I— you will hear me get excited when I'm painting and I just really love something, and really excited for you guys when you have those big wins. So this is the early bird bonus. You get these 11 additional paintings. The Christmas workshop actually comes with like 4 separate sessions inside of here, so that's 4-in-1. And then if you did not sign up for the Go to the Pumpkin Patch workshop, you actually get that included as well. We had so many people fall in love with this, and I am just absolutely amazed at what people have created in that workshop. And that was just in 3 days of painting with me. So tomorrow I'm going to share a slideshow of everyone's Go to the Pumpkin Patch workshop. We're going to put together But I want to show you, if you can make that much progress in 3 days, or if you're painting along with me and you did day 1 yesterday and day 2 in the watercolor today, we're going to do impasto tomorrow, mixed media on Thursday. This is just 4 short days, and my hope and the reason why I do these workshops is to prove to you that you can do this and to prove to anyone that they can. You just need to learn the skills. In order to do it. So that's, that's what we want for you and to be able to help you continue in your art journey. So these bonuses again go to all Tribe Sisters, new and old, but you have to sign up before midnight tonight. So that's it. Tomorrow I will be back on for our impasto pumpkins, and we will be doing that class at 7 PM tomorrow night Central Standard Time, so check your time zone on what time that is for you. So thank you guys so much. Today was awesome and fun, and I will see you tomorrow. Bye!










