Day 3 of Paint Week with Christie
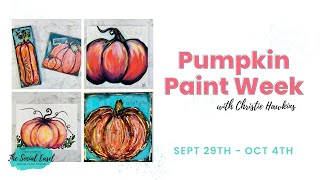
In this live YouTube session, Christie Renee Hawkins (Christie) leads the third night of her "Paint Week" series, focusing on creating an impasto‑style pumpkin using modeling paste, acrylics, and metallics. She recaps the previous days (watercolor and basic acrylic pumpkins) and showcases participant progress from the "Go to the Pumpkin Patch" workshop. Throughout the session Christie promotes her online art community, "Tribe," highlighting its upcoming door‑closing deadline, member count (250+ women), and the benefits of membership such as ongoing live lessons, a library of past tutorials, contests, and a downloadable planning workbook. She answers numerous live chat questions about materials (modeling paste vs. impasto, drying times, brand recommendations), techniques (color mixing, use of iridescent medium, stamping, gold leaf), and business aspects (selling art, paint‑party advice). Christie demonstrates multiple pumpkin variations (blue, teal, white, metallic, iridescent) while encouraging a playful, low‑pressure mindset, emphasizing confidence‑building, community support, and the joy of creative routine. The session ends with a preview of upcoming October content, a reminder of replay availability, and a teaser for a studio tour.
Chapters
Now can you hear me? I'll start over again. Welcome to night 3. Making sure you guys can hear me now. Okay, we're good. Sorry about that. I had this on mute while I was getting it set up, and I forgot to hit unmute. Started going. So we're here for night 3, and tonight we're gonna do the impasto style pumpkin. So if you are just joining us, um, this is day 3 of paint week. Um, we have already done— I think I have my other one over here. We've already done a watercolor version of a pumpkin, and you can watch the replay of that from last night. And then we've also done a basic acrylic version. So this whole week I'm just showing you an example of some of the different styles that I teach inside of my tribe, because doors are open, but only for like less than 3 days now. We close Friday at midnight. So this is your chance to get to hang out with me for a week, paint with me for a week, and see what you think. So I hope you're having fun. So far it's been really fun seeing everybody's work. So before we get started into our impasto style pumpkin tonight, which, by the way, we, we started prep last night. We had a little homework at the end of day 2 for day 3. I want to show you some of the progress that we have seen from people between this week and then our Go to the Pumpkin Patch workshop. What people have accomplished in such a short amount of time. So I, we have made a slideshow that I'm gonna go ahead and share. Share with you guys, and I'm going to mute myself, and I'll remember to unmute this time when it comes back on so you don't hear me in the background. Okay, we are back. I'm going to make sure you guys have sound and everything before I go further. Why does it have me so dark now? I was not that dark earlier. Weren't those amazing? So I just absolutely love— this has been probably one of my favorite month of workshops that we've ever done in the Social Easel. So we started out September with our Jump Start into Acrylics, which was very basics, beginner getting into acrylic painting, and we had Women learned so much from that, and we bounced from that into our Go to the Pumpkin Patch workshop, which I have to say, hands down, my favorite workshop I've ever taught. And the, the results, the paintings that you guys have done has just been phenomenal, and it makes me so happy. And now we're into our final week of lives, and doors close Friday. Friday to Tribe. So all of this that we've had going on for the last 30 days is all for the opening of Tribe because we haven't opened to the public once this year. So unless you were a part of a workshop with me, you haven't had the opportunity to be a part of Tribe. So we're so excited to open doors again. We have over 250 women that have already joined us this month as new members, and we're so excited. And I think what I really want to share with all of you today is, like, especially from the Go to the Pumpkin Patch workshop, we're talking 3 days. In 3 days, these women, who most of whom have never painted before, or maybe not since they were in grade school, right? Accomplished not a minor painting, but a painting with lots of steps, with lots of depth, with lots of technique in them, and they did it in 3 days. So imagine if you can get those results in 3 days of painting with me, what you're going to get if you continue your journey painting with me inside of Tribe every single month, and you start learning new techniques just like what we're doing this week. That was one style of painting, but I don't teach just one style. Um, you are going to continue to grow as an artist, you're going to continue to build confidence with every single painting that you finish and every new technique that you learn. And it just gets me so excited because if you've missed the interviews this week, I encourage you to go back and watch them because I had the privilege of getting to interview so many of our Tribe sisters and for them to share their journeys of what Tribe has done for them. And I say it all the time, but it's about so much more than painting. And yeah, Yes, I want you to become a part of it with us because you are gonna learn. You are gonna learn how to become an artist. You're gonna be able to call yourself an artist. But it's so much more than that. The confidence that you gain, the friendships that you gain in doing this learning thing together in a group is priceless, and I'm just so excited about it. So throughout the evening tonight, if you guys have any questions about Tribe, I want you to make sure and ask them because there's a limited amount of time left. And we do have, um, bonuses still going on. If you missed the big early bird bonus, you're not totally left out. We have another bonus going on with some of my favorite seasonal paintings. And you will also get the Go to the Pumpkin Patch workshop if you didn't get to sign up for that. You also get the Jump Start into Acrylics workshop is already loaded into the Tribe Sister library. And then this paint week that we're doing together right now will go away on Friday at midnight when the doors to Tribe close. But as a Tribe sister, you will get continued access to all of the replays this week. So there's lots in store for you. And then at the end, I'm gonna share with you— you can see I always go to the wrong side of the new painting behind me. I had it over here a second ago, but this is a work in progress. But this is one of the paintings that I'm gonna be doing inside of Tribe in October. So if you— you're getting to play with palette knife a little tonight with the impasto, and last night with the modeling paste. But this is obviously a bigger version and a fall landscape that I'm in the process of working on. But I love to get to share the progress with you. And then our other painting that we're doing in October is the little cozy cup of cappuccino. This was so fun to paint. Um, so this is a super easy and simple one. You'll have a template for this. Um, but I just want you to kind of get a sneak peek into what we're doing inside of Tribe. And then, um, after we're done painting today, I'm gonna share with you our entire October calendar because we have so much in store. So you have your live painting lessons with me, your devotional. We're gonna do critiques at the end of the month, but we also have another super fun contest and Zoom paint parties going on inside of Tribe. So if you've had fun over the last 30 days, or maybe even just the last few, if you just found me, the fun does not have to end. So you can keep on painting with us. I am going to switch cameras now, give you an overhead view, and show you some of the panels that I've already prepared with my impasto style, or my modeling paste. Sorry. And we prepared these ahead of time so that they're dry and ready to paint on tonight. So let me pull myself off here and show you the overhead. Okay. Alright, so this was obviously the original that the example was made from, and technically we're doing mixed media tomorrow night, but technically this is mixed media too, even though— excuse me— even though we're using acrylic paint and modeling paste for this. I also incorporated a gold paint pen in this, and I also incorporated stamps. So when you hear the word or the phrase mixed media, that's all that means is you're using different mediums. Some people think it's like, oh, that's going to be a complicated way of doing art, but it's really not. It's, it's just playing. And I think the more you play and the more stuff you incorporate into your art, the more interesting and fun it becomes. So that is the original example. And then last night, if you were here last night, I did one on a skinny canvas because I love my skinny canvases, and this one mimics the same shape as the mixed media one that we're doing tomorrow night. So I thought it would be fun to show you guys how you can take the same design and make two completely different pieces of art from the same template. By using different techniques. Marcy, I think so too. Like, I got my nails done today. I have to show you guys because I'm just slightly obsessed with them. They were like this really mauve pretty color, and then I had them do the chrome on top of it. So they're kind of like mermaid tail but kind of still fall, but they're fun. They're me, and I love them. Okay, so anyways, tonight we're going to paint a couple, because what I want you to see with— thank you guys— with this style is how simple and easy it is. And my goal always for you is to break things down into simple, doable steps. So no matter how complicated something looks, I want you to know that it's totally doable regardless of the amount of experience you have. So we did this last night. Hopefully you guys had fun prepping your canvases. I did see a question while the slideshow was going, and someone had said their modeling paste cracked, and she asked if that was normal. So there's a couple of things that can cause that. One could be the humidity. In your space. One could be that it was just too thick, and then maybe it dried too fast and it caused it to crack. It could be an older container of modeling paste. So there's, there's lots of things. But to answer your question, no, it shouldn't crack. Like, that's not a normal— normal— can you tell me? My brain is so tired. Is that a normal thing for modeling paste to do? Is what I'm trying to say. Okay, so tonight is just all about painting. I promised someone last week that I would do a blue pumpkin, so I think I'm gonna do— and I forgot to bring mine from home that I did at the beach this summer that was a blue pumpkin that turned out so pretty. But we're gonna paint some tonight. The other thing I want to, to kind of share with you is like, if you decide to do some of these, this is a great way to do it and to get them done faster. If you batch a lot of canvases at the same time, then when it comes time to paint, like if you're wanting to sell these, this is a great way for you to get a lot done in a shorter amount of time. And I also want you to see that not everything has to be, you know, long and tedious. Some of the paintings I teach are a couple hours, some are 45 minutes. So there's a lot of variation, and depending on the amount of time you want to commit to a painting, you can choose. And you also don't— I think sometimes people think they, in order to learn how to paint, that you are going to have to commit like 10 hours a week to painting, and that's simply just not true. If you can, absolutely. Like, if you have that kind of freedom, or even maybe you have more hours than that to commit to painting, that's amazing and fantastic. But I don't want people to think you have to have that much time to be able to get a ton out of the tribe membership, because you can break your paintings down into sessions. These don't all have to be done at one time, and there's a lot of times I work on a painting over the span of several days and sometimes several weeks. I usually am working on multiple paintings at the same time. Kellen said, what is the difference between impasto and modeling paste? So impasto is a style of painting. It just means like thick-bodied, like 3D-looking paint. That's a style of painting. Modeling paste is an actual medium, and that's what we— that's an actual product that we put on here. So the first thing I'm going to do on one of these, I'm going to make it similar. To this. And just to let those of you that are Tribe sisters or thinking about coming, these 3 paintings that I am working on tonight are actually going to be prizes that I'm going to give away inside of Tribe in October. So we're doing another fun contest in October And we're going to pick 3 winners, and I have these adorable Hello Pumpkin mugs, and 3 lucky ladies from the group are going to get a fall pumpkin mug and an original piece of art from me that you are watching me create right now. So inside, we always do fun contests and challenges, and we have another one coming up this month. Where we're going to actually paint pumpkins— like, not paint pumpkins like we're painting now, but paint on a pumpkin. So I'm super excited about it, and there's going to be more to come inside of Tribe all about that. So all I'm doing right now, nothing really technical. I'm just using the round out of my set. Use whatever brush you want to, and I am just coming in and simply laying in some color on the background. So I took some of my Bahama Blue and some of my Bluegrass Green, which is just a darker teal. If you can't find— I know during the workshop that was one of the colors we used, and my set got sold out, and then people were having a hard time finding it in the store. It's just a really pretty teal, so any teal is fine, whatever your favorite teal is. And I'm just kind of messily going around. I'm not trying to make it perfectly smooth or anything, just kind of getting some background color on there. So on the original, I did black on the sides. I'm probably going to do the same thing. I just really love the way that this looks. Um, Jackie said, once painted, do they need to be sealed or anything? That's up to you. I don't seal every single thing that I create, but depending on where you're putting it, you may want to seal it, and it does kind of give it a nicer finish. Okay, so I'm not going to paint the sides right now. I'm just going to paint that, and then I think I'm going to make this one my blue teal pumpkin. So I'm going to leave those colors there, and I'm going to grab some of my darker, my Ultra Blue Deep, out of my set. Next to that, and I'm going to do a little color mixing. I love blue pumpkins too. So this is some of my Ultra Blue Deep, and then I left some of that teal mixed in there as well. But you're going to start seeing as I go over this, you can already start seeing these fun grooves and that texture showing through the paint. Isn't that fun? And this is what I mean, like, it's so fast and easy. You really don't have to do a lot of detail work to these to make them really cool looking. The modeling paste does a lot of the work for you. Then you just get to come in and kind of lay some color in wherever you want it. So I'm just kind of bouncing back and forth between my blues and teals. And just know, like, you, you can't make ugly colors with these as long as you're staying on the cool side of the color wheel, then you're good. So I'm keeping kind of like we've been doing, keeping a little darker where the grooves are, and then lighter in the middle. And I'm just bouncing back and forth between these colors so that we have that variation in there. What do you guys think so far? Pretty easy, right? Bobby said, how do you apply the background paint so there is not a trim around your object? I'm not quite sure what you mean, but I'm just going straight up to the edge of where that modeling paste is. Can you see that? Like on this, I even like— it went on top of the modeling paste, which is totally fine. So this is very forgiving. Nancy said, I took my canvas outside to dry and then it dried too fast and cracked. So another thing you could do— not that you have to for this, because you probably want to go ahead and paint it anyways, and I really— you're probably not even going to be able to notice once you get all the paint and everything on there. But I do think you could go back with more modeling paste and let it dry at a slower speed and cover that up as well, just for future reference. These colors just make me so happy, and they make me feel like I'm back at the beach again, where I wish I was all the time. Okay, so I'm going to start going a little darker around my edges, and again, I'm still just using a round. You don't have to use a certain brush for this. This is all about preference and doing what works for you. If you're trying to get into some smaller areas, then pick a smaller brush. If you're trying to spread paint in several areas, then you can use a larger brush. Michelle said, how long does it take for the modeling paste to dry? It depends on the brand, the humidity in your space. So I always say, just to be on the safe side, to give it 24 hours. It shouldn't take any longer than that. I got overzealous at our live event and thought if we did them first thing in the morning, they'd be ready to paint by the end of that afternoon. And the modeling paste and the humidity in here, that did not happen. So they ended up taking those projects home to work on them. So, you know, it just gave them something fun to do when they got home. The party wasn't over. What color do you guys think I should do this stem? I'm trying to decide if I want to do it brown or black, and what color I want to do the background. You could even make another tint of blue over here. That, that dark blue is so pretty when you add white to it and you get this really pretty like baby blue color, almost looks like periwinkle. But do you see how just these quick little brush strokes here and there just start adding fun little touches to your pumpkin? Oh wait, someone said silver, but you know what I'm thinking? Maybe I will do gold. I didn't think about doing a metallic because this has a little bit of metallic bronze and gold on it, which I'm still going to do on here. So maybe a gold stem would be really pretty. And don't forget to hang out with us tonight because later in the session Megan is going to be picking another Happy Mail winner. So someone will randomly get selected who's been commenting and engaging and hanging out with us tonight. Um, Kirsten said, are you going to incorporate the copper shimmer? Yes, I'm going to do that on this one tonight. And again, you can decide, like, how much do you want to blend? Maybe you want to just have just some big brushstrokes in there too. You do whatever you want. And I will say, sometimes, you know, when things are this simple, we tend to overwork it and think, surely I can't already be done. But sometimes you just are. So don't feel like you have to keep going. Like, if you like the way that it looks, you can just call it good and move on to your next section. Now I could also even add black into my blue if I wanted to, you know, make it more of like a navy blue. But I want you to get comfortable with playing with different colors seeing how they work together, finding out what colors you love together, finding out what colors you don't love so much together. And you can work on all those things in your mixed media pad. You don't have to commit to a painting to find that out. Okay, I'm really liking the way that looks right now. Um, if you are gonna buy a new modeling paste, I actually did some research on it last night, um, because I just bought a cheaper one, um, for this project off of Amazon, and it's not my favorite. From what I have researched and found, the Golden brand of modeling paste seems to, um, be the most recommended. I think I'm going to get a bigger brush for this to get it done a little faster here. So I'm just going back into my lighter teal. So I'm going to get some of this on here, maybe pull in a little darker in some areas, and then I am going to finger paint and mix my colors together with my finger. And you don't have to worry if anything gets on your pumpkin because it's all going to get covered up. I love doing backgrounds like this. It's just fun to watch the colors blend together and see what kind of mixtures you get. Kind of get that cloudy look like. I like some of the darker spots and the lighter spots. And when you're finger painting, you can start seeing some of that texture of the canvas showing through. But doesn't that look cool? And you just do it with your finger. All right, I'm liking the way these two look so far. What color of background, or what color of pumpkin? So I know this one's going to be orange. Let's just go ahead and start throwing some color on here while I'm, while I'm thinking. Again, kind of going back to what we did on day 1, this is so basic. Like, there's no technique to what I'm doing right now other than just filling in color on top of my pumpkin shape that we've created. Don't worry about that teal that you see coming through in some areas. This is just our base coat, and we're going to be putting a lot more layers on top of it, so you're not going to be able to see that later. Sandy, I have to pull this up. That's so funny. She said, what have you done? I've turned into an impasto crazy lady. I want to paste everything. I love this technique. Oh my gosh, that is so funny. I'm telling you, it's so fun and it's so easy. Like, this isn't hard, and they're so beautiful. Oh, MJ, good idea. I never do a white pumpkin. I always like— I'm so obsessed with color that I always forget about simple. Like, white is great. Okay, let's do a white pumpkin. Now what color background do we want to do with our white pumpkin? I have a couple white pumpkins, I guess, as I'm looking at my fall wall of art over there. Okay guys, so this one's going to be a white pumpkin. Now I need votes on what color the background is going to be. The other thing that's really fun, like if you're just I'm going to pull some white into my orange just to get a slightly different color too. If you're doing the black edges like I am, or whatever color you decide to do on your edges, just a solid color, it really doesn't matter how messy you get on those edges because you'll be able to come back in and cover all that up. So I'm not worried if orange goes on the bottom or, or what. Oh, I got a couple people saying navy. I like that idea. Maybe we'll start with navy, and maybe I'll mix in some purple into that navy. Pink, fuchsia, also good ideas. Okay, we're just gonna have to see what's gonna happen here tonight. So usually when I add the metallics on like I did in that one, I let the base color dry before I do it so that metallic really stands out. You can mix it, um, with your colors, but I don't feel like it shows up as much as it could. Did we decide on a background on this one? We're doing a gold stem. I already forgot what you guys told me, if we did. Um, I'm— you— for the— for this pumpkin, I'm using my Tiger Lily and my Bright Salmon, which is a coral. So just an orange and a coral, but you could also just use an orange and mix white with it and get that coral if you don't have one. Now this is just straight white, but my— got a little gnat in here. Um, Because my orange is still wet, I can add the white directly on here and just kind of blend it in. And then I was thinking for the bottom, I'm gonna do just a touch of— I'm gonna make more of like a kind of rust orange by mixing just a tiny bit of brown with it. So see how just that little bit of brown kind of gives me a more toned down kind of rust version there? I think I want to do— I think I want to do coral on this background. Okay, I'm gonna switch to my smaller brush here. I didn't get black yet. I want some black on here. And you— I don't know if you can see, but even around this in the original, I ended up going back at the end and dragging some black around that edge just to give it more of that kind of rustic look there. Debbie said, I love these colors. Can you do modeling paste on wood? Yes, absolutely. Yeah, wood panels are great for modeling paste because they can, they can handle the weight of the modeling paste really good. You don't have to worry about them bowing or anything. So this is just leftover black I have. On my round. I'm just kind of dragging around, and I'm basically just letting it catch some of these grooves. So again, modeling paste kind of doing the work, the work for us. So I'm going to hold this one up so you can see that closer. Pretty cool, right? So I'm going to let this guy dry, push him off to the side here. Okay, jumping back to this, I need a clean brush. So we are going to do this one white, but I'm going to steal my friend Cindy Manley with Art Shattered— I'm going to steal her idea and do a white iridescent one. She did one while we were in Florida and it was gorgeous. So hang on just a second while I grab that paint. So this is the same, same brand, same style of metallics. From DecoArt that I'm using. So 24-karat gold, copper, and pearl— those are the ones we're going to play with tonight. Um, another idea, just because I like to try new things, um, I just— let's see where it sits. I have so many mediums down here because I love experimenting and trying all the stuff. Okay, must be this one. I just got this one from Liquitex. I don't even think I have it opened yet. No, I don't. So this is an iridescent medium. We're going to play with this, so I'm just going to read you the directions on it real quick. It says it adds an iridescent surface finish, it extends color, which basically just means it's going to stay wetter longer, and it works best with transparent or translucent colors. Use on its own, or you can mix it with color. You can also thin it with 30% water. and use it as like a glaze. So before I even read that, that's kind of what I was thinking is like, oh, this would make like a really pretty glaze over top of this blue. Oh, I can already tell it's going to be pretty. Can you guys see? Probably just looks like glue on the screen, but it's very shimmery. I'm excited. Okay, I just have to test it out. So here's the thing, this is how my brain works, is I just am going to do it. Like, I don't care if I put it on here and I end up hating it because I can let it dry and I can paint right over top of this again, right? Um, Tori said, if we are in Tribe, are these going to be available later? Yes, I'm actually adding them to the Tribe Sister Vault up at the top where the beginner paintings are. This is called Iridescent Medium, and it's by Liquitex. I'm going to show— see if this— yeah, you can see that shimmer there. So let's do a little compare. That's a medium, so it's meant to be mixed with this, whereas this is just metallic paint. I might— this has been sitting over there for a while. So Jennifer's asking about shaking them. So, like I said, I've had some of these paints like for years. It doesn't mean they're bad, but they separate over time. So I'm just shaking them to kind of mix them back together. Gail, we have not— oh, for October, Gail said, what's the painting of the month for October? So, Gail, that's already included with your membership. It was the watercolor Autumn Chapel, and that is in your member library. You guys, I might not be able to use this. It's not mixing. Well, good thing I have an iridescent medium then, I guess. Let's test it out on the blue. I can already tell I love it. Can you guys see that? Well, this is going to be a new favorite. Look how pretty that one section of that pumpkin looks. Now that's wet. We'll wait and see how it looks dry, but it's going to be very pretty. And I think because it has so much texture, it looks even cooler. Like, if this was just a flat surface and there was no texture to it, I don't think it would have all this shimmer and shine that it does. And I'm being very liberal with it, so I'm spreading quite a bit on there. This is going to be so pretty. Okay, so I'm going to leave that there. I'm going to get a clean brush and I'm just going to put white on here and then go right over it with the iridescent medium. So for those of you watching tonight, I do want you to pay attention to how quickly I'm moving It's okay to be fast and messy and not overthink each step that you're doing on the painting. It does you good to just kind of get lost in it and playing. It's good for the soul. Okay, so I'm going to go right over this while it's wet and just add some of this iridescent medium right into it. All right, give that a chance to dry here. It started making me think maybe I don't want to do this coral. Maybe I want this to just be a simple white background. That would be pretty too, don't you think? Changing my mind. It's okay to change your mind. Um, Stacy said, could you mix them beforehand and paint them in together? Um, yes, it does say that you can mix that medium directly with the paint, so you can do it either way. So this is— I mean, it does have some of that medium in it, but it's mostly white, so I'm getting like a good base coat on here before I put the iridescent over top of it. I think for this, I'm thinking I want to do this white with the iridescent, and then I think I'm actually going to paint the sides gold. Just imagine all the possibilities you can do with these pumpkins. Okay, so letting that dry, scooting over. Yes, Michelle, I was thinking the same thing. So she said, um, I wonder if you could add some gold touches to the white background of the blue pumpkin. What I'm thinking I want to do is I'm going to paint this stem gold, and then I'm going to do kind of like a little gold edging around it and then gold on the sides. Um, Sean, uh, said, I love this, can you use a hair dryer to speed up the process? Yes, you can. Um, Bobby said, how often do you stick to the color wheels? So I don't know quite what you mean by stick to the color wheel, but the understanding the color wheel is essential to pretty much every choice that I make in painting. So I, I mean, I definitely use it. I teach people how to use it, um, because I know, like, if you are not familiar with it, it can be a little overwhelming and you don't really understand everything. So 100%, we, um, definitely focus on the color wheel and the importance of it. Carol said, is the shimmer less if mixed with the paint? I feel like it would be, which is why I'm doing them separate, but I'm not 100% sure on that. Okay. Setting this one aside. Already forgot if we decided a background color on this. We were thinking maybe navy, weren't we? Yeah, let's go ahead and get the background on there, then that's done. Now I'm using tons of brushes tonight because I have them over here and it's way faster for me to just keep switching brushes than it is for me to keep rinsing them in between. So I'm starting with black. Well, now I'm thinking maybe I just want to do black because I love black and white and black and white checkers on the side. See what I mean? Like, there's just so many ideas, you guys. You gotta, you gotta do a bunch of them so you can test all your ideas out. I'm gonna pull a chair up really quick. My feet are tired of standing. April said, what about copper on the blue one? You could definitely do that. I'm going to do gold, but you could definitely do copper. Nancy said, are you going to shade the white pumpkin? If I do, it's going to be very subtle. I don't want— I kind of just want it to kind of stand on its own. Jennifer said, now I need to go get more canvases. I'm telling you, once you start, it's like a— but I'm also telling you this, if this is something that you like doing and then you start sharing them, people are gonna want these. They're so adorable and cute, and you could easily make some extra money this holiday season. Doing some of these small, quick, and easy canvases, because I'm pretty sure these will just sell themselves. Oh, Megan, that's a great idea for gifts too. Teacher gifts. If you wanted to do teacher gifts, maybe something fun for Christmas, cute little Christmas trees with modeling paste. So I'll actually— I think I am going to do checks with this, and I'm going to show you guys my quick cheat for doing this. This is a fast way to get them done, is do all one color first, and then you can either use a brush or like a white Posca pen, and then come back and add your stripes or your checks to the side, whatever you decide. Stacy said, oh my goodness, I need more time. So one of the other things that we are doing in tribe in October is I am kind of putting together a planning, a painting planning guide right now, kind of like a workbook for Tribe Sisters to help you once you decide, like, yes, I'm gonna paint. But it's really easy for us to say that, right? Like, I mean, I'm guilty of it myself. I sign up to, you know, learn other artists' styles, and I sign up for these fun classes And then I realized like a month has gone by and I never did it. Um, so now before I do that, I'm like, okay, I've got to find where on my calendar I'm going to commit that time. So we're going to talk about batching, which I already talked about, how to save time by batching and doing multiple of similar things at the same time. Um, but it's also going to be a workbook to help you figure out where you can carve that time out for your creative time. And it's not selfish. I mean, this is like We carve times out for so many other things in our lives. And then we say something like this is extra or frivolous, and it's not. This is your chance to kind of disconnect from the world. You know, turn music or a show on while you're painting. I mean, how many hours do we waste as a society scrolling endlessly on Facebook, TikTok, Instagram, doing nothing, getting nothing out of it? But if you use that time instead, or binge-watching something on Netflix, to do something creative, to do something that can bring you joy and bring other people joy. So we're, we're adding in, um, a session in Tribe next month where we're going to present that planner to the Tribe sisters, and we're also going to talk about organization to help give everyone kind of like a heads up, you know, um, for this fourth quarter, especially fourth quarter can get crazy, but it's also a time of the year that people love crafting and doing this kind of stuff. So just being okay with making an appointment for yourself and setting aside that time to do something that you love and that brings you joy. So I'm really excited about it. It's going to have pages inside the workbook where you can keep track of paintings that you want to do, your supplies. What you learned from each painting, and it's going to help you also figure out like what you really love. What do you keep going back to? What are you drawn to? And then just imagine in like a couple months from now, or maybe even a couple years from now, you're going to have this workbook and this binder where you have all of your work that you've been working on, that you're going to be able to look back and see your growth. So I'm super excited about it. Jennifer said, my counselor is so happy that I am prioritizing this and getting back into being creative. The planner sounds like it will be very helpful for me. I think so too. I mean, it's going to be helpful for me too. Like, as I was like coming up with the idea for it, I was like, this is so good. Like, why am I just now thinking— and I don't mean, I don't mean that like I'm bragging at myself, but it's so good because I need it also. Like creative brains, like we're scattered anyways. So it's just something to help keep you on track. And I think about anything that I've committed to like that, learning a new skill, learning how to run a membership. Like when I went back and took that course 7 years ago, I didn't have any extra time in my day. I still had 3 kids with crazy activities and a husband and everything else in life. But somehow I found that time to carve out for that because it was important to me, right? So I think you just have to decide, like, is this the time? Is this the time that you're really going to pull the trigger and, you know, commit to, you know, making this a part of your life? Or is life just going to continue to get in the way? Because I got a, got a surprise for you. Life is always going to get in the way. It's never going to just magically open up. Brenda said, I'm definitely going to be ordering that Liquitex Iridescent Medium. I know, I love it. Yay, yay! Welcome, Debbie— or Deborah, sorry. Welcome, Deborah, just joined the tribe last night. Oh, thank you, Wendy. I'm glad that was what you needed to hear. Marissa said the planner sounds amazing. Good. I'm glad you guys are excited about it too. Debbie said, is it going to be something you mail out? I won't mail it out. It's going to be downloadable. So, and here's that— it'll have like blank calendar, calendar pages in it, and it will have blank— or not like when I say blank calendar, I mean, I'm not going to print out the entire 12 months, but for you guys to fill in your calendar depending on what month you're in, and you'll be able to match it to the activities we have. And Tribe and then decide when you're going to do them. Like we have down our times of when I teach live, but not everyone can join me live because we have members all over the world. So let's say I'm teaching on Tuesday at 1. You may not be able to make that, but you're like, you know what, I'm going to do Christie's lesson from Tuesday on Thursday at 7 and really just start making those appointments for yourself, no different than you would anything else that you have in your life. And then there's gonna be pages where it's basically like a summary after you finish a painting for you to take notes, for you to kind of, you know, go through your process. Like, what are your big takeaways? What did you learn? What did you love? What did you struggle with? Because then that's gonna help you know what you need to work on next, right, to keep moving forward. So I'm so excited about it. Lisa said, I love the planner idea. I feel guilty sometimes and put the time off, so this would benefit me, especially as a new tribe sister. So excited to be here. Yay, we are excited to have you. I'm glad you guys are so excited about the workbook. I am too. Gina said, will there be a fee? No, this is just going to be included with the tribe membership. So we're creating this. And then it will be a download that you can use and print off new pages as you need them. So what I'd like to do is plan out our next 3 months, you know, and take 3 months at a time. And so you start creating short-term goals, midterm goals, long-term goals, and then we break those down into actionable steps. Because when you think about the whole thing, it can become overwhelming. And that's the whole point in being a part of a community like this, is to have the guidance and the support. That's what I'm here for, is to be your teacher, to be your guide along this journey and to help you. And this is one of those tools that I can give you as your teacher that is going to help keep you on track and help you making progress, because the more progress you make, the more confidence you're going to build and the bigger transformation you're going to have with your art and with yourself. You will be amazed. At how much it's not just about you growing as an artist, but how much you are going to grow as a person when you commit time to something like this. Okay, sorry, I'm trying to get caught up on comments, make sure I'm not missing anything. Okay, you guys ready to see, um, some of this copper on our orange pumpkin here? I'm going to zoom you in. I'm obsessed with this. How pretty is that? Why is there something about iridescent shiny things that just make them look expensive and rich. I just love them. Debbie's asking if I can make a per— make an option to purchase it. That's a huge expense, Debbie, and a whole lot of work to, to do that. So if your printer is broken, all you need to do is go to a Staples, Office Depot, Office Max, whatever you have in your area, UPS store, and all you have to do is have the file and they can print it for you. So you don't have to have a printer to do it. I love this, Lynn. She said, I have grown so much as an artist. I started with you with no experience, and I'm so proud of how far I've come. I love that. That makes me happy. Yes, Hannah, I agree. She said it's so hard to commit time for ourselves. Writing in a planner definitely helps train our brains, um, or train our minds to plan and do it. The other thing that I think I'm going to include in there is just some positive quotes and some positive sayings that we say inside of Tribe and some scripture to remind you of what truth is and what positive self-talk is and how— think about how God would be speaking to you. Because again, somewhere along the way, we start being really hard on ourselves and we take grace away. And I don't know why we do that, but we deserve grace just as much as we give grace to other people. So just kind of— we talk a lot about mindset. Inside a Tribe, because I think it is such an important aspect, um, of growing in everything that you do in your personal and professional creative life. Look how pretty this is! I love it. So I'm going to fix this little edge right here. I kind of pulled my brush off, and now it looks like that pumpkin is like flat right there. Yeah, so any, um, you guys are talking about the metallics, they tend to be translucent. They're not, um, they are not opaque. So like if I paint gold on the sides of this, I'll probably have to do a couple coats of it to actually get it to look like solid gold. It will do it, but it definitely is going to take more than one. One coat to do that. Are you guys having fun tonight? Okay, now that we've gotten this far into the evening, now, which night is your favorite so far? We had some— I don't like that color. We had so many people say last night was their favorite, which so surprised me, I have to tell you, because so many people tend to be scared of watercolor and say they don't like it. But the feedback we got from yesterday was like overwhelming, how much fun and how relaxing people thought last night was, which I agree. That's what I said when I was painting, is I love doing watercolor, but obviously I love doing this too. To me, this is less serious— not that watercolor is serious. I guess you just have to pay attention more. I feel like with this you can be messy and fast and fun. And this is something that if you guys have kids, grandkids, this— any age can do this type of artwork, and they're going to have so much fun with it. For my live event here, I even had my 17-year-old daughter Emma, who is— I will say used to be very artistic. She doesn't really take the time for it anymore right now. But while I had her here with all the ladies, in the group. I had extra canvas with me up here, and I was like, why don't you just play and dabble a little? I have to show you what she did. Hang on, I have hers over here. And I was so proud of her that she painted again, and she was having fun with it, and she was totally lost. She was totally lost in her little world. Watercolor in tonight. Look, this is Emma's mixed media pumpkin. Look how good she did while she was sitting here with me at our Tribe Sister Retreat. I love her. She did all this by herself. I did not help in one way other than give her the template. So super proud of her, and it was very outside of her comfort zone. And she's like, Mom, I don't think I want to do that. And I'm like, just start on it. And then, and then there you go. Sometimes that's all you have to do is just get that little, little push. So you guys see how I can just come back and I put some blue on there, I didn't like it, no need to freak out about it, just come back, cover it up, not a big deal. These are my favorite days when I go home like this. That means I had fun. So I think I want to do— this is dry. I'm going to go ahead and get some gold metallic. Sherry said, I'm going to say tonight is my favorite. It seems like so much fun. I missed— I was walking over there to get Emma's thing and I missed all the, uh, the, the votes. Linda said tonight's my favorite so far. I've been wanting to try this for some time but was afraid to try. So I love this. Now that you've seen it, now you know it's not scary, right? That's my goal. So I've got some metallic gold is what I just grabbed and put on my palette. I'm going to do that on the stem and then leave some of the black showing through. And I think I'm— I was going to use that pen for this, but since I have this paint, I'm just going to use the metallic paint. So we're using two different metallics on here. Oh, that's a good view. You guys like that? I'll leave it here. Thank you. I'll be sure to tell Emma that you guys all liked her painting. So what I'm doing now with the gold, it doesn't matter if it mixes with the copper, it doesn't matter what it mixes with, but I'm just getting enough on here And I'm just holding my brush kind of like sideways, and I'm just dragging it over these ridges that our modeling paste has created. And so it does the highlights for you. You don't have to decide where they're going to go. The modeling paste already decided that for you. Like, how can you not just want to play with modeling paste every day? Oh my gosh, let me tell you guys, this new— you're gonna be like, oh my gosh. But I'll, I'll let you know once I experiment with it. But I, I made the mistake of getting on— now I can't remember, was it Golden? Yeah, no, hang on, I think it is Liquitex. This is going to be my next, next thing to play with on a day of play just for me. And then once I nail it down, then I'll share it with you guys. Look at this one, is glass beads. I can only imagine how fun that's going to be. Nancy said, what is the brand of copper paint? Can you overspread the modeling paste when making the pump? Not really, Nancy. It's really just preference. So you could just keep layering it on thick. The brand that I'm using is DecoArt. There are several different brands out there. FolkArt has good, um, metallics as well. I am very much liking this little pumpkin. Oh, Gina said she just bought the glass beads too but hasn't used it yet. I'm so excited. But here's the thing, because you guys sound like you may be a little bit like me, and I mean, we all love going into the craft store, right? And like, or art store, whatever, and like looking and buying. Buying art supplies is like the funnest thing to buy. Um, but if you're also like me, you may have, um, a stockpile of supplies, and now you have them and you don't know what to do with them. Um, so that's where I come in, is I'm gonna play with them, I'm gonna figure it out, and then I'm gonna show you how to use them so you don't have to figure it out on your own. So that is going to be a lot of fun. Okay, so I'm thinking I'm gonna kind of I'm kind of thinking I might change my mind what I was going to do on this. I'm going to do some finger paint of gold. Yes, this is what I want— finger paint of gold around the edges. I'm also going to start working on— like, Sophie wants me— Sophie's my youngest daughter, um, she wants me to do kind of like a abstract landscape scene. And what I mean by that is one where, like, if you look at it long enough, you're like, oh yeah, I think I see water or mountains, but then you're also like, I really can't tell if that's supposed to be that or not. Um, and she wants one like that for her room, so that's going to be something I'm going to be working on over the next couple months. And then of course I'll be sharing that work inside of Tribe. I am loving this. So let's just do a side-by-side comparison of the two small pumpkins. My original— Lisa said— I'm sorry, I have to put that up. That's so funny. Lisa said art supplies are like crack, they're so addictive. It is so— it's just true because you Because here's the thing, like, we, we're like, oh, shiny new thing, and we just get so excited about stuff, right? Because that's how a creative brain works. But now we're going to actually use those supplies. Okay, just comparing the two, they have a totally different feel to them. Which one do you like better? Or keep in mind, I'll probably still put grateful up here, or maybe thankful on this one. Do I have any Tribe Sisters who would be excited about getting this in their happy mail for our contest next month? I like it. Um, Jackie, I do the, uh, letters for grateful with a wood stamp set, so I will show you guys that. You guys are funny. Oh, Grace would be good. I like that idea. Um, Teresa said Grace would be good for tonight's pumpkin. I do still think I'm going to paint black on the edges of this. I'm going to let that dry just so I don't make a mess, and then I'm going to come back and put the letters on there. So let's bounce back— actually, let's bounce back to this. Look, you can hardly— do you guys see that? That just looks like modeling paste. So, um, my vote on mixing— I think it did that because I mixed it together. So someone was asking that while I was doing this one, like, is that gonna show up as much? You can see it clearly does not show up as much as it did on this one. So my advice would be do your paint color first and then do the iridescent medium over top of it so that it really stands out. So I'm going to put more— I need more space. I'm going to put more iridescent medium on here, and then I'm going to accent it with the gold. I may even use this brush that has a tiny bit of orange in it, because if it adds that accent in there, that's still going to be pretty. Yeah, definitely stands out more on its own. Let's take a little— I'm gonna get a little coral and white here. It needs a little something. Okay, so this one's my least favorite so far. So I'm going to think about this one for a little bit and decide what I want to change about it. It may be completely different by the end of this class. So this one's going to go rest for a little bit. Let's come back and finish this one. So I'm going into Just straight metallic gold. So you guys can see probably how translucent this is right now, so it's definitely gonna Need another coat on there. It actually looks kind of good on camera, but in person it looks very translucent. So I was going to do the checkerboard on the side of that. I didn't want it on the front of the canvas, but now I'm kind of leaning back to maybe I want to make this navy and maybe make this pink, and I could still do the iridescent on top of it. But I also love navy and pink together, so that might be cute. Yeah, that's a good idea. Um, Lindsay said green and black for the pumpkin for Halloween. Yeah, you could— green and orange and purple and black, like, those are all great Halloween colors. We could definitely do something more Halloweeny. With that one too. I don't know, but I really do love navy and pink. Okay, so we're going to let this dry a little bit, and I'm just going to take my brush. Again, you can do this with your finger or brush or both, and I'm going to add some more iridescent on that. Actually, I take that back, I may not. Maybe we'll just let the pumpkin be iridescent so that it separates from the back a little bit more. A little bit more. Where did I put it? Sorry, I went radio silent on you. I'm over here thinking about that and trying to decide how much gold I want to add to this. I think that looks really pretty though. I love it, love it, love it, love it. Okay, I am going to continue with the gold though. I feel like I want to tie it all together. I'm going to pull a little bit in inside the blue, but I'm not gonna— I'm not gonna do as much as I did on the other one. Definitely more of like an accent, but I think it ties the painting together a little bit better. Oh my gosh, I love the blue and gold together. Look how pretty this is. Yes, I was in my thinking mode. Sorry about that. I'm going to have to make another one of these for myself since I'm giving this one away, cuz I really, really like it. So much fun. It's, it's a thing. It's my favorite so far too. Okay, so I am going to paint the sides, but I'm not, I'm not going to do that live with you guys tonight because it's just time consuming and there's no point. I'm not teaching you anything by doing that, but what I'll do is just come in and do one coat of gold all around my edges, and I'm going to let it dry completely. And then you would go back with a second coat of gold. Usually two coats is enough to cover it. Sandy said, and thank you in advance for the blue pumpkin. You never know. Okay, let's fix this little booger up because I don't like it. I'm going to start with doing my navy background, so I'm doing Ultra Blue Deep and black, and that's going to be my navy. So I just mix all that together. I'm going to pull in just a touch of that light Bahama Blue in there to lighten it up in some areas. I already like it better. I think I just didn't like that it was solid black because I don't usually do just a solid like that. It was bugging me. And I can leave some of that black around the edges here. This is going to be a moody pumpkin. That looks good, doesn't it? So yes, I agree, so much better. So sometimes this is, this is part of the process. I always say like get, get lost in the process Enjoy the process. Don't think about the end of this, just how we're not supposed to worry about tomorrow, right? Tomorrow has enough worries of its own, and God tells us just to focus on today and what's in front of us right now. It's the same when it comes to painting. Don't focus on the end. You don't know what the end is going to be like, so why even worry about it right now? Focus on your next step in front of you and just have fun. In the creative process. And if you get frustrated, that's okay. That happens sometimes. I get frustrated sometimes. I don't just walk around in a happy mood all the time with my art. Sometimes I get mad at it. Then take a break, walk away, but then come back to it. And you come back refreshed, and you come back with— like, if you're like me anyways, like, if I am not happy with something, then I kind of like Well, kind of like what I was doing when I got quiet with you guys. I was processing and I was like thinking about what, what can I do to change that? What do I want to fix on it? That's how, that's how you learn. That's how you grow. And sometimes it ends up making the most beautiful art. The ones that you struggle with sometimes end up being your favorites. I'm so congested. If I sound nasally, that is why. Yeah, I like that background so much better. Yay! Megan has picked our winner for tonight is Miss Jean Kepler. Congratulations, Jean! Okay, so let's get some pink. What pink do we want? I'm gonna use— I'm gonna use Berry Cobbler, but I'm going to use Berry Cobbler and then put the iridescent medium over top of it, which is going to lighten it a little. I think I may even add some white into this. I love Berry Cobbler. It's one of my favorite, favorite paint colors. You can mix this with so many things. This and this together, you probably would think, why in the world would I ever mix those two colors together? That is how I got this really beautiful dark teal in this painting, was mixing those two colors together. So you're going to learn color mixing inside a tribe and what colors you can mix together and what you can't. So don't be afraid to mix your colors. Don't always just use what's straight out of the bottle. If you can't find Berry Cobbler, then any berry color. I mean, really, there's, there's several, um, even from DecoArt that are so similar to that. Bobby said, I love color mixing. I could color mix all day long. That's like a whole art in itself, I feel like. And then you find what some of your favorite colors are and color mixtures are, just like I was talking about. Like, I love those two colors together. So I'm just taking a little bit of my Berry right now. There's a touch of white in it. I can already tell you I'm gonna like this so much better. And this berry with some of the dark blue makes a beautiful dark purple. Look at that. And I, I don't know if I'm saying your name right, but she said, I can't get the colors right when I mix them. So inside a Tribe, we have several separate lessons outside of just painting tutorials on color mixing, and those are going to be included for you as part of your Tribe membership. So it's really just learning the color wheel, learning how to use it, learning what colors work together. And just like anything else, it, it's just learning it. Once, once you understand how everything works together, you're going to become a pro at color mixing. Every layer is just making it better and better, or I think so anyways. I'm liking it. It's so fun. Stephanie, I'm going to throw your question up on the screen. She said, what is the difference between heavy gel medium and modeling paste? So I have a whole blog on this on social easel.com, so you can look up that there. But the gist of it is heavy gel medium is going to take like your craft acrylic like this, and you add heavy gel medium to it, and it's just going to make it thick like a heavy-bodied acrylic. Okay, it's not going to change the color or anything. It's just going to make this thicker. Modeling paste is what we used for the base of this. If you add modeling paste to your paint, it's going to tint it. It will add— it's like adding white to your paint, so you're going to get a pastel instead of just the color out of the bottle. Gel medium is not going to alter this color at all. If you add modeling paste to this, then it's going to turn into a light teal. So it will alter the color. You also can't build up depth with gel medium. That— you need modeling paste for that. I know, isn't this funny? This one's becoming some of your guys' favorites too. So the other thing I'm thinking that would be really pretty with this is just a slight bit of coral mixed in with our berry. The coral and the berry are really pretty mixed together. You don't want the coral and purple to mix together though, so I'm avoiding anywhere I might have a little bit of wet purple. I'm not putting coral down there. What do you guys think of the addition of that? I'm Liking it. Nancy said, how do you come up with ideas? There are so many ways. I take pictures constantly. I mean, I'm always studying art and looking for inspiration. A lot of my inspiration comes from photos. Um, why I'm drawing a blank right now, I don't know. And a lot of it just comes from playing. I like that lighter, really pale, very pink color in there too. So I think I'm gonna do— got some of my copper left here. But I want more. Lindsay said, are you using all watercolor? Now I'm not using any watercolor. This is all craft acrylic. And it's not watered down, it's just straight, straight out of the bottle. Oh, I think this copper— look at that, the copper is going to look really pretty on here. I love it. So I was going to add iridescent medium on top of this, but now I feel like maybe I don't want to do that. So I'm going to do something that's probably going to scare some of you, but I'm going into my black blue mixture. I want to kind of go around the edges a little bit. I'm tempted to put some of that iridescent medium on the navy background to see what it looks like. Hey, Michelle is asking, is there a way to rewatch from the beginning? So since we're still live right now, you can't restart it. As soon as I'm done tonight, you'll be able to come back to this exact same link, and you'll be able to watch the replay from the beginning, and then you can fast forward or do whatever you want. So I'm also going to add in— this is the part that I was going to say is going to scare you— I'm going to add in, I think, some lines back in here. I don't like that one spot. Um, these canvases are 6 by 6, I think. Yeah, I think I like that. Okay, what's your vote? Do I add the iridescent medium to the navy Or do I leave it like this? Let's, let's have a look at all of our pumpkins from tonight. Well, and the original. Everyone's saying yes, add, add. These are also fun. Well, now I'm looking at them and I just feel like the navy needs gold. All right, we'll try the iridescent medium. If we don't like it, we'll paint over it, but we're going to try it. I think I'm going to put just a touch of that blue mixture that I made in the medium, just so it's not too overpowering. Oh yeah. I like the iridescent on it. Okay, so I am going to take just a touch of gold. I just feel like it needs to like stand out a little bit more. I'm really wanting to add resin to some of these. That's a whole nother thing, but if you've ever done resin or wanted to, that, um, we also have some lessons on that inside of Tribe, so you can try that out at your leisure. Yep, see, I already like the gold. And I'm doing the same thing I did on that other one where I'm just kind of dragging it around those raised edges. Okay, now I love it. It's very magical. Okay, let me show you how you would put the words on. So obviously for this one, um, it wouldn't work with black ink because that's not gonna show up on there. I don't ever use these. These is these not is. It's just a stamp set. This is in my Amazon store, by the way. And then just regular black ink. I love this little guy. I think it's only like— it's either like $10 or $12 or $15. It's somewhere around there, and you're only going to ever need to buy one of them. So I use it all the time in my mixed media. So I love this. Oh yeah, good idea. Someone said, um, Tisa said put some gold around the edges. Good call. Before I'm done. And I'm just dragging that brush along the edge there. Good call. Thanks for that. Pauline, yes, the store is open. We did add a— we did add a Tribe Sister starter kit to the store today because I don't sell color wheels anymore. So we had to take those out and redo the set. So it comes with an apron, brushes, palette knives, and then, um, it comes with a whole bunch of Tribe Sister fun swag that you will get. So if you are joining Tribe, um, again, if you want to kind of continue this paint journey with me, um, the next step would be to join Tribe, and you get to continue to paint with me each and every month, um, all my new lessons that I do on a monthly basis, and then You also get access to the 6 years' worth of content, so that's over 195 tutorials plus technique sessions in our vault. We do devotionals, contests, critiques. There's so many things. So right now I'm just picking out my letters, and you can— like, I like to mix my uppercase and lowercase letters. I just think it looks fun. So That's what I do. And I never put these back in alphabetical order. I know someone who is Type A watching right now is probably cringing at my mixture of letters here. That would be way too organized of me to do. That's an L. Wow, you can tell I'm blind now. I have the reflection of the light. I thought that was a lowercase r. Here it is. Okay. Welcome, Michelle said. I just joined and I'm super excited. Congratulations. We are excited to have you. Megan did just drop the link there for you as well. So I just do one at a time and I don't worry about them being straight. I'm not trying to make them straight. Oops, I didn't get enough ink on that. Well, now I'm gonna have to wait because— so if you mess up like that did— well, it's actually— I didn't mess up, my ink pad messed up. You can come back and just touch it up, but we're going to let that dry before I try to fix it. Okay, I'm going to let that dry real quick. So while I'm doing that, I'm going to open it up to questions that you guys have about Tribe, and then as soon as this is dry, I will finish those letters, and we will be done for this evening, and we'll finish up tomorrow. The session starts at 4 because I have Emma's volleyball game tomorrow evening, and we will be doing our mixed media pumpkin. Laura said, can you lightly paint a lighter color your letter? Are you talking about like if if you wanted to use this. Let's try it and see. I don't ever put paint on these, but we can try it. Oh wait, you know what someone did? I think Helen did it while she was here. I'm gonna try this. This is my gold paint pen that I love. I feel like she asked if she could do this, but then I don't know if she did. I'm gonna put this gold on it. It worked! Okay, so that's exciting. See, great question. Now I'm gonna do something. Now I'm gonna put wonder on here. Should I put wonder or magic? This one is just so like full of wonder and magic to me. So that was a paint pen. So you could use any of your paint pens on there. You could probably do paint too, but I feel like they get like a little tacky. Let me collect my letters here. I think I'm going to go with wonder. Okay, this is going to be so fun. I have never done gold lettering before. Hannah said, in Tribe, do you give advice for starting a paint party business? So we have, we have some guest artists in there. My friend Heidi with Texas Art and Soul has come in as a guest artist to give tips. Obviously, I used to do paint parties, so I have shared some as well. I don't do like continual lessons on that. However, I was already thinking for this time of year. And no, we— our October is full already, but I'm thinking at the beginning of November I might do an extra session where we talk about how you can make money with your art, whether that be paint parties or selling locally or online. So I will give tips on how I run my paint parties. In there. Okay, so I'm just taking my gold paint pen, also in my store. It might be kind of faint, but I think it'll still be cute. Oh, that one's smeared. Boo. You know, sometimes this is just what happens. All right, let that dry. Come back to this one. We'll just go back and forth with our letters. What did I do with my G? There you are. There we go. I was using the side of my ink pad and I think it had dried out a little there. Now I don't mind the little like rectangle spots that show through from around the stamp. You can cut those and trim them if you want, if they bother you when they're on here. I kind of like the added texture of them, but if they bother you when they're on here, you can also just touch up your paint. What did I do with my C? I just had it. There it is. So if you didn't like that those little— I'm just dipping into that. My— you can just kind of come back and add, even if you let a little of the black show through, but maybe you don't want all of it. Again, that's just preference on what you like. And when you do this kind of background where it's just kind of mottled colors like this, it's kind of easy to come back and change. Okay, now we'll come back to the gold and we will be done for the evening. I think I got too much on my end. There we go. Someone was mentioning too, you could use a baby wipe to wipe these off. You can do that, or a wet paper towel would work. That one didn't stamp all the way. I'm going to fix it with an itty-bitty brush and just connect my R there. All right, let's look at our finished pieces and we will call it a night. Thanks for hanging out with me tonight. This was definitely fun to experiment and play with all our different colored pumpkins. Melinda, there was a supply list for the entire week. Provided. If you don't have it, it's inside the Tribe group, or you can sign up for the paint weekend. They'll email it to you. So here are— this was the original. I shouldn't say we made all of those tonight, but here are the 3 that we made tonight and our original. So let me know which one is your favorite now that we have them All finished. It's a hard choice. Um, Lindsay, the replay will be on YouTube tomorrow. It's on my Facebook page. And then if you are getting emails from us, we have the direct link in those emails. And then we also have created a, um, landing page. So there's lots of different ways that you can rewatch these. Megan just posted in the comments, if you guys save that link. It's called the Pumpkin Paint Week with Kristi Hubb. Everything— the Tribe Sister interviews, each paint lesson that we've done for the week— is all on one page along with the supply list. So everything that you need is there. Awesome, awesome. All right, thank you guys so much. Everyone have a great night, and I will be back tomorrow at 4 PM. For our final paint session. 11 AM is going to be our final Tribe Sister interview. And then I didn't get to it today. I don't know if you guys saw my post on Facebook, but I asked if anyone wanted to see a tour of the studio and planned on doing that today. And then our day kind of got altered a little bit and some things came up that prevented that from happening, which is par for the course for my life. So, um, we are going to do a tour of the studio tomorrow too, and that'll be just like a quick 10-15 minute Facebook Live to give you guys kind of a sneak peek and everything that goes on here. And you can see my, my mess and where all the, all the art happens. All right, so I will see you guys tomorrow a few different times. Talk to you then. Bye.










