Easy Christmas Tree Farm Sign Painting | DIY Holiday Decor for Beginners
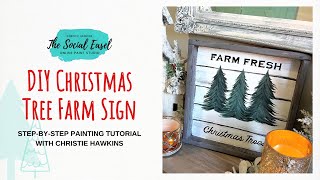
In this live DIY tutorial Christie Renee Hawkins transforms a simple 14" x 14" wooden box frame into a rustic farmhouse‑style Christmas sign. She begins by explaining the frame’s construction and offers low‑cost alternatives for beginners. Christie then applies a white base coat and creates faux wood slats using a dry‑brush technique with burnt umber, black, and white paints. She mixes her own “driftwood” stain from black, burnt umber, and white instead of using commercial stain. After the base is dry, she demonstrates how to transfer printed lettering onto the board using graphite paper, outlines the letters, and adds serifs. Next, she paints three simple evergreen trees using angled and fan brushes, showing color mixing (dark and light greens) and brush‑stroke tips for a wispy look. The tutorial concludes with detailing the letters and trees using black Posca pens, comparing Posca to Arteza pens, and offering encouragement to viewers of all skill levels. Throughout, Christie engages with live comments, mentions her Tribe Sister community, and provides practical alternatives for tools and materials.
Chapters
Okay, so this is an old wood, like, box frame that Corey made me several years ago. This paper doesn't want to come up, so I'm just going to show you what this is. All he did was take a piece of plywood and 1x2s. That's it. And he air nailed them together. So that's how simple the design is. I believe this is a— sorry, I think the interior is about a 12 by 12. Yeah, so all together the whole thing is 14 by 14. But that's what we did. If you don't have someone who can build that for you, or you can't build it yourself, you can find any anything like this. All these like little wood box frames, they have them at craft stores. So this is my easy way for you guys to do lettering if you are not good at doing hand lettering yourself or you don't want to attempt to try. Here's like a little cheat for you. So I just went in to whatever Word document you type up in, and I typed in the words farm fresh because I want those at the top of my sign. And then I typed in Christmas trees because I'm going to have these, and then we're going to have Christmas trees in the middle, and I'm going to have these, uh, that word, those words at the bottom. So I wanted this to kind of be like rustic farmhouse font and this more cursive-y. So you can just play with the different fonts you have. You can download fonts for free online. Find what you like for your sign, and then you just print them off. And I'm going to show you how we transfer those on there. So I'm actually going to start with that first. Oh, actually, you know what? No, I'm not. I'm going to refinish this a little bit more. Like I said, this is— had been painted probably 2 years ago, and it's just been in my basement. I thought it would be cute to make this look more of like it— like it had wood pieces. So I'm gonna do a quick fresh coat of white and then do some horizontal lines across it that are going to kind of give it the look of being a wood slat sign. So let me get my paint ready here. Thank you for sharing. So I'm just gonna get some white paint, and I'm just getting this— this is just like a chip brush, nothing fancy here. I'm not worried about what I get on the sides right now because I'm going to come back and actually touch that up. They're black right now, but that's not how I want the finished product to be. I want it to be more of like a wood brown colored sign. So we're going to come back and change all of that as well. So I'm just getting some white craft paint, just a cheap chip brush you can get at Walmart, getting another coat of white on here. And I kind of like some of the streaks to be left behind. Sorry, got a phone call coming in. So what are y'all doing today? All right, so we're gonna leave that. I'm gonna get like a skinny liner brush here. I've already got some black that I had left over here. I'm going to get a little bit of brown with that. Pauline was washing windows. She's taking a break. I would be taking a break from washing windows too. This is a lot more fun, right? Janet is finishing up her funky winter flowers, doing some crafting today. All right, so I'm gonna get a little burnt umber and black, just mixing them together so it's a little darker. And I've got this little liner brush here, and I'm not worried about making this absolutely perfect. I'm just going to kind of go across, and we're just going to give the illusion of some wood slats here. So I'm not worried too much about how they look right now because we can come back if I get a little thick in some areas. I can come back and change it and just add in a little bit of white. And again, I'm just kind of eyeballing. I did not do any measuring. If you want to measure, you certainly can. Hey, I did pretty good. They're just about all even. That one went up a little. We'll just come back and fix that in a minute. So I'm just going to go back with— I just grabbed an angled brush. You can really use whatever you want to. I'm going to grab a little bit of white and just kind of soften some of these edges. And with this, it's definitely okay if it pulls in some of that wet paint while you're doing it. See how that kind of softens that line up? Have you guys ever painted fake wood slats before? They're actually easier than you think. It's just a fun little effect to give to your pieces. You can do this on canvas too. This doesn't just have to be done on wood. And I love the look of like kind of driftwood. It doesn't need to be solid white. I may even purposely streak some other color back in here just to give it more of a rustic wood slat look. All right, if you guys will let me know in the comments, um, let me know if you've ever painted like this before or if you're new to painting this kind of style. I feel like the comments are delayed, and I just want to see if they're actually working. And hopefully you guys can still see what I'm doing. We've had lots of glitches lately, so it's not gonna surprise me if we're glitching again right now. I may have to get out of my screen and come back in. Because when I look up at the camera, I can see your comments. When I'm looking on here— all right, so I'm thinking I like the way this looks. Pretty fun. And then again, if you, you know, sometimes it's a back and forth thing. If you're like, oh well, I want it to show up a little bit more there, just go back in, add a little bit more in there again. You can decide how much, you know, all pieces of wood and how they meet up are all going to be different. I feel like when you go back with just a little bit more, it gives it a slightly more 3D effect because you've got the lighter grays on the side of it so it stands out a little bit more. And it's starting to look like we've got some real wood on the back of this board. Okay, I'm happy with that. I think that looks really good. Okay, and then I think I want my farmhouse frame to be a little different too. I'm just gonna mix my own little color here. I love mixing black and burnt umber and white all together, and you kind of get— I call it driftwood. You kind of get this brownish grayish color. And again, I'm just going over with this chip brush that I have. So you can see some of that darker color come through in some areas, so I'm not covering it completely. And again, you can make this whatever color you want. This is what I do instead of stain, okay? Instead of messing with stain, I make my own stain colors. And if this was raw wood— like, I had already painted it black, but if this was just raw bare wood you would be able to just brush this over and wipe it off, and it would have a more stained wood effect to it. Carrie, I'm gonna go ahead and do all the sides right now because I'm letting this dry, so it's just using my time wisely while I'm on a Facebook Live with you guys. I will come back and actually do this like interior section at the end when I do— when I have time to do some more detailing. This is just to kind of get this— change the color on our frame while I'm letting the inside dry. Actually, this is going pretty— I may not even have to wait to do that inner corner. This brush is actually working perfect to go right up against that edge. So I'm going to try to lift this a little bit so you guys can see without me getting paint everywhere. But you can see I've got that inside edge painted too. But I love the look of this because the paint just grabs the rough pieces of wood and it kind of decides where your paint color is going based on that. And we just want kind of an old rustic look here. That's what I'm going for anyways. And I'm gonna have to keep mixing myself some more paint. Oh, that spread pretty good. I like it so much better than the black already. Okay, I'm liking this color. Let's paint this edge here. It's amazing what little paint in your brush can spread when you're doing this kind of technique. It's almost like a dry brush. It's going much smoother than I thought it would. That's always a bonus. Thank you for sprinkling, Susan and Vicki. All right, we've got ourselves a nice little farmhouse frame here. I'm going to do a quick blow dry so that I can transfer my lettering on here. Now obviously I'm moving a little bit faster because I'm doing a Facebook Live, um, and I'm on a time frame to pick Sophie up from school. Preferably you would want this all to be completely dry before you go in here and try to do your lettering. So I'm just going to kind of maneuver around that. Thank you, Patty and Tamara. Let me know in the comments if you're new to painting with me, or if you're a Tribe Sister or a Painting of the Month Club member. What is your experience? So inside my group, I teach all different styles. It's not just one way to paint. We do just regular paintings like this and like this, and then, um, this is a floral that we have inside of the group. The Jar Full of Sunshine. This is one of my favorite sunflower paintings that I've done. Um, and then we do some crazy funky flowers that are completely different than that and not realistic, and we do some mixed media, and I'm going to show you some of that tonight. Um, I'm going to cut the top of this off. We do palette knife work. So really my goal in when you join Tribe is to kind of push you out of your comfort zone as an artist and, uh, try new things every month. Every time I learn something new, I share it with you guys. So when you're doing a transfer, if you ever hear me talk about transferring a template or anything like that, this is what you need to do it. You need graphite paper, the shiny black side down, and then I'm gonna lay my lettering over top of it, and I'm going to put it flush with the edge of my sign so I know it's straight. And then I'm just going to scoot it down just a tad. Okay, and then I am going to outline these letters. Now for me, I want to include the thickness, so I'm actually outlining the shape of each letter so I can get as close to this font that I've copied. Oh, thank you, Janet. We're going to have a lot of fun. And by doing the outline, this is going to allow you That was a little rough. To stay as close to this as possible. Now of course you don't have to do it this way. If you are good at lettering, you can just freehand it on there. I like doing it like this because I really want this to kind of look like one of those signs that you'd go buy at a craft show or something. But we're just gonna make our own. Mary, you could tape it down if you want to. I'm just used to holding mine. And then Christine said, could it be decoupage? You could— yeah, you could definitely decoupage it. It would not have— like, this is solid white, and it would look a little different than my background. So I kind of want it to look more rustic, like a hand-lettered, um, sign. So then let's figure out where we want our trees. Christmas trees. It would be cute mixed media piece. So I'm going to do the same thing here and just trace over my letters. With this, I'm not going to do the outlines I'm going to kind of let my marker, my pen that I'm going to use, and the width of that kind of help me with this. But now I'll just have these easy lines to follow. It's gonna be cute. Oh, awesome! Lisa said she's building slatted Christmas trees as she's watching. I can't wait to see them. Okay, so now I've got that placement and I want to go in and paint our Christmas trees. So I think I kind of want these to be a little bit softer. I've got this dark, this Hauser dark green. These are the same colors I used last night, by the way, when I did this. So these will look really cute next to each other because they're the same colors as well. If you didn't see that topiary, you can go back to my Facebook Live videos on Facebook and you can go catch that. Candy, I'm jealous. She said it's a great day for painting. It's snowing here in North Dakota. I love snow. I can't wait for snow. So I'm just going to grab an angled brush and I'm going to practice before I put this straight on my canvas. I'm going to practice on my mixed media pad and I'm going to show you guys. This is what I recommend doing until you like are sure you get your brush strokes the way you want them. So see, these I did the other day, just kind of playing around. What do I want my trees to look like? I know I don't want them that color, but this will give me a chance to kind of see here. Look how fast and easy these are. I definitely like this color better, so that's a little bit of a mix. I'm getting some of the dark green and light green on there. Let's do another one. Just give yourself a vertical line as a base, and then just a couple flicks this way. And if you curve up, you kind of get that little twist up on the side. So these are— again, we're going for simple, simple. This is just going to be a little farmhouse sign. I could go dark and put some more of this light color on top. We'll just kind of play with it and see. Fun little Christmas trees. What do you think? Um, Mary said, do you suggest the brush you're using or a fan brush that you've shown us before? So if you want this kind of style of Christmas tree that I'm doing right now with the little flicks out, I would recommend an angled brush. That's how I did all of these. If you use a fan brush— here, I've got one here, I can show you— you can do a couple different, different types of trees. That's what I was kind of playing with over here, and I'm like, I don't really like that, but I'll show you how. So if we want some like that, let's do one up here. I kind of start just using the edge, and then see how my bristles are separated? Just kind of staggering. You can spread them out more if you want. Sometimes wiping on this side of your palette will help spread them back out. So you can choose which style you like better. Which one do you guys like? Do you like the fan brush that I'm doing right now, or do you like the wispy ones? They're both fun, they're just a little different. There is not a template for the topiary. I just freehanded that last night, and they look cute either way. So some fun little Christmas trees. I'm gonna go with wispy for my farmhouse sign, but now you know how to make some evergreens. I think I'm going to pull a little bit of black into my dark green like I always do. So I'm just going to do 3 little trees. I think I want my point a little bit higher. I like that a lot. I think this is gonna look really cute. Awesome, Cheryl! I'm glad you learned something new. The fan brush is really cool for a lot of different things. So I will tell you, with this kind of technique, I do think your speed is important to get that quick wispy look like that. You don't want to go too slow or it just won't have the same kind of feel to it. What do you guys think so far? Are you liking it? This one got a little wonky over here. Okay, I like that better. Now I feel like I need to make this other one a little bit bigger. I'm glad you guys are liking it. So you want to always have plenty of paint in your brush. I like how they're overlapping too. I think this one needs to be a little wider down here. Let's have it fan out a little bit more. Now I need a little more wispy up here. All right, so that's my darker. Now I'm not going to rinse that out, but I am going to go into my lighter green. What do you guys think of the lighter green? I like that on there. These are so fun. I have to tell you, these are very relaxing to paint. So I'm gonna do this one first because I want my middle one to be in the front. Yeah, I think it gives it immediate depth to it. I don't think I'm gonna add snow. I think I'm gonna leave them dark. Because I want the contrast of the white background. And now we're gonna go in with our black Posca pen. Where did I set it down? Over here. My office is a complete mess right now. We got stuff everywhere. We'll have to do a whole blog post on all these Christmas crafts I've made with you guys and where they ended up in my home. So when we get our Christmas decorations up, you can see those. I'm going to blow dry this really quick just so I don't get my hand in wet paint. Okay, so I'm just going to go back over, and if you want, you can always like lay whatever your reference font is in front of you. I'm gonna go with the basic fill-in first, and then I'm going to come back and add the serifs. And if you don't know what serifs are, they're just the little lines that are added on lettering. Sue said she just got her Posca pens today. I love them. This is just a bullet point one, just a regular hair dryer. And remember, we're not trying to make this absolutely perfect. We're going for a rustic homemade look, and that's what we're gonna get. And if you have any lines showing, Um, from your transfer, you can come back and erase those later. I'm already liking it with the letters. So I didn't make, um, a stencil. This was— I just printed off a font, these words in a font that I liked, and then traced them on here. And I am sure there is probably a finer point Posca pen you could use for this, but I'm going to stick with this one. I think it's turning out even better than what I hoped it was going to. Janet, this is a frame that Corey made me. It's about 14 by 14. Where's my lettering? Pull this up as my reference here. Welcome, Karen, since you joined last night. Excited to learn and has never painted before. Awesome, we are excited to have you. And listen, you guys can be at any level. We have every single level inside of the Tribe Sister group. So whether you are brand new starting out, whether you've been painting a while, you may be doing paint parties or selling, um, your individual pieces, we have ladies in all of those categories. So I'm just doing a rough run-through of the letters, and then I'm going to come back and thicken my letters up as I come down. Okay, so now I'm going to come back and thicken these lines up. I'm loving the thicker lettering. We are almost done. This is a black Posca pen, not a Sharpie. A Sharpie has a little bit of a different finish. It almost leaves like a coppery look to it, so I like paint pens better than a Sharpie. Sue said, can you use Arteza paint pens for the words if you wanted them in another color? Possibly. Allison and I were just talking about this this morning, and I'll probably do a Facebook Live comparing the difference between the pens. I feel like the Posca pens have more pigment in them, whereas the Arteza ones are a little more translucent, which works great in all the ways that I've used them up to this point. But I prefer my Posca pens, my white and black especially, if I want anything to be really bold, because I feel like they stand out better than the Arteza ones do. So I like having both of them. Okay, I think I'm done. What do you guys think? So I hope you guys learned some awesome Christmas tree tips to practice and then make yourself your own little farmhouse sign. So yeah, I can't wait to get this up in the house. It's exactly how I wanted it to turn out. And I didn't have to go buy it.










