Easy Hand Painted Christmas Ornaments | Acrylic Painting Tutorial for Beginners
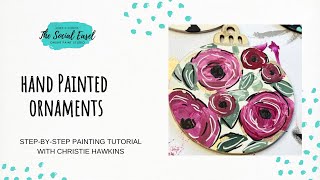
In this informal, step‑by‑step YouTube tutorial, Christie Renee Hawkins of The Social Easel demonstrates how to turn raw wooden Christmas ornaments into personalized acrylic‑painted decorations. Using leftover acrylic paints, she shows how to apply base coats (white, black, gray) with round brushes, mix colors for whimsical floral motifs, and add details using a skinny brush for polka‑dot effects, a DecoArt Harlequin stencil with a makeup sponge, and a gold DecoArt paint pen. She then outlines designs with black and white Posca pens, discusses protective sealing for durability, and offers creative variations such as florals, polka dots, stencils, and personalized initials. Throughout, she shares practical tips on brush reuse without rinsing, managing drying times, and planning ahead for Christmas, while encouraging viewers to experiment with color and design.
Chapters
Hey guys, it's Christie with The Social Easel, and I'm back for another fun little Christmas project. Today we are going to do some wood ornaments, and I'm gonna paint florals on them. I've got all this like leftover paint that I just can't let go to waste, and I was trying to figure out what I was gonna do with it, and then I thought, oh yeah, I've got those wood ornaments. We can paint some cute little florals with these colors on these ornaments and then add some detail work with our Posca pen. And today I thought we would do a few little wood ornaments. I've got these in my Amazon store. I can't remember, I think you get like 40 in a pack, so they come in little bags like this. Little strings you can tie on them, or you could do cuter ribbon. So go ahead and sprinkle the video with your friends so they can do some Christmas crafts with us. So I think I want to do these a couple different ways. They're just raw wood right now. I think I want to paint black on some of them, white on some of them maybe, and then leave some bare and, um, just paint some flowers on them. And then we're going to outline them with the Posca pins. So, all right, so let's— I think I want to do one white, maybe a couple black, and then maybe one bear. We'll see which we like the most. I'm gonna paint some fun little whimsical flowers. So on my palette, I've still got some red that's wet, some of this like deep magenta color. But I'm thinking some even teal flowers would be fun. Now if I have too much black paint here, we're going to spread some on another one. I'm going to leave the top part of that ornament blank right now. Works great as a little handle while you're painting it, and then at the very end we can finish it. I'm thinking gold or silver, or maybe a bright color like red. That's the fun thing about this. You get 40 in there, right? Yeah, 40 pieces. So you can do all kinds of things. And I was just thinking florals because I love doing them, but you could do little Christmas trees, little snowmen, whatever you want. Wanting to show you some different seals that you can put on these because these especially going on a Christmas tree, being packed with your ornaments and stuff, they're probably going to get scratched up. So we want something to protect them. And me personally, I probably want them to have a little bit of shine. All right, I think I'm gonna— I'm changing my mind here. I've already got all this black in my brush anyways, right? Let's wipe a little bit of that off, and I'm just going to turn this gray right on here. We're going to do gray on the back of one, and it doesn't all have to be blended in either. I kind of like it with the mixture. Look, kind of going in a circular motion kind of gives it that little rounded effect. What do you guys think? I'm just using my, um, my round brushes from my store. All right, so we got some base colors here. We may start with the white one just because it doesn't matter if some of these colors blend with the white, but I'm going to switch to a smaller brush here. All right, let's just grab some of this pretty magenta here. That is a pretty color. I'm just going to do some random ones all around. All right, let's add some green. Maybe a little bit smaller brush for the green for the leaves. All right, let's add some fun little leaves. Maybe some in a different color too. Let's do some dark, and these don't all have to be the same. It's just a little whimsical floral that we're doing. I think I want a darker one here. Maybe one, maybe a couple little flowers. I think I like the rounded ones better. Maybe a couple together over here. So I'm trying to keep my paint pretty thin on here because this is really just the beginning, um, and then we're going to come back with a Posca pen and add some details inside of here as well. So let me know what you guys think so far. Carry that around to the side here. I kind of just like the white and the pink together already. Let's use our little liner brush. So I'm switching to a little bit smaller brush just so I can do a little bit more detail work here. Let's go in with a little black. I love it. Can you guys see that good enough? Isn't that pretty? Simple little flowers. I'm loving the pink with the white background. Let me know what you guys think. Shoot me up some hearts if you like that one. We're going to set that off to the side over here and start on a black one. I think for this black I'm going to have to pull in a little teal. Add a little white to my green, get this lightened a little bit. Right now I'm just putting some random leaves all over. Probably doesn't look like anything special right now, but we're just going to add some layers to this one. So we have some greenery in the background, different little leaves poking out from underneath the flowers that we're going to add. We're going to do each one different and just kind of play and see what we like. So if you don't have a small, um, detail brush set, I do recommend this one that I'm using. It's in the store as well. Going to get some of my red in here. Sorry, I was holding that totally off the screen when I did that. Let's do it again. So I went straight from my red to my white because it's okay for the colors to mix, right? Just little rosettes. So I'm just adding a little water to my black that was getting dried up here. Okay, y'all, I want some teal on this one that's black. So if you haven't seen me do my little polka dot trick, I'm going to show you. I take the end of a paintbrush, a skinny paintbrush, and dip it in the paint I want so I can add little polka dots that I don't have to worry about the brush pushing down too hard. Isn't that fun? Super easy way to do some little polka dots without them getting too big on you. You can change the sizes, just push down or hold down, make it a little bit bigger. Isn't that cute? I'm liking that one too. I'm having a hard time deciding right now just between these two which one's my favorite. Okay, I think on this one I want to do some bigger polka dots in the back. Maybe some white too. Super random, not overthinking it. I'm kind of thinking I want to do just one big flower in the middle of this one. Maybe let's just play with it and see. We'll see what we come up with here. And it's— so see how I'm using that, that teal underneath there? It's mixing in. It's just kind of given almost like a mauvy color to my flower. That one's fun. Maybe come in and add a little white. And then maybe a couple little— maybe a little black in the middle there. I'm going to do some white polka dots on here too. Works better with the craft paint. This is really thick acrylic that I'm using right now. The polka dots work better with the craft paint. We'll just make the white ones bigger. Let's do another— let's paint another white one really quick. I mean, how fun is this? I really feel like I could just sit here and do this all day. But this is a great little thing. Look around, what do you have around your house? If you've got some leftover paint and you're like, oh, I could add a couple fun little flowers to something. These are just so quick and easy. How long have I been on here? 30 minutes? Not too bad for getting a base coat and a couple of them done. All right, we're gonna let that one dry. We're gonna save this for Harlequin. What if we did some teal flowers on one? I mean, you know, teal is my signature color for the Social Easel, so kind of makes sense for me to have some teal flowers. All right, I'm going to take a little bit of this teal and pull just a tiny bit of that magenta in there. It's going to give it like a purpley color, lavender. Look, isn't that pretty? Just to change the color up a little on the inside of them. Let's add some leaves on here. That needs to go in there. I kind of want a little bit darker teal. I'm just going to add some fun little white brush strokes back here too. Let's take a little of that teal and white, make it a lighter color. And we got to get some greenery on here. You can see I did not rinse first. I just left whatever teal was in my brush and went straight into my green. You don't always have to rinse your, your brush out. Just a little loose, a little messy. Let's have that one kind of overlap this. That one's going to be fun. Then I still need a little dot of black in the middle. Actually, let's do this. I'm going to take a little bit of this red with this black. We'll have a reddish black, almost like a plum color. What do you guys think so far? We're getting ready to do the Harlequin one, then we're gonna come back and add gold to the handles. Handles, is that what you call them? I don't really think that's the right word, but we're gonna do the garlic Harlequin stencil on this one. It's It's a little tacky right now. Let me go blow dry this real quick. All right, my palette is dry right here, so this is a safe little spot for me to put a little bit of black. We're not going to need much. Now I'm anxious to see if any of your opinions change when we add the detail work to them, because it's going to kind of bring out some more fun and color. And then you're going to have another choice to make here. So I'm going to use my— this is my Harlequin stencil from DecoArt. Use a makeup sponge and kind of tap off some of that extra black because we don't want it seeping under the edge. Scoot this up just a little. And just pounce. You don't want a ton of paint on there because if it gets too saturated and too wet, it ends up seeping underneath your stencil. That's fun, huh? All right, let's let that dry a little. Let's come back with our gold paint pen, and we're just going to fill in the top here. My favorite gold paint pen, super shiny. Oh, it's so pretty! Isn't that gorgeous with the gold on it? I feel like starting this early is the only way I would ever actually have anything ready by Christmas time to do for decorations. Like, literally, you know, I was trying to do all that Halloween stuff and then life happened and of course none of that got done. So I have to start like a month and a half ahead. I think these might be a little hard to part with. This is my DecoArt Premium Gold paint pen. Let's do the gold on this. Let's see what that looks like. And that's so much easier than trying to paint. Look how good that looks. Just make sure your paint is completely dry if you're doing this with a paint pen, cuz you don't want wet paint stuck on your paint pen. I'm going to have to come back and get this. Oh, I think I got it. Scoot that with my pen. I know that gold What color do you think on the Harlequin? I'm kind of leaning towards hot pink myself. A little gold mixed into that one. I like the gold on the black. I'm known to get carried away with the gold. It's hard to stop once you start. Let's let those all dry and come over here to this one. Did like an initial on here. I'm just gonna do a C for Christie because it's easier. And then I was thinking do a little letter like this, and then maybe some like flowers, little itty-bitty flowers off to the side. Or I could outline it in the gold. Not my best C, but it'll do. All right, let's go back with our Posca pens. Now this one's pretty dry. These pens are Posca pens, and I have them in black and white. These are just the bullet-shaped PC3M is what they say. What do you guys think? Do you like it, or did you like it before the lines? It's okay if you liked it before the lines too. Everyone has a different preference, but just like, let's do a side-by-side of lines and no lines. So just gives a little bit more detail and definition. I think they're so fun, just little scribbles in here. I just do little squiggly circular lines. I'm not really overthinking it too much. And here's the thing, if you do something and you don't like it, you can always paint over top of it. So just keep that in mind. Let's do something different on this one. What do you think? See, that got a little paint on it. It's a little wet. I'm trying to be careful around the middle. Can you see them all? Okay, now this one's still wet. I'm going to avoid where the wet paint is. Decide if I want to add any flowers to this or just have a cute little initial ornament here. All right, I think we're done for the day.










