Easy Painted Pumpkin Ideas | Floral & Leopard Acrylic Painting Tutorial
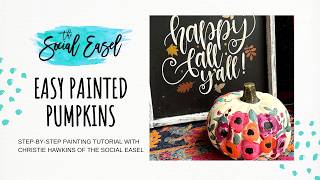
In this tutorial, Christie Renee Hawkins demonstrates how to transform inexpensive styrofoam pumpkins into festive fall décor using acrylic paints and paint pens. She begins by showing the pre‑painted pumpkins she saved from a previous season and explains why no primer is needed on the already‑painted surface. Christie selects a palette of warm DecoArt acrylic colors (Berry Cobbler, Cherry Red, Warm Sunset, Tiger Lily, Laurel, Thicket, Hauser Dark Green, Antique Gold Yellow) and outlines her workflow: first applying loose, messy floral motifs with brush strokes, layering colors, adding stems and leaves, and then letting the paint dry. After the base flowers are dry, she introduces a quick leopard‑print technique using yellow/orange blobs, black outlines, and metallic gold highlights, emphasizing that the pattern can be customized in any color. She then shows how to accent the finished pumpkins with Posca paint pens (black, white, gold, teal) for additional details such as squiggles, leaf shapes, and center dots. Christie discusses finishing options, recommending DecoArt DuraClear sealants in matte, satin, or gloss, as well as UV‑resistant acrylic spray, to protect the artwork. Throughout, she offers practical tips—using newsprint to protect the work surface, mixing white into colors for depth, embracing imperfect brush strokes, and the flexibility to adapt designs for Halloween, Thanksgiving, or porch displays. The tutorial concludes with both floral‑styled and leopard‑print pumpkins, showcasing the versatility of acrylic painting on non‑canvas surfaces.
Chapters
We are going to do painted pumpkins today. So I just got these styrofoam pumpkins from Michaels last year. I think I actually got them on clearance at the end of the season and was saving them for, um, this season. Last year I played around a little when I got them, but never actually like finished it and wasn't 100% thrilled with what I did. So you'll see this is wet right now because I already started painting over it, but we're gonna do these loose florals, which you've seen me do these types of flowers a lot. We're going to do them on pumpkins today, so it's going to be similar to kind of this style, um, and then I've got some different little brush strokes and leaves and flowers I've been working on in my sketch pad. So as far as your creativity takes you is what you can do with these painted pumpkins. I love just finding different surfaces to paint on other than canvas, so most of the paintings that I teach can be painted on anything, different surfaces. It's going to be these fun florals. Because I've already got some of these painted on, this is going to help me be able to show you the next step faster. I'll show you how to paint these flowers, and then once these dry, I'll show you how we're going to take paint pens and add some detailing over top of it. I just started playing around with this one because everyone loves a little leopard print every once in a while, and it is so easy— easier than what you think— to to do a leopard print pattern. So this one was done super fast, again drying just a little bit, but I'll show you how easy some leopard spots are to add. Of course, you can do these in any colored leopard spots that you want. So those are going to be the different pumpkins that we are going to do today. So on these two, I'm just going to flip them around and paint on this side. So I'm gonna switch the screen now to where you have your overhead view so you can see what I am doing. And I'm just going to grab a piece of newsprint out of my pad here to put down because I know I'm going to make more of a mess. When I'm doing these pumpkins. Try to save myself a little work later cleaning off my countertop. Okay, so I'm going to leave this side. I've got my— I've just got a variety of different warm fall paint colors here from DecoArt: Berry Cobbler, Cherry Red, Warm Sunset, Tiger Lily. These are all fun warm colors. Um, and then for my greens, I've got Laurel and— where did my dark green go? I've got Laurel and Thicket, which I love, but I do have a dark Hauser Green as well that apparently got knocked— there it is. I was like, it was just here. Hauser Dark Green glitter, in case we want to add glitter. And then to finish this, for a sealant, you have several different options. If you want it to stay matte— like, this is matte right now, it's not going to have any shine to it because craft— this craft paint dries matte— you can just do the DuraClear Ultra Matte from DecoArt and cover the whole pumpkin. It's going to help protect it. If you want it shiny, get a high gloss. If you want it in between, you can get a satin. So there's different finishes for whatever style you want that to be. You can also get a spray, which I'm not going to do in here, but this is a UV-resistant acrylic matte spray. Again, you can get this in different finishes, um, and that will help protect your pumpkin. Um, Anna, I do not prime first. There's really no reason to prime. This is already a painted styrofoam pumpkin, so it's already got a layer there. The paint is not going to absorb into anything. The only reason you ever need to prime something is if paint is going to absorb into the material underneath it. Okay, so those are some of the colors we've got. I've already put some on my palette over here. Oh, I forgot the yellow. I have like an antique gold yellow as well, and we're just going to kind of play with a mixture of these. I'm going to go ahead and get a little bit more white on here. These flowers that I'm going to show you are super easy, and now we're just doing some warm fall colors. So the thing I love about these flowers is they are super messy and you really can't mess them up. So I'm just going to start with— we'll start with this like berry color. This is straight out of the bottle. I usually do a couple coats, and we're going for like circular-like shapes but like not a perfect circle. So I'll do a couple in this color and then just start adding in some of our other colors as well. So you'll see you're probably going to want a second coat. I usually add white in with my paint as well. Let's add another little one here, which I'll show you in just a second. And I'm just going to go ahead and go into like my reddish orange. I've got red and orange on this one. I think maybe I'll add a couple little berries and then some greenery too. Okay, let me rinse that and I'm going to get some more. I need to get a little bit more of my orange on here. Let's add some little orange blossoms in here. Maybe get a little bit of that Antique Gold with some of them. And then I'm going to leave room for a little bit of greenery. In between. I'm going to rinse the orange out of that round, and I'm going to grab a little bit of white. I love the white added to these berry colors. It makes like a pretty, like, mauve almost. Now I'll be coming back over with some of the darker too, but I like how this is going to create some depth for us by adding the dark and light colors of that berry. So easy enough so far, right? We are just making messy, messy little blobs that we're going to turn into flowers. Just regular craft acrylic, DecoArt Americana. Okay, and I'm gonna rinse that wipe off my excess, and I'm going to do the same thing in my red and my orange flowers. And a little bit of white goes a long way. You don't need a ton of it. I love it mixed with the orange too because it makes like almost like a peachy coral color. So I'm going to switch to a really small round. This would be like a 1, almost like a liner brush. And I'm going to go in my dark green and just kind of lightly drag some stems out that we're going to add some leaves too. And then also just some cute little leaves. So just one line down, curved, another one where it meets, fill it in. And then I'm going to come back with some lighter green to add to it. So you just have to kind of get used to painting in the grooves of the pumpkin and know that it's not about, you know, perfection and it being perfect. It's going to have some little bumps and stuff in it. Those are little things that you are really not going to notice on the end finished product. Let's add maybe some little daintier leaves on this one. It's already starting to look so cute. Let me know in the comments, which do you prefer? The flowers like I'm doing right now, or do you like the leopard print? We may have to go over in time just a little bit for me to show you those. Let's give a couple little stems for our berries. Look, I'm loving how that's looking. And these are really not that hard. We're doing some simple shapes for the leaves. Again, practice in a mixed media pad until you get the hang of it if it makes you nervous to go straight to a project. And all these leaves don't have to be the same. You can do different styles mixed in, maybe some longer, skinnier ones. And these would also be cute done— like, if you love Halloween and you do a lot of decorating for Halloween, you could do these in Halloween colors as well. Okay. So I already know I'm gonna like this side of my pumpkin so much better than my other side, so I'm only going to show you the other side to show you like some of the pinwork technique. So while this— the green is still wet on these leaves, I'm going to go into a lighter green, or you could even just add white to your Hauser Dark Green. And come in and add some brush strokes of that lighter color. You can decide how much, you can decide if you want to blend it all the way or if you like the brush strokes showing. I personally like the brush strokes to show. I like it a little messier. Pull this one out a little bit more. See, you can just change your mind as you go. Maybe pull another one over here, but they're super fun to paint on. They're going to be so pretty on the front porch. I can't wait to show you guys my front porch this year, um, what Corey and I built last year for our front porch. We made a full leaf-like frame that goes around a new addition that we added on to the front of our house, and I loved it. It was all things fall, and I think these pumpkins are going to be so cute added on to it. So can you see the difference of the dark and the light together? Versus just the dark. That second color makes such a big difference. Yes, this would be great for a Thanksgiving, like, table setting, a big centerpiece with some difference, because you can get them in all different sizes, all different size pumpkins. You could add metallic to it. I have some gold that I used on the back side of this, gold paint pens or gold paint, either one. Okay, so we're gonna let that dry for just a little bit. I'm gonna get some black paint. So I have this— I'm just going to use this one for today, this Yellow Oxide, but you can also get it in the DecoArt, like, Antique Gold. So I'm going to get some of this, and I'm going to get some metallic gold just because I love metallics. Which is pretty much the same color but in a metallic. Like, the metallic gold is almost the same as like that mustardy yellow. So I'm going to put them right next to each other on my palette. So again, you can do this in any color you want. I'm going to start with the mustard-colored yellow, and I'm just going to start making blobs. I think I got a little close together on the other side, so we may spread these out just a little bit more. And again, you're going to vary them in size and how close they are. To each other. Some can be long, some can be more circular. Cover up any scuff marks that may have happened on your pumpkin from storage or just being at the store, whatever. Okay, so that's step 1. Easy enough, right? I'm gonna actually just set this brush down because I know I'm going to use it again for my gold. Okay, so now we've got our black. And the trick for the leopard print is that you don't want all these black lines— I'm going to go over these again because some of them got mixed in with the yellow— you don't want them to necessarily all connect. There's little openings, so you're not coming around the entire blob with one outline brush stroke. Black little blobs in between. Now, and it's okay if they mix with the yellow a little bit. If you want it to stand out more or have more of a contrast, you can just let that dry and go back over top of it. And it feels a little funny at first. It may even feel like it looks a little funny to you, but once you start getting a cluster of them all together, then that's really where the leopard print starts standing out. I even painted a leopard print birthday cake years ago when I used to do cake decorating before I taught painting for one of my friends, and he wanted a leopard print cake, and I did this same method except with the alcohol and the colors for painting on fondant and added some metallic gold to it, and it turned out so pretty. We had a big feather sticking out of the top of it. He loved it. Let's add maybe a little black. Start adding that in, maybe some thicker sections around some of the areas. So that's your very basic leopard print guide. And then I would come back— I'm just going to wipe off this extra yellow in the middle. I'm going to dip into my metallic gold and just add a couple brush strokes of the metallic gold over top of my yellow, so it's going to give it a little bit of shimmer. If you really love shimmer and even glitter, you could let this dry completely and come back and paint glitter over top as well to even add some more fun and dimension to it. Just remember, if you do something like I pulled in a little bit of black right there, if you make a mistake, it's not a big deal. One, try to fix it if you can. If that doesn't work, let it dry and you can paint over top of it. So that's our leopard print. I don't know if I can lay that without it rolling so you guys can still see that one. We'll test it. So fun, right? And easy peasy. Okay, so back to my other flowers. Um, I usually put black in the center of mine. You can choose whatever colors you want to, but I'm going to put some black blobs on the inside now. And again, it's still a little bit wet, which I love, because then it mixes with some of these paints too. And it's not about them being perfect circles either. So you could leave it like this and let it dry. Or you could come back in and add more layers of color to your flowers, just avoiding So just kind of play with it, play with flowers and your mixed media pad, see what style you like. Do you like adding the black? Maybe you want to try a different color center. Okay, so that is our wet paint side. And now this side I have let dry enough. Obviously I don't have my centers in it. I can put those in really quick because it's not going to affect the paintwork that I'm going to do. Okay, so these are a little bit more basic. See how my, like, leaves are not nearly as cute on this side as they were the other side, I don't think. So if you haven't used Posca pens before, um, you can get other brands of paint pens too. I just happen to really like Posca. This is the PC-5, which is more of like a medium tip. You can get a skinnier one, and then you can get super skinny paint pens in a different brand, um, and you can decide what kind of lines and accent marks that you want on here. So I'm just going to quickly just kind of go around, almost like little squiggly scribbles. You can use as your accent marks, you can do white or black. So that's with the white and then the black. Originally I had way too many black lines and it was just like too much for me. I like more of like the outside and just a couple strokes on the inside. You could also do gold paint pens if you want gold accent marks in there. So there's just so many different possibilities that you can do with that. If even if you don't like doing the greenery with your, your brushes, you can do it with paint pens. I'm gonna test this one. No, not that one. This is an Arteza paint pen, so it's a little bit different. It's more transparent than the Poscas are. I don't like that at all, so no for me. Um, I would either use a Posca, which we can just add some fun teal in here. It doesn't have to really be green, right? You can do some leaf shapes, you can do some swirls. So the Posca pens, it's literally paint in a pen, so it's going to have the same finish I mean, personally, I kind of like the teal with that, but I really like my colors on the other side that I did today much better. So I'll probably end up painting over some of these extra things to make it match the other side. So there's your— there's your two pumpkins. Hopefully you guys enjoyed that.










