Easy Sand Dollar Painting Tutorial for Beginners | Acrylic Step-by-Step
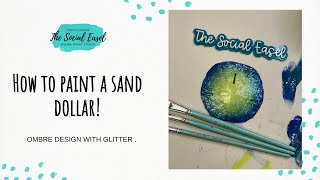
Christie Renee Hawkins paints a sand dollar in acrylics, then shows how to adapt it for beach towels, Stanley cups, and ornaments. She tests sealing options like DecoArt polyurethane varnish and Krylon UV spray, explaining how each affects glitter and holographic finishes.
Chapters
I'm going to just wipe off any excess debris or sand that may have still have a little bit of a residue on there. And you could paint both sides. I'm just going to paint the top today. Oh, yay, Teresa! Oh, I love that. Um, she said she received her Lighthouse beach towel this week. I'm so pleased with the quality and bright colors. Those are my girls' favorite beach towels, the ones that I designed, um, for the store. We have 3 different, um, patterns— not patterns, 3 different, um, paintings that I had printed on beach towels. They are so soft and comfy, and they're not overly huge. Like, I just think they're like the perfect size beach towel. But I do want to design some new beach towels for this season. Do you guys think this one would be pretty on a beach towel? I think it might be. It's really fun. So I just have to kind of play with the, um, the shape because obviously that's a big long triangle. Um, but yeah, let me know if, uh, if there's any paintings that you're thinking of, of mine, and you're like, oh, she needs to put that on a beach towel, and I'll, I'll see if I can go design that. So I'm gonna do this. I'm just playing. Remember, this is my first time doing this, so we're just experimenting here. I kind of want this watered down a little bit because I want to see that star shape in the middle. So I'm going to water down my yellow just a bit. That's pretty because you can still see that shape underneath. Oh yeah, the Casitas too. Yes, Nicole, the lighthouse. Is on beach towels, my flamingo, um, and my sailboats. Those are the 3 designs we have right now. I do have several other beach scenes that I just have to play with that could go on them. Um, but yeah, I think, uh, Carol, uh, Carla, sorry, said she'd love to have the mason jars on a beach towel too. So I'll work on those designs. Patricia said the dragonfly design would be cool. Um, it would. That's a square. See, I have to get creative here and how I'm going to, uh, to work these designs in because the new palm trees that I just did, um, that will be the prettiest beach towel ever, all those bright colors. So I'm going to do the same thing here. I went from straight paint to my sand dollar, but I'm going to go back, add some water in my brush. This is just another way to make blending a little bit easier too, if you have a damp brush. But usually I don't recommend putting a ton of extra water on your canvas because it just dilutes it too much. But for this, this is going to be so cute. I'm already loving how that looks. Yeah, the Belize Casitas definitely need to go on a beach towel. I agree. So I'm coming back with a little of my yellow again. So these are just choices you make. You don't have to do it exactly like me. I kind of want that yellow all over that star design, but you can just kind of keep playing, keep blending. That is so pretty, and look how soft that is. You can't even see the brushstrokes. Looks like it's like glow-in-the-dark right now. Christie Renee Hawkins was asking, do I coat the sand dollar with something first to seal the surface? I did not, so it is soaking into the sand dollar, which I actually kind of like because it's, it's helping with the blending process by doing that. Now you could seal it after to protect it and keep it from fading if you want it to be glossy or matte. So again, I'm just in straight paint right now. Let's touch up a little green around here really quick. Okay, I'm going to grab a little water. So usually when I'm doing backgrounds like this, if you see a background like this in one of my paintings, Most of the time I'm coming back and I put a base coat down and then I'm coming back for a second coat to make the final blending process. So there's two reasons I do that on canvas specifically, because blues, especially blues, purples, reds, they're all really transparent. So sometimes it just takes two coats. I'm gonna go a little bit lighter. That's looking so fun. Pretty, pretty. Okay, let's do the darkest. I'm gonna go around the edge. I thought the radial kind of glow blending was perfect for a sand dollar since it's already a circle. So I'm going to push it in first, kind of pull some of that extra paint off, and then come back with just a little bit of water. Use your finger to help blend it out too. I'm a big fan of finger painting. Don't forget, if you're watching from Facebook, don't forget you can share this with your friends if you think they would think this was a fun summer project. Oh, I kind of like that. That's creating like a teal there. So I wipe off the excess water on the side of my cup. I'm not going from like dripping water straight to the sand dollar. Change your brush strokes up so it doesn't just look like a circle of rings. That is so pretty. And then you could put someone's name on it, write a name with Posca pen, or if I had actually remembered what trip this was from, I could put, you know, what beach we were on and what year it was. Um, so just a fun little keepsake you can make with your sand dollars. But again, you could do the same thing on a rock. And then if you want to seal it— that is just so fun looking— if you want to seal it, there's lots of different options that you can choose. I'll just show you a couple here. Um, you can do— this is a polyurethane varnish from DecoArt. This one is ultra matte, which means it'll have the same finish that a sand dollar does. So it'll stay matte. The other version of that, and this is one of my favorite ones, is the high gloss. So you've got two different finishes you can choose from, and these just brush on. I can go ahead and seal it for you so you guys can see. You can also use DecoArt's DecoPodge, and this is a glue, a sealer, and a finish. So this is so multi-purpose and so handy to have in your craft room, your art room, whatever it is. I use this in my mixed media pieces. I use it to seal, and I use it to finish a piece too and create one, um, one finish for the entire painting. So maybe if you use some metallic or use gloss and use different kinds of paint, you can finish it with one whole finish and everything will look the same. Um, what else do I have over here? This is fun. Um, you could add glitter to this if you wanted to. Um, this— I thought I had one more. Maybe that was it. Um, you can also do a spray. So Krylon makes several different acrylic sprays that are meant for this. It's gonna— this one is UV resistant, so if it's going to be outside or anything, it would protect from UV light rays. It's non-yellowing, so you don't have to worry about it changing. They have lots of different finishes. And again, you're— it's not— one's not going to be better than the other. It is preference. Do you want it to be glossy? Do you want it to be matte? Do you want it to be satin? So you kind of choose. I think I am going to add some glitter to this because why not? I can always make another version with no glitter if I choose to. This is one of my favorite ones from DecoArt. This is the Holographic Illusions. I use it all the time. Um, let me show you a finish. So you guys remember a couple weeks ago I was talking about painting Stanley Cups for winners of my Tribe Sisters? By the way, if you're one of those Tribe Sisters, I did not forget about you. They're, they're taking me longer than I planned. But I want to show you this one. I only painted one side of this one so far. How pretty is that? And I put— I haven't sealed this one yet, but I put the holographic glitter that I just showed you over top of the painted design, and then I'm leaving the cup matte so that you can see the difference. And then I'll seal it and it will protect everything. So I just think this one turned out so pretty. So let's grab a little glitter first, and then I'll seal it, and then we will be done for the day. So you could put this on your palette if you want to, but I'm just going to put it straight on my sand dollar, and if I need more, I'll get more. Doesn't matter what brush you use. Um, yes, I'll show you this sealer that I'm using. You could actually use either one of these on those cups. Either one would work. I wanted to do a spray version just because it's faster and I don't want there to be any chance of brush strokes showing through, so I'm using a spray. I just love glitter. Not everyone does, and that's okay, but I do. Make sure and push it through those holes. Are you guys glitter fans or anti-glitter? It's a very controversial conversation in The Creative Space. I mean, come on, that's so fun. And this will— you saw that it went on white, but it will dry clear. And Pamela said it's so pretty, can't ever have too much glitter. I love it too. All right, we got some glitter fans on here today. I'm gonna do a quick blow dry because I want to finish this so I can show you how to put a complete sealant on there. So now that that's all dry, you can see all the white went away and it's just this really pretty glittery finish. Okay, so for the sealer, what do you guys think? Should I do a matte or a high gloss? Let me know in the comments your vote. While you're voting on that, I'm going to show you what I am using to seal the Stanley cups. Um, I had this for a long time and I went and compared all the different things, um, and I hadn't used this before, so it was just in my drawer, and I tested it out on my, um, my cup to make sure I liked it first. So let me show you that finish. I'm really, really happy with how it turned out. So this is my own personal cup that I was kind of testing on. So you see it has that little bit of sheen, but when you're here in person, you really can't see a big difference on the actual cup, so it doesn't really change the finish of it that much, but it's protecting all the paint from scratches, from fading. You would obviously still hand wash it, and it doesn't have to be food safe because unless you're licking your cup, you don't, don't need to be worrying about all this down here. I tape off any part that your mouth would possibly touch when you're drinking, but these have lids and straws, but I still taped off the metal at the top, and then I taped off my handle so I didn't get any spray on that, so that I could just do the surface. I just love how fast spray sealers are. So what do you guys think? You like it? So that's what you can kind of see the difference here. This one's got a little bit of a sheen to it, and it dries super fast too, um, 15 minutes or less. That one dried really fast. Um, so that's what— and I could use that on this right now too, but I don't want to breathe in all those fumes inside. I think I'm going to go with the high gloss. And again, you could put this on your palette if you want to. but I'm just going to put it directly on the sand dollar. Um, Cheryl said, I'm curious to know, since you use the glitter already, would the matte finish make it look different than the high gloss? So you could test it and see. I mean, the glitter is still gonna show through and be glittery, so I don't know that it would dull that. But I have not— I don't ever use a matte sealer. Um, like, this hasn't even been opened yet, so, um, I don't know. You would have to test it out and see what the finish would be. Maybe I can put a little— we'll just test it out right now. So I'm just going to paint these brush strokes in glitter, let those dry, and we'll put matte over top of it and see. Lisa said, for the cups, can you still use brush-on? Yeah, absolutely. You can use either one. I just prefer a spray because it's faster. Okay, so I'm doing high gloss. You can see I just kind of drizzled some on there. I think it would be so pretty to have like a bunch of these mixed in with some different little different shells and, um, maybe some like wooden balls or different things like in a basket together. I think that would be really pretty, or like a centerpiece if you have like a beach-themed room or something, to have a centerpiece with these. Um, someone was asking about a string. You could— I mean, it would— I don't have a hole on this side. You could either put a string through the middle here or one of the outer sides if you wanted. So obviously this is wet right now, so it has a really wet shine, but it will dry, really high gloss too. And that is also going to protect it from any scraping, scratching, roughing up the surface. It kind of looks like a turtle shell right now. Okay, I'm gonna pull you down closer here. So this is our— let me shake this up really quick. This is the matte. Just dipping my brush straight into the bottle because I just need a little bit of it, and we're going to test it on my brushstrokes here. I'm gonna blow dry this real quick. All right, we'll see. That was a fun little experiment because you can still see the shimmer of the glitter with the matte finish. I don't know if you guys can see that, so I'm going to pull you back in. So see, you still get that shimmer. But instead of the whole thing being glossy, the paint is matte, but your glitter is still shimmering and showing through the matte finish. And then this is our super high gloss Sand Dollar. Oh my gosh, Tina! Yeah, you definitely need to get to painting. Um, Tina said, this is so pretty. I live in Florida but never thought to paint any of the sand dollars or shells that are so readily available. It's a whole new thing for you to paint on. And you could do like— you could even do this. I should have done this. Um, I mean, I still could and go refinish it again, but this would be so pretty even with just like a silhouette of like palm tree, like black silhouette of palm trees on there, like you would go buy in a gift shop in Florida. All the painted seashells and sand dollars they have, you can do them yourself. You don't need to buy them from the store, and then they're even more meaningful. Awesome. Karina said she lives in Florida and she's been collecting them, so she's gonna have some to paint. You're welcome, Cheryl. That was fun to test out. Now we know. Um, Glenda said if it was used as a Christmas tree ornament, would you leave the back as is? I was thinking a ribbon, but it would turn around. Yeah, that's up to you. Um, you— I mean, I guess if I was, I would either do the back painted, well, especially if I was like messy like I was on here. Um, or you could like paint it white and then put like in Sharpie or a paint pen like your memory. And write words on the back too. So pretty.










