Easy St. Patricks Day Gnome Acrylic Painting Tutorial
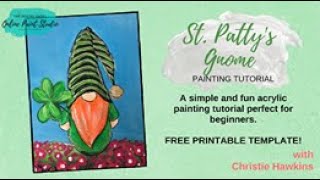
In this 2021 YouTube tutorial, Christie Renee Hawkins, owner of The Social Easel, guides viewers through painting a St. Patrick’s Day‑themed gnome using acrylics. She begins by offering a free printable template and explains how to transfer the design onto an 11×14 canvas with transfer paper and Sharpie. Throughout the video she showcases essential, budget‑friendly supplies—including mixed‑media pads, craft‑grade acrylic paints (DecoArt and equivalents), and affordable brush sets—while emphasizing practical tips such as loading the brush with enough paint, letting layers dry before re‑coating, and adding white to increase opacity. Hawkins demonstrates color mixing for greens, oranges, and skin tones, applies a second coat for coverage, and adds finishing details like black outlines, gold metallic accents, and optional spring flowers. Interwoven with the step‑by‑step instruction are personal reflections on how painting serves as therapy for her, her belief that creativity is a God‑given gift, and her mission to empower women through online classes, a Facebook community, and a subscription group called “Christie’s Inner Tribe.” The tutorial concludes with encouragement for beginners to face their fear of painting and enjoy the creative process.
Chapters
Hey everybody, my name is Christie Hawkins and I'm the owner of The Social Easel and I teach women how to paint with acrylics online. And we are gonna do a fun St. Patty's Day gnome. So you guys can get a free template so you can do this at home. You can download— sorry, it's on reverse, so I'm going to be switching my angle here, but you can download your own. So grab that. I'm going to show you how to transfer this on also. So if you haven't ever done a traceable template, all we're going to do is you just print this off on your printer. You don't have to change the size of it or anything. It's just going to print on 8.5 by 11. I'm doing an 11 by 14 canvas and we're just going to kind of position our gnome on there where we want him. So you've got your template, you got your canvas. You can also do a canvas board, which is— they're cheaper than canvas, and it's like a flat hardboard instead of the canvas that has a little bit of give. Another thing you can do— this is— I'm just going to show you guys this. The one we're doing is going to be much, much cuter. This was my rough draft that I was working on, but I drew the template up, and I like my template a lot better than my freehand one. So that's what you you guys are learning today, but that's a kind of a sneak peek of where we're going with this. This is another option. So everyone that paints with me online, I highly recommend they get one of these. It's called a mixed media pad, and I'll show you what this looks like. It's basically— you can kind of see all these pages— it's like a big sketchbook for painting. So most sketchbooks, regular sketchbooks, you can just use pencil, charcoal, that kind of stuff in. They don't take paint. And the paint will seep through the pages. So I love this thing. It's called a mixed media pad, and I have every— all the supplies I'm talking about today, by the way, are in my Amazon affiliate store, so you don't have to worry about trying to remember what I'm talking about or write it down because it's all in there in my getting started supply list. But mixed media pad, you can paint in this. This is an 11 by 14, and what I love about it is you can practice. So you can just see some of my practice pages here, and if you mess up, it's not a big deal because you can just turn the page and start over. And then if you like something you do— this is one of my Christmas paintings— since it's an 11 by 14, you can pull this out. It's got a perforated edge. I'm just gonna go ahead and take this out so I can show you. Well, I think I am. There we go. So it's got a perforated edge and you can just tear it out. And like I said, it's 11 by 14, so then all you have to do is go pick out a super cute frame with glass and frame it. So if you do love something that you did in your mixed media pad, it doesn't just have to stay in there. You can take it out and frame it. So this is one of my favorite supplies and one of my first must-haves that I tell people, um, to get. So I just want to kind of show you that because it's like a big practice sketchbook for paint is what I like to call it. Okay, so another supply that you need to transfer on is— this is called transfer paper. Now I have a big roll of it because I taught so many local classes, it was easier for me. You can also buy this in sheets and it'll be called transfer paper or graphite paper. And you can get it anywhere. You can get it at Walmart, Hobby Lobby, all that good stuff. So I'm gonna lay this down on my canvas, shiny black side down, and I'm just kind of feeling where my canvas is right now so I can get my gnome where I want him. Then all you're gonna do is just trace right over top of your lines on here. And the little shamrock that we have on here— again, you guys don't have to worry about freehanding this, but it's basically like 3 little hearts put together, so it's a cute little simple shape here. Is anybody else obsessed with gnomes? Because I kind of am. I did, I did a trio of Christmas gnomes and for a Christmas painting, and then I did my Valentine's gnome, changed it up a little, and now I'm doing a St. Patty's Day one because they're just cute for every season. And I love— I make each one just like a little bit different. You can change their hats and their hair. So most of my gnomes are— they usually have like the white-gray beard. But I usually do like a gray-white beard, and I thought it would be cute for our St. Patty's Day one to have a red beer. I said beer. Beard is what I meant to say. We're gonna have a little Irish gnome this time. Okay. So get this out of the way, get our template out of the way, and then I'm gonna show you guys what it's gonna look like. And of course I forgot a Sharpie. I'm gonna grab a Sharpie really quick because I like— you could leave it like this, but here's what, what happens if you do. Sometimes when you start painting, when your paint goes over these lines, you're gonna lose them and they don't show through. So I like to do all of my templates in, obviously, with the transfer paper, and then I go over them in Sharpie. So the reason why we can do that is because all of these lines that we're going to have on here, at the very end, after we get all the inside colors filled out, and we're going to come back over and put some black, like, light outlines around the edges. So we shouldn't have to worry about our Sharpie lines showing through the final painting. So over the past 6 years, I have taught thousands of women how to paint, and I would say 95% of the people who have painted with me have never painted before. So I try to break things down into very simple, easy-to-follow steps. We're not using any fancy supplies, so you guys probably already have this stuff because you're crafters, but DecoArt is my favorite brand of paint. So we're just using craft paint. So same thing you use for a lot of your other projects. That's what I use in my painting classes. So it's not intimidating. But yeah, I like to break things down for you in simple, easy-to-understand steps because I want everyone to be able to find the joy in painting that I have. And I love getting to share that with other people. You know, painting for me has helped me through a ton in my life. And, um, you know, I was sharing this with Brooke when we were together, um, was that last week in North Carolina? And we were talking in the group, and for me, painting has been, you know, like therapy for me. So I have struggled with depression and anxiety my entire life since I was 15, and this has always been my outlet to help me kind of deal with that and kind of get away from the world and just be in, in this place. And, um, I'm a firm believer that God gave us all creativity, even if you don't think you have it, because we're created in his image, right? So he is the original creator, and if we're created in his image and he is a creator, then we are also creative. And some of us just need help pulling that out. So that's what I love about what I get to do, is help you guys find your creative side, even if you think you don't have it, because I know you do. And I'll have to warn you, I talk a lot, so if you don't like talkers, I may not be your person to learn from. So I talk a lot while I'm painting. and the ladies in my group know that. So we basically are just hanging out and painting together. I'm pulling my— I pulled my beard down a little bit too far. So I'm going to show you this because this doesn't matter if you don't even like stay in your lines. Oh, I hope my dogs don't go crazy here in a second. Can you guys see that? So this was my original line and then I drew my beard too far down. So I just made my lines lower. So you can go back and change things if you need to. So I have a super messy palette because I just reuse mine all the time. So I was using this yesterday. I was teaching a spring truck that we're doing. So ignore these colors. We're not using all of these, but I'm just repurposing this plate. Someone asked the name of my group. So I own the Social Easel. That's where you can find me. That's my Facebook page. And then I have a painting membership also, and that's called Christie's Inner Tribe, and that's where women get to paint with me each month, like step-by-step, start-to-finish paintings. I have women in my group at every, every level and everything in between teaching paint parties, and they've never picked up a paintbrush paintbrush before. So I teach all levels. So we're going to start with painting the background first, and I'm going to show you. So this is what my plate looks like. I've got this— like I said, this is Peacock Teal, is the blue I'm using. Any blue you want to— it doesn't have to be, have to be this. And then white. So look how much paint I have on my brush though. So this is really key. This is like my number one tip if you haven't ever painted before, is make sure you have enough paint in your brush, because if you don't, your brush strokes are not going to look the same as mine, and you're going to get frustrated because it's too thin and it's not covering the way that mine is. So you guys see how that's a lot of paint, right? So when I taught local classes, you know, I'd say this at the beginning of class, and then I'd come around and start helping people And I'll show you now that I've gotten this off of mine. This is usually more of what it looked like when I came around to people. Can you see just— it's like just on that very edge. So that's how much paint people would have in their brush, and then they go to start painting and they'd be able to like make like 2 brushstrokes and then that would be it. So you want enough that it glides. See how this is gliding really smooth? It's not tugging. If it starts tugging or you start seeing like the canvas grooves coming through, then that's your cue to know you need to get more paint on your paintbrush. So hopefully that makes sense to you guys. Now I'm, I'm a little bit messy when I paint. I'm not— I am Type A in some areas of my life, but when it comes to painting, usually not so much. So you will see me overlap these lines a little bit. And this is what I was talking about earlier, why we want to use Sharpie when we're putting our template on there, because when I do this and that turquoise goes over top of that, I'm still going to be able to see those Sharpie lines through there. And if I didn't have them there, I wouldn't be able to see my original transfer lines. But I know I can go over these lines because I know by the time I get to the shamrock this is going to be dry. And when you're working with acrylic paint, once something is dry, you can paint over it like anything you want to. So this is why I love acrylic, because it's very, very forgiving. If you do something that you don't like while you're painting and you're like, oh, I messed it up, it's ruined now, it's really not, because you can literally paint over anything. So I say all the time to the ladies that paint with me, let it dry. If you get frustrated or you mess up, let it dry. Don't try to fix it, um, while it's wet, because what will happen is it just creates a bigger mess for you. So let's say I dropped some orange in the middle of this blue right now. If I tried to fix it while it's wet, that orange is going to blend with the blue, and then I'm going to get this like brown color because they're opposites on the color wheel. Um, so we don't want to do that. But if I let that orange dry and then come back over top of it, you're not even going to know that it was there. I have found if you can like rest your arm while you're painting, that helps a lot. And then sometimes when I'm doing like something like if I'm going along the lines, I'll even hold my wrist if they feel kind of shaky. I'll kind of hold my wrist while I'm doing it, and it just stays your hand a little bit. And I want to see your finished paintings too, so we have a free Facebook group where you get to share work from the tutorials that I teach, like on my page and stuff. And then that group also is— if you are wanting to learn to paint, there's some tips and tricks inside of there that you can go back and play with too, because once you start doing it, you're probably not going to want to stop. So I had to talk through this, but basically I want you to see that it doesn't matter, like the direction I'm going with the paintbrush. I'm just going all over the place, so there's no right or wrong to how I'm doing this background. And again, I have enough paint on there that it's like blending easily for me. I'm just kind of filling it in. It doesn't need to be one solid color. I like for there to be brush strokes in it. And if you want it even more, you could get like a little more white on there. So a lot of my backgrounds are like this. I was looking to see if I had another one in here to show you. But like, I'll pick up a little bit of white and just kind of pull that in just to add some texture and contrast in the background so it's not just one solid block of color. This is a 1-inch flat brush. I do have this in my Amazon store too, but if you're just getting started painting, instead of buying individual brushes— because I don't want you guys to spend a ton of money on your brushes— because I paint with like super cheap brushes. I don't have anything fancy. Okay, but inside my store, this is— I have that individual one. So if you want a 1-inch, you can have it, but there's a brush set in my store called Addie's Art Set, and they're these white-handled ones, and I want to say it's a 6-piece. It's either a 6-piece or an 8-piece. I can't remember off the top of my head, but it's gonna give you all the basic brushes you need to be able to paint the way that I paint. So it's gonna have your large flat, it's gonna have an angled, it's gonna have rounds, filberts. So it gives you a variety of paintbrushes. And I want to say it's somewhere— you know, it's Amazon, so sometimes they change prices— but I want to say for that whole set of brushes, it's only like $15, maybe less than that. So that's what I would recommend. Or there's another brush set in there too, which is what I started doing paint nights with. When I did these locally, and it is from Michaels, and it's their Artist Loft brand, and it's a 10-piece set. And like I said, this is what— like, when I started doing paint nights, I would just go in and buy sets of them at a time. I only really used 2 brushes out of the sets, so I have a lot of extra, but, but it's good basic brushes to start with. So don't go buy a $20 paintbrush. You don't need it. So The first thing I'm gonna do— try to keep this on here for you— I'm gonna paint the body of the gnome. And like I said, you're gonna see a little bit of blue at first showing through, but I'm not gonna stress about it because I know it's probably gonna take a second coat. And this is an 11 by 14 canvas. And so when you're painting, another little hint about acrylic paint, you don't want to layer up your wet paint on wet paint. So what I mean by that is when we put this first coat on here, you may say, well, that's really transparent, it's see-through, I don't like the way that looks. Just let it dry. That's— you're gonna hear me say that a lot. Let it dry and then come back to it, and we're gonna put a second coat on. Because if you do it while it's wet and you try to add more paint to it, it's gonna get thick and gloppy, and you're basically just scooting your paint around the canvas. It's not actually giving it another good layer. So I'm gonna make his body this lime green color. Let me see what this is called. This is Sour Apple by DecoArt. I just realized I missed part of the sky, so we'll come back and fix that too. Can you guys see? Okay. So I'm just going around trying to avoid the beard area, but like I said, if you get a little over that line, don't don't let it stress you out. So you just want it nice and smooth. You don't want this super thick because the thicker it is, the longer it's going to take to dry. So I'm going to show you up close so you can see that's a little bit see-through, right? But I'm not going to worry about it right now. I'm going to let that dry and I'm going to come back to it later. Um, all right, so I'm gonna let this dry. I don't want to do the orange and the beard right now because I don't want it to mix with that green. So I'm going to jump up and start filling in his hat. Now I'm using a filbert brush for this. It doesn't matter what size you use or what style for this. Um, you can use a round, you can use a flat. This just happened to be the one that I had, and I like it because it picks up a good amount of paint and you're not having to like— you're not having little streaky lines. So you just kind of want to, um, just judge it on how big your space is that you're filling. It's really funny because the dogs are terrified of the cat. The other day they were all in my office and the dogs came in there because I have, uh, well, I have 3 daughters, but my youngest had come home from school and, uh, she had a really rough day and she was crying and she was sitting in my lap. And whenever that happens, the dogs have to come and check on her and, you know, see what's going on. Well, they had come in there and then Oreo, which is my cat, decided to come in there and then they were trapped because she blocks the door and hisses at them and they can't get around her because they're scared. And she doesn't even, she doesn't even have claws in the front. So she can't technically hurt them, but she hisses at them and waves, you know, swats at them. So they're in the room and they're trying to get out, and she's on one side of the doorway and the dogs are on the other, and they're just slowly scooting around, keeping, keeping their eyes on her to make sure she doesn't lunge at them. It's pretty amusing. When we first got our newest dog, Oreo just stayed upstairs. She wouldn't— because Paisley's really big, we just adopted her less than a year ago. And so Oreo literally just stayed upstairs and wouldn't even come down on the main level of the house. And now she's decided she owns the house and the dogs should just go away. And now, now they battle over the couch, who gets the closest to us. Okay, so I'm going to show you what I'm doing, talking and painting at the same time. So I'm just filling this in, but I'm getting down to this skinny part right here. So I'm just going to set this down. Yeah, I'm just gonna set it down for a second, and I'm gonna grab a smaller one to just fill in that little space right here. I haven't decided what color we should make the little puffball on the end. Of course, every— you guys can make this completely your own, and you can use this gnome template for any season. So just keep that in mind. It doesn't just have to be for St. Patty's Day. You can change it up. Okay. So I'm gonna leave that for right now. Oh, I didn't tell you that color, by the way. That's Holly Green, and you guys don't have to use these exact colors. I tell— I do give color lists when I teach, But I tell people not to get too hung up on the color lists because one, it's your painting, and two, depending on what you have in your local town or where you order from, it's going to be a different brand. So you've got DecoArt, you've got Michaels Craft Smart, you've got Apple Barrel from Walmart. I use all of them and there's comparable colors in each one. So I just tell people to use my original reference photo as a guide and and then pick what colors you like the most. So I've got dark blue, fuchsia pink. Oh, gold glitter paint. Good one. I may have to go grab— I think that's— I think that will be cute. Gold would be super cute. I've got some fun gold metallic paints I can use too. Okay, really quick, see how I left this area underneath my shamrock there? I forgot to fill that sky color in. I'm gonna do that really fast. Okay, so I've got this other green that is Festive Green. And you could, if you don't want to buy like 3 separate greens, you can just buy 1 green and then just add white to it to change the color of it and add a little black to it if you want a darker green. So don't feel like you have to buy all these different bottles. Now, I, you know, most of you are probably like me and you probably get a little obsessed with all the fun paint colors and you just want to buy them all. That's how I am anyways. I go into DecoArt, and for me it's like being a kid— or go into Hobby Lobby, and it's like being a kid in a candy store picking out all my new colors. I just look at them and then just grab my favorites and then try to figure out what I'm gonna paint with it. Okay, so this bottom part of our gnome is dry, so I can go back and put a second coat on. And hopefully you guys can see as soon as I do this how much more coverage that has. I'm going to lift it up here in a little bit too. So can you see how much by letting that dry and then putting another coat on, it gives it better coverage for us? So if you're looking at the hat right now, you can see all the streaks and the brush strokes in it. So we're going to go back and put a second coat on that too once it's dry. So that is still a little bit wet, so we're just going to rest that. I'm going to get a smaller brush here. I don't like that one. I'm just going to get a small round, and I've got this festive green color that I'm going to make my shamrock. Another tip, if you have colors that are transparent blues, purples, greens, a lot of them really. When you put one coat on, you can still see your brushstrokes through it. So obviously you can wait, let it dry, do a second coat. Another thing you can do is add a little bit of white to it. So you guys can download the template for this so you can paint your own, and then you can come back and watch this video again and and kind of do this step by step. So again, I'm just doing green right now, but watch what happens when I add a little bit of white to it. I'm gonna hold this up so you can see the difference. I add just a touch of white and it makes it more opaque, so it's not as transparent anymore. So just a little bit of white does wonders for your paint. These are just craft acrylic paints, so DecoArt, just regular craft paints, no special kind or type or anything. When I teach in my classes online, instead of teaching like this, holding it up and kind of talking to you guys, I I still talk to you because I always talk while I'm painting. I have a camera that does an aerial view, so you get to be right on top of the canvas and see exactly the brushstrokes that I'm using and everything. So you're not having to try to squint and like see what I'm doing. It's all like right there for you. I think someone asked what, what size brush I'm using. This is just— I believe this is from that Addie's Art set. I think this is a number 1. I'm just grabbing a little bit of white again. I also like adding white to it because it gives it some like streaks in the paint. Because I don't really like things to just be like a solid color. I like them to have a little interest to them. So how's that looking so far? I know we have a lot of green, but we're going to be adding some colors on it. I meant to say this at the beginning, so this is what your template looks like. If you don't have transfer paper or you don't want to go get it Another really easy thing you can do is just get a pencil, scribble on the back where the lines are, and it's putting graphite on the back of this. And then when you lay it down and trace over the lines, it will also transfer that image onto your canvas. So if you don't want to buy one more supply, that's a little cheat around that. Now we're gonna jump back. I know there's a lot of jumping back and forth. But hopefully it'll help you guys see how this kind of starts coming together. So I'm going to go back to the dark green and put a second coat in here because this is dry now, and then it's going to cover up all those brush strokes that you were seeing. Can you guys see the difference that that makes? I'm going to be real careful going down here. I might be mad at myself for doing it. I'm going to try to do it without the skinny brush. It's easier when you're doing the second coat because you don't have to have as much paint. So I can just barely touch down there. I've got a little dry piece of paint on here. All right, so let's do the beard. I love watching these come together. They're so fun. I'm gonna start with a round. This is a number 4, and I always tell people with rounds, depending on the brand that you use, it really makes no sense because this is a number 4 and it's super skinny, but I have a number 2 in another brand and it's big and fat. So just base it on like what area you're filling in, whether you want a really skinny brush or or if you want something with a little bit more meat to it so it can hold more paint. So I'm grabbing a bunch of white, and then I'm going into my orange. I'm going to show you guys how much paint I put on here again. It's loaded up, so not so much that it's like dripping, but it's pretty loaded up so that we can spread the paint easy. And this is my first gnome with an orange beard, and I love it. I love it with the, the contrast. Of the green. And again, you could do this with just the orange, or you can add a little bit of white into it. And I just kind of keep spreading as I go. So this orange covers pretty well. We may want to add a little bit more to it. I'm gonna grab a little bit of white. I still have the orange. On my brush, but I'm just going to add a couple little like white streaks in here because I like it. Again, I kind of like there to be brush strokes in it so it kind of actually looks like a beard and not just one solid thing. Don't mind my animals eating behind me. You guys like the white in there? I'm liking the beard. I think it's so cute. I have to put some— you know, I'm gonna put some grass on here really quick. It's really bothering me that he's just floating in the air right now. Now, I didn't bring all my paint colors in here. Usually I teach in my studio, but there's really not until I get another table set up in there. There's not a good spot for me like this where I can show you upside down and talk to you at the same time, so that's why I'm in my kitchen today. But this is what— this is a good example of what I was talking about. Once something's dry, you can paint anything over top of it. So this is all blue all the way down here. I'm just gonna drag this across and give them some grass to stand on. Maybe add a little white to it. And right, you would never know that I had blue underneath there. And I'm just picking up some different greens, so I pretty much have all the greens on my brush right now because it doesn't matter, like, if they need to be a specific color. Hey, remember when I messed up earlier and did that little spot of green down here, now it doesn't matter because I have grass over top of it and it was going to be green anyways. So a lot of times when I do those little— we call them happy accidents, like Bob Ross says— a lot of times when I do that, I let them go and I just keep moving through the painting, and then I'll come back and fix it later if I need to. Sometimes it ends up fixing itself and you don't even have to worry about it. Don't you like it with the grass and the different colors? I like how it's a little bit darker up underneath. And then I think I'm gonna pull in a little white with my lime green, so I'm gonna do a little color mixing here. So I'm always mixing my colors too. Don't feel like you have to use what's straight out of the container. And this is another tip: if you can still see your transfer lines or something, again, just adding white to it is going to help cover those. I'm going to get a little bit more of the lime green. Let's pull this over top. So he's coming down on top of the grass a little bit more. This will stand out more when we add our outlines around this. Now I'm going to touch up my beard on the end. So you can go back and forth, and if you cover something up that you need to fix, you just— you can right now. If it's— this is not super thick, so I can kind of get away with it. I still may need to come back in a little bit and add more orange to it once it, once it dries. But this would be really cute. What I was thinking and I may, if you guys are patient enough to wait for me to go grab some fun little spring flower colors. When we get done with the gnome, I may come back and show you guys how to add some fun little flowers down on the bottom just to brighten the painting up, and it will show you another little fun technique that I have. I love flowers. If you go look on my page, you'll realize that I love flowers. It's in almost all of my paintings. Okay, so we've got— I've got to go grab the gold anyways, right? So I can grab some of the spring colors out of my studio too. We're gonna do his skin tone color, which is gonna be— this is Coral, Coral Blush, or Coral, either one. They're pretty much the same. I'm gonna go back to my small round, and let me show you guys this too. This is just another little— don't feel like you always have to get clean water when you're painting. Now, not that you should be as bad as me, because I do not— I am no example of taking care of your brushes the right way, because I leave them in the paint water, and you shouldn't do that. But when you're rinsing— so this is all like murky green water right now, but I know I can still use it and rinse my brushes in it, and I don't have to worry about that color transferring to my painting, because I'm going to take a paper towel. I've rinsed my brush really good, and then I'm gonna squeeze this brush in between a paper towel and make sure all that excess water is out of there so it doesn't transfer to the painting. So yeah, make sure you do that. Make sure you're drying your brushes off in between. So I'm starting with white first where this skin tone is going to be because that's gonna cover the best for me. And then I'm going to go back and add the, like, skin tone, the coral to it, but I mix the coral and the white together. One hand is maybe a little bit bigger than the other, but that's okay. So I've still got white in my brush and I'm just going to grab a little bit of the coral here. That's too much. Let's mix it on the plate first. You don't need a lot of coral, just a little bit to add to the white. And then we're going to do the nose. Now with the nose, I do like to have some variation in there, so I usually do like a little bit darker underneath. So I'm going to grab a little bit more coral and go underneath here. And then on the top, I'm going to grab a little bit more white. How's that look? You guys like it so far? I'm going to go over my my shamrock really quick. And then we're going to start adding stripes to the hat. But this is— see how much faster this is on the second coat because that base coat is already down there for us. See how that's starting to get filled in here. And I'm just gonna pick up a little bit of white, just make these fun little accent marks around the shape. So they don't have to completely stay white, they can blend just a little bit. And we're gonna let that— the skin tone colors, we're gonna let that dry. I think the nose is fine. I don't think I'm gonna add a second coat to that, but the hands need a second coat. So we're gonna let those dry before we do that. So we are gonna add some stripes on. So the stripes are fun because they don't have to be anything too specific, and it's okay for them to be wavy and not straight because it's a hat and it's bunched up and all that, all that good stuff. So I'm just kind of making my lines. I'm just dragging my brush. So you want to get plenty of paint in there, and then I just start on one side and I'm just kind of pulling across. Another thing I recommend to people when they're painting, and I tell my students, is to be sure to take pictures while you're painting because it's very easy for us to be super critical of ourselves and pick things apart while we're painting, and we don't really see things like it's going to be when it's finished. But when you take pictures of it, you can see where you need to add something, or maybe one color is brighter here. You just see things differently. So always, like, take pictures during the process, and it will help you look at it a little bit different and kind of get a different vantage point on it. You guys like the stripes? It already makes it so much cuter, doesn't it? And I like the freedom in it that you're not trying to make it perfect. These lines do not have to all be identical. I'm just kind of pulling them to the edge. I'm not too worried about how they're hitting the edge because I know I'm gonna put a black outline over top of this. Let me turn this really quick to make sure I get my angle right on here. And I try to stagger those stripes when they're coming down that little side part of the hat, just so it helps break that line up. Even more. I'm thinking it will be cute if I add some white stripes in here too. Don't you think white will be cute and help it pop? This is what I love about painting too. So if you look at the beginning of this, and if you were following me since the beginning, you may be thinking, I don't know if that's really gonna come together. I can see through things. This is what I love about painting because you have to trust the process. And I tell my students all the time, it may look ugly while you're doing it. It may not be pretty. Don't compare it to what the finished product is going to look like because you have to get there. You got to go through the steps to get there. So trust the process and know that we're building. So we're building these layers on the painting, and usually the last 10 or 15 minutes is when the painting comes together. And it looks finished. But all along the way, you're probably in your head wondering what in the world is going on with it. So just know you're not the only one that feels that way. That's normal to think that, but just trust the process. Keep moving through the steps. Trust each next step that I'm saying, and it will all come together. So I am going to put white here first because we're going to do gold but again, I want it to have like a base coat. So we're going to do a little white. That's actually pretty cute with the white on there. And then we'll add some little white stripes in. And these don't even have to be super solid. They're going to be— I'm using a skinnier brush, so I'm using a liner brush. These are also in my store. If you do decide to start painting, I really recommend getting liner brushes because they make doing skinny little lines much easier. So I'm just going underneath each one of my lime green lines and just pulling from there. We'll see. I'm kind of doing this with you guys for the first time. The idea was in my head but not completely out on canvas yet. These lines get so much easier the higher up you go. He's so cute. Since I've got white in my little liner brush, I'm going to go ahead and use this just to do little quick highlights around my gnome. I always like to do white highlights in most of my paintings, so you'll see that, and it just adds just a little touch of like whimsy, gives it a little more whimsical kind of touch to it. Sometimes it just starts pulling the painting together, just having those extra white brushstrokes in there. That good so far? All right, if you guys want to hang tight, I am gonna go grab my gold paint and a few spring colors for flowers, and then we're gonna finish off the painting. So we're gonna do like a little fun gold ball at the end of his hat. And then I'm going to show you some really quick and easy— they're like abstract flowers, but you'll see them in a lot of my paintings because they're just really fun to do and they look super cute. So I'm gonna prop this up so you guys can look at it while I run and get my paint colors, and I'll be super fast. So you're not gonna need very much paint for each one of these colors. I'm doing like a lavender. This is Purple Cow. It's one of my favorite colors of purple from DecoArt. This one's Dragon Fruit. Pink Peony is another really good pink. This is just yellow. This is a really bright one. This is Primary Yellow. So I think we'll use those colors. I already have coral from his hands and his nose. Oh, don't let me forget, I need to go back and put a second coat on his hands. This needs to be shaken up some more. This is a new bottle. This is the metallic I'm gonna use. It's called 24-Karat Gold Extreme Sheen by DecoArt. Sometimes you got to shake your paint up. If it settles too much, then it separates. So you guys can make this completely your own, and I look forward to seeing what they look like. So get creative with it. You may come up with some super cute ideas that I didn't think of. So I'm just gonna— I'm getting my coral, like, skin tone color again. So before I forget, I'm gonna go ahead and fill this back in. Sorry, someone asked— let me go back. Ellen said, is it expensive buying the paints and the brushes? It is not. So these are just craft paints. So if they're regular price in Hobby Lobby, I think they're like $1.29. Piece, but every other week they put them 30% off. I have a few sets of DecoArt colors in my store, so if you want to buy the sets, I think it makes them a little bit cheaper too, to give you a good base amount of colors to start with. And then I have some brush sets in my store that, you know, range from $10 to $15 for a set of them, so you don't need to buy expensive brushes. You can just buy a cheaper set. All right, should we go ahead and add— let's do— oh, let me get the gold on there. Let me stay focused. We're gonna put the gold on, and then I'm gonna come back with black, and we're gonna outline, because this is what really finishes him off, is adding the black outline around all of the shapes. So I'm just getting a little liner brush and I've got my black here. It is a good idea— usually I do not say to add water to your paint, but when you're doing the black for the outlines of stuff, I do add a little bit of water to it so that it makes it nice and thin and it allows you to get these thin skinny lines that we want to. See, I already forgot what I was doing. I mixed the black, forgot to do the gold. We're going to go ahead and outline them in black and I'll come back for the gold. So when I'm outlining, I don't just do hard, like solid black outlines. I kind of make them light and wispy. So I'm just going to kind of lightly pull along these edges and it doesn't have to stay connected the whole time. So it's okay for it to kind of pick up and then drop back down. And the lines don't even have to go exactly on the original lines. So sometimes my outlines are a little bit outside of the shape, sometimes they're inside the shape. We're gonna go ahead and put a little around where that ball is gonna be, and then I like to do like little extra lines too. We could add some little extra black lines in the hat just to kind of make it look like it's all slouchy. Start seeing how that's coming together. I'm gonna get a little bit more— my black's drying up on me— just make it a little bit thinner. Just add a couple little lines in here. We're almost done. Have you guys had fun watching the painting come together today? I hope so. Hope I can add that gold inside the little cotton ball. Oh, I love this gold! We're gonna have to add this somewhere else in the painting. It's so pretty. I also love metallics, and I love glitter, and metallics and glitter are in a lot of my paintings too. I'm gonna add some gold to his beard. Why not? Let's make it shimmer a little bit. That's so fun. This is when I can get a little carried away, but I'm gonna add some gold little marks in these shamrocks too. All right, let me get some paint here. I think I actually need more of that dark, darker color. I love the gold accents on the shamrock. I think it adds that little pop. I think I'm gonna have to outline this little stem that I forgot about too, so it stands out a little bit more. I think you're really gonna have fun with the flowers too. It's completely different style than what we did here, so everything's like kind of paint-by-number. On this, right? And then we're going to do these flowers, and they're crazy, and they don't really have a lot of rules, and they're just really fun. that a little bit better. I've got to decide what brush I want to use. Okay, so these flowers are just gonna be these messy little blobs of paint on the bottom. and then I'm going to add little centers to them to kind of make them look like poppies. They're going to have little black centers, and you can do whatever you want to with this. I'm just going to show you how I do mine, and I think this little pop of color at the bottom is really going to finish the painting. So I'm just gonna— I've got a lot of paint in here, and I'm literally just going to come on and just kind of push my brush around. These are like irregular little shapes, all different sizes. He's going to be standing in a field of flowers here, and I'm going to do some different colors. So I'm just kind of staggering these again, different sizes. You can have some kind of going off the canvas. This is one of those trust the process moments. You're thinking, what is she doing right now? This looks terrible. It'll come together. But I want to be careful. Of course, I'm doing this upside down. I'm trying to not create a pattern. I want these to be very random, so I don't want you to overthink where you're putting these down. I'm just kind of like, wherever my brush lands, that's where I'm going to put a flower. So we've got some hot pink down there. So now I'm going to start adding that coral in, and this doesn't have to be solid. Like, I'm getting— I always go a little overboard. With my flowers because I love doing them. I think I want to add a little bit of yellow in here. I think I'm gonna do something different with the yellow and just do some little dots just to have some different types of flowers. So I'm literally just like dabbing these on. I think I'm going to have the flowers a little heavier on the sides. and then let's do a little bit of purple. All right, so I'm going in with the black, and I'm just going to do these quick little dots. And it doesn't even have to be on all of them. You can just kind of stagger and pick which ones you want. Add some little white flowers up here. So I'm gonna do some little clusters of white around here. I kind of want to change up my flowers a little bit. I may— so just a cute little field of flowers here. What do you guys think? And see how messy and crazy the flowers were? I mean, he's got to have gold, right? It's St. Patty's Day. He's got to have some gold. All right, well, thank you guys so much for hanging out with me today and painting. Grab your download, okay? You can get this template, transfer it on. All the directions for that are at the beginning of this video if you joined late. If you haven't painted before, I hope this encourages you to try to paint and not be afraid of it. Just face that fear. We're all creative. Some of us just need help pulling it out. So that's what I do. I help you guys find joy in painting, and we have a lot of fun with it. So thank you guys again. Bye.










