Easy Watercolor Floral Painting Tutorial for Beginners
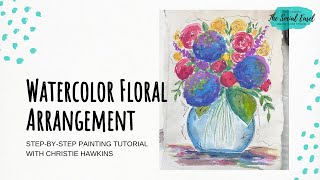
In this 2022 live stream, Christie Renee Hawkins of The Social Easel walks viewers through a step‑by‑step watercolor painting of a vase filled with hydrangeas, roses, and foliage. She begins by introducing the required materials—watercolor paper (including a new rough‑edged mixed‑media pad from Leather Village), waterproof brush pens, a ceramic palette dish, and her regular watercolor set—while linking each item to her Amazon and Shopify stores. After a brief sketch of the vase and flower layout, Christie demonstrates her workflow: starting with background greenery, using wet‑on‑wet techniques, layering colors, preserving white space for highlights, and adding darker tones for depth. Throughout the session she engages with live comments, answers questions about supplies, troubleshooting streaming glitches, and explains how to adapt acrylics for watercolor effects. The tutorial also serves as a promotional platform, announcing upcoming paid workshops (the "Funky Summer Flowers" series), membership programs (Tribe Sister VIP and Painting of the Month Club), and how to receive text alerts for future live events. Christie emphasizes a relaxed, experimental mindset, encouraging beginners to embrace imperfections, experiment with color variations, and use scribble lines for added movement. The video concludes with a comparison of different paper types and a reminder to text "LIVE" or "AMAZON" for alerts and supply links.
Chapters
Hey everybody, it's Christie with The Social Easel, and we are gonna go live today and do another little fun watercolor painting. I did a reel of this the other day if you follow me on Instagram, and a lot of you were requesting that I teach it to you. So I did this on Fourth of July morning, but we can do these flowers anytime, so I thought I would jump on and do them with you today. So let me know when you are on here. I'm gonna get you pulled up on Facebook so I can see your comments. So this one is super simple. All you're gonna need for it is watercolor paper, a mixed media pad. I'm gonna be painting it on something different today that I'm getting ready to tell you about, and then a few waterproof pens. If you were with me last week, I was using these from an old set that was a couple years old and they were dried out, so I ordered a new set from Amazon and it comes with 3 new brush pens as well. So that was fun, added little bonus. And then we are using the same watercolor set that I used last week as well. Both of these items are in my watercolors— or in my Amazon store under the watercolor section there, so you can get all that information there if you want the link to my Amazon store if you don't already have it. You can just text the word Amazon to this phone number and it will send you a link directly to my Amazon store, and then you can see all my favorite supplies there. Hold on, my door is rattling. I have to fix that. Hey Lynn! Hey Brenda! I've never heard it do that before, and I'm not sure why it's doing it now. Okay. Hey, Cindy. All right, so this is what we're doing today. Set this stuff over here, actually. I try to keep my watercolor somewhat on the screen so you guys can see what colors I'm dipping into. Let me know if any of you have done watercolor yet. We've been doing it for a couple weeks now, so some of you hadn't done it before, but maybe you have. With these last few lessons that we've done. So you can let me know that in the comments. I'm just gonna grab a pencil out real quick for us to get a loose sketch on here, and then I think I'll probably use my fine tip black pen after. I'm gonna set that one out, but we'll see. I may change my mind. Julie said, I love that painting. Watercolors freak me out though. Excited to watch. Listen, watercolors are actually super fun. So I was a little intimidated by them at first just because I'm so used to acrylic. And if you don't have watercolors, you know, you can just water down acrylic paint and treat it like watercolor as well, which is what I used to do. Very often, but lately I've just been having a lot of fun playing with them. It's very relaxing and chill. Okay, let me see if there's any other questions here before we jump in and get started. So when I was looking, um, last week to add a watercolor pad to my Amazon store, um, because people always ask me what supplies to get. So I added it all under that watercolor section. But while I was searching for that, this came up, so I had to order it because it looks so fun and cool and I wanted to try it out. So this is watercolor paper with these rough edges, so it's like pressed paper made by the Leather Village. And again, this is in my Amazon store. So the first time I'm using it is here today with you guys. So, you know, it's kind of a trial and error. We'll see if I like it or if I prefer just regular watercolor paper. But what I had envisioned with doing this is painting this, and then this would look really cool in like an 11 by 14 floating frame where you just have, you know, the glass and you just put this in between two pieces of glass and then the frames on the outside. That would look super classy and clean and be a pretty addition to your home decor. So that's what we're going to do today. So the first thing I want to do is just do a loose sketch here. So even when I did this originally— let me know if you guys are getting any glitches in the video. It keeps happening on my iPad, but no one's saying anything yet, so it might be something wrong with my iPad. This is like a little lopsided, right? It's not perfectly symmetrical, but it's one of those things like you don't really pay attention. At the end. So don't get too caught up in the small details. Little imperfections, little wonky things in our paintings are sometimes what make them more interesting and fun to look at. Thank you, Amanda, for the stars. So I'm gonna just do like a simple kind of round shape vase, and then I'm just gonna do— um, yes, it is glitching. Okay, so I don't know why, because I'm connected Let me try. All right, let's see if that helps. Sorry if I'm a little louder, I'm right next to the phone. I turned on work mode on my phone. I'm not seeing any glitches anymore. I'm wondering if it was someone texting or calling me and it was causing it to glitch. So let me know if it's better. I'm gonna keep on going though. So I'm just gonna set this off to the side. What I was saying is we're just gonna do a loose vase shape and then just a kind of an idea where I want my hydrangeas and stuff. But again, I didn't sketch all of those on there. I kind of just did all that with watercolor and just kind of played around with it. So this will be slightly skinnier because I'm on, um, a small, smaller piece of paper. So I'm going to start down here, just give myself like a little line for the base and think of it like parentheses. We're just coming out on the sides and putting two little parentheses there. Then you can just draw a line for the top. You're probably not even going to see this. You'll end up erasing it later if you still can. And then I know I want a hydrangea bloom kind of coming off the edge over here, maybe one a little bit higher here. And you want to kind of stay with odd numbers. It's just more appealing to the eye. So, um, so that's why I have 3 hydrangea blooms there. I honestly didn't pay attention to how many little roses I put in here. I kind of just started putting them around the hydrangeas until I was happy with how it looked. And then you can have like maybe some of these longer ones shooting out here, but I really don't add too much of that in ahead of time. Hydrangeas, you know, are known for their big leaves, so maybe one of those coming over here, maybe one kind of peeking out the side here too. Okay, so that is about it for our sketch. It's still doing that. I'm scared if I try to change anything, it's gonna disconnect you guys completely. So I apologize for the glitches. I'm not sure why that's happening. I'm connected to Wi-Fi with all, all the bars and everything looks fine. Hey Edith, yes, there are always replays. Any Facebook Live that I do always has replays available after. I'm gonna raise this up just a little so we can fit more in the screen there. Okay, how's that look for you guys? So the very first thing I did was actually the greenery. That is usually where I start. On my florals is you want to work on your background first and then start working on the flowers in front, especially with, um, watercolor, because you can't cover it up as easily as you can acrylic. So I've got plenty of water in my brush, and I'm just going to go into one of my greens here. You can see I've got some leftover Over here, I'm just going to go straight into that. This is a ceramic dish that I'm using for my watercolor that also in my Amazon store. I put all these supplies in there. I really like the ceramic dish because it's just easy to do your colors on. So I'm just going to start by doing a couple skinny little stems down here. They're not all necessarily attached to a certain flower, just kind of giving us the idea of those stems being in there. Get a little bit more water here, and then I even just kind of go in with a little extra green kind of in between my flowers. A little bit more water to that. These are really fun to watch come together too. Now if you guys ever have trouble finding the Facebook Lives when I go live, I send out text alerts So again, if you want text alerts, just text LIVE to this phone number here. But the other thing you can do is make sure that you are following the Social Easel. Because if you follow me on Facebook, then Facebook is also going to give you a notification in addition to the text. And then when you click on that notification, it's going to take you straight to the live. Let's add a little bit of bluish color in here. I like to have lots of variations of green, some darker, some lighter. Then let's start filling in our flower— not our flower, our leaf. And see, when it's still wet, you just get to watch the colors kind of meld together and do their own thing. I love that. It's a little darker around the edges. Oh, you can't even see the whole number here. Sorry about that. It would help if you could see the whole number. Hey Julie, I am using— these are the Social Easel brush set. These are my customized signature brushes that I have just recently added to my store, and that's what I use for all my paintings now. They can be used for watercolor, or for acrylic. And I'm just using a small round. Let's get a little bit darker here. Okay, so I love doing this part. Watch how I'm going to do dark on this edge Get a little bit more. Now all that's gonna show because we're gonna have a bloom on top of it. So that's nice and wet, and then I'm gonna pick up some more of that lime green color. Just kind of dot it on there and let the paint do its thing. And once this dries, you can go back and add more color and more pigment to it if you want to. I'm going to get just a tiny bit bigger round. And you can even leave some white spaces in between. Thank you, Jane. Glad you love the text alerts. So the white spaces that you leave in watercolor act as your highlights because we don't add white with watercolor. Okay, I'm gonna get a little bit more limey color here, and I'm gonna pull out kind of a skinnier stem that will add a couple of leaves to. And so I'm just using a little bit longer round, kind of like a liner brush. Now if you guys want this brush set, we do still have some available. They are in my Shopify store, and it's got a variety of brushes so you have all that you need for all the different paintings. So I've never liked to do just one color on my leaves, so I'm going to come back and add a little darkness to this. If you guys are enjoying this, I would love it if you would share with your friends. And let them know about the Social Easel. We're gonna be doing some more fun paintings this summer in my summer fruit series, and then sometimes I just pop on with some little ideas that I have. And if you want to learn a full big painting, the next one I have coming up is I'm really excited about it because it's one of my favorites, is my Funky Summer Flowers. So all the details are in the link in the description up above, and then we can put them in the comments for you as well. This is going to be a live event that starts on July 19th, and I'm going to break the painting down over the span of 3 sessions. So the actual event lasts longer than 3 days. We're extending the event to give you some implementation days in between. We're anxious to see if you guys like that. It gives you a little bit more time to get your paintings done and kind of catch up with the steps. So we would love to have you join us. I'll show you the painting here in just a second if you haven't seen it before. So So this is not going to be identical to the one I did either. So when you're creating your own, I want you to just kind of start going with, going with the flow and seeing where the painting takes you because you may want to add some different types of flowers into your paintings. Awesome. Melissa, excited to have you. She's already signed up for the Funky Flowers. So this is the Funky Summer Flowers. I have a series of these. We did one in the spring, summer, and we'll be doing another one in the fall. But this is the summer one, and it's gonna really help loosen you up. You're gonna learn all the basics of acrylic painting. You're gonna scribble. That's gonna loosen you up if you've never scribbled in your paint before. It's super fun. We even did a little finger painting in this one, and we're gonna learn all these different types of flowers. So this is a really cool experience because you are going to learn this from composition all the way to completion, meaning you are not going to have a template for this. And I know that scares a lot of you who are watching and thinking, there's no way I can do that without a template. And I promise you, you can, because I've seen thousands of women do it before. So I actually start from the beginning, just like we did this vase. I'm going to show you simple lines, simple structures to create the base of your painting, and then we're going to start adding in the layers. And I break it down over the span of 3 days so that you can take your time and we can really focus on those steps. This is great for all levels, whether you are a newbie to painting and you've never done it before, or if you're a seasoned painter and maybe you want to try a new style or loosen it up, or you just love it and you want to do it. Um, so we're going to do all that, and then all these black and white marks that you see on here are some paint pens that we're going to be throwing in too. So that's just another level that you can add into your painting that is super fun. So that is only $15. It starts July 19th, and that is your only chance to paint that. So it will not be available once we close doors to that. It's gone. It goes back in the vault, and you won't see it again until next summer. So if you want to join us, do so. It's only $15, and I promise you're going to have a ton of fun in there. And it gets to get you involved with a group of women. So you're not doing it alone. You're going to be inside a private Facebook group with other women just like you who are learning, who are excited to have fun. And we're going to start each day off with a mini devotional. So we'll have a little coffee talk and Jesus, and then we're going to jump into painting. And the reason I do those devotionals at the beginning is because I really want to help you guys learn to loosen up. I want to help you learn to trust him and trust the process in your painting, um, because it is such a gift that we're given that we even have the ability to create. And he created us in his image, and therefore he is the original creator. Guess what? That means he put some creativity in all of us too. Some of us just haven't tapped into it yet. And that's what we're going to do in this challenge. So what I'm doing right now is I've got this really pretty, like, ultra marine blue. I'm kind of going a loose shape here around the bottom curves of where my hydrangeas are going to be. Thank you, Vicki. I love teaching you guys how to paint. Um, if you are new to following the Social Easel or new to me and you're not familiar with me, I have been teaching women how to paint. For— it has been— Kylie's 18. It has been 18 years, all— or, I'm sorry, 8 years, almost 9 years. It'll be 9 years in October that I have been teaching women how to paint. So I started out doing local paint nights, and then about 4 years ago we transitioned to doing online. And it's so fun for me because now I'm teaching women all over the world. If you would have told me that 5 years ago, I would have thought you were crazy. Um, so it's super fun to get to be able to do this with all of you and have no limitations to the amount of women we can reach and meet online. So that is the ultramarine blue. You saw me do one layer first, right? And then I went back immediately after and added some darker coloring in there. So that is how you work with watercolors. If you want a stronger pigment, you go back and you can add another little layer there. Hey Karen, yes, if you are a Tribe Sister, make sure you're checking the Tribe Sister Facebook group. So everything for Tribe Sisters is always in that group. Tribe Sisters get the workshop for free. That is a bonus of being a Tribe Sister, and your link to that is inside our Facebook group, and it's all under the featured tab. If you are one of my— that's my VIP membership for those of you guys who are not familiar with that. And then if you are a Painting of the Month Club member, you have a special 50% off link that we sent out via email. If you don't have that, just email customer service at christie@thesocialeasel.com and let them know you're a Painting of the Month Club member and they will get that over to you. Julie said, I've already done spring and winter, which I loved. Is it weird or overkill to do summer too? No, not at all. Most women who started with me in one of the seasons have done every season, and they switch them out seasonally. So you can do that. And then we have some women who have hung them all together as like a collection on their walls as well. So definitely, definitely join us and do the summer one too. They're all slightly different. Okay, what do you guys think of the hydrangeas so far? I'm liking them. We're gonna get a little more purple in there. So look, I'm just taking this blue that I already had, and then I had some of this pink, pinkish-red color on here. I'm just gonna pull some of that in, and we're gonna start adding. I'm just kind of dotting down with my brush here, so it's given some separation. Let's pull a little bit more pink in. It's almost like a lavenderish color, and each one is going to be slightly different. None of them are the same, just like in nature. One's gonna have more purple, one's gonna have more blue. Now I'm gonna get a little limey green. You notice in hydrangeas how it has that, that little inner part? Regardless of what color the hydrangea is, you always see just a slight bit of of that green in there that I love. Let's add a little bit more greenery in here. Now you will see me just dance around a painting like that. I don't typically stay in one certain area. I like to move around a lot. Hey, Carrie is asking, what do I have to do to become a Tribe Sister? Um, Tribe— so the being a Tribe Sister is my VIP membership. So I just have two memberships. That's the VIP one, and then my second one is Painting of the Month Club. So becoming a Tribe Sister, we will open doors to those of you that are doing the challenge with us. Otherwise, we do not open doors to the public into the until the fall. Um, being a Tribe Sister gets you inside our private Facebook group that is just for us. That is where I do all my teachings. You get 3 paintings per month with me, and then we have a guest artist or speaker as well. And then a Painting of the Month Club is available for sign up monthly from the 15th through the end of the month. And Painting of the Month Club does not come with a Facebook group. You are just getting one painting delivered to your membership website on the first of every single month. And if you're a Tribe Sister, Painting of the Month Club is included in your membership. You do not have to do both. It's included. Yes, Becky said doing all the seasons is a great way to practice and improve your painting. I agree, you'll learn, you'll learn different things in every single one of them. So I'm gonna kind of leave these right now. I may come back and I want to add maybe a little bit more blue in some areas. We'll see. But right now I think I want to start adding in some of my roses in here. So I'm just gonna get some of this red And I'm just going to start putting in some little circular-like shapes here. The main thing I want you to focus on here is that these are not perfect circles. Maybe even leave a little white in some of these areas. We can come back and add a little water. It's just going to give it a little bit more depth. Let's see, maybe one up here. So again, there's really no rhyme or reason or right or wrong to this. I'm just kind of looking at it and placing them down and start filling in that, that negative space I've got here. Maybe we have one kind of peeking out behind this one. Now this one in the middle here that has some of that green behind it, that is absolutely okay because green is a complementary color to red, so all that's going to do is create like a toned-down, darker version of red. Where that is. So it's kind of doing the work for us and creating that shadow. What do you think of the addition of the red? Do you like it? Yes, Linda, good question. She said, if we take the Funky Summer Flowers class, will we be able to access it after the class if we don't finish at the end? So the live classes stay in the Facebook group for 30 days in the group, and then they go to the membership website. So whenever you purchase a workshop or anything like that from me, after it's in the Facebook group, it goes to our website where you can log in and access it anytime you want to. You have lifetime access to it. So yes, you're— the answer is yes to your question. You do not have to be there with us live. If you can't be, I would love for you to be because it is a lot more fun to do it when everyone else is. It gives you the ability to ask some questions if you want, but if your schedule doesn't work with that, you can absolutely go back and do it whenever you want to. So I decided to just grab a little bit of this like burgundy color here and add that in for some shading as well, and I really like that color. I didn't do that in the original, but I'm liking how that looks. I'm really frustrated that this is glitchy today. I wish I could do something to change it. So also in the original, I did these little, like, larkspur, whatever you want to call them. There's kind of a couple different flowers that look like that. I did them this dark blue. But I think in this one I actually want to do them like kind of like a lavender color. Let's change it up a little. Yellow would be really pretty too. So for these, let's see, where do I want one? First of all, let's have one kind of coming out here. I'm going to just overlap that greenery. You're going to start with kind of bigger blobs towards the bottom. So what you'll learn is a lot of flowers that you paint are really just blobs that end up connecting together and we turn them into a shape. And I'm going to keep going and it's going to get skinnier. As I go up. Let's add another one coming out over here. A little bit more water. I think I do actually want to add a little yellow into this bouquet. I'm gonna grab some yellow here. Remember, you can always change it up. You don't have to stick with what was originally there. So this is kind of a golden yellow. I'm going to come back and add a lighter yellow to that as well. And they don't even all have to make sense. I don't know what those flowers are. I just want to add them in there. It's a little bit of yellow over here too. Kind of pulls it in. It's a little bit warmer than some of the other colors we have on there, so it kind of pulls it forward. I kind of like all these colors together. I'm just gonna add a little bit more water there to blend that in some. What do you guys think? Like it? Let's add a little bit more greenery here. Just kind of touch around the flowers. It's so full and pretty. So these roses that I added in, I left that white space in there. You could leave it like that. I'm gonna go in with like a lighter pinky pinky red color here and just add a little bit in there. Not a ton, but it's just going to be a very light color. Alright, I'm liking that. Let's grab some of that lemony yellow that I was talking about here. I'm just picking the lightest color yellow in my palette, getting plenty of water with it, and I'm going to come in Kind of do the same thing here. We're just adding a little variation in color to what we have on there. Now I'm going to go back to my hydrangeas again and go back in with some of that darker ultramarine blue, a little purple in there, and just kind of go around some of the edges again just to even add a little more contrast. And a little bit more of this, like, I call it kind of like a sky blue. I love this color in hydrangeas. And it always looks a little different once it dries, so wait to make all your choices until it's dry so you can see what it looks like, and you may want to go back and add more. Okay, for the vase, I kind of did more of like a slate bluish color. Yeah, this one. So I'm gonna go darker around the edges. Okay, so I'm just kind of going around the outline, and then immediately I'm gonna go back into my water and start dragging that around the base. Again, you can leave a some white areas here. This doesn't have to be filled in completely. Pick a little bit more color, go along the bottom on this edge, dip into my water. Maybe a little darker around those— Maybe a little darker up here where it'd be a little overcrowded by the flowers. Let's add a little table for it to sit on. What color do I want to do? I did brown on the last one. Give me your opinions. I'll wait for you. What colors do you think I should do? While you guys are commenting on that, I'm gonna grab my greens. There's just a couple places I want to add a little bit more greenery sticking out. you have given me. Shirley says dark blue. I was actually leaning towards maybe a blue myself, or we could go for contrast. And create maybe like a— yeah, don't let watercolors intimidate you guys. A lot of you are saying you love this style and you haven't tried it yet. It's so fun. Once you try it, you're going to be so happy that you did, and you're probably going to wish you did a long time ago. I'm going to go in and create a little bit more darkness here. All right, I'm just going to go kind of— I actually like that color. That's kind of like, um, Almost like a plumish color, really. I was gonna add a little more yellow to it, just create something a little warmer. For that matter, we don't really have to decide on just one color, do we? We can have multiple colors in our table, maybe even some— the idea of some reflection. multicolors. Hey Diana, yes, this is all watercolor. You can water down acrylic paint to do this as well. I haven't tested that on watercolor paper. I've done it on mixed media pad. So if you want to water down your acrylics and treat it like watercolor, you can do that as well. All right, what do you guys think? So we're not done yet. I'm gonna let this dry a little. Do I have my blow dryer over here? I do. So you could leave it like this and not do anything, okay? You do not have to add the black. I tend to really love black scribble lines, so that's what I'm doing in mine. And when I say scribbles, that's what I'm doing. I'm gonna get a little closer so you can see this. You can decide how much you want or or if you want any at all. Like I said, some people are not crazy about that. I tend to like a messier look. I think it got in a little on my paint there. Oh yeah, it's dragging in my wet paint. I thought I got it dry enough. So wait for it to be completely dry. What's your vote? Black lines or no black lines? Still think it's too wet. For me, it just kind of finishes it, and again, it's not everywhere. You guys like the lines? Good, I'm glad. I like them on the outside too, just really random around. The vase. I just think it adds movement to it, kind of pulls your eyes in different areas. They start dancing around the canvas. And here's the thing I want you to think about too. Let's say you do this and then you add your scribbles on there and you don't like it. That's okay. You've learned something. Now you can just flip that page to the side if you did it in your mixed media pad or watercolor pad, and then flip to the next page and do it again. Art is all about creating and experimenting, so don't let fear stop you from trying new things because you may not know you like them until you try them. That's just too wet for those lines. I know, I love the whimsical look that it gives too. Okay, so minus the technical difficulties, that was supposed to be a little bit shorter than it was, but we had a couple times where we paused. But I really do love this watercolor paper that I did it on. Let me know which one you guys like the most. So this is regular watercolor paper. This is this new really cool style that I bought. And this is going to be really cool framed in a— in between two pieces of glass. Open— why did I just forget what it's called? It's not frameless, is it? But you guys know what I'm talking about. So there you go. If you want to join me next time I go live and you haven't already signed up for the text text alerts, just text the word LIVE to 417-217-7044. If you want my link to all the Amazon supplies that I use, like this watercolor paper or the ceramic plate or the paint, that paint itself, all of that is in my Amazon store. Just text the word AMAZON to that same number. Floating. Thank you. I said it at the beginning of the video and then my brain just went went blank. Um, so yes, you could do it in a floating frame, but, um, yeah, this watercolor paper is in there too. It's very, very cool. So










