Easy Watercolor Postcard Tutorial for Beginners | Step-by-Step
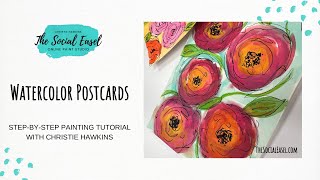
Christie Renee Hawkins teaches watercolor postcards using wet-on-wet and wet-on-dry techniques on affordable card stock. She adds loose line work with waterproof pens after the paint dries, then flattens the cards under a book. The whole project takes 20 minutes and works for beginners and kids.
Chapters
Hey everyone, it's Christie Renee Hawkins with The Social Easel, and it is my goal to teach you some quick and easy tips and techniques in less than 20 minutes. So today I thought we would do something fun. I did this at my live event last October. We've done it with the kids in Honduras for them to make cards for their tías and tíos, and I thought it would be fun to show you guys how to do some really simple watercolor postcards. There's lots of different brands of watercolor cards. These are some different ones that I've used that I've just played on. I'm going to kind of show you some that even may look kind of not so great, um, right now, but I'm gonna show you how you can turn even the messiest of blobs of colors into some cute flowers. And then these are some of the ones that I did at my event last year. So you can see these are all different. This is, um, these are Arteza cards Um, if you want the link to my Amazon store where I have all of this listed, text the word Amazon to this phone number and it will take you to my Amazon store where you can get my supplies. Um, so anyways, there's several different brands. Um, the other ones that I have are folded watercolor note cards. So there's no right or wrong. This is just preference on what style you want to do. Um, today I'm going to use some that I had left in my drawer that is just from— I think this is from Hobby Lobby. Yeah, this is Master's Touch, just a little watercolor pad. This one's a 4x6 and it's $2.49 regular price, but they put these on half off a bunch, so, um, you you could get those for super cheap. Um, so I'm gonna go ahead and pull one of these out. And the watercolors that I'm using today are also in my Amazon store. So there had been this smaller set that I liked for a really long time. Amazon had it for years and they don't make it anymore. Um, or it's not available there anyways. So I found another one, and the ones that I'm using today that you see on the smaller screen, um, that is what we used in Honduras. And I did a bunch of watercolor with the kids there, and I absolutely love this watercolor set. And it's only like $9.97 or something like that. It's super cheap. So if you don't have your own watercolors yet, I suggest getting there. Okay, so I'm going to take myself off the camera and we are going to go full screen on our watercolors. I'm going to scoot this camera over a little bit. We're doing some watercolor cards today. I've got some different examples here that I've done. We'll kind of use this one as an example. So this is just a really fun and simple way to do it. I am just going to pick some colors that I want my flowers to be, and I'm getting lots of water in my brush. Now there's a couple different ways you could do it. So all I'm doing is just putting water on my watercolor paper, and I'm doing it in circular shapes. You'll see that in just a second if you can't see that reflection now. Have some kind of come off the page a little. These are going to be our flowers. So here is the fun thing about— if you haven't done much with watercolor, this is a really fun, fun way to do it, is the wet-on-wet technique. So you go ahead and start with wet paper and And then you come in with your color and your pigment, and you just drop that in, and you kind of let the color go where it wants to. More pigmented in some areas, less in others. See how it just spread into that other circle? Go ahead and add a little pink in here. And I could do some different colors, maybe some orange. So I'm getting lots of water in my color so that it's very wet, and when I drop it into that color— or I mean that water spot— it just spreads. So really, it's, it's not— you're not like measuring a certain amount of water. You just want enough that it will do what I'm doing right now, where it's, it's almost like a little puddle so that when you touch down with the pigment, the actual watercolor, it will spread. See how it does that? And I don't want these to be perfect little circles. You can see I can still change the shape. I can come and put some pink into that orange. Even— it's super fun to test and play with. This is a little bit lighter pink. Maybe put some dark over on this side. And you just want to make sure you're adding enough water to your palette like I'm doing over here and really loading that up so that has plenty of pigment in it. You can always go back and add more if you want. And you can leave— when you're working with watercolor, you don't usually paint white on. You can get paint accents by coming back with a white paint pen at the end, but you can also create the white space by leaving negative space. So by leaving some white openings in your shapes that creates your highlight. If you go to my Amazon store, um, this watercolor set that I'm using right now is in that store. I don't know what brand it is. It, it's only like $9 on Amazon, so it is a great deal because it will last you a long time. The other thing I love about this set is that the lid has all these little divots for the circles, and you can use those to mix your watercolors in. So it's kind of like a mixing palette and a paint palette all in one, which is super handy. So while we're letting that dry, I'm going to show you how I'm going to make this other one that is already dry— matches my nails— um, turn it into something pretty because it's not so pretty right now. So I'm going to let this dry, come back and add some background color and some leaves. But I don't want to do that right now because if I came in with more wet watercolor, with how wet this is right now, they will bleed and to one another. So I want to let that dry before I do that. So this is one, um, I know nothing special to look at right now, but this is one that I was playing with in Honduras just to show the kids, kind of, um, just to give them an idea of what we were gonna do. So now I'm gonna make this one a little bit prettier. We're gonna come in and we're gonna add some leaves in here. This, by the way, is my ceramic palette that you can do color mixing in also, and you can reactivate watercolors if you haven't painted with watercolor before. The colors you see on my palette, when I add water to them, they will reactivate, which is kind of cool. You can't do that with acrylic. So I'm just going to come in and do some little leaf shapes on here. Maybe a little bit more vibrant. I try not to think too hard while I'm doing it. I just want it to be kind of free and loose. Maybe do a couple little vines off of here. And then some of my colors got kind of muddy in the flowers, like this one, so I'm going to go back and add a little bit more to that to brighten it up. Do I just use watercolor paper or cut them down to a certain size? I don't cut them because I don't have time to hand cut a bunch of things. So you can buy pre-made ones that are watercolor postcards like this I have in my Amazon store. These are watercolor note cards, so the outside is to paint on, the inside is to write your notes on. And then what I'm actually painting on this one today is just a 4x6 watercolor paper already pre-cut. So you have lots of options. But you can see even with this one that, you know, I'm not like super thrilled with how it's looking right now. You'll see that watercolor is very forgiving, and you can still kind of work with it and turn it into something pretty, even if you may think it's not so much right now. I think I want to come back with a little yellow in the center of these. So see, I'm just getting plenty of water touching down on that color. So this would be wet on dry, which is different than the technique that I showed you in this one. This was wet on wet. This is wet on dry. Okay, so I'm going to rinse that pretty good. I'm going to grab a little bit of yellow here, and you really just have to work your water into that little cake. The more water you add, the less color it's going to have. So if you want very, very vibrant, you're not going to use as much water. Once I get the watercolor how I want it, I'm going to blow dry this one really quick. Then I'm going to use my waterproof pens and do some pen work on them, or you can use a Sharpie. So I've got a bunch of different brands of black pens that are waterproof. I like to try a bunch of different brands and see which ones I like the most. Um, all these are in my Amazon store again, but this, uh, the Faber-Castell is probably one of my favorites, but I also like the Pentelic and the Micron. So any of them, as long as they say like waterproof, then you're pretty much good to go. And they all have different tips. So some are super skinny, some are a little bit more of a brush. So I'm going to start with my leaves, and again, the way I do it is very sketchy. I'm not trying to be perfect. I want this to be loose. You can decide how much pen work you want to add to it. And of course you could do white if you want, or any color. So even just adding that, I feel like, to the leaves and the stems immediately kind of adds to the whimsy of the flowers as well in the card. I'm gonna go around. See how I'm just kind of scribbling around the outside, maybe some loose lines inside. How many of you like this look, the messy, loose? I love it. And how many of you struggle with doing this because it is so messy? So that is just a super quick, fun version. Um, you can see like on this other example that I used, this was just with a Sharpie. You can do the same thing with a Sharpie. And then I like to use— you can either use— I have a paint pen here I could use if I wanted to put little center dots in. Let me go ahead and prime this and make sure it's ready. Come in with a paint pen so it's got a little bit more pigment and ink to it if I wanted to do some little centers inside of here. Still messy, still little scribbles, but it's totally up to you. You get to decide what all you want to add to your flowers and how you like them. I just want to show you a couple different fun, messy, loose options. That's it. So we took our not-so-pretty card at the beginning and made it into something cute and fun, pretty, whimsical, loose and messy. Now we got this guy over here. I'm gonna go ahead— this one little section is staying a little wet. I'm just gonna take my paper towel and blot that. You can see it's taken some of the color with it, but That's okay. I'm just going to do a different kind of look for this one. So for this, I think I'm going to do something similar to what I did in the original I showed here. So I'm just going to come in— this is pretty heavy pigment. You see how strong that color is? Now what if I wanted to kind of dilute that down? I just come in with more water on my brush. I can just push that color around, and I'm not even going to worry about if it overlaps some of my flowers because they're all warm colors, and I think that's just going to make it look pretty. You're not going to get any ugly muddy colors with this one if they mix. So more water means less color, and it doesn't have to be the same anywhere. You can have some sections where maybe it's a little more pigmented than others. Variation is good. And then I'm going to take a skinnier brush here and do a little bit of green. You can even see on this original, even where these colors blend together like that, it really doesn't matter. It still looks pretty once you add the pen work over top of it. So don't get too caught up in that perfectionism or saying you messed up. Like, just kind of let the colors do what they're going to do. It's amazing what a little line work over top of it can do. And again, you can decide, do you want those to be more pigmented, or do you want them kind of blending in to the yellow? So while that background's drying, I'm going to go ahead and just start with my pen work and the flowers. I'm going to pick this one. I hope this is one of my new ones. It might be a little dry. Um, let me— I was gonna say I was gonna grab a brush tip. I love brush tips because it is more like a brush, so it's wider like that. So I just kind of start with some squiggly lines. Inside. And you kind of want to think about them like alternating, like if you are doing more lines— I'm being a little bit more careful on this one. See how they kind of stagger? So my little curved line sections are not all starting and stopping at the same point. But even if you're not really thinking about it and you're just— I will say the quicker you go, the— I think for the most part, the better it's going to look because it is going to look more loose. And when you move faster, you don't allow yourself to overthink. What you're doing. It's not important that these black lines stay within these flowers. It's okay if they go out in that background section too. All right, so we've got our flowers done, and then I'm just going to do a quick blow dry on my greenery. And then the last thing I'm going to do is add some lines around my leaves, and then we will be done. Now, if you want these to be nice and flat before you mail them out, you would just put them underneath a heavy book once they're completely dry and allow them to flatten. Okay, so there you go. There are a couple different styles. For some quick and easy artwork you can do with postcards. You could do the same thing if you just love the look of this and you don't want to make a postcard. You could do this on a bigger piece of watercolor paper and frame it. That would make a beautiful framed piece of loose abstract art that you could hang anywhere in your home. So I hope you guys enjoyed that, um, quick and fun lesson today. Um, have a great day, and I can't wait to see what you make with your watercolor postcards. Bye!










