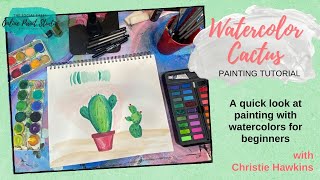
In this live Facebook/YouTube session, Christie Renee Hawkins of The Social Easel introduces viewers to watercolor painting, focusing on a succulent/cactus composition. She begins by explaining her motivation—cacti are popular and she wanted to try watercolor despite usually teaching acrylics. Christie showcases her art supplies, including an old watercolor set, a new Amazon‑purchased set, Nik Pro watercolor brushes, and mixed‑media pads, and notes that all items are available in her Amazon store. She outlines two workflow options: sketch first with a waterproof pen then paint, or paint first and outline later. Throughout the demo she explains core watercolor fundamentals: loading pigment versus adding water to control value, building layers for shadow and depth, leaving paper white for highlights, and the importance of brush size and water content. Christie demonstrates these concepts while painting a simple cactus shape, adding gradients, shading edges, and experimenting with background elements such as pots and desert floor. She discusses material choices (watercolor paper vs. mixed‑media pads), affordable starter kits, and how to blend colors on the fly. The session is interactive, with Christie prompting viewers to comment, share, and join her free community group. She also promotes upcoming content, including her “Fave Five” live series at 11 a.m. CST, and encourages viewers to practice, experiment without fear, and request a continuation of the painting. The video ends with a call‑to‑action to join the free group, watch future live sessions, and practice regularly.
Chapters
Hey everybody, it's Christie with The Social Easel, and we're gonna do some painting today. We're gonna do some watercolor today. So I don't normally teach watercolor, but I was just feeling it today, and cactuses are so popular right now, so I thought we would do some succulents. This is one that I taught inside My Tribe this month. This is all done with acrylics, and I don't want to copy this design completely, but I have it here for inspiration. And then I ordered these cute little mailers with some other different styles of cactus on it too. So I just always have stuff like that on hand when you are starting to create something. You know, you got to have your inspiration pieces and And I have some— this is my old watercolor set. You guys can see here. This has— I've been using this for I don't even know how many years. Watercolor sets last you forever. And this is a new one that I bought because it was a really good deal on Amazon. All of this stuff is in my Amazon store, by the way. So I'm gonna— oh, that was the other thing I wanted to show you. These new brushes. These are also in my store. These are— I haven't got to use them yet. It's Nik Pro watercolor brushes, so I'm excited to try these out. They're a little bit different than what I use for acrylic, so that's what we're gonna play with today. Let me know who's done watercolor before. So there's two ways you can do this. You can start with sketching with a waterproof pen, which if you followed me before, you've seen me do this. If you are new to the Social Easel or new to following me, you can go to my YouTube channel and you can find all kinds of videos of me teaching you different stuff. So a lot of times I like to sketch and then I treat my acrylic like watercolor to fill in. so you can draw your design on first or you can watercolor it first and then if you want to outline it with pen and ink you can. So I think I'm gonna try just some freeform to begin with and I've got all these pretty greens in this new palette that I have so I'm gonna play with some of these and watercolor is a little bit different than acrylic because you build layers to get shadowing and depth, and you leave it white to get highlights. So you can't add white to it because it's— it doesn't have the ability to cover. So it can be a little tricky if you're not used to working with it. The more pigment you have in your brush— we'll just do some basic brush strokes here first. The more pigment you have in your brush, the more color you're gonna have. Okay, so I'm really loading this up. See how much darker that is because I got more on it? Now the opposite of that is true, and I'm gonna water my brush down. You guys can't see this. I'm gonna use this over here. And I can add more water to that and see how thin it is. So that's how you play with value with watercolor. Very little water, then it's darker like that, and then a whole bunch of water And you can do this on any surface. Like, I just use the lids. You can see this is the lid to my other set, and it makes it softer. So that's just a couple tips to get you going on how watercolor works. And then we can start kind of playing with our design. I'm digging— I'm— this is the first time I've seen the table on a Facebook Live. All these colors, like, is this not like the funnest, most creative space? It just makes you want to paint. We've got a rainbow explosion here of colors. So let's go ahead and get started with our shape. And don't forget to sprinkle if you're having fun watching these videos and you think your friends will too. Make sure you let them know about it. So cactus shapes are really easy and kind of hard to mess up. —so we're just going to start with a very, very basic shape like this, give it some arms. I'm just kind of getting a little outline going here first. I'm going to get a little bit more water on here, and I'm using a mixed media pad for this, not watercolor paper. You can use watercolor paper or mixed media. Watercolor paper is gonna hold your paint better, but mixed media— a mixed media pad is more affordable because you get several more sheets in it, and these are what I use as like a sketchbook for painting. So you can doodle, practice brushstrokes, all that kind of stuff. So what I'm doing right now is just basically filling in the shape. And I'm gonna do it a little darker around the edges and then grab more water in my brush and do it a little softer in the middle. Watercolor is also very soothing and relaxing to paint with, and it's kind of fun to see what it does. And this is also a very affordable way to paint. Look at all the colors you get in this set. You don't need a ton of brushes, so you want to start with watercolors, it doesn't, it doesn't require a lot of supplies to do so. So now I'm coming back and I can do a little bit of shading over here. Let's add a little depth to this, and maybe I want to pick up a lighter color of green inside. You don't have to stick with one color of green. I like those colors together. I'm just grabbing a little bit more water, just kind of going back and forth over top of those brushstrokes, and it's just kind of blending those colors. In together. Let's get a little bit more paint on here. What should we do for the ground? Should we put it in a pot? Should we just have a base on the ground there? And I also— let Let's do this a little bit. I'm gonna take one of these bigger brushes. I love pale pink and green together, so I'm gonna get a little pink over here with a big wash and just give myself a faint little background here while I'm waiting on you guys to help me decide. What base we're gonna have. Are we gonna do some pots? Are we gonna have some desert underneath it? And I love watercolor because your brushstrokes can show. You can decide how much, you know, color you want in one area. Like, I can go a little darker like around my outline, and I'm leaving a little bit of white around the shape of the cactus. So we're just playing around today. We're not doing like a full-on composition, but I thought it would be fun for you guys to see how you use watercolor and how you can make it a little bit more vibrant and how you can tone it down. So I could just continue to fill that whole page like this. We may wait a little bit because if we do some more, I might want to outline those as well. Watercolor is really fun to do on, like, note cards for people. They make really pretty prints framed, and this is why I love mixed media pads too, because you can frame it. Afterwards. Can you guys see how that's a little bit more pink closer to the cactus? I'm seeing a lot of pots, desert floor. Let's do this. Maybe we'll do a combination of some pots and some plants. And you can mix your watercolors too. Like this brown, I don't know if that's quite the desert sand color I want. So I can come and maybe grab a little bit of yellow to change that color. So you can mix your watercolors together too, or maybe I want a little orange in there. Well, that's a good color. Watercolor brushes— I think, Pauline, you were asking that— they just are a little bit bigger. See how big the bristles are? And they hold a little bit more water. And again, I don't have to fill this in all the way. I can just kind of let it kind of fade down. I can grab a little bit more if I want it darker in some areas. Maybe we want to come down here and have like another little— maybe a little sand dune. Patty said she has this set and loves it. Yeah, these are fun colors. So this is my first time playing with this set, first time playing with these brushes, and they're just a lot of fun. Let's do— okay, so I think I'm gonna make this a pot. Now the question is, what color of pot should it be? I got so many brushes here, I got to decide what size I want. Let's do a smaller round. This is a pretty color. Let's see what this looks like. Looks like it's gonna be kind of like a wine burgundy color. That's pretty. So I want this to be a little stronger, so I'm not putting as much water on it so it has more pigment. So that'll be kind of like our little top part of the pot. Then let's do the bottom here. You could do this multiple ways. We could do, you know, like a little— I just lost my train of thought. You know, like trapezoids shape, or I could kind of have it curve out. I think I'm just gonna pull it down like this. Maybe we should pull it out a little. Maybe this cactus is a little big for that small little pot. We'll grab a little bit more water. And again, I don't want to make it the same throughout everywhere. I want there to be some differences in the color and opacity. You guys know when I get quiet, I'm super focused trying to decide how I want that bottom of that to look. What do you guys think? Does it make you want to try to do your own? And you guys can always go back to these, you know, it'll be uploaded to YouTube probably by tomorrow, or you can come back to this Facebook page and just go under videos to go back and see it too. So if you're new to watching with me, again, I normally teach in acrylics, but I thought it would be fun to show you guys something different today. Let's switch brushes again so I can even— I've got this smaller— this is a really, really skinny skinny little brush so you can get a little bit more detail in there. Maybe add some of this brighter color over here. You can just play with these and just build layers and see what you like. I mean, there's really not a right or wrong. So I'm just adding a little more water, just let that blend in a little bit more. I'm going to pick up a little bit more of the dark over here. I feel like it's really easy to play with shading in watercolor too. See how just darkening those edges changes that? Years of playing around. My biggest piece of advice for you guys is don't let fear stop you from trying something new. How are you ever gonna know whether you could paint or not if you never try, right? Let's add a little bit more dark over here. I've got lots of videos you can go back and watch showing you all kinds of different techniques. And we also have a blog. Did you guys know that? Tomorrow I'm gonna be on here again, and we're gonna be doing my Fave Five. These are my 5 favorite things of the week, and I thought it would be fun to do my top 5 blog posts, my 5 favorite blog posts, to share with you guys and kind of recap on all the different things that you can learn over there. So I'll be going over those tomorrow at 11:00 a.m. Central Standard Time. I'm gonna grab some of this really bright lime green. Oh, look at that! I love it. I knew I would. I love that pop of color. Let's do one more, see what I have time for. I'm about to have to take Emma to volleyball practice, so we'll see if we can get another one on here. This style is fun too. You kind of start almost like you're just doing like a petal It's kind of what it looks like. Just fill that in really quick because we know we can come back and add some fun colors to it, right? Yes, watercolors dry pretty quick. These can just come out all different directions. Maybe we have a little guy come out over on this side. And they're fairly fast paintings, so I mean, you can see, um, you could add as many cactus as you want to, but It's a pretty fast way to paint your subject matter. See, that's naturally kind of leaving the darkness over on the side. Let's do a little extra shading over here. And then we're gonna grab some more of that lime green. I really liked that color. See, those colors touch when they're both wet. They'll kind of blend together a little bit. It's just so fun to play with. And then some of these have— let me find a smaller brush here. They have those like little blooms on the top. Let's add some of those on. They're so pretty. Yeah, I'm really loving this watercolor set. Those fun, fun colors. Maybe we pull some of that hot pink down here. Then if you wanted to, for kind of give the effect of like the little thorns sticking out, so I've got my dark green. Let's grab a little bit of black and make it even darker. We could do the same thing over here, maybe add some little lines. Again, this doesn't have to be super solid, it's just kind of giving the idea. We can even pull some of that black in with the green closer to the edge, just a little bit more shading, a little bit darker on the bottom here, and then Just getting a little bit more black. If you wanted to, you could do a couple little spikes. They're like little V's. And have a couple come off the cactus too. We could add the little pink things on here if we wanted. What do you think? Pretty fun. Didn't take too long. So, um, that's all I have for you today. Maybe we'll finish up this painting. Maybe we'll continue on this. Do you guys want to see me add more to this? Maybe we can do a continuation next week, um, if you want to see that. So let me know in the comments if you want to see me add more to this and kind of make this into a finished composition. Just type the word "more," and maybe that's what I'll do next week when I teach with you. I think I'm— I can't remember off the top of my head, but I'll be live next Friday with my Fave Five, but we're also gonna do another little painting session, so I can do something new or I can finish this up with you guys. Thank you so much. You guys have an awesome night, and if you're not in the free group already, jump in the free group because that's where you can share, like, what you've been painting. We have posts underneath there where you can share your progress. So don't forget to practice. This is the fun part. Practice, doodle. Don't be afraid to use multiple pages to play with this. So I hope you guys had fun and you learned something new today, and I will see you tomorrow at 11 AM Central Standard Time. Bye!