Fall Bushel of Apples with Christie
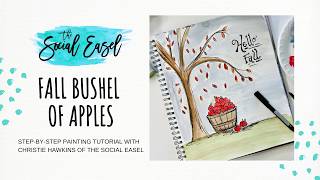
In this 12,500‑token live/recorded session, Christie Renee Hawkins (The Social Easel) combines a step‑by‑step acrylic painting demo of a fall bushel of apples with a comprehensive promotion of her new self‑study course, Learn the Process of Creating Original Art. She explains the course’s three modules – Fall Wreath (the Art of Not Copying, using Pinterest for inspiration), Happy Little Scarecrow (mixed‑media, template creation, hand‑lettering), and Pumpkin & Sunflower Still Life (lighting, composition, Procreate templates) – and details the bonus resources, early‑bird incentives, pricing ($150 or 2 × $79.50), lifetime 24/7 access, weekly homework, and customer‑service support. Throughout the demo she shares practical tips on sketching, color mixing, brush selection, using metallic paints, and adding hand‑lettering, while encouraging viewers to experiment, use templates, and not fear mistakes. She runs a “text WIN to 417‑217‑7044” giveaway for a keychain, promotes her Amazon store for pens, and invites the audience to join her text/email list for future live sessions (e.g., sealing paintings). The tone is conversational, enthusiastic, and instructional, with frequent audience interaction and promotional persuasion.
Chapters
Hey everyone, I am Christie Hawkins with The Social Easel, and today I'm gonna talk to you a little bit about my brand new course called Learn the Process of Creating Original Art, and we're also gonna do a super fun little painting. So we're gonna have a lot of fun. This is what we did last week, so I sketched this live with you guys, and, um, like I said, the video was terrible and it messed up the entire time. So you can go back and watch this, um, however you will see it and it will look like freeze frame as I'm doing this, like little steps at a time. But if you want to see me do this watercolor version, you can go back and watch the live from last week. Today we are gonna redo this But instead of doing a watercolor version like this, I'm going to paint it with just my craft acrylic paints like I normally do before I ever started doing the watercolor version. So, um, that's what we're going to do today while I, um, talk to you a little bit about my new course. If you want to get a template for this too, um, in the description up above, you can just click that link and you can sign up to get an email sent to you with this template so you don't have to freehand it. And my recommendation is always to just hang out and paint with me, talk to me, ask me some questions, and then go back and watch the replay later and paint at your own pace and your own speed. And this is the same thing I recommend inside any of my courses where I teach live is for people to just kind of watch the first time and then go back and paint because it's gonna make your whole experience so much better and then if I do mess up and make mistakes, you're not making the same mistakes as me because you're going to catch that. Um, so anyways, just hang out, have fun with me today, um, ask me any questions that you have. So we're going to be getting to this in just a minute, and I think what I'm going to do, since I can't get, um, StreamYard to cooperate with me, which is what we used last week where I can use two cameras at the same time, um, I'm not even going to try to mess with them. So, um, what we're going to do is after I share a little bit about the Learn the Process course with you. I'm going to take the camera— it's going to be a little jerky for just a second— and then I'm going to switch you and give you a nice overhead view so you can really watch me paint this step by step and see exactly what I'm doing. So link to get your free template is up above, um, and then, um, throughout the live today, I'm just gonna do a couple little reminders, um, for you to enter a contest to win a cute little keychain. So if you want to possibly win one of these little guys, this is my happy little scarecrow. He's one of my very favorite paintings.
He's part of the Learn the Process course that I'm going to tell you about.
Um, and I made him into a little keychain. So if you want a chance to win one of these, I want you to text the word win to 417-217-7044. We are going to pick 10 winners that are here with us live today, um, from that. So tomorrow morning we're going to pick 10 winners. All you have to do is text the word win to 417-217-7044, and this will put you on my text list and also, um, let you know anytime that I go live. How many of you want to know how to create your own artwork? It is the number one question that I get, is, you know, especially from women who have been painting with me for a while, um, or maybe you've been painting for years and you've gone to classes or you've taken classes online, and maybe you're brand new to it, but you would love to be able to sit down and look at a blank canvas and just create something. And that is something that is definitely learned over time, that I have learned over time as an artist, and I have created my own, um, system and techniques on how I come up with original designs. So that's what this brand new course is all about. I'm really, really excited about it. It's my first ever course, and again, it's called Learn the Process. Of creating art. And inside this course, you are going to learn 3 different techniques that I use to come up with ideas to create my originals. Um, and these are the 3 behind me. So this Hello Fall Wreath, our Happy Little Scarecrow, and then our Pumpkin and Sunflower Still Life. Um, you're going to learn all 3 paintings inside the course. But it's much more than just painting tutorials. There's over 6 hours of video footage where you are literally getting to go behind the scenes with me. You're kind of getting a peek into my brain and how it works. So for the first one, I'm going to grab my notes here just so I don't get, um, you know, off. So inside this course, um, there are 3 different modules, and all of this is stored on our membership website, course website, whatever you want to call it. You can log in to your own account, you have 24/7 access to everything, and you have lifetime access to it. So these are not live lessons, these are all pre-recorded so that you can take them in whatever speed that you need to. And I'm actually slowly releasing them, so when you buy the course You're going to have access to Module 1 to begin with, and that's going to be the first painting. You're also going to have access to all my bonus resources and tips on how I create templates, transfer them to canvas, et cetera. And because some of you may still want to sharpen your painting skills, I'm also giving you the 4-day video series with Basics in Acrylics. So you're going to have access to all of that when you sign up and buy the course. and then that is week 1. Week 2 of the course, and this is released depending on whenever you sign up for it, you'll get the second module a week later. And then, um, you have a homework assignment from me each week to help you really process that technique that I'm teaching you in that module. And then the second week you'll get module 2 and painting tutorial number 2, and then the third week you'll get module number 3 and painting number 3. So I'm gonna go over all of that with you and kind of tell you what you're going to learn inside the course. So in the first one, um, I'm gonna stand up and grab this really quick because it's a little small for you to see, but this is the Hello Fall Wreath. I love this one. I keep mine on a little shelf, so this is a great size for a shelf sitter. I think it's like 14 by 14 off the top of my head, but inside this one. The title of this module is called The Art of Not Copying because that painting—
prop it back up here really quick—
this Hello Fall painting, that wreath, was inspired by ideas that I got off Pinterest. So how many of you have been on Pinterest and you're saving all these cute ideas, arts and crafts, paintings that you want to do? But the thing is, we cannot copy other people's art. So in this module, I'm going to teach you the art of not copying, how you can be inspired by what you see on Pinterest, but you're not copying somebody else's work because guess what? You can't do that. And artists can come after you and they can sue you if they see you taking their artwork and claiming it as your own. So make sure you're not doing that. Sometimes people don't know that. It's one thing if you just paint it for yourself and no one else ever sees it and you're just practicing and you want to see if you can. It's another thing if you take it and then try to sell it as your own design, um, or teach paintings with it, um, teach painting classes with it. So that is not allowed. Um, you have to have the artist's permission in order to do that. You can't just grab an idea off Pinterest and say it's yours. So inside this module, I'm going to teach you how to look on Pinterest, how to see all the different things and create an idea from all the different things that you see on there. I'm going to show you how I create boards. It's like, for instance, for the fall wreath, how I went on there and I got reference photos. Um, I got reference photos of real fall wreaths that I love. I looked at different fall decor, like little pumpkins sitting on a table, and then I looked at paintings and just kind of looked at several different things, and I'm going to show you how to take 8 to 10 reference photos that are giving you inspiration and how to, and how to turn them into your own design. I'm going to show you how to create thumbnails and start sketching. And you're also going to learn some bonus techniques in this module. One, some simple hand lettering and how to apply that to your canvas and your paintings. and you're also going to learn some color mixing. So if you're one of those people that you always want to have the exact colors that I'm teaching with, and it makes you panic when you don't, this is going to be a great lesson for you because it's going to show you how you can make your own paintings even if you only have a few paints at home. You can make a lot of different colors with a few different paint colors that you have, so you don't have to go out and buy every other color that I use. So we're going to talk about color mixing in that. And then the second module is going to be our little happy little scarecrow. So inside this module, I'm going to show you how to take real life inspiration. So let's say you're going to Michaels or Hobby Lobby or Kirkland's and you see all the cute fall stuff and you see this little fall statue, um, or like wood cutout. That's what inspired this painting for me. A few years ago I was at Hobby Lobby and I saw this really cute scarecrow and I thought that would be so cute, like make a little scarecrow like that as a painting. But you're going to see how I took that wood cutout that I saw, took a picture of it. I'm always taking pictures everywhere I go and how I made it completely my own. Very small reference to get my idea and then turned it completely into my own piece of art. And inside this one, you're going to learn again how to take sketches, how to take your idea, your little sketch, how to make that into a template that you can transfer onto your canvas. You're going to learn some mixed media. So if you have never done mixed media before, I highly recommend it because it's a ton of fun. But all that means is that you're using a bunch of different mediums to create a piece of art. So for instance, in this little guy, I don't think— but yeah, that won't fall. I'm gonna hold him a little bit closer so I can show you some of the details about him. This little band on his hat, his scarf, the little fabric at the end of his jeans, all of that is scrapbook paper. This sunflower scrapbook paper. These little polka dots in the background, tissue paper. So you can take all this fun stuff and incorporate it into your art. So if you've never done mixed media before, you're going to learn all those mixed media tips on there as well. And you get to see a little— remember I told you it was going behind the scenes with me? Um, you get to see how I fix mistakes, because in this module, when I first taught this to my tribe— again, these are pre-recorded, so these were taught live in my Inner Tribe membership last fall. And when I started it, I painted the whole thing and I thought I could just freehand my scarecrow on there. And guess what? It just did not turn out. So you're gonna get to see me deal with that and you're gonna get to see me fix it. And I think that's a very important lesson for anyone when, um, you're trying to create your own art. Number one, it's important to know you're going to make mistakes. You learn through mistakes, so don't let that stress you out. This is not about perfection. Art is not about perfection. It's about you creating. It's about you enjoying the process of getting your hands dirty, grabbing a brush, and just having fun. But you're gonna see in this module that it didn't work out for me that day and that I had to stop, refresh, make myself a template because I loved my sketch so much and I thought I could just freehand it on there. And then I realized I really need to take this little itty-bitty sketch that I did and I need to make it bigger so that I can transfer it on there exactly the way that I drew it originally. And then look how he turned out. So I love him now. Um, so you're gonna get to go through all of that. With me. And then the final one, and this is really one of my favorite ones to teach you because this gives you— all three of these really give you limitless ideas of how to create your own artwork. But I think you can learn a lot from still lifes. You can learn, um, lighting, shading, light source, where it comes from. You're gonna learn in this not only how to paint a still life, but you're also going to learn how to actually create one. So I'm literally going with you from the very beginning in this module with the supplies that I got from the craft store. So a pumpkin, the sunflowers, some fall decor, all of it. I made my own still life. You're going to get to make it with me. You're going to get to see how I photograph it, um, at different angles and how to get it set up, how to build your composition inside that photograph. and then I'm going to show you how to take that photograph and get it on to your painting surface. And you're going to learn two ways to do that. You can learn the non-technical way where I literally just show you how to trace it on there. And then you can learn through using an app called Procreate on an iPad, which is what I use for most of my templates. Um, so it's going to be jam-packed with a lot of information. Um, that's going to teach you how to do this. So next time you go to the store, or maybe you buy a flower bouquet for yourself or some new cute fall decor, you're going to be able to look at it and say, oh, I'm going to put all this stuff together, I'm going to take a picture of it, and now I've got a painting that is completely your own. Nobody else's is like yours because it's your own original still life. So you're going to learn all of that in this course, um, plus a few extras. So because we had some technical difficulties last week, we actually extended the early bird bonus. So if you sign up for this course before Monday night at midnight, you're gonna get 2 bonus paintings. And when you go to the page, um, you go to the course page to read all about it, everything I just shared with you is all going to be written there for you, um, and explained. You're going to scroll down and you're going to see the bonus tutorials that you're gonna get, and you're gonna want them. So make sure you join before Monday because it's one of my favorite Santas. Yes, one of my favorites. It's my Rustic Santa and my Cozy Little Snowman. So I thought it would be really fun to give these to you as bonuses. Once you go through your fall courses, what's next? We got to be ready for Christmas, right? So I'm gonna give you a couple winter favorites as your bonuses, and these are valued at over $65, $70. Um, they're normally $37 a piece in my store. So you can do the math on that. So for everything that I've talked about today, the course is $150, or you can do 2 payments of $79.50. And again, this is a self-study course. You have lifetime 24/7 access to it. So you get to take it at your own pace and at your own speed. Um, you will have weekly modules and homework from me, and you will also have, of course, our customer service team. If you ever have any questions while you're taking the course, you can email christie@thesocialeasel.com and they will get back to you within 24 hours. And then if you want to show me what you're doing, this is what I love about this, because I did give you homework assignments. I not only want to see you reproduce the 3 paintings that you're going to learn, but I'm challenging you in this course to learn how to create your own, right? So that's going to be part of your homework assignment, and you're going to be able to text me directly to share your artwork and to share your progress with me through this course. So I'm super excited about it. I hope you guys are too. Um, like I said, it's something that people have been asking me for a long time, and I can't say enough about the benefits of learning these techniques so that you can create your own artwork so that you stand out on your own and so that you're not copying others out there, because there is enough in this world for all of us. Um, and there's definitely enough for you to create your own art instead of copying a fellow artist's art that you see. So learn to make something new and be inspired by everything that you see out there, and then learn how to take that and turn it into your own compositions. So I'm really, really excited about it. Um, I'm gonna start prepping things here to get ready to paint with you guys. Let's get some paints together. So, um, I'm just grabbing some fall colors again. This is what we're getting ready to paint.
This was a watercolor version, and today we're just going to do a true acrylic version, but I'm keeping with similar colors, kind of muted fall tones. And I'm not going to do a color list for this.
Pick your favorite colors. You can print this off, you can hold your phone up when you're in the store and look at colors and hold them next to paint bottles in there if you're wanting to find something similar. So I just grabbed kind of like a calm slate-ish blue for the sky with some white, grabbing an orange, red, and yellow.
Pretty basic. Okay, so I'm just grabbing some greens. You guys will see this when I flip the camera over. I'll show you my paint plate.
And I decided we'd add a little metallic today, so I'm using DecoArt paints. This is the Extreme Sheen 24-karat gold.
Fantastic gold, one of my favorites.
Okay, so these are—
this was a used plate, by the way, but these are some of the fall colors that I'm going to use.
And again, I'm probably not going to necessarily use them straight out of the bottle like they are.
Look, that one kind of is in a shape of a little apple. Um, see how easily I get distracted?
Um, we're probably going to do some color mixing, but before I do anything, again, I'm going to freehand this. You guys don't have to because I made a template for you.
These are my favorite waterproof pens. This is Faber-Castell. Um, these are in my Amazon store. You can also text the word Amazon to that same phone number and it will literally just send you a link to my Amazon store so you don't have to go find it somewhere. So I'm just going to start sketching, okay? Just one side. Now when I sketch, I usually have some loose lines. I don't want them to be perfect and stiff. And this tree doesn't have to be the same as my original. I love those little swoopy branches. I may add a little knot into this tree.
I don't know, I just thought it would be cute to have, yeah, almost a naked tree, a couple little leaves kind of floating down.
And then of course our basket of apples down there. So if you're looking at me sketching the tree, this would be the same if I was teaching this as a painting. Notice the shape in between each little break that I do. What letter do you see me making? I'm going to make another one here. Maybe make this a little bit wider. So when you're doing trees, yes, it's the letter V And that's just going to give you a really natural look instead of like crazy octopus legs coming off of something, right? So that's your little tip for that. And then for the leaves, just these little— I'm just doing simple little like leaf shapes. I like to think of it as like two little parentheses that are touching one another. You can make them all different sizes. This would be a great little coloring sheet if you've got kids or grandkids. You guys can do this together. Maybe some that are a little wonky, like they're falling through the air, can't really see the whole thing.
If you want to, you could add lines in.
So if you want to get a little fancier, you could even just add one line down the middle, or you could do the little angled veins that come in the leaves. This— so it comes with several different pen sizes. I personally like the brush because it does give you bolder brush strokes, um, like scribbles and stuff.
There are very fine pens in there like this one.
This isn't the same brand, but you can see it for reference. Very, very fine skinny lines as well. So depending on what you're doing, you can decide what kind of pen you want to use. So let's go ahead and get our ground on here. And again, I just kind of like the little scribbles. And then we can start our little bushel of apples. How many of you are going to try this on your own, and how many of you are like, yeah, no, I'm good, I'm just going to get the template? But I want you to see, like, already pretty basic shape, right? Kind of coming down a little bit of an angle, a slightly curved bottom, and then a slightly curved top. It would go around a little bit there, but we're going to stack some apples up in it. And then I'm gonna add another little line here, some little nail holes. This is not about being perfect, it's about being sketchy and just having fun with it. Maybe one more band kind of holding that basket together in the middle. And then some semi-vertical lines. So I'm just going to start— they're almost like little pumpkin shapes. Well, that's how my apples are going to be anyways. They got a little bit of curve to them. They look like little butts right now. Then we're just going to start stacking them up. Some semi-circles, some big, some small. They can have a little curve in them if you want. Here's the thing, guys, just allow yourself to try. You're never going to know if you don't try. What's the worst that happens? You hate it and you rip that page out of your sketchbook or your mixed media pad and you toss it in the trash, and then you never have to look at it again. Let's turn that one into an apple too, and maybe a couple at the top. We'll add A little leaf coming out. Doesn't need to be on all of them. How cute is that? Oh, I'm just laughing at how big my basket is to the size of my tree, um, because obviously it's huge. That is one big bushel of apples that we have created. So really, this tree would be much taller, but that's okay. It doesn't matter, right? You guys still liked it anyways. Um, someone had a good idea, um, I saw the other day where you could add like a little picket sign over here that says like 5-cent apples, or you could maybe start like a little picket fence. What if we just added a little fence over here? But this is what I like about sketching, is because it's kind of supposed to be messy. Where do I want the other You can make it your own. Are there any suggestions on how to get decent script? My handwriting is not canvas worthy. So here's a quick tip for you.
Um, find a font that you like, type out whatever saying it is that you want to put on there, and then you can trace, trace that font.
If you don't like your handwriting, find a handwriting or a font that you like.
I happen to know this really great girl named Casey who teaches hand lettering.
She's one of my best friends. If you want to get some free lessons from her, I think she has some free templates. Her business is called Whatever Letter with Pizzazz Art Studio. So she, she teaches hand lettering. So there's lots of options out there for you. Alright, so let's get to the paint part, right? I am going to do a pretty light sky because I don't want it to be super, super heavy. So I'm leaving a decent amount of water on my brush. Now I am just grabbing whatever big brush I have. This happens to be a filbert. If you don't have a filbert and you have a flat or a round instead, that is perfectly fine. I'm not gonna lie, it's a little bit of a gloomy sky, but you know how fall days are when the sun's not always shining, but it's just a cool fall day. Maybe add a little bit more white in some areas, but you can pick a brighter blue if you want a more cheerful painting and not the grayish blue sky. I'm going to paint over those leaves because I can still see the lines and I know I can come back to them. Let's just paint over those. So the difference between this and what I did here is just the amount of water that I'm using. So what are you guys thinking when you do yours? You're going to pick a soft slate blue like this, or do you think you're going to go with something brighter? So you could do a little cheating here because we're going to do full-on acrylic with this. Some of you are probably freaking out that I'm overlapping those lines like that, but look, I can still see through them, and my colors that I'm going to put on that tree trunk and the leaves are going to cover what I'm doing right now, so it's not going to matter that it's there. There's something about this scene, it just makes me think of Winnie the Pooh. I feel like he should just be walking up to this little basket of apples anytime now, except of course he would want it to be honey. Can't you just see him and Eeyore coming over here? That's the little kid in me. And I'm not even worried about covering the whole thing. It's okay for there to be some brush strokes showing in the sky, all of that. You guys see Winnie the Pooh too? All right, let's jump down to the grass. I'm not even going to rinse my brush because it doesn't matter. I've got some dark green and light green, just going to mix together down here. I'm going to pull in a little bit of water just to thin it down some. And you could even make your ground go back further. You can always change your mind. So just two shades of green. Let's take some of that darker, add a little bit of shadow under there, maybe under where our tree is, and take some of the lighter. I'm going to grab some yellow. With that lighter green that I have, just for a different color. Told you we'd do some color mixing here, throw in some lighter areas. Just kind of play with it and see what you like. All right, I'm going to switch to Smaller round. Now grab some of my brown, a little bit of white with it. So if you want these nice smooth lines when you're doing something like this See how I'm just pulling it? Pull down, get nice smooth edges. I may need to add some apples down here on the ground. So I'm doing a little bit of brown, a little bit of white, so when you pull those brush strokes you kind of get that variation. And I could leave that simple like this, or I could even go further and add some shading to it. I'm going to get a skinnier brush to do these far out branches. Got a little bit of red in my brown there. I don't mind it, but I'm out of brown. Do you have a preference so far between the two? Can you decide if you like one versus the other? Do you need to see it all the way? Now I could also leave this all paint and no black outlines, or I could come back like I did in this one and add some black over top of it again. So I'm going to get a little bit lighter brown here for my basket, maybe add a little bit of water to that. I think I want it a little thinner still. Maybe add some orangey color in that brown, give it a different tone than the tree. So I'm just adding a little orange to my brown, pulling it in there. This is how easily you can change colors and make them your own. And if you aren't sure which colors can go together and which can't, I would highly recommend getting a color wheel. If you don't already have my Basics in Acrylics lesson, you can purchase that for $10 where I really explain this to you. Um, or it is included in the Learn the Process course. So if you plan on buying that course, no need to buy that separately because we included it for you. So I'm just getting a skinnier brush now. It's a great course if you just want to learn some basics, obviously, in acrylic painting, color mixing, shading. It does come with a bonus tutorial, all kinds of fun goodies in there. So I could leave my tree like this, but I think I want to add a little bit of light in here too. So I'm going to take some of my white, just a touch of brown, start highlighting Just a little here and there.
See how easily a little bit of white just adds that extra element?
Start adding the little bands around the basket. So one big difference you're going to see between the two styles is speed. So it's much faster to paint with the watercolor version. It's a fast, fun painting. When you're painting with acrylics, it adds a little bit more time to what you're doing. I'm going to switch back to another brush here. Forgot to give myself paper towels. I'm just wiping it on the back of this. I'm going to grab some white, little bit of brown. I'm gonna let that dry first, and then I'm going to come back and add some like brighter white. Over top of it to make it really stand out. Let me make those pickets a little bit more apparent here. So we're going to start with just some basic red here. Like I said, I'll probably be adding to this. This is straight out of the bottle, and honestly, we can do a little bit of a cheat here. We're just going to fill it in. I'm going to get a little orange with it. I can't just leave it straight out of the bottle on line. I have to mix. So again, I can still see those lines, so I can do a little bit of cheating there, and then we can come back and add more color individually to it. And those of you asking about replays, everything that we do on Facebook is always available for replay. We don't delete any of our videos. And then they will also be on my YouTube channel. So if you're not following me over on YouTube, you can check that out and you'll just have all kinds of fun little tips that you can practice on. Now you could use a smaller brush for this. I'm just using a number 2 round. This is in my same mixture that I have, but I'm going to come back and put some other colors in there as well. And I'm being a little messy with it. Some leaves are big, but I want you guys to realize something when you're painting and doing this. You know, I wasn't concerned about it being perfect, about the proportion being perfect, any of that kind of stuff. It's just a fun little painting. Don't over-concern yourself with those things that are going to stop you from being creative. The leaves can be whatever size you want them to be. It's just a fun little painting. Just kidding, I was trying to make it better, but I think it just moved it, made it worse. Okay, I'm gonna start going back over, pull a little bit of orange into this red. Couple little leaves on here. Let's add one down. Another little tip for you. If you want to make some darker red, add a little green to it. It's going to tone it down. We can create a little bit of shading in here. And then I'm gonna go with a little yellowy orange. I didn't rinse my brush. We're gonna kind of use this as kind of our highlight side, just to add a a little bit of contrast in there. Maybe some yellow and orange and some of our leaves. Okay, I think I'm just going to add some white to our fence posts, and then I may add some black lines back over. So I'm not completely covering all of that brown. I'm letting a little bit kind of peek through there. Now, whenever you're doing the fence, make sure whichever way you decide, whatever is going to be in front, whether it's the vertical lines or the horizontal, that they're both the same. So for me, it's the vertical. So I want to make sure and do each one so it doesn't look like that board is coming across wrong in different areas. That makes sense. Well, you know, I thought I was done, but I think I want to add just a couple some messy little leaves down on the ground. These are really just going to be a bunch of brush strokes. I'm not even making them all the leaf shape. Don't you love the extra leaves? I like the leaves.
I love it, it's so happy. Okay, let me—
I'm gonna see if I can grab my pen real quick. It was meant to be. I had a Posca pen right here. All right, priming my pen. Whenever you're going back over with a paint pen, Sharpie, whatever it is that you choose, always make sure that wherever you're drawing the lines, that it is 100% dry first. And again, I'm going to do this Christie style, fast and sketchy. I can hear the panic and the gasps through the computer. Just loose, get loose with it. Some scribbles. They don't have to fully outline the leaves, just kind of give the idea of that leaf shape. Or you may not even want to do that, you may just want to leave it all paint. I just think it kind of pulls everything together. I just think it kind of ties everything together. I could do a nut hole. All right, what do we think?
Are we done?
I think I'm happy with it. I don't think I'm gonna add any words today. Y'all can text me your finished paintings. So if you painted with me, text me and show me. And then if you want to get entered in to get a cute little keychain, make sure you text the word win to 417-217-7044. We're going to pick 10 winners for that tomorrow. If you missed that at the beginning, I hope you guys had fun. Almost gives him a slight pink. Get some of that color in there too.
All right, I hope you guys had fun.
Um, which version do you like better? They're both super fun to do. Again, if you want just to relax and chill and want a fast, easy painting, doing watercolor style is just so much fun. Um, so relaxing to do.
You don't really worry about details.
Too much, but they're both fun. I feel like I could walk right into this scene. Yeah, the second one just has more character, doesn't it? I think so too. There's some closer up so you can see the detail. All right, thanks for hanging out with me, guys.
Um, we will be back next week.
I think next week I'm gonna be showing you how to seal your artwork and go over some different— people ask this question all the time. What kind of sealer do you use on your paintings? I don't use any, but if you want to, I'm going to show you some different options that you have. Um, I'm going to finish off a door hanger that— if you're doing a door hanger or anything that's going to be outdoors, you want some kind of sealant on it. So, um, next week, I don't have a specific day and time yet, but make sure you're on my text list, make sure you're on my email list, and you will get notified when we go live. So that'll be coming up next week.
If that's something you're curious about, come back and join me then. Bye!










