Flat Paint Brush Techniques for Beginners | Full Acrylic Tutorial
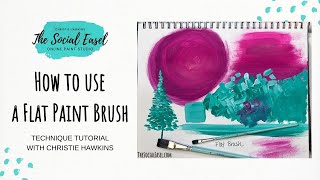
Christie Renee Hawkins teaches flat brush techniques for acrylic painting. Learn to load the brush evenly, dry-brush for texture, blend wet-on-wet without overworking, and paint straight edges and trees by dabbing and rotating the brush.
Chapters
Hey everyone, today we are going to learn all the things that you can do with a flat brush. So in this brush series, we're going to break each brush down and I'm going to show you some different techniques that you can use with each one of them. So we're going to start with our flat brush. This is probably probably the most commonly used paintbrush because it is so versatile and you can use it for so many things. So I've got two different sizes here. These are out of my brush set that we're going to start with. So I've got a large one and then obviously a smaller one. So we're going to start with a large one, and I am just loading up my brush So when you're loading, you want it to be kind of loaded on both sides of your paintbrush so you get nice smooth brushstrokes. And we're just going to start with very simple. We're just going to cover surfaces. So large flats are really good for backgrounds, for blending, and you can kind of see how quickly you can fill in a section like this. And so while I'm showing you this, I also want to show you when to know to reload your brush. You can see there's not much in here anymore, and the further we go out, we're really having to push into our mixed media pad, which I'm using, or our canvas to get the paint to show up. So when you start seeing it kind of skip sections like that, that's your cue to load your brush up again, and it should glide nice and smooth for you as you go back and forth. Now, this technique can come in handy if you are wanting to do what I call dry brushing. This is a technique you can use that you are purposely doing that, and you have very little paint in your brush. I usually do it after I do some brush strokes just like this and then just use my leftover if I want that effect. So let's say you had a base color underneath here and and you just want a little bit of that dry brush effect on top of it to kind of give it more of a rustic feel, or just added texture to your painting, you can use your flat for dry brushing. But let's jump back up here, and I've got this— that was our hot pink, and we're going to grab some of this like plum purple, and I'm going to go right over top of that. The other thing a flat brush is good for is blending. So right now you can see those lines clearly defined. I'm just going to overlap that. Now I'm able to do this because the pink is wet and the purple is wet. If it wasn't, it would be very hard to transition those. So I'm going to kind of blend them together. You could go back into the pink. So you're bouncing back and forth between both colors, giving you that nice trend transition from pink to the combo of them and then to the purple on its own. Now, the other way you can do that is in a circular format. So sometimes I do this in backgrounds, um, if you kind of want it to have like a radial center, maybe like a moon or a sun. Obviously we're doing this with pink, but whenever you're doing this type of blending, you don't want your circle to end up looking like a bullseye, right? So we've got our purple and our pink, and right now it just kind of looks like two rings together. So again, where those two colors meet, we're going to go back. And you move quickly when you're blending. You don't want to wait too long, especially if you are painting on something like paper or wood where the paint dries quicker. You want to move quickly to get that blended nice transition. And then if you need to, you can come back, pick up more of your pink in the middle and transition out. Now keep in mind, whenever you're doing this, this doesn't mean this has to be your finished background. You can let this dry and put another layer on top if you see any streaking coming through. A lot of colors are just very transparent and they need two coats of paint. So if you see that in any of the pink sections or even the purple, and what a lot of people do, and it's a big mistake when you're first learning how to work with acrylics, is they'll see that and they want those streaks to go away. So they will just keep taking paint and keep adding more and more and more, and it's putting wet paint on wet paint, and what happens is it's just scooting the paint around. You're not going to achieve what you're trying to, which is covering those streaks up. You're just going to continue to have them. So the trick is to let this dry. You can use a blow dryer if you're in a hurry, or just let it dry on its own. Once it's dry, come back and you'll put your second coat on so you can cover up any streaking that you may see. So another fun thing— we'll switch colors— now why don't we switch brushes— more of like an impasto style where it's thicker. You can leave bold amounts of paint so you're not overly blending them. I also like to call this— my, my words for it are— I call it the art of not blending. So You're just laying down these colors next to each other, over top of each other. They are overlapping some, but I want you to see the difference. I like doing these for different backgrounds, um, just to create more texture in your painting and more interest. So the way I'm doing that is by doing quick brush strokes, all different directions, and then picking up and going. So you can make short ones, or you could make longer, more rectangular, and a combination in between. So I'm doing that by not blending, right? So what happens sometimes when I show this and then when people go to do it is they think, they're like, okay, I'm doing what she's doing. But they keep going and they just keep overworking that area. And now look what's happened. You see no contrast in here. Everything has started to blend together because you're leaving your paintbrush attached to your surface instead of coming in and picking up and putting down. I'm not staying connected. So this is picking up and putting down, this is staying connected, and everything starts blending together. Now that doesn't make this wrong, it just means when you're trying to do that particular technique of not blending, this is where people struggle with that because they're staying attached to their canvas. You still may like the look of that, and that is perfectly fine, but I want you to see the difference between the two.
I want to give you a little close-up to see exactly how I'm laying these brush strokes down, how the colors overlaps and they mix slightly, but they're not overly blended together. You can overlap with a secondary color and you can really see those brush strokes separate and build that contrast.
Um, so the other benefit to a flat brush is doing nice straight edges. So this is what I'll use when I'm doing a horizon line. Say we've got a nice pretty ocean back here and I want a nice smooth line for my horizon line. I'm going to start— because I'm right-handed, I start on the left side and pull across. And you get that nice smooth edge. This is good for when you're doing any kinds of shapes, obviously, especially squares and rectangles. You're going to want to use a flat brush for those versus a round or like a filbert. So sides of buildings, anything that you need a straight edge for. And then one of the last things I want to show you that you can do with this brush is like evergreen trees. I love this technique. It's very simple. We're just going to kind of do like a little line here as like our tree trunk, and I like to start at the top, and I'm holding it up and down Okay, so I'm holding it vertically and I'm just going to start kind of dabbing. And then see how I'm slowly turning my brush and just start staggering out. We're going to overlap that tree trunk that is just really our guide, and we'll start coming in I'm going to try to hold my brush so you can see. I'm just kind of making these little dashes that are overlapping. So we're just kind of overlapping as we go down. And you can decide how much you want space in between. There's all kinds of different evergreens, but this is a really easy way. To kind of get that look. And of course, we could take it a step further and, you know, put some lighter areas on top of that and start creating that contrast. But I like using a flat brush for this technique. It's a very simple way to start making trees.
I wanted to do a quick close-up to show you how I turn the paintbrush vertically to get the tip of that tree nice and sharp.
So hopefully that is helpful to you and you can see the benefits of using a flat brush and exactly what you need to use them for. When to use it, I would say anytime you're doing any kind of huge blended background, when you want to kind of create this look of the not blending and staggering your shapes on top of each other, your brushstrokes, more of an impasto style. And of course you can add— I'm using just regular craft paint, but that works great with thicker-bodied paint as well. Any of your square or rectangular shapes, your horizon lines, any straight edge that you need, buildings, horizon lines, anything like that, the dry brushing technique that we talked about, and then just some quick, easy evergreen trees. So I hope you have found that helpful, and stay tuned for the next brush.










