Fri Yay with Christie 7.3.20
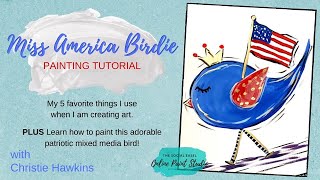
In this live session, Christie Renee Hawkins of The Social Easel greets viewers and announces a new Friday schedule. She presents her "Fave Five" – the five art supplies she uses most: the Addi’s Art 10‑piece synthetic brush set, a skinny liner brush set, DecoArt Premium Gold Paint Pen (chisel and skinny tip), a 24‑pack of Craft Smart acrylic paints, and Mod Podge. She also shares a bonus non‑art recommendation, an ice maker, and advises purchasing Amazon’s Protection Plan for such appliances. Christie then demonstrates a mixed‑media Fourth of July bird painting, walking through each step: sketching the bird shape, using a filbert brush for broad fills, a liner brush for fine details, loading paint correctly, applying Mod Podge to secure scrapbook paper, and adding patriotic elements (flag, gold accents) with the gold paint pen. Throughout she compares multiple gold pen brands, explains how to prime and use them, offers practical tips on brush pressure, paint consistency, and re‑using old brushes with Mod Podge. The session ends with encouragement to enjoy the holiday safely and a reminder that imperfections are part of the creative process.
Chapters
Hey guys, how's everyone doing? It's Christie with The Social Easel, and we are going to talk about all things painting today. So it's finally Friday. So happy. This felt like the longest week ever for some reason. On Fridays, we're changing the time to 11 a.m. moving forward, but every Friday you can come back and and we're gonna do a Fave Five. So this week we're doing a Fave Five on my 5 favorite things that I use when I'm creating art. And it was really hard to narrow it down to 5 things, so, because I use a lot of stuff, but these are some of my top, top things. I'm also going to tell you about one bonus item that has nothing to do with painting at all, but if you've painted with me this week, you may have heard me talk about it, and people were asking for the link, so I'm gonna tell you about that too. And once I tell you about everything, we are going to use those supplies and create one more little Fourth of July piece of art. But so I'm thinking I'm probably gonna teach you guys— I'm gonna move this chair out of the way in a minute, and I'm gonna teach you standing today, a little bit different than the overview. So let's get started. Okay, how many of you painted with me the other day? I can't remember which day it was that we were talking about my ice maker broke, and I was like devastated because I love ice. So I ordered a new ice maker because the one that I had was from China, and I was like, you know, chances of me actually hearing back from them and with everything going on, them even having anything in stock, I was like, it was under warranty. I was like, there, there's no way, um, I'm actually going to get a replacement for that. So I went and ordered a new ice maker. Um, so that is the first bonus link, um, is my ice maker. Because if you love ice, especially if you loved, um, if you love soft ice, um, and you want something you can crunch on, um, you'll love this ice maker. So, so anyways, that's the first one is my ice maker. If, if you love ice, I highly recommend them. And then get the— this last one that I was telling you about that I ordered from China, I did not add Amazon's protection plan on it, and I just went through the company because it said 2 years. So I was like, well, that's good, that'll cover me. But it wasn't as easy to get taken care of. If you get Amazon's Protection Plan when you buy stuff like this, it's so simple. I had one break down a few years ago, contacted Amazon, used my SquareTrade thing, and they literally put a balance in my Amazon account for me to use to order myself a replacement. So that's my recommendation for there. But then, so the second part of that story is I ordered a new one, and then surprisingly I actually heard back from the company I got the first one, and they're sending me a new one. So now I'm gonna have two ice makers. So I'll have one for the new deck, which is going to be awesome, and then I'll have one in my kitchen. So Cory was like, really? And I'm like, well, I didn't think they were gonna say anything back, and I wasn't gonna wait like 2 weeks to not have any ice. So anyways, that's the first one. Now we'll get to the art stuff. So, and you've heard me talk about these a million times, but I just want to go over them again because if you are new, you haven't heard me talk about it. So when you go to that list, you're gonna see a couple brush sets in there. These are my two favorite brush sets. That I use in all of my paintings that I teach you guys. So the first one is the Addi's art set. It's these white handled brushes, and they are a 10-pack, and they have all different sizes. But these have really, really good bristles. These are synthetic bristles. They're the perfect sizes. So it's a 10-piece brush set. So that's my first one, and I think it's only $15 right now. They have been out of stock for a really, really long time, which also makes it hard to give you guys, um, links to stuff because everything has been out of stock since COVID They got these back in stock, so if you need good brushes, get the Addie's Art set. It's a 10-piece brush set. Um, the second brush set is See these? It's a really skinny little liner brush. I was trying to find some of my other ones. I think this is— this one's wet, but they come in different sizes. But these little liner brushes are really, really important when you're doing detail work. So if we're talking about like on the— this is the painting for the Painting of the Month for July. That link is in there too if you want to learn how to paint this. It's already up inside the membership hub for Painting of the Month Club. But like when I'm doing any of these like fine detail lines around the outline, these little white marks, these little black marks, especially on the fence here, we don't want something that's big we want a skinny little brush so that we can make those little brushstrokes without them being gigantic. Liner brushes. And then another painting— keep turning around the wrong way— and this one is not available right now anymore. It was a previous month in the Painting of the Month Club, but you can use a fan brush, a rake brush, or you can use a liner brush. So if you'd rather use that, then— because sometimes fan and rake brushes are a little tricky and you can get heavy-handed with them. So a liner brush, you just pull your line out and then you just pull these little palms down and they make great, great little leaves for that too. So obviously you can use liner brushes for everything, but I highly recommend that set. And then you guys have seen me use this already a few times this week, but this— and people always ask because when they see me use it on a piece of art, they're like, oh my gosh, it stands out so much, right? But this is my absolute favorite gold paint pen. It's super metallic. It's DecoArt Premium, but they are amazing and they write— like, you can do lettering with them, you can do accent marks with them. And I've used every brand of gold paint pen that is out there, and this is the best one. It stands out so much more. It doesn't— like, a lot of them, when you put them down on paper, you can see that it's kind of dull. This one is not dull at all. In fact, it kind of makes me wonder. I may show you guys later because I have— and you can also, by the way, this is my big one. Has the chisel size, which I love, and then they also make a really skinny one. So if you need one for skinny lettering, you can get that too. So those are my first 3, and then, um, I was really excited. I was talking about things being out of stock. So this is Craft Smart craft paint. If you're new to painting with me, we just use craft paint. Every once in a while I use some artist grade, like thicker paint, but 90% of the time this is what we use. And there's multiple brands, so you can use Apple Barrel, Craft Smart, DecoArt. I use all of them, but again, everything has been out of stock. So this, I just found this yesterday. They have a 24-pack of Craft Smart on Amazon now, and it comes to just a little over a dollar per bottle. And it's a great assortment of colors. Like, if you're new to painting and you just, you just need a good assortment of colors and you don't want to have to like pick them out individually, this set that I have in my store now is awesome. It's, it's got the bright teals that I use, all shades of the rainbow, your, you know, browns, blacks, whites, gray, like all that, all that good stuff. So that's in there. And then the very last thing is Mod Podge. So I used that yesterday in my mixed media American flag, and we're going to use it again today. So I'm going to use all these products that I've talked about today, and we're going to make one more little piece of patriotic art today. This is going to be the scrapbook paper that I used today. I did find some of— I was telling you I wanted to find some different gold paint pens. Because I have bought like everything to test out what I like. So, um, these are all the different ones I have, all different brands, and then I have my premium one that I love. So we'll kind of go over the difference of those. And this was Christmas paper, but I'm gonna cut it out and use it for the wing and it's just going to look like a bunch of swirls. So you're not going to— can you see that that was like little swirly Christmas trees? But you're not going to be able to tell that when you are working with gold paint pens. You want to make sure that they are primed before you use them on your canvas or your paper, whatever you're doing. So to prime them, you push them down, you push this tip down. I just do it on my table because you guys know there's paint all over my table, so it doesn't matter. So I'm priming all of these so we can see the difference. And you never want to press them down on whatever you're working on because it will leak gold all over your, your project. And if you have these other ones, they're still good. I just want you to see the difference in how how much brighter it is. I mean, I could still use these, but my go-to is definitely the DecoArt. And if you're doing paint parties, you kind of just buy whatever they have in the store and you make it work. So that's why I have so many of these, is from when I used to do paint parties locally and I needed paint pens for my projects, and it never failed, they never had all of what I wanted, so I had to buy several different brands. I've got 5 different brands here that are different, and then I've got my DecoArt premium one that I love. This one is Treehouse Studio. We'll just do some little swirls up here, and I'm gonna hold it closer so you guys can see. This one is Uni-ball, which you— this is a Posca pen. This is really good for lettering. So again, I'm not saying these are bad. I just want you to see the difference in how the gold shows up. That's a Sharpie that's not even working. Let me see if this one will. Now this is, this is just a Sharpie. This is not a Sharpie paint pen, but again, I've used these at paint nights because you can still make good accent marks with them. This is the painter's pen. I think you get these at Walmart. This is Sharpies, which is probably my second favorite if I had to choose a second place. So see how they all kind of look bronzy. And then we'll do the DecoArt one that I love, and I just think it stands out so much more. Can you guys see I'm trying to get closer. I hate it when I have to turn it around because it messes me up on which way to show you guys. So that's the difference in the gold paint pens. So let me know if you have any questions about that. But I love this one the most. It stands out the most. It reflects the most light back. So anyways, that's my favorite. Now let's paint ourselves a little bird. So I'm just going to use— this is one of the brushes in there. This is just a filbert brush, so it's got that little curve at the top of it. And we're going to make a little blue bird. I'm going to grab a little bit of white and a little bit of blue just to make it a little bit lighter. So my basic shape for my bird is like kind of like you're starting to do a C, and you just kind of keep going, and then this kind of swoops down like a hill. Oops, I got some dry paint on there. So it almost looks like a paisley. My dog's name is Paisley. She's probably like, what are you talking about? But it's kind of like a paisley shape. So not too hard. You guys might fall in love with these little birds after we do this one today. I'm just adding some white to it. You don't have to. I'm just kind of playing with the colors here and blending. But do you see how these brushes glide nice and smooth? I like the Filbert because it fills in. It's thick enough and wide enough that it fills in easily. But it's got that curved edges on the bristles, so it makes doing things with a curve nice and easy. So we've got the basic shape of our little birdie down here, and then we're gonna switch to our liner brush. Because if I used that same brush or even a smaller round to try to get this point here, it'd be really, really hard to get it as fine as I want it. And the thing you have to remember with skinny liner brushes like this, it may seem— you may be tempted to just get like a dab of paint you really need to have— wrong way, wrong way. I'm getting there. You need to have a lot of paint in there so that it can make the brush stroke that you want it to. If you don't have enough paint, it's going to be really streaky and it runs out fast. See how this is streaky right here? So I'm just going to load back up. And pull down. And then I just kind of feather it in. If you want to go back and re-blend that, you can. I kind of like the feathering look. Okay, what do you guys think? Easy enough so far? Basic shape of the bird. And then we are going to I didn't get black on here yet. You can do the black legs one of two ways also. You could use— if you could use a Sharpie, if you're worried about doing those fine lines, you can use the liner brush with black paint, and I'll go over that to show you guys. But I like my legs on my birds to kind of come out like triangles. Like this basic little shape here, and then I have them have like a little, little line at the bottom. This is a terrible Sharpie that needs to be thrown away, but that's the basic shape. I'm going to use a liner brush and some black paint to put those on. I kind of miss painting on my easel. This is what I use when I taught paint nights. So I water down the black just a little. Just makes it a little bit thinner, easier to use. So we've got the nice liner brush filled up here. Just pull that straight down. Let's give him some little feet. How cute would this be with a couple little birdies walking behind him? You could have a little Fourth of July parade of birds. That'd be cute, wouldn't it? Maybe we'll have— should I have him hold like a little flag? Under his wing, maybe tuck a little American flag under his wing or hers. I'm gonna use this same liner brush and we're gonna give her just a little semicircle there. Now I don't always put eyelashes on on them, but we're gonna give her eyelashes today. And then you can also— so I talked about when we like do those accent marks, I'm gonna go around the outer edge here. She looks so funny without her beak. And again, I am barely putting any pressure down at all. Like the bristles are just lightly dragging across the canvas. And then sometimes I like to come on the outside of the shape. I just think it adds a little bit of movement. We're just gonna give her a little beak here. And sometimes I cut the little beak out of paper. I cut like a little triangle out and put that on there. Today I'm gonna paint it in though. And so I have that wing. Did you guys say yes to the flag? What do you guys think? Maybe like right here and have our flag sticking out here. I'm gonna have to cut this off. I'm thinking like this with a little flag. Okay, so let's— before I put that on, I'm gonna go back and grab my liner brush again, and we'll go ahead and put the little flagpole up there. I want to add a little ground here too. I like making these little scenes. And you can make these birds in all kinds of colors. Okay, so let's go to— I'm gonna scoot you guys back for just a second. So keep those scrapbook papers hanging around. You can cut them out, use them. Like, I could have— I've done some where I cut the whole shape of the bird out scrapbook paper too. And I'm just going to clean off my filbert brush, and I'm going to use that again. I'm going to put some of this Mod Podge on the backside of the wing and get it on here where we want it. I want a little bit of the wing. Sometimes I just do the wing in the body, but I think since she's holding the flag, I kind of want it like she's got it tucked under her arm there. So I just want to make sure it's got a good coat, our paper is not gonna peel up on us. She's so cute! Make sure when you use your Mod Podge— now I used that same brush. If you have some old brushes, I would recommend using old brushes when you use Mod Podge because sometimes it's really hard to get out of your bristles. It doesn't ruin the paintbrushes, Beth. I just— I have had some, but that could be because they weren't really, really clean super well after a paint night when we've used them, and it makes the bristles stiff. So I just prefer to use old paintbrushes instead. So I'm gonna go in, I've got some bright red here. And again, I don't have to make her beak orange just because normally it would be, because we're doing a patriotic little bird today. And then I like to add paint to my scrapbook paper too instead of just leaving it just like that. Maybe add a little bit of white in there so you still see some of that pattern behind there. Yes, and napkins work great. I'm so glad you brought that up. And there is, um, oh, I can't think of her name right now, one of my creative crafty friends, she actually does a napkin exchange. And every time she goes to Hobby Lobby or Dollar Tree, any of those places, look at napkins because they are great to use in mixed media pieces. They're super fun. They're thin. So if you want the look of like letting something show through a little bit, you can use napkins too. I'm gonna give some little polka dots on her nose. And again, I'm using this liner brush that I love. We're gonna come in. I always like to add white and black accent marks. Now we're going to get our basic shape down of our flag. Do a little navy up here in the corner. And don't forget, we still got to add gold. So I'm gonna do my white first just so I'm not going back and dragging my— I can't talk and paint at the same time sometimes— so I'm not dragging the red through the white later. Hopefully this ends with odd numbers here. What do we have? I may not. I may throw another stripe up there. We'll see. So I'm going to tone down my red a little bit for my flag. So I've got the red on my plate, and I'm just going to take a touch of black. A little bit. Remember, a little bit of black goes a long way. It just tones it down just a little bit so it's not quite so, so bright. And I'm using that same liner brush, so I've been using the same one the whole time since this is more of a detailed painting and I'm not worried about getting these lines perfectly straight. Where do you guys think I should add the gold? I think she's starting to come together. She's so cute. So I just want a little bit different color for— I want to do some streaks of color down on the ground where I did the black, so I'm making some purple here. Mixing my navy and my red. I like to show you guys the color mixing so you can think outside of the box. Just keep playing with it until you get it the color you want it to be. I pulled in a little bit of white to it, and then I'm just gonna streak some— look at that pretty plum color down here. Gold stars, top of the flagpole. Yeah, I definitely want to do the flagpole in gold. Oh, I forgot my favorite part of the legs. My girls think these are so funny that I put them on all my birds. I love the skinny little lines on their legs. I told you guys I really like FolkArt, and this is what gives it kind of that, like, FolkArt feeling to it. And on a white background, I'm not even having to worry about it going over the sides. Don't you love the little stripes on her legs? So I gotta add some stars up here. I'm flipping my brush over. I'm just gonna add a couple little dots up here. You guys may see this again because I'm betting my graphic designer Allison is gonna take this little image and turn it into a digital one. She's so cute because anytime I paint something like this on a white background, she can take that and do something fun with it. Actually, I want to go over a little black on this edge. Remember what I said about not pushing down? Like, you can put pressure on it but you don't want to actually like depress the tip or you will have gold dripping down. The other thing to remember, this is permanent. When you need to shake it up, make sure you put your lid on. I've had paint nights where people have needed to get it, you know, shaken up again, and they're sitting there doing this without the lid on and we had gold paint everywhere. So make sure you put your lid on. And because it's a chisel, I'm gonna depress it here, make sure I've got a nice flow. You can use— can you guys see that? It doesn't show up very well, but you can use the pointed side to make skinny lines and then use the chisel side to make big thick lines. Now that she's got a crown, she's gonna need some cute little jewels on the top of it. You could also add, like, a little heart on the end of the tail for the bird if you wanted to. I think she's all decked out and ready for the Fourth. What do you guys think? She's leading the parade. I love her. She's so cute. Get a little bit closer look here. You see some of the detail, but I do want you guys to see when I'm showing you up close too how messy and imperfect things are up close. For you to not get too worried about the details and the perfectionism and just have fun, because look at all how messy everything is up close. But then as you get further away, you don't notice all that stuff. You just notice a cute little bird. That's it. That's it for my week of lives. So everyone have a happy Fourth of July. Be safe. Don't get close to fireworks and just have fun celebrating this weekend. Bye!










