How to Draw and Paint a Mason Jar with Flowers with Christie
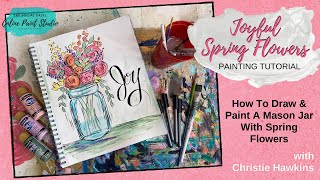
In this live YouTube tutorial, Christie Renee Hawkins of The Social Easel walks viewers through creating a Mother’s Day gift—a mason‑jar illustration filled with spring flowers. She begins by introducing the project’s purpose and showing a digital mock‑up, then lists the supplies (Pentel illustration pens of various tip sizes, mixed‑media or watercolor paper, and acrylic paints thinned to behave like watercolor). Christie demonstrates a loose, sketchy drawing of the jar, emphasizing that imperfect, sketchy lines are intentional and that waterproof pens prevent bleeding. She adds the jar’s top details, outlines for stems and leaves, and explains how to use quick hand motions before committing ink. Next, she mixes muted greens, purples, yellows, pinks, and coral, showing how to control pigment intensity with water, and paints the flowers in layers, allowing the ink to show through. Throughout, she offers practical tips (paper choice, pen waterproofness, brush loading, color mixing, and how to adjust mistakes) and encourages viewers to draw inspiration from everyday objects. The tutorial also promotes her community offerings: the $20‑per‑month Painting of the Month Club and the Inner Tribe membership, which provide exclusive paintings, tutorials, and a supportive Facebook group. Christie ends by adding cursive lettering (“joy”) and invites viewers to share their finished pieces in the free Facebook group.
Chapters
Hey guys, how's everybody doing? It's Christie with The Social Easel, and I am gonna do a little Mother's Day piece of art for you today. So let me show you what we're gonna do today. I'm gonna show you on my iPad because I don't actually have it physically drawn out yet. I did a digital version of it and I had so much fun doing it, and I thought you guys would like to learn how to do it as well. I'm gonna apologize ahead of time if you guys hear some noise. We are adding on a deck to the back of our house, and they're replacing the back door right now, so you may hear some background noise here and there. So this is— oops, I'm kicking the thing. Can you guys see that okay? I think that's showing backwards, but I'm gonna flip the camera to where, um, it won't. I can show you guys how to put the words on, but what I was thinking is I'm gonna show you how to do the mason jar, which is actually a lot easier than you think. So this is what I do when I teach this in paint nights. Um, we're gonna do it with pen today, but you could do the technique that I'm teaching you— you could do it with pen marker or paintbrush. But this is the same way I teach at my paint nights on how to do a mason jar because they're so popular and you can do so many different things with them. It's just, it's a fun thing to know how to do. So we're— I'm going to show you how to do that today and then add some fun spring flowers to it. Um, we're gonna do what we did with the lemon wreath. If you guys haven't seen the lemon wreath tutorial, you can go on my YouTube channel and check that out. But basically what we're going to do is we're going to use acrylics today like watercolor. I love doing this, and I love pen and ink art. So for me to get to sketch and then add paint to it, like, it's one of my favorite ways to create things. And it's something fun and simple and easy that you guys can do and make a little gift for your mom or whoever you want to send a Mother's Day gift to this year. And then I just put Choose Joy because you know, joy is my word for the year, but you could put whatever you want to on there. So this is what we're gonna do today. Okay, so here is what we're gonna start with. These are Pentel— is the brand, but these are Pentel illustration pens, and they come in several different sizes. It's either a 4-pack or a 5-pack. I feel like I'm missing one, but maybe Maybe it's just a 4-pack. My favorite one to use is the brush because it kind of has like the felt tip. It kind of looks like a liquid eyeliner, and then the other ones are like you'd use more for like sketching, which you can still do. So just to kind of show you kind of the difference of the brush strokes. So that's the brush versus the 0.5, and then we have the 0.3, which would be even skinnier little lines. And then what's this one? 0.05, super skinny. So you guys even see what I'm doing right now? It's starting to look like a little flower just by zigging and zagging these lines around in a circle. So that's kind of what we're going to do today. And I love the style of art that I am teaching you guys today. It's supposed to be messy and loose, so this is not about perfection. Leave that somewhere else. Don't worry about it here. This is going to be for you guys to learn to enjoy the process, let loose, and not stay in between the lines. So, um, we're gonna— I wonder if I have— is that in this one? Hang on, I might have it in here and I can show you. I have multiple sketch pad or mixed media pads, which is what I'm painting in, um, that you guys can also get in my Amazon store. But we're gonna do a loose style like I did my lemon wreath. I really thought it was in this one. But maybe not. Let me check here. So basically, I'll just not worry about trying to find that right now. Basically what we're gonna do is I'm gonna draw on the mason jar. We're gonna sketch on some flowers, and we don't even have to do all the flowers right away. We can draw some lines like where we're gonna have some leaves and different things come out, and or we could go back and add watercolor— it's going to be acrylic, but we're going to act like it's watercolor because we're going to water it down— and you could put paint on first and then come back over the paint with the pen. So you can go back and forth. All right, let's move some things around here and get you going. And we may even use multiple pens too. The main thing you want to make sure of, if you don't get this brand, just make sure that it says that it's a waterproof pen. That way it won't bleed into your colors because that would just ruin your piece of art and then you're gonna get frustrated. So we don't want that. Fixing the lighting here just a little bit. Okay, so the first thing that we're gonna do is work on the top of the mason jar. And let's see, I know I'm gonna have like my bottom somewhere down here. I'm just gonna give myself a rough little line like that because I kind of want it to be off-centered so that I can come in and add words over here, whatever you decide to add. I'm doing this on mixed media pad. This is an 11 by 14. You You could also do this on watercolor paper, so either one of those would work. Okay, so I want to have it a little, little to the left, and then I also want to leave enough room up here for my flowers. So I want to keep those things in mind when I start sketching this out. So pay attention to, you know, the, the canvas that you're working on and kind of, you know, get that idea before you just go straight to it. Now, if you wanted to, you could do a pencil first if going straight with pen makes you a little bit nervous. But, um, I'm just gonna come down about right here. That leaves me the upper half of my canvas, and the top of the mason jar we're going to start is like a parenthesis. Okay, so I'm just going to do that side of the parenthesis this side. Okay, so that's step 1. And then, and I want you to notice that my lines are sketchy, meaning they don't have to be perfect and solid. Okay, I think it looks better to have sketchy lines. I like the messy look of the extra lines. Thank you guys for sprinkling. Yeah, if you have someone you think would like to do this for a Mother's Day gift, that would be awesome if you want to share away. So let's see, I got that a little crooked. So big— so I have my parentheses and now I'm just connecting the lines, but I'm not gonna let that bother me. We'll just straighten it out here. And here's what I want you to realize. So that may have looked like a mistake, but it's fine and it's not gonna matter. We've got the top of the mason jar has all those grooves in it, right? So it's got these grooves that go around to screw the lid on. So we're just going to add some lines up here for that. We're going to have one that comes from the left over to the right but doesn't go all the way, and then we'll have one that goes from the right to the left. So that is the top of our mason jar. And then we just want— you know, all mason jars are different. I've got it like— this is a short squatty one in here, but see how it kind of goes in and then back out a little and then in again? So that's usually how I do mine. So we're gonna go out just a little bit. So see that like triangle space you've got right there? Just a short little jaunt over, just out just a little bit. And then I'm going to just pull these lines straight down. And again, you're going to see me not make one solid line. So if you're worried about, oh, I'm not super steady with my hands and it's going to wiggle a little bit, that's fine. It doesn't matter. That's kind of the style that we're going for, and they're going to be sketchy little lines. So I'm picking up and putting down multiple times. Just like that. Okay, and then we're just gonna finish the bottom, and I'm curving that just a little bit so it's not a straight line across. It's got a little bit of curve. And then we'll come on the inside, just— we're gonna do a really small little, like, oval down here just to create that back section of the jar. Now I personally like to throw in some extra little brush strokes just to kind of act as highlights on there. So that's how you do a mason jar, and you can do this, like I said, with paint, with pen, with marker. It's a very basic construction that you can turn in and use in anything, whatever medium that you're using. What do you guys think of that? Was that an easy enough breakdown? You can go back and watch this on replay. You can pause it and, you know, do it step by step if I move a little fast for you. I tend to move fast, but let me know what you guys think. Now we're going to grab our palette. We're going to start deciding what colors we're going to do. Good, I'm glad you guys like that. So before I add, um, all of my paint on, we are going to do a little bit of kind of some drawing up here as well. So I want to have like a couple stems kind of just draping over, maybe adding some little leaves. Leaves. I don't know why I said it like that. But again, see how this is not perfect. Sketchy. Not about being exact. You want to have these quick motions. When you're doing— you guys see kind of how I like almost shadow it before I actually do it? This is something that I like— when you learn to draw, you kind of like do the motion with your hand before you actually touch down on the paper that you're working on. So I'm gonna— another little drapey coming out this side. Maybe we'll have some shooting up here, and they can be different. You can have some different greenery in there. So a lot of what you're doing when you're painting and drawing is really, really the same thing. Super similar. It's just what you're using. Whether you're more comfortable with a pen or paintbrush, and hopefully you'll learn to be comfortable with both. Then I want to have maybe just another one out here a little bit, and we can always come back and change this. We can come back and add more. You can't take away with pen, but you can come back and add more. And I like the little things that come up, and they kind of look like maybe a little baby's breath. I probably went over a little bit too much here, didn't leave myself a ton of room for words. So I want to show you guys, if you are struggling with inspiration, this is just a coloring book that the girls had with Psalms in it, but I love the COVID of it. So look around what's in your house. Look for inspiration everywhere. Maybe be magazines, books, journals, Bibles. Like, my Bible is so pretty. It has flowers and stuff all over it. And you can use all these different things to figure out what you want to make your jar of flowers look like. So a lot of times people ask me, well, like, how do we make it our own? How do we make it to where it's not copying you? Like, if you want to start making original art, use multiple things for inspiration. So you can use what I'm doing today on here, look around your house, see what you can find that show you some different fun little flowers that we could add on. If I wanted to add on some with these little lines on them, but this style is going to be very similar to what we're doing today. This is watercolor, but I'm going to show you how to cheat. If you don't have watercolor and you don't want to go buy watercolor, you can use your acrylic paint and water it down, and it gives you a little bit more freedom than watercolor does. So I'm just going to start doing— I love my little circular fat flowers here. We're just gonna sketch a few in, and they don't all have to be open up and circular. We could have some maybe shooting out like that, different sizes. And it may look messy and crazy right now, but that's okay. This is where I'm always telling the ladies, you just gotta trust the process. It's all gonna come together in the end, and we can tweak things along the way. So I think I'm gonna start with that. We gotta have our stems down here, right? And now we can start going to the, um, adding the color, which is the fun part. Cheryl said, will you draw the baby's breath again? Yeah, you know what? Because I was thinking this looks a little empty right here, so why don't we fill that in with some baby's breath? I'm just doing a quick little line, and then they're just little circles kind of clustered together, and they kind of taper towards the top. And they may not even be baby's breath— it's not the right word for them, um, but I'm not trying to get all technical on my flower terms. I'm sure some of you will know what they should be called, and you can let the other ladies know. So now I'm just going to start picking my colors. Okay, I want this to be kind of muted. This is like a mint julep green. These are DecoArt paints, um, so I don't know how readily available these are. I would just search DecoArt. I know my store was sold out of them. I don't know if they got back in stock, but just Google DecoArt paint online and hopefully you can find a website that has them, or if you're fortunate enough that you can go to Michaels or Hobby Lobby, hopefully they have some back in stock too. These are like my go-to colors. I love these colors. This one's Dragon Fruit. What else do I want to use? What colors do you guys think my flowers should be? What do you guys think of this style so far? And this would be a good experiment. You know what, you could try it on, you know, you could do this on just copy paper or whatever, and you could do it with pen and ink first and use the paint on top of it. Or— and then you could jump over to a canvas or use another page of your mixed media pad and try it in paints, doing the same style, doing the same layout. You know, I do love my purples and yellows together. All right, I'm going to grab some yellow. And don't forget, you guys can color mix. So if you don't have the color right out of the bottle that you want work with the colors you have and make your own. Let's grab a little lavender here. This is actually Purple Rain, and then I can come in and add white to it to lighten it up. Well, I think I can. Time to grab a new bottle of this. Okay, so I'm just gonna— you, it really doesn't matter what type of brush you use. I'm just using a round, and I'm going to start with my green first. And I have clean water in my water cup, and I'm just picking up some water and adding it to my paint. So like, even the amount of paint I put on here is like way more than you need. So this is a very inexpensive little project as far as supplies needed. And then I'm just going to start going in the leaves that I have on here, and you'll, you'll see it start kind of soaking in to the page in a second. And you could even make it more transparent if you wanted to. Like, at this point, I feel like it's like a coloring book, just enjoying the sound of saws. How many of you on here, um, follow my blog post? I put a new post up yesterday, so if you haven't seen it yet, jump over there. It's just the social easel, onlinepaintstudio.com, and then you'll see a tab at the top for my blog post. But this one's a little different. It is not about painting. It's about going after your dream and not letting fear stop you from achieving whatever you want to achieve in life, from whatever you want in life. I was sharing the story about my skydiving adventures 8 years ago. It was on our anniversary. Cory and I went and did a skydiving trip. We wanted to do it forever, like since we got married. And we— I've been with Cory since I was 19, so we have spent many, many years together. And we finally did it on our anniversary 8 years ago. But yeah, if you— I won't, I won't tell you the whole story, but go check out the blog post and you can hear the story of skydiving. You can see some pictures of me skydiving and and how I relate that to my life now. What do you guys think so far? You like the green? Yeah, it was one of those like spur-of-the-moment blog posts. Usually I kind of have a plan, but you know how Facebook lets things pop up in your memory and it's like, this happened 8 years ago. So I saw that in the morning and I was looking at the pictures and reading it, and then it just— it was like God was just like, look at how this relates how this relates to your life right now, and I just decided to share it with you guys. Okay, so I'm thinking— I think I'm gonna do some purple here, and again, I'm just loading up my brush with water. We'll see if this is the right amount or if I want to come back and add a little bit more. I'm going to make my little dainty flowers here purple. So see how I'm not just staying in those lines? You can go messy and go around it and fill in with more color. And then at the end, if we want to go back and add more lines where we have paint, we can do that. This is why I love this style of painting, because you can really just keep playing with it. Jackie's asking if it can be done on canvas too. I would not recommend doing it on canvas because I don't think the pen, um, the ink is gonna handle the same way. You're not going to get the same effect that you would on paper. So I would suggest mixed media paper or watercolor paper. I like the purple— I love the purple and green together. We'll go in a little bit more here. So, um, let's see. Jane said, are you wanting it to look like watercolor? Could you just paint it with acrylic paint? Yes. So my— I'm purposely making it look like watercolor because I just like the look of it. You could do it with acrylic paint. However, the acrylic paint is going to cover up your pen, so it's not going to have quite the same effect, which is why I watered it down some. Yeah, Vicki, you can use a paint pen too. You just want to make sure it's waterproof. So there's lots of different ways you can do this. I just love the purple and the green together. All right, so I think I want to make these little yellow ones off to the side. I don't really want them that bright purple either. I'm gonna— you'll see me mix a lot. Very rarely do I use a color straight out of the bottle. Sometimes I do. All right, so I just made this pretty pale yellow, kind of like a buttercup color. Now I've got those two little flowers there. I think I'm gonna fill in, maybe put a little yellow back here behind And if I want to come back later and add some pen marks there, I can. Maybe do another one back here. So I'm just going to leave those paint marks for right now, but when they dry, I may come back and give them some more shape. Let's make our big flowers, um, pink and maybe some coral, and I'm going to show you how you can make coral. If you don't have coral, you can make your own. And I honestly like the pre-made corals— or I mean the homemade coral paints that I make— better than I like the ones that are store-bought. So we're gonna grab some of our pink here. I'm gonna water it down. And so here's how you can make this, you know, like I said, kind of act like watercolor. With watercolor, to get things heavier in some sections than others, it's all based on how much water and pigment you have. So if I want it to be a little bit stronger, I can get a little more pigment, and if I want it lighter, I just add a lot of water to it to get a really pale pink. So maybe dark in the middle. Come out here and do a little bit more water. And this is why watercolor paper or mixed media pad works so well, because you are gonna add— let's make this one bigger. Let's just extend this out. Doesn't matter that we don't have lines there. I want a big flower back there. But your, your mixed media pad and your watercolor paper can handle the amount of water that you're putting on there. So I'm coming in with lots and lots of water and very little color. Even more water and less color. And I'm just going to kind of push my brush around here. So I'm digging my pink, and now I'm gonna mix some coral, and I'm gonna make those ones that we haven't done yet a pretty coral color. So I'm going to come over here to my pink and yellow, mix them together, and this is where you are just playing. You're going to mix until you like it. Depends on how orangey you want your coral to look or how pinky you want your coral to look. I tend to like mine a little pinkier. And if you guys want more information about the memberships, we have two memberships now. So depending on the level of what you're looking for or what you want to learn, I have my new membership, which is the Painting of the Month Club, and it's only $20 a month. And for the $20 a month, you get a painting delivered to your membership website on the first of each month. And it's a surprise painting. It's exclusive to me. Obviously, they're my designs, but you can't get— I don't even have them for sale anywhere else. So I've saved them for the Painting of the Month Club, and that's only $20. If you're wanting more than that, I have the Inner Tribe, and it is only going to be open for 2 more weeks, and then we close doors to Inner Tribe, and I don't open them back up to the public until September of this year. And the Inner Tribe is a really tight-knit community of women that are learning to paint just like you, all levels. We have an amazing Facebook community where the women share their work, and that's where I go live and teach them. They get 3 brand new paintings a month with me, and in addition to that, we have a guest artist or speaker. And then they have our membership hub, library, vault, you can call it whatever you want. And it has over 65 tutorials already loaded in there that they can go back and access whenever they want. So you got two different ways. If you're having fun doing this and you want just a little bit more, you can join one of the memberships. So I'm just gonna kind of throw that in. What do you guys think about the colors? But I tell people, don't even Numbers are not a reliable source of size because every brand is different. This is a number 2 in this brand, but if I went to another brand of paintbrush, it'd be like a 5. So kind of annoying, but, but, um, I would just say base it on how much paint you can hold in your brush, just enough to fill to where you're not like forcing it so that it can fill the area. All right, so I'm liking the colors, but I feel like it's a little lopsided. What do you guys think? I'm thinking maybe I should add— should I add like another pink flower over here? Oh wait, I got an idea. Let's do this. See, this is like the fun creative process. You just, just going a little at a time until you figure something out. I want to add some smaller flowers coming out here. Let's bring this coral over to this side of the painting a little bit, and then we'll come back and add some I'm losing my train of thought, ladies. We'll come back and add some pen, pen marks on top of that. And then I'm gonna add a little bit more pink on this other side. It's gonna probably I think I'm gonna have it tucked behind here a little bit. So I'm just going around my green, not covering it up. It's a nice full bouquet of flowers. So yeah, I would love to see you guys do this. For the moms or special ladies in your life. Give them a little hand-painted sketch and painting, and then you could add your own words to it over on the other side. Linda said, so how are you making the paint appear to be watercolors? I think, is that what you're asking? It's just by basically just watering it down. That's about it. Linda said maybe a sunflower on the left. That is a good idea, but you know what I think I'll do? I'm just gonna go in and add a little bit more yellow popping up over there. I'm running out of room. I'm filling up my whole page. I tend to get a little carried away and over the top with my flowers. If you've followed me for a while, you can probably tell that from my paintings. I love painting florals, though. It's nice and full, that's for sure. Okay, so y'all know I love my turquoise. I'm gonna add a little bit of blue to my mason jar here. I'm just kind of dancing around the edges that I've already drawn on here. Don't you love that little pop of turquoise? I think it, like, pulls the painting together. I need a little green up here. And then we're gonna add just a tiny bit of water in here, really watered down. Grab a little bit more water, and there you go. You got your little pretty mason jar, and then you could make this bottom down here whatever color you want. I'm gonna do maybe a little green. So that's a little heavier paint, and then I'm gonna water it down a little bit. But hopefully that gives you guys some inspiration, something fun you can do as a gift for someone or as a Mother's Day gift. Maybe put a little bit of turquoise shadow over on this side. Why not? Maybe even a little purple. You guys know I love my color. I like little pops of color everywhere. Okay, so We've got these areas up here though, right, that we need to add more of the ink to. So I'm going to move my paint out of the way and grab my pen. And remember, you could come in with other pens too of different sizes and make skinnier lines if you don't want them to all be like the brush stroke. We're going to jump back up here. Maybe add a few lines. You can hear Jeremy talking. He's one of the guys working on our deck. And again, we're just doing these light sketchy little lines. So, and you'll notice with some of this, like, as you start adding paint on, it's going to fade your black. So if you want the black to be really on top, you just go back over that after the paint has dried. Then let's add in these little ones up here. And see how I'm not going around the entire edge? It's just to kind of give the idea of an outline there. Maybe go a little heavier on my black lines on the side of my mason jar. But you see how sketchy this is? You guys don't have to worry about getting perfect straight lines. I even like to have the lines kind of come on the outside of the jar too, just adds a little bit of movement to it. I love doing this style of painting. So I made mine too messy because I got paint over here, but I also didn't leave myself a ton of room for lettering. But, you know, my word of the year is joy, and my goal is to bring you guys as much joy as I possibly can. Through painting. So I'm just gonna put the word joy over here. We're gonna do like a cursive one. So, you know, what I should do is sketch it first just so I don't ruin the whole thing. I'm just gonna do a light pencil. Kind of get my base down of how I think I want my word to look. Yes, I want you guys to share those. So if you haven't joined the free Facebook group, join the free Facebook group because that's where you can share the work that you do from my Facebook Lives. So I'll have Becky make a post with this that says, hey, did you paint the spring flowers in the mason jar? Post your pics below. Below here, and then you guys can share them in that group because I would love to see them and love to see what words you chose to put on them, who you're giving them to. Shannon, there are some lettering lessons in the club. I have two friends who are lettering experts, Casey Hope and Christie Renee Hawkins, and they have both been guest speakers in my group. So they're— one, actually Christie was just live in the group this week, and then Casey's training is in the membership hub. So what I'm doing right now, I got my lettering on there, and then— sorry, I'm scooting off just a little. And then I'm gonna go thicker on my downstrokes here, just kind of fill this in. Now you could jump over to doing a Sharpie or something now to make it easier to fill that in faster. It is really relaxing to do lettering. Do many of you do it? I'm, I'm in Casey's group also, so I'm learning my skills from Casey. Let's see, where do I want to add a little bit more? I think I want this thicker here. I don't know that I'm exactly following Casey's advice on that. I think I may be jumping around a little bit, but I'm kind of just judging where I want a little bit more thickness in my lettering because I want this to kind of tail off and be thin. All right, what do you guys think? Maybe add a few little sketchy lines down here, and we're gonna call her done. All right, I hope you guys had lots of fun watching that, and yeah, you can go back to the replay, you can go back to videos or scroll down my Facebook page and to find it, and then you can post in the free group. Well, I'll have Becky, um, put like a little graphic, a post in there. I'll send her a picture of this, and it's like, if you painted this today, then you can post your pictures underneath there. All right, I will talk to you guys later. Bye!










