How to Paint a Pumpkin || The Social Easel
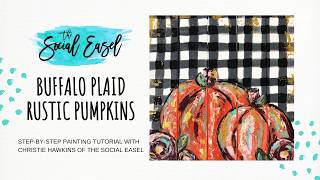
In this live YouTube session, Christie Renee Hawkins guides viewers through a step‑by‑step palette‑knife pumpkin painting on a pallet board, adding a buffalo‑plaid background and optional text. While painting, she engages the audience via chat, asks viewers to share the video for a brush‑set contest, and repeatedly reminds them that enrollment for her Social Easel Online Paint Studio closes at midnight the next day. She outlines the studio’s subscription model ($47/month or $470/year), the monthly curriculum (two full‑painting lessons, technique weeks, live Q&A, private Facebook group "Christie's Inner Tribe"), local class discounts, and upcoming seasonal projects (Thanksgiving, Christmas, Folk‑Art tree). Throughout, she shares tips on palette‑knife handling, color mixing, wood‑grain effects, and encourages beginners to join, emphasizing that no prior experience is required. The session blends instructional art content, community building, and marketing of her paid online painting community.
Chapters
All right, everybody, how's everyone doing tonight? I'm gonna let you guys get a few of you on here before I start. All right, say hi, let me know you're here whenever you pop on. I see Dee and I see Gail, some of my new members. I'm very happy to have here. So tonight, I had you guys vote earlier today. Some of you were on there. Hey Terry, hey Nancy. But I did a live earlier today showing you guys all, everything you're gonna get in the Social Easel online paint studio. I showed you all the paintings and then asked you guys to vote on what you wanted to see me paint tonight. Hey Jackie, so guess what? The pumpkins won. I don't think anyone's surprised by that. We're all ready for fall, right? I don't know about where you guys are, but here in Springfield it's still 90 degrees outside. So, but this weekend I think we're finally gonna get some fall weather and we get to go to some craft shows and it's gonna be fun. So do me a favor, hit that share button really quick as you guys are popping on. It's right next to to where you write your comments and then just let me know where you're watching from and maybe if you've been with me before, painted with me before. So this is, this is one of our palette boards that I'm painting on and this was an idea I had in my head to do anyways for this season. So you guys will just get to be a part of it while I'm creating it since everyone wanted to see the pumpkins again. So if you missed it the other day, this is the new pumpkin painting that is gonna be in our online paint studio. So if you join, you get to— you get step-by-step how to do this. All right, you have until tomorrow night at midnight. Thursday night at midnight, we close doors, and after that, we will not open again until 2019. So if you're wanting to get your hands on these paintings and learn how to paint, even if you've never painted before, make sure you get in before tomorrow night at midnight. Hey, Allison. So this is gonna be a palette class for my local class that we're doing tonight. That one I just showed you is for our online class, but the pumpkins are kind of built, designed the same way. Thank you, Janice. I believe Janice is one of our new members, right? I think, I think you hit the sign up now button if I read your post correctly. So we're— I'm just gonna show you basics on how to do a pumpkin, and I'm not sure what I want to add on to this one, but this is one of our pallet boards. You can see I've got the boards painted white right now because I'm going to put Buffalo Plaid behind this pumpkin, and then we're gonna put some Happy Fall Y'all something, some kind of words on there. So I'm gonna leave some space up here. This is all going to be Buffalo Plaid, and then I'm gonna put a big pumpkin down at the bottom. Maybe I'll do 2 pumpkins. Maybe I'll do something different. I did a really big one off the corner on that one painting, so maybe I'll make this one a little bit different. Hey Sarah. Alright, so this is where you get to see me kind of decide as I go. Hey Gina. Let me know where you guys are from as you're hopping on. Hit that share button for me. Maybe we'll, we'll do a little contest. Okay, how about that? So you guys will use this video and we'll end the contest tomorrow. So this is gonna be a short one. So someone will get a brush set, but in order to get a brush set, I need you to do me a favor and share this post so all your friends know about it too, because we are closing the doors to the Social Easel online paint studio tomorrow at midnight. So we want to make sure everyone knows about it before we close the doors. So we're going to do a little contest here. Hit that share button, let people know what you're watching, and after you've hit the share button, comment "shared" underneath. I'm gonna go in tomorrow and go through everyone's comments, and everyone who shared it and commented underneath so I know that you did will get entered into the contest, and someone's going to win a set of paintbrushes. Alrighty. And even that's even if you're not local, so I'll ship those. I'll ship those out to you because we have people from all over and we've had tons of people this go-round joining the group that are from all over. So let me— I haven't seen many comments of where everybody is from right now, so if you haven't commented where you're watching from, let me know. So what I'm doing right now at the top of the pumpkin, I kind of like to do— and you can make this as big as you want, maybe I'll make it a little fatter— I'm basically kind of coming in like I'm making a little heart. And then since I'm painting on pallet board, that's why you see me keep going back and filling in those creases on the pallet board. So you could do this on anything. I mean, doesn't fall just scream pumpkins on wood? So find a— find an old piece of wood that's laying around. Maybe you want to turn it into something cute and paint yourself a cute little pumpkin on it. We've got Mandy Jones from Alabama. 102, holy cow! It was seriously so hot here today, and when I got in my car after I picked my daughter up from school, it said 93. But I have a black vehicle, so that probably was not accurate. But either way, it's hot and I'm tired of it, and I'm ready for fall weather, which we finally get this weekend. I think I get to lounge around in a sweatshirt and sweatpants. All right, so what we're doing here, I've kind of done a little bit of a heart shape there. I'm having my pumpkins come off the edge, so you can decide if you want it to come completely off the edge or if you want it to sit just above that if you have like a table or something there. Let me see where else we've got. Louisiana, Nova Scotia. Holy cow, that's awesome. Where else am I missing? Louisiana, did I say that? Mississippi, Michigan. Alright, so this is our first pumpkin, and I'm using kind of a darker color, and then I want to have a littler one over here, and I left that paint in my brush, and I'm just gonna come and make a little— give him a little buddy right next to it. Since these are similar enough in color, I can just paint right over top of what I just did. So this is step 1 to doing your pumpkins, and I'm picking up a little bit lighter peachier color for this, and we'll have some added details in there so you can finish seeing the difference of what this will look like once we get all done. So that's our base coat, and if you joined after I set it, if you're wondering what the background is gonna look like, we're not just gonna leave it— we're not just gonna leave it plain white. This is gonna be a buffalo plaid background. So super fun. If you are local in Springfield, this will be in a local Springfield class. If you're not, there's a video of me teaching you how to do the buffalo plaid, so you can combine that video with this video and and you can make your own. So I'd love to see what you guys come up with. So again, I'm just kind of going around a little bit. I'm gonna pick up a little bit of white. Pumpkins are so easy because there's like no right or wrong when it comes to like the colors that you're putting in there. It doesn't have to stay a certain way. I just want to be able— eventually these are gonna stand out and separate a little bit more. I don't like that lighting that you guys have. I'm gonna try to scoot my light a little closer here for you without getting too much in my way. All right, we had a lot of new people hop on here, so we are— I'm up to about 60 viewers. If you are just hopping on, right next to the comment button down below, you can hit share. And we're doing a contest, so we want to get this shared with all of our friends tonight. So hit that share button. After you do it, comment shared. Tomorrow, um, we'll probably do it around— you know what, I can't give you a time because my daughter's getting her braces off tomorrow. So it will be sometime in between her getting her braces taken off where I can get to the computer and do it. But we are gonna do a contest. Someone will get picked out of those of you who have shared it and win a paintbrush set. So I've got a 12-piece set right here that someone is gonna win so you guys can get to painting at home. So make sure you hit the share button and then just comment below and let me know that you did. Okay, I don't have any brown on my palette yet, so I'm gonna get a little brown here. And I think I'm gonna switch it up a little. I think I want to switch to a palette knife. So the one I'm doing for the Social Easel online paint studio— this is still a really bad shadow. Sorry guys, I'm watching your video and I don't like how dark it is right there. I'm trying to find the best spot for this. Maybe if I scoot it back a little. It's because this, um, pallet's a little bigger than what I'm used to trying to fit under here, and I still have to give myself room to stand. All right, I think that looks pretty good for you. All right, we're up to 67. That's a record. That's awesome, guys. So thank you for sharing that. Those of you that are just hopping on, make sure you hit the share button. Let me know that you did. Someone's gonna win a set of paintbrushes tomorrow. And if you guys don't already know, Some of you may be new on here and haven't even seen me paint before yet, but we have a private online painting group called the Social Easel Online Paint Studio, and this is a subscription-based service, and we have an awesome group. You get 2 paintings per month in this group taught like this with me. You get technique weeks. You get a live Q&A. You get our awesome online community where you're all going to be together. But the doors close tomorrow at midnight. So if you're interested, you can go to thesocial easel onlinepaintstudio.com and all the information is there for you. But you have to sign up before midnight tomorrow if you want to get in on this group because it will be closed until 2019. We're gonna close the doors so I can love on my people and focus on them and teach them some super fun stuff. So this is the pumpkin painting that we're teaching in our group. So that's coming in October. If you're new to the Social Easel, be sure to go back to my Facebook page. I showed a video earlier today that was kind of like a Q&A, question-answer, excuse me, all your questions, and I also showed you everything that you got when you became a member of the Social Easel. So I've got— trying to get in my crease here. So that pumpkin painting I just showed you guys, that was done with palette knife like this. And I love this because it's a messy look. You don't have to have it perfect. You can kind of make it however you want. So we're gonna start there. We'll be coming back and adding some stuff to this. So you got the basic shape down. Those of you that just joined, let us know where you're from, where you're watching from tonight. We are gonna switch to a little round brush over here. So we've got our basic shape. You got a kind of a heart shape, kind of a circular shape on the bottom. I'm gonna jump over here and pick up a little bit of brown, and we're just gonna do this really quick outline around our pumpkin. And if you're wondering why it's white in the background, we're gonna do a buffalo plaid back there. I don't know if we'll get to that tonight. I think I'm just gonna show you the pumpkins tonight. I may show you the finished piece tomorrow, but we're gonna have a buffalo plaid background, put some fun little words up here, probably "Happy Fall, Y'all" to do something different than my other pumpkin painting. So we got Patty from Oklahoma. Thank you for sharing, Angela and Mandy and Sally and Tammy. We've got all kinds of people on here. So make sure you're sharing and make sure you're commenting and letting me know that you did, and we'll get you entered in that contest. So we are just gonna— so you guys can see, that's kind of messy. Nothing too fancy here. This is what— this is just our base coat, so I'm not worried about anything looking pretty and perfect right now. I'm just getting my outlines on there. So all of our curves for our pumpkin are going to come from the same point. So we want one to come out a little further here. See how I'm just kind of duplicating those curved lines? And I don't know if I want to add another one there. Let's start like this. We'll start like this and see where we end up. Since these are smaller, fatter little pumpkins, they may not have as many lines on them. The ones I did the other day had a couple more, and I think I want to pull this out a little bit more. So just keep in mind, whenever you're painting, just because you put it on there doesn't mean it has to stay have to stay that way. It's your painting. You can go back and change it and edit it and make it whatever you want. So it doesn't always have to just— just because you have it on there doesn't mean you have to leave it. Let's make this guy a little curvy. Build this one up a little. So who else is ready for fall? I'm guessing a lot of you since you're on here watching some pumpkins. Alright, so we've got that on there. Now I'm gonna jump back over and we're gonna start adding some color in here. So I've got several different shades of orange on here. I've got like a kind of a coral color. I've got some sage green, white, and burnt umber. So what I want to do is use— I'm going to use a palette knife for this, and I'm probably going to switch in between two different ones, two different shapes that I have here. But we're just going to start filling in with big blocks of color and kind of just see what see what happens. So you just load up your palette knife and just start smoothing it on there. And I'm going right up next to those lines. It's okay if it covers them a little bit because we can always come back and pull the brown on top again. Allergies are killing me today. I can't get rid of this annoying little cough. So the thing I love about palette knife is how fun and messy it is. So you guys have got a little bit of a glare on there. Let's see if I can adjust this just a tad. Tiny bit if it'll make a difference. I think that might help a little. That's helping some for you guys to see. So again, just kind of picking up some different colors. Maybe I want to grab a little bit— I like the look of a little green in there. Now this is even more fun on wood because it'll hit these grooves, it'll hit rough spots in the wood and just give you a completely different look. And the different ways you use your palette knife and the different size palette knives you use, a different kind of look. You'll get. So what do you guys think so far? You liking how it's coming along? Watch me lose my voice tomorrow on my last day when I'm trying to talk to everybody. That'll be nice. I need these allergies to go away. So I think I'm gonna switch to my smaller one here, come on with a little bit lighter. So you get a little bit more control with that angle on this one. So how many of you are new to the Social Easel, and how many of you have either watched my videos before or painted with me? Let me know, let me know who I'm talking to tonight. Who's, who's here with me? Yeah, I think I'm widening this pumpkin out a little bit too. Add some white in here. I just love how that looks. Don't you love those little strokes that it puts in there? The little streaks of color. It'll catch the wood grain. It's so pretty. Heidi says she's watched and wants to come paint. Where in— Heidi, you said where you were from earlier. You're in Missouri. Where in Missouri are you? You should come paint. We got lots of fun stuff on the calendar right now. Jean, this is her first time catching me. Painted pumpkins with me last year. Mindy Terri's new. Terri's new in our group. Margaret, you painted several with me. Patty's watched me for a while. Oh, you're a Nixa, Heidi. You should definitely get up here and come paint. Thank you, Jackie. Debbie from Myrtle Beach, South Carolina. One of my first beach vacations that I took as a little girl. I love Myrtle Beach. So you can really just kind of keep playing with this and making it your own. And you know what I did here that I don't like? Hey, Angel! I'm going to come back and fix this stem. I don't like that I have it going with that curve. It looks like it's connected to it, and that's annoying. Sorry, it looked like we were getting fuzzy for a second there. I was just checking the— checking the video. Now it looks like it's coming back in focus. Maybe it got unfocused somehow. Amanda's in Rawla. Thank you. So those of you that are new These— I've done, you know, a few of these live videos kind of showing you guys what I do because this is what I do in our group. So you get full classes with me on the first week of the month. We do a full painting tutorial. On the second week, I do a technique video or I have a special guest come in. To teach you about painting. On the third week, we do another, another full painting tutorial, and you guys get some say in that too. So a lot of my current members have helped kind of decide what we've worked on, and then we've got the fun stuff coming with— we've got our October calendar done. I've got a few ideas for you for Thanksgiving time and Christmas. I was showing them earlier today. Here is one of the Christmas paintings I know that we're doing. This is my little FolkArt Santa. He's so cute. And then we have Silent Night, which is another one of my winter paintings. So both of these have been— it's hard to get that whole angle in there, but both of these have been super popular. So I know for sure we're gonna do those two this season, and I've got all kinds of other fun ideas as well. So someone asked to— can, can you turn up the mic a little bit? Is anybody else having problems hearing me? Let me know, because I won't know if you guys don't tell me. So yeah, let me know if you're having a hard time hearing me. So I'm gonna grab a little bit of this, like, teal color. I love this as— seems kind of random, but just a little fun accent in here. We've got a little bit of that sage green, but I really like this turquoise accent in the pumpkins as well. All right, everyone sounds good, so I'm not sure who that was who couldn't hear me, but maybe check to make sure your mic is up all the way. We need a little heavier paint up here. The other thing I love about palette knife painting is you can streak all these colors together, so it's just real fun to see how they work together. But our online, our online studio— so I think I paused for a second there. So you get 2 full paintings a month, our technique week, live Q&A, which is gonna be with me inside of our private Facebook group that's called Christie's Inner Tribe. That's where all the members share their photos. That's where I get on live with them and teach them the tutorials, and we talk and comment on everybody's art. So we have tons of fun in there. And if you are local— I keep forgetting to mention this— but those of you that are local here in Springfield, Missouri, you also get a tribe discount to any of the local paint nights that I offer. So that's an added bonus. You get $10 off each one of your classes if you decide to come paint with me here locally. So that's an extra little bonus. And then we have a brand new website, which is awesome. You will get your own username and password, and you log in there, and we've got technique videos ready for you. And then our entire library, which consists of about 13 paintings, I think, at this point, if we're including September. And all those paintings are in there. They're categorized by month, so you can just click on, you know, June and see what paintings we did in June. And then underneath that, you'll have a picture that you can look at, and you will have the full-length video from blank canvas to finished artwork, and then you'll also have a color list. So everything is already set up for you. This is great if you've— even if you've never painted before. I did some interviews last night with some of my current students, and all of them at different points in their life— one was retired, one's hoping to retire and is still working to get to that point, and one of them is young with kids at home, and each one of them really had no painting experience prior to joining the online paint studio, and they are just making some of the most beautiful art. So don't feel like you have to have experience. You can come into this with none whatsoever. If you do have experience, maybe you're someone who has painted a little bit We've got some different techniques, and you can always— I think you can always learn new things. So I didn't even learn palette knife painting until recently, but now I'm kind of like obsessed with it because I love this texture like you guys are talking about. I'm gonna switch back to my little one over here. Just get a little bit more control here. I think I want to add maybe some more green and teal into this one. So if any of my members are on here right now, you guys feel free to let them know what you think so far. We had some new members on here, I believe, coming in and starting to get their supplies together and get going with it. We're getting ready to teach our next tutorial, is going to be this Friday, and we're doing a FolkArt tree, which is super fun. And you can make these whatever colors you want. So let me know if you guys have any questions about how the group works. Some of you are in our free workshop, and we will be archiving that group just to save on confusion so people people are not going to the wrong spot. So we'll only have our online paint studio as a group to be a part of, and that's our paid subscription. So we'll be closing doors tomorrow at midnight, and then my plan is to open them again in spring of 2019. But you guys don't want to miss out on all this seasonal fun stuff we're getting ready to do. Let me add maybe a little bit of white up here. Maybe a little green. See how you can just do these quick little touches and just play with it a little until you are happy with it. So I'm gonna add on some white. So I've got this one little corner down here where I need to go back and finish my white off down there. So I think I'm going to show you guys a little bit You guys want to see a little bit of the Buffalo Plaid? You want to see me do a couple of the stripes on here? Might as well while we're— while we're here, because these pumpkins don't take too awful long. I may add some berries down here as well. You know what, I want a clean plate for this one. All right, so you guys give me some thumbs up or hearts if you want to see me do some buffalo plaid. Let me know if you want to know how to do that. I'm gonna start filling in the white here. I am just using craft paint, so you can get this at Walmart, Hobby Lobby, Michaels, any of the above. All right, I'm getting some yeses here, so I'm gonna move my color palette out of the way. My office is such a mess right now. Okay, black. I'm gonna get a little gray on here. Makes it a little easier to just have a pre-mixed gray instead of mixing your own if you're gonna do Buffalo Plaid. So we're gonna start— we've already got our white on there. So I'm just gonna start here with the Buffalo Plaid. I'm gonna come in maybe just a little bit, and I like to just use a 1-inch brush and just slowly go back and forth. I'm not worried about it coming over my edges here because I can go back and touch that up. So I'm not gonna worry about that right now. So you just want to kind of eyeball your spacing. It's not gonna be perfect, and I actually don't want— if you guys saw my other buffalo plaid that I did, I like the messy look of it, especially because we're using the palette knife on this. So I want it to be a little bit messier. Got some gray coming down there, and it's okay for it to be, you know, streaky in between. I don't want clean, perfect edges on this. So that looks fairly dark for you guys. It's not quite as dark as what it looks like on the screen here. So then I'll start coming down this way. So we're just doing kind of a small example here. Can you guys see that streakiness and how it picks up the wood grain? I may need to scoot this. Do I need to scoot it some? So I like how it doesn't cover completely. It's got kind of rough edges there. But if you just use a 1-inch brush, it makes your job nice and easy for you because— this is bugging me, I have to go ahead and get this line on here— because you're just going back and forth with your brush. You're not having to like measure where you're at exactly. Hello, Deb from Pennsylvania. Hi, Mom. My mom's on here watching. We're doing this to start with the pumpkins because that was the main thing we were focusing on tonight and what I wanted you guys to see, and then I decided to go ahead and show you the buffalo plaid too. So extra bonus for you guys. Now once I do that, this is all just gray. I'm gonna come in with black, and everywhere that those two lines intersect, I'm gonna put just a little brushstroke of black there. Again, letting the brush do the work for me. I'm not trying to make these perfect. Is that better or worse? I can't tell if that makes the glare better or worse. But I want it to have that rustic, homemade look to it. We're doing this on pallet board. So it just kind of adds to the texture of what we're doing, the roughness of what we're doing, by not having these perfect. So I know that's hard for some of you. A lot of you are Type A's, and you would probably be measuring and trying to get perfect lines here. Am I talking to any of you? I know I have some in my classes. But if you can allow yourself to let go and just make the brush strokes, you'll get that look that you want. Sometimes that look that we want is from doing it messy instead of perfectly neat. So hopefully that helps. I'm going to need another line up here, so I'm going to go ahead— that is bothering me, that space up at the top. We're going to have another line there. I'm just going to add in my black. For right now. What do you guys think so far? You think it's turning out cute? Shoot me some thumbs up and hearts if you like it. Oop, I almost painted the wrong one. Oh, this is gonna be so cute. I think this is even cuter in person than it is on video. I really wish you guys could see it from my perspective. This is gonna be so cute once we get this done all the way across here, and then we can come up and add some words. It's gonna be super cute. So I want to add I still want a little bit more highlights on my pumpkin, and I actually want them to be— this is an off-white that I'm going to use here instead of just regular white. I just like it on the pumpkin. So again, just kind of getting a little scoop on there, and my theory of painting is, and I'm sure you can kind of tell by how I'm doing this. I do not really think too much about where I'm landing. I kind of just go with the process and let your mind go. Don't overthink it, have fun with it. None of this is supposed to be precise. If it's too precise, it's not as fun. So let your colors mix. I'm gonna switch back to some of my oranges here, maybe add a little bit of that in. And see how I'm just staying with the curve of my pumpkin while I'm doing this? Maybe add a little bit of darkness here and there on this one. Maybe a little on the bottom. What do you think? Should be darker on the bottom, but I want a highlight breaking these edges. And then I like using— where'd it go? My skinny palette knife. To come in and add some darkness in here, add a little separation. We want to be able to see the grooves, or the ideas of the, the grooves in our pumpkin, so it's not completely perfect around these edges. Got some darkness here. So this is one of those— I tell my students this a lot— when you're working on something like this, it's very good for you to step back. It's good to get away from your painting for a little bit, look at it from across the room. Because you're gonna see different things. I also see different things because I'm watching it in the video with you guys, and that's another thing I recommend. Not that you guys are gonna take videos of yourself painting, but you can take pictures while you're painting, and you will see different things in your pictures that you will not see when you're painting. In person. Alright, so I think I'm about done. I'm probably gonna come in later and add some berries and stuff in here. I haven't quite decided yet what I want to add. Maybe some fun little flowers. Maybe I'll do some fun little flowers on here instead. I think I'm gonna add one down here. Let's just do it, because now I want to know what it's gonna look like. So I'm gonna get— no, that's not the color I wanted. That's not what I thought it was. Switching. And I am going to be putting some of my medium in this one just to make it a little bit thicker. So this is just gel medium. You can get at your craft stores or order online. I have an online store where you guys can order all my recommended products. That's one of, like, my affiliates, so you can go check that out too. But I like this wine color. Maybe grab a little bit of that peachy orange with it. So come on here. I've got this kind of vacant corner anyways. Same over here. I think I just want to fill these in. With some flowers. And the palette knife flowers are fun because there's really not that much to them. They're nice and messy. You're just kind of going around in these curves, picking up a little bit of the lighter colors here. Can you guys see that? Okay. And then I think I want to add maybe one big one and one small one over here. But we want these nice and thick. Whenever you're doing something on the edge like this, make sure you bring it around the edge so it doesn't look like it stops right at your board. And it looks kind of cool because it's picking up some of these colors. From underneath here. And the thicker you go— it's got a little string of dry paint in it— the less it'll pick up those underneath colors. I want to add maybe a little one down here, just kind of swirling that palette knife around, but we want some contrast in there too. This glare is irritating me so bad. I can't tell if it's this— no, it's not that. All right, I'm gonna try to back this away and see if that helps so you guys can actually see the flower a little bit more. Sorry, I keep moving the light on you. It was fine for the pumpkins, and then I get to the flowers and all you guys are seeing is glare. So that helps a little bit more. Then you can just come put a little center here in the middle. Work in some of that other color. First I thought I didn't like it, but it's actually a good contrast here. So with these palette knife flowers, you're just kind of going real thick curves around and around. I actually think I want to add— we'll see if this is gonna look like what I want it to look like. I'm gonna pick up a little bit of purple in here just to add some contrast. The purple looks pretty in there. Can you guys see that? I may zoom in a little bit if you can't. And then give these little centers I don't want the white to get too out of control here. I don't want it to overtake my other colors. Gotta add some leaves in there, right? Need a little bit of dark green. Let me see what I have here. I don't know if this is the color I want. We'll see. Oh, that's a pretty contrast. Can you guys see that? That pretty green in there? So I love this with palette knives because it's just like one little stroke with the palette knife. Maybe a little mixture of green on there. And of course this is a very abstract version, but you guys can see how that adds a little bit to it. So what do you guys think so far? Are we liking it? I want to bring this flower up a little bit, and I did like that purple in there. I think I'm gonna add a little bit more purple. Oh, I love how that purple pops on there. I hope you guys can see that. All right, I'm gonna show you the finished product tomorrow. I'm sure I'm gonna tweak it a little bit more. I can already tell you I want more teal in it. Those of you that are new, teal is my favorite, and it's pretty much somewhere in every one of my paintings. Somehow it's got to make its way in there. But I love it on the pumpkins because orange and blue are opposite colors, so that pop That you see when I add the blue in there, that's why our eyes are so drawn to it, because they're opposites on the color wheel. So it attracts, it attracts our eyes to it. In fact, I think I'm going to come in here. We're gonna have to do something to get some more separation up here. I think maybe you need to add a highlight on to these stems. So I'm gonna come back in and play with those a little bit tomorrow, and we'll show you the finished, the finished product. Maybe swirl around my flowers a little bit more. But these are so fun because you can just scoot, keep scooting your palette knife around until you can get your flower the way that you want it. If you want to add more white in, or maybe you want to even do just a lighter flower in general— see how pretty that white looks when it blends and it picks up some of those colors underneath? That's really pretty too. And then you can come back in Maybe we'll— let's see what this looks like. I don't know, I'm gonna have to decide. Do I like the black center more or the white? I think I might like the black, but that's probably because I love poppies. All right, my friends, I'm gonna jump off here for the night. So just to recap, tomorrow's the last day. That's it. Tomorrow at midnight we close the doors. So if you had fun painting with me and you want to learn more about painting and you want to have a couple lessons per month and you want to have some in-depth technique videos, live Q&A, you have me in this group all the time. So I personally comment on all the paintings that you guys post. I will give you helpful tips and techniques. If I think there's something you can do in your painting to give it more depth or whatever it may need, I will help you out with that and show you. So our inner tribe is awesome. It's a group of wonderful people, and you guys are going to want to be a part of this, but the doors close tomorrow at midnight. It's only $47 a month, and it includes all of that. You can go to thesocialeaselonlinepaintstudio.com. All the information's there. I believe any— I think I've answered all the questions that you guys may have, but if you have any more, you can message me and go check that page out to see. So it's $47 a month, or if you know you're going to want to do it for a while, you can do the annual plan is $470 and you get 2 months for free. So I think that's about it. Let me know if you guys have any questions. Make sure if you were not on when I said it earlier, we're doing a contest for this video. So share this video with your friends, hit the share button, comment below, let me know you shared. Tomorrow in the afternoon sometime, I am going to pick a winner for this, and someone's going to win a set of paintbrushes. So I will be back on with you guys tomorrow with hopefully a finished painting. That may or may not get done. But I think that's it. So that's it. You guys have a good night, and I will be back on sometime tomorrow. Bye.










