How To Paint A Sand Dollar: A Quick Lesson
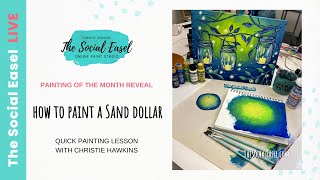
In this live session, Christie Renee Hawkins of The Social Easel announces the July Painting of the Month Club (POMC) theme—"Summer Lanterns"—and explains how the painting teaches fundamentals such as atmospheric perspective, overlapping, and depth. She then demonstrates an ombre‑style blending technique on a mixed‑media pad, applying it to a sand dollar to create a glowing background. Throughout the demo she discusses brush choices (large and small filbert), color selection (DecoArt Celery Shoot, Sour Apple, Bright Blue, Ultra Blue Deep), the importance of keeping both colors wet, layering, and corrective strategies. After the demo she reviews sealing options (DecoArt polyurethane matte/gloss, Decopodge, Krylon UV‑resistant spray, glitter additives) and shows how to finish both sand dollars and other projects (e.g., painted cups). The stream also includes community engagement: welcoming viewers, answering questions about blending, sealing, and product preferences, promoting the POMC membership (price $20, sign‑up deadline June 30, lifetime access), and highlighting the upcoming third Honduras service trip (art camp, tie‑dye shirts, Amazon wishlist, devotionals, Tía Time). She also teases new beach‑towel designs and other merchandise. The session ends with a call to join the club, watch past tutorials, and follow her Honduras journey.
Chapters
Hey everybody, it is Christie Renee Hawkins with The Social Easel, and we are doing our Painting of the Month Club reveal today. So I'm super excited to share that with you. So I'm going to give everyone a second to hop on here. When you join us, let me know where you're watching from. And, and then we will go ahead and get started. So I have something kind of fun planned for today's live that is different than anything that we've done before. So I'm going to reveal what is coming up next for Painting of the Month Club for July. We are opening it a day early this month just to kind of correlate with my Facebook Live that I do on Wednesday. So you're getting an extra day. This month to sign up and join us. I think you guys are going to be really excited about this one. It's super fun. It's perfect for summer, and it's been one of our most heavily requested ones. So I think you guys are going to be excited to see what we're going to do. And then I'm going to take a technique that I teach in that painting, and I'm going to break it down um, for you today. So we're going to focus on blending, and, um, well, I don't want to give too much away of what we're going to do, but we're not going to do it on a canvas. We're going to do it on something different, um, that I have been wanting to do for a really long time. And I came across them yesterday as I was organizing the studio, which is still a hot mess, by the way. It's starting to come together, but it's not quite there yet. But we're going to paint on a new fun, um, item today, so stay tuned for that. Let me set this camera up really quick. Give me just a second. Okay, come on. All right, there we go. They are not palm fronds. Um, so yeah, let me know where you guys are watching from today. If you got the text alert, let me know that as well because we sent out a, um, a live stream link in addition to going live. On the Facebook page because we thought it would be easier for you guys to find the live that way instead of having to refresh the Facebook page. Um, so yeah, let me know if that helped out this morning. Hey, Carol and Pamela and Dawn and Peggy and Chantel. Hey, Cindy from Tennessee, Carol from Alabama. So I'll give you a little teaser. Here are the colors that we're going to be working with today. So we've got— this is Celery Shoot, Sour Apple, and Bright Blue. These are all DecoArt colors that I'm going to be using to show you some techniques today for Painting of the Month Club. So that may give you a hint. As to, um, to what we're painting. Hey, Joanne! Oh, awesome! She said, I got your text alert from Madison, Wisconsin. Kim is here from North Carolina. Okay, awesome. All right, are you guys ready? I'm really excited about this one. So without further ado, the painting for Painting of the Month Club— and if you are a Tribe Sister, this is already included in your membership, so no need for you to sign up. It's included. You already have it in the vault and you have access to it. This is what we're doing, our summer lanterns. Give you a nice close-up here. How fun is this for summer? This just totally makes me think of summer nights, especially like being a little kid running around and catching fireflies and hanging, you know, the lanterns hanging in the trees with the glow. So it's super fun. It's really actually really fun to paint, especially the background with this blending. That's why I didn't want to give too much away. But what we're going to do today is— how many of you, let me know in the comments, struggle with blending? It's something that a lot of people say that they struggle with. So we're going to go over how to blend and the important steps to make sure that that is successful for you. So we're going to do kind of an ombre-like glow with blending today to create this background here, and hopefully that will also show you that you can use that with other color families as well, not just this one. I'm glad you guys love it. It's so fun. Um, but in addition to that, I love this one because it's got so many layers to it. Um, so obviously you have your background, but if you look closely, you've got this mid-ground here, kind of like these limbs that are back here peeking through, and that helps create depth in the painting. And then same with the lanterns hanging on the branches. All of this overlapping that we do in this composition is what creates that depth in your art. So I really love this one because it teaches you so many of those, like, fundamentals and how important it is to have overlapping and to have things like this. The branches is kind of what you would refer to as, like, atmospheric perspective. And what that means is, like, the further away something is Like, think about when you're looking like down the road or something far away. Things are kind of blurry the further away that they are. So it's kind of— that's a representation of what we're doing here with the branches. They don't have a lot of detail. They're kind of faded into the background, but you can still see them there. So that is one kind of perspective that we're doing that creates depth in the painting, and the other one is the overlapping. So each month in Painting of the Month Club, I pick these specific paintings, one, because they're some of our most popular ones that the Tribe Sisters have loved, and two, I try to pick a different one each month to teach you fundamentals of art. It's not just about repeating and copying the exact painting, but in the process of you painting this and each month that you are a member, you are learning new techniques that you can apply to your future paintings. So every month you're building those techniques up, and the more you practice, the better you're going to get. But this month, those fundamentals that I just shared with you are kind of what we are focusing on. So love this one for summer, and we're going to do something really fun. And actually paint a really like pretty ombre glow on a sand dollar today. I thought this would be so pretty on a sand dollar with that glow coming from the middle where our little star shape is there. I have a collection of sand dollars that we have collected from all of our trips to Florida. I've been saying I was going to paint on one for years, and I'm finally doing it. So, so that's what we're going to do today. I won't be painting the whole painting on there, obviously, but I am going to create the background. And then, you know, then after that you could do whatever you wanted to with it. But this would be a really fun one to do with kids as well. If you have sand dollars, if you have shells, if you have rocks, any of those fun things, but to just get, get, you know, loose with your painting, learning how to blend and seeing how colors work together. I think this will be really fun. So let me know if you guys are excited about doing the sand dollar. And then I'm gonna go to my other camera and we'll go ahead and switch to the overhead view. Oh, thank you, Deborah. She said let's keep Christie and her family in prayer for her trip to Honduras and all she's doing. Thank you, Deborah. Um, yeah, so if you guys are new to following me, um, I have gone to Honduras twice now and we are leaving Next week for our third visit, and I go out there with my family and my friend's family. And for the past two times, we've had people who follow me on the Social Easel, Painting of the Month Club members, Tribe Sisters have come out to Honduras not knowing anyone, not meeting me before until we met at the airport. And we go and do an art camp for these kids at the children's home in Honduras. And I love these kids. So much, and we're super excited to be going back next week. So yes, we have that coming up. If you do want to help, I've had several, several, sorry, people reach out and ask if they can help in any other way. We made an Amazon wishlist for all the fun activities that we're going to do with the kids that week. So since this is our first time to go in summer, so since we are going in summer, in addition to just regular art camp that they get with me. Um, we're doing all kinds of fun outdoor activities as well. And so we've put some of, um, that stuff on the wish list, um, that you can purchase, and it sends it directly to my house. And I just want to say, yesterday I didn't have a chance this morning to take a video of it before I left the house, but we got so many packages yesterday, um, for Honduras. from the wish list. So I just want to say a huge thank you to everyone out there who, um, supports me in this journey. But really, it's not even about me, it's about those kids and, um, giving us the ability to go and love on them and do these crazy fun things with them. Um, so we're gonna do, uh, tie-dye t-shirts when we're out there, so you'll see some tie-dye kits on that. And I know that may seem like What's that really have to do, and why do you really need tie-dye kits? So most of these kids— or not most, all of them— have hand-me-down clothes. You know, 95% of their clothing is hand-me-down clothes. And for the last 2 trips that we've done, I have made them shirts that you guys have seen in the past, the Choose Love and the Spread Now I can't even— Spread Joy. Um, but I did two different designs, and then we turned those into shirts for the kids and the tías. Those are the, the moms, the aunts that take care of them. And they absolutely love them. Like, they want to wear them every day, and they're so, like, proud of it and happy to have it because it's theirs and it wasn't somebody else's. So this year, instead of making a new design for them, Stacy and I decided we wanted to do tie-dye t-shirts with them instead because I don't know about you, but who doesn't love tie-dye and color? And you know, it's, it's all the fun things. It's all the things I love— bright colors— and make them just help them all make their own individual tie-dye shirt. So that's what that's for. And then some other fun water activities because it's gonna be hot when we go. So, um, I just want to say thank you, and I appreciate it so much, more than you know. It makes such a, such a big difference, um, for us to not have to fund at all of that, because it all adds up. Because there's about 60 kids at the children's home, ranging from newborns all the way to 17 and getting ready to age out of the home. So I'm really excited. We've got that planned. We do Tia Time where we spend time with the Tias who take care of the kids, and we do a special painting and project with them. So since everyone loved it so much, and I know that I can do a smaller version and teach them, I'm actually going to teach the Tias the Bold Blooms that I did a few months ago. So I'll be sharing um, all of that either while I'm there if we have service or when I get back and share some of what we did. And then because it's summer, we're also getting extra time with the kids because normally when we go, they have to go to bed early and we get up and we walk them to school each day. And this time we don't have to do that, and so we get to stay up later with the kids. We get to go in their casitas and hang out with them in small groups And so I'm leading devotionals with the older girls, and I have the Jesus Lives devotional on the Honduras wish list because I love that devotional so much, because in the beginning of it, it has different categories. So like if you want to read Bible verses about trust, and then it has all these different devotionals for trust or fear or hurt or grief, like whatever it is, right? And I want to make sure that these kids are raised already in a Christian environment, but I want to make sure that, you know, they really do know Jesus and they really do know that he is there with them in spite of their circumstances and the difficulties that they deal with that are so different from anything that we deal with. And so we're going to spend the evenings with the older girls and boys We're not excluding the boys. Corey's doing that. And I'm really excited about that. That'll be something different that we're doing, and I hope it brings out some beautiful conversations and some, some eye-opening experiences for them as well. Natalie said, do you speak Spanish? I do not, but thankfully all the kids speak English. The tías speak Spanish, so when I teach them and we do tía time with them, the older girls are translators, and they're so good at it, and they're so sweet. So it's just a really unique experience, and our heart is just there with the kids. So we're pretty pumped to see them again. We haven't seen them since Thanksgiving, um, so I can't wait for those hugs. and I'll share what I can if you guys are interested. But there's only so much we can share on the public page to protect them, but we may make some kind of private kind of viewing of some of the photos or videos, or maybe something I send out via email so that it is not publicly shared. So, hey, Miss Lisa, good to have you back. All right. So here's what we're doing. If you joined late, this is the new Painting of the Month Club painting for July. You have until June 30th to sign up for this class. And these are a limited time. Once, once this is over, once the month is over, this goes back in the vault and it's not available again for purchase. So this is your only chance to join to do this painting, and it's only $20. And you can cancel any time. But I would encourage you, if you really want to learn how to paint and you're taking this step to, to do that, the longer you stay in Painting of the Month Club, the more you're going to learn. And if you're worried about time, this is the perfect club for you because it's one painting a month. These are pre-recorded lessons. You don't have to be live with me. There's no Facebook group. Group. Everything is on your own membership website where you can log in, and we break the videos down into different sessions so that you can take it at your own pace. And you could do, you know, 30 minutes a week, or you could sit down and do it all in one session. But you get lifetime access to it, so you can take your time. If you know you love the painting and you're like, oh, I love it, but I'm so busy in June, I'm so busy in July, I mean, there's no way I can do it. That's okay. You still have access to it after July is over. But today we are going to do some really cool blending on our sand dollar. And when you go to that link, you are going to see, um, several other Tribe Sisters' paintings that they have done. So again, I taught this to them, um, last year. And so when you go to the sales page to sign up, you'll see some pictures of Tribe Sisters with their paintings. One of the ladies put it on a cup. Um, so there's so many different things you can do with it, but I love getting to share their artwork with you guys too. All right, so we are gonna switch views here. Okay, how's that looking for everyone? What I thought we would do first, so I'm going to paint on the sand dollar. But I have my mixed media pad here. If you don't have a mixed media pad, I highly recommend getting one because this is like— think of this like your practice pad. If you don't want to go straight to canvas, in fact, I recommend every— everyone that paints with me, I recommend getting a mixed media pad. This is where you're going to practice blending. This is where you're going to practice your brushstrokes. And all of that good stuff. Um, so we're— I'm going to show you some blending techniques on here first, and then we're actually going to paint the sand dollar. All right, so let's get our colors. I just grabbed this blue. I may actually want a little bit darker one. These are such fun colors. I am going to go grab— oh well, how handy, I have one right here. Ultra Blue Deep. I was going to grab another dark blue. So how many of you have done like an ombre or like, um, kind of a glowing, uh, blending like this? Let me know in the comments. If not, that's going to kind of be what we do today, is like what I would call an ombre, as colors kind of start bright and fade into each other. Super fun to do. So the first thing I'm going to do, and you can pick different brushes, you don't have to use the brushes that I'm using, but when I do blending, especially backgrounds like this, if I was doing a really big background, I would pick my large filbert out of my brush. A filbert has this curved tip, and then I also have a smaller one in here, so I'm going to be using the smaller one today. Um, those are out of my brush set that you can order in our store. Um, but I like the filbert because it helps with the blending to give soft edges. So you can kind of see here how they kind of blend together really pretty. I do that with a filbert brush instead of a flat because a flat has the really straight edges. Um, you could also use a round, but for this I just, I really prefer a filbert instead. So I'm going to start in the middle because we're going to kind of create a glow, right? So we're going to go light to dark. I'm going to start with my lightest color And these are not the exact colors I used in the painting. When you sign up for Painting of the Month Club, you will get a full supply and color list. So if you want to match exactly what I did, you can. But I also want you to see, like, what I'm doing now. I just grabbed these colors off my wall. They're similar. You don't have to buy the exact colors or brand that I use. So that's our light color, right? And I'm just quickly going in all different directions here. Okay, now before that dries too much, I'm leaving this color in my brush. I want to grab some green and I want to start going around that edge. Now this is the important part of blending. How many of you struggle with it? The important part, and it's a little harder on a mixed media pad because the paper dries so fast, is that you need both colors when you're blending to be wet. If that first color is already dry and then you go to put your second color on, then it's, it's not going to blend together. It's going to look very starkly different. So you can see how I'm just kind of pushing. There's not a ton of paint in my brush. You don't need it to be sopping wet. But you just want to blend before it dries completely and you kind of create that glow. Now let's say you waited too long. Okay, let's say you put that on, something happened, you left, you came back, and you're like, great, now I messed up. I didn't, I didn't do it fast enough. It's okay. All you have to do is come back with your light color. And sometimes I do this a lot, come back with second coats to make the color stronger, or if I just didn't care for like my blend the first time, I come back with my inner color again. And then while that's still wet, I'm coming back with my second color. So let me know if that makes sense in the comments, if you have any questions about that. And then I'm just going to keep spreading this out. So look, right now you can see like that's not all the way blended together, so I'm not done yet. I'm kind of working the excess green out of my brush because I almost want this to be dry. You can see the paint kind of pushing towards the top. So now when it's almost dry, I'm going to come where those colors meet. So where the yellow and the green meet, I'm going to come back in. And I don't, I don't want it to just be a ring. So I'm not just going to go around like that because it still looks like a ring. I want to break it up a little. Maybe pull a little more light out this way. So you can keep going back and forth. The key is to do it while both colors are wet. And sometimes even at the end of my background, I'll get all the way done with the whole background, and then I'm like, I just want my center to be a little brighter. You can come back and just kind of fan it out and make your center a little brighter again. So, isn't that pretty? So I'm gonna rinse that out. You don't really have to, you could have left that paint in there, but I want to go from the green to blue now. It's okay if there's a little bit left in there. So I'm going to start with my green coming a little bit further out because now we've got like these two created— we've got the yellow, we've got the green, but it's kind of created a yellow-green, right? So now this is just the straight green out of the bottle, so I'm going to go wider around that. Okay, and just kind of lightly brush that in, soften those edges, and then quickly move to my blue. So what you're doing when you're laying these colors next to each other for blending, you're creating different sections of new colors. So it's not just the colors straight out of the bottle. What happens when we're blending those two colors together is we're taking our blue and our green and they're overlapping and they're creating a new color. They're creating this really pretty bluish green, almost like a dark teal. So see how that filbert just makes nice soft edges? You don't see any lines. But even here, I don't think that's blended enough. Can you see that? So what I would do, wipe off my excess. And I'm going to come back and grab my green and soften up those edges again. And this is kind of just the process that you'll do as you're going out. So this is kind of a radial, um, blending. Now you could do this just like if— let's say you were doing this as a sky and you were just doing horizontal all the way down, it would be the same thing. You would just be going this way instead of in a circular motion. So we're creating all these different variations of greens and green blues, and then we're just going to keep going out from there. So I'm going to load up my blue. I'm just going to do this one side, and then we'll move to the sand dollar. How many of you have ever painted on a sand dollar before? Curious. And I love doing a really dark color as my outer color because the contrast between the dark and the light is just really, really appealing to the eye, and that's what draws you in to the painting. So see that contrast between the dark and the light just makes it grabs your attention. So we've got both of our blues wet here, but clearly they are not blended, so I'm just going to soften those edges again. And this is just one of many ways you can do fun backgrounds. In your painting. Wiping off excess again. So I'm kind of like dry brushing, which basically just means I don't have a lot of paint in my brush. And when you're dry brushing and they're still damp, you're able to get this really pretty soft blend. So you really can't mess this up. Keep in mind, if you do something that you don't like and you're not happy with, let it dry and come back. You could paint over this whole thing again. So again, practice in a mixed media pad first if you haven't done this kind of blending, and then do whatever your project is, whether it be canvas board starfish, a sand dollar. Awesome, Patricia said she's painted them and made them for Christmas ornaments. I do kind of want— even though I live in the middle of Missouri, or the middle of the US, I should say— I want— I like to have themed Christmas trees all over my house, and I really want a beach-themed one because I love the beach so much. All right, let's move on to this sand dollar here. I'm going to— I've not cleaned this. I mean, other than us just, you know, bringing them home from the beach, they've been in a container for years. I'm gonna just wipe off any excess debris or sand that may have still have a little bit of a residue on there. And you could paint both sides. I'm just going to paint the top today. Oh yay, Teresa! Oh, I love that. Um, she said she received her Lighthouse Beach Towel this week. I'm so pleased with the quality and bright colors. Those are my girls' favorite beach towels, the ones that I designed for the store. We have 3 different, um, patterns— not patterns, 3 different, um, paintings that I had printed on beach towels. They are so soft and comfy, and they're not overly huge. Like, I just think they're like the perfect size beach towel. But I do want to design some new beach towels for this season. Do you guys think this one would be pretty on a beach towel? I think it might be. It's really fun. So I just have to kind of play with the, um, the shape because obviously that's a big long triangle. Um, but yeah, let me know if, uh, if there's any paintings that you're thinking of of mine and you're like, oh, she needs to put that on a beach towel, and I'll, I'll see if I can go design that. So I'm gonna do this— I'm just playing, remember, this is my first time doing this, so we're just experimenting here. I kind of want this watered down a little bit because I want to see that star shape in the middle, so I'm going to water down my yellow just a bit. That's pretty because you can still see that shape underneath. Oh yeah, the Casitas too. Yes, Nicole, the lighthouse is on beach towels. My flamingo and my sailboats. Those are the 3 designs we have right now. I do have several other beach scenes that I just have to play with that could go on them. But yeah, I think Carol— Carla, sorry— said she'd love to have the mason jars on a beach towel too. So I'll work on those designs. Patricia said the dragonfly design would be cool. It would. That's a square. See, I have to get creative here and how I'm going to to work these designs in, because the new palm trees that I just did, um, that will be the prettiest beach towel ever. All those bright colors. So I'm going to do the same thing here. I went from straight paint to, um, my Sand Dollar, but I'm going to go back add some water in my brush. This is just another way to make blending a little bit easier too, if you have a damp brush. But usually I don't recommend putting a ton of extra water on your canvas because it just dilutes it too much. But for this, this is going to be so cute. I'm already loving how that looks. Yeah, the Belize Casitas definitely need to go On a beach towel, I agree. So I'm coming back with a little of my yellow again. So these are just choices you make. You don't have to do it exactly like me. I kind of want that yellow all over that star design, but you can just kind of keep playing, keep blending. That is so pretty, and look how soft that is. You can't even see the brushstrokes. Looks like it's like glow-in-the-dark right now. Um, Christie Renee Hawkins was asking, do I coat the sand dollar with something first to seal the surface. I did not, so it is soaking into the sand dollar, which I actually kind of like because it's, it's helping with the blending process by doing that. Now you could seal it after to protect it and keep it from fading if you want it to be glossy or matte. So again, I'm just in straight paint right now. Let's touch up a little green around here really quick. Okay, I'm gonna grab a little water. So usually when I'm doing backgrounds like this, if you see a background like this in one of my paintings, Most of the time I'm coming back and I put a base coat down, and then I'm coming back for a second coat to make the final blending process. So there's two reasons I do that on canvas specifically, because blues, especially blues, purples, reds, they're all really transparent. So sometimes it just takes two coats. I'm gonna go a little bit lighter. That's looking so fun. Pretty, pretty. Okay, let's do the darkest. I'm gonna go around the edge. I thought the radial kind of glow blending was perfect for a sand dollar since it's already a circle. So I'm going to push it in first, kind of pull some of that extra paint off, and then come back with just a little bit of water. Use your finger to help blend it out too. I'm a big fan of finger painting. Don't forget, if you're watching from Facebook, don't forget you can share this with your friends if you think they would think this was a fun summer project. Oh, I kind of like that. That's creating like a teal there. So I wipe off the excess water on the side of my cup. I'm not going from like dripping water straight to the sand dollar. Change your brush strokes up so it doesn't just look like a circle of rings. That is so pretty. And then you could put someone's name on it, write a name with Posca pen, or if I had actually remembered what trip this was from, I could put, you know, what beach we were on and what year it was. Um, so just a fun little keepsake you can make with your sand dollars. But again, you could do the same thing on a rock. And then if you want to seal it, that is just so fun looking. If you want to seal it, there's lots of different options that you can choose. I'll just show you a couple here. You can do— this is a polyurethane varnish from DecoArt. This one is ultra matte, which means it'll have the same finish that a sand dollar does. So it'll stay matte. The other version of that, and this is one of my favorite ones, is the high gloss. So you've got two different finishes you can choose from, and these just brush on. I can go ahead and seal it for you so you guys can see. You can also use DecoArt's DecoPodge, and this is a glue, a sealer, and a finish. So this is so multi-purpose and so handy to have in your craft room, your art room, whatever it is. I use this in my mixed media pieces. I use it to seal, and I use it to finish a piece too and create one, um, one finish for the entire painting. So maybe if you use some metallic or use gloss and use different kinds of paint, you can finish it with one whole finish and everything will look the same. Um, what else do I have over here? This is fun. Um, you could add glitter to this if you wanted to. Um, this— I thought I had one more. Maybe that was it. Um, you can also do a spray. So Krylon makes several different acrylic sprays that are meant for this. It's gonna— this one is UV resistant, so if it's going to be outside or anything, it would protect from UV light rays. It's non-yellowing, so you don't have to worry about it changing. They have lots of different finishes. And again, you're— it's not— one's not going to be better than the other. It is preference. Do you want it to be glossy? Do you want it to be matte? Do you want it to be satin? So you kind of choose. I think I am going to add some glitter to this because why not? I can always make another version with no glitter if I choose to. This is one of my favorite ones from DecoArt. This is the Holographic Illusions. I use it all the time. Um, let me show you a finish. So you guys remember a couple weeks ago I was talking about painting Stanley Cups for winners of my Tribe Sisters? By the way, if you're one of those Tribe Sisters, I did not forget about you. They're, they're taking me longer than I planned. But I want to show you this one. I only painted one side of this one so far. How pretty is that? And I put— I haven't sealed this one yet, but I put the holographic glitter that I just showed you over top of the painted design, and then I'm leaving the cup matte so that you can see the difference. And then I'll seal it and it will protect everything. So I just think this one turned out so pretty. So let's grab a little glitter first, and then I'll seal it, and then we will be done for the day. So you could put this on your palette if you want to, but I'm just going to put it straight on my sand dollar, and if I need more, I'll get more. Doesn't matter what brush you use. Um, yes, I'll show you this sealer that I'm using. You could actually use either one of these on those cups. Either one would work. I wanted to do a spray version just because it's faster and I don't want there to be any chance of brush strokes showing through, so I'm using a spray. I just love glitter. Not everyone does, and that's okay, but I do. Make sure and push it through those holes. Are you guys glitter fans or anti-glitter? It's a very controversial conversation in The Creative Space. I mean, come on, that's so fun. And this will— you saw that it went on white, but it will dry clear. And Pamela said it's so pretty, can't ever have too much glitter. I love it too. All right, we got some glitter fans on here today. I'm gonna do a quick blow dry because I want to finish this so I can show you how to, um, um, put a complete sealant on there. And I just unplugged my blow dryer. Hang on. Cheryl, I agree. She said, I like the glitter paints that we use in your tutorials, but I do not like dry glitter. I do not either, because what a freaking mess, and it is impossible to ever get it all out. So now that that's all dry, you can see all the white went away and it's just this really pretty glittery finish. Okay, so for the sealer, what do you guys think? Should I do a matte or a high gloss? Let me know in the comments your vote. While you're voting on that, I'm going to show you what I am using to seal the Stanley cups. Um, I had this for a long time and I went and compared all the different things And I hadn't used this before, so it was just in my drawer, and I tested it out on my, um, my cup to make sure I liked it first. So let me show you that finish. I'm really, really happy with how it turned out. So this is my own personal cup that I was kind of testing. On. So you see it has that little bit of sheen, but when you're here in person, you really can't see a big difference on the actual cup. So it doesn't really change the finish of it that much, but it's protecting all the paint from scratches, from fading. You would obviously still hand wash it, and it doesn't have to be food safe because unless you're licking your cup, you don't, don't need to be worrying about all this down here. I tape off any part that your mouth would possibly touch when you're drinking, but these have lids and straws, but I still taped off the metal at the top, and then I taped off my handle so I didn't get any spray on that so that I could just do the surface. I just love how fast spray sealers are. So what do you guys think? You like it? So that's what You can kind of see the difference here. This one's got a little bit of a sheen to it, and it dries super fast too, um, 15 minutes or less. That one dried really fast, um, so that's what— and I could use that on this right now too, but I don't want to breathe in all those fumes inside. I think I'm going to go with the high gloss. And again, you could put this on your palette if you want to, but I'm just going to put it directly on the sand dollar. Um, Cheryl said, I'm curious to know, since you use the glitter already, would the matte finish make it look different than the high gloss? So you could test it and see. I mean, the glitter is still gonna show through and be glittery, um, so I don't know that it would dull that. But I have not— I don't ever use a matte sealer. Um, like, this hasn't even been opened yet, so, um, I don't know. You would have to test it out and see what the finish would be. Maybe I can put a little— we'll just test it out right now. So I'm just gonna paint these brush strokes in glitter, let those dry, and we'll put matte over top of it and see. Lisa said, for the cups, can you still use brush-on? Yeah, absolutely, you can use either one. I just I prefer a spray because it's faster. Okay, so I'm doing high gloss. You can see I just kind of drizzled some on there. I think it would be so pretty to have like a bunch of these mixed in with some different little different shells and, um, maybe some like wooden balls or different things like in a basket together. I think that would be really pretty. Or like a centerpiece if you have like a beach-themed room or something, to have a centerpiece with these. Um, someone was asking about a string. You could— I mean, it would— I don't have a hole on this side. You could either put a string through the middle here or one of the outer sides if you wanted. So obviously this is wet right now, so it has a really wet shine, but it will dry really high gloss too. And that is also going to protect it from any scraping, scratching, roughing up the surface It kind of looks like a turtle shell right now. Okay, I'm gonna pull you down closer here. So this is our— let me shake this up really quick. This is the matte. Just dipping my brush straight into the bottle because I just need a little bit of it, and we're gonna test it on my brushstrokes here. I'm gonna blow dry this real quick. All right, we'll see. That was a fun little experiment because you can still see the shimmer of the glitter with the matte finish. I don't know if you guys can see this, I'm going to pull you back in. So see, you still get that shimmer, but instead of the whole thing being glossy, uh, the paint is matte, but your glitter is still shimmering and showing through the matte finish. And then this is our super high gloss Sand Dollar. Oh my gosh, Tina! Yeah, you definitely need to get to painting. Tina said, this is so pretty. I live in Florida but never thought to paint any of the sand dollars or shells that are so readily available. It's a whole new thing for you to paint on. And you could do like— you could even do this. I should have done this. Um, I mean, I still could and go refinish it again, but this would be so pretty even with just like a silhouette of like palm tree, like black silhouette of palm trees on there. Like you would go buy in a gift shop in Florida all the painted seashells and sand dollars they have. You can do them yourself. You don't need to buy them. From the store, and then they're even more meaningful. Awesome. Karina said she lives in Florida and she's been collecting them, so she's gonna have some to paint. You're welcome, Cheryl. That was fun to test out. Now we know. Um, Glenda said, if it was used as a Christmas tree ornament, would you leave the back as is? I was thinking a ribbon, but it would turn around. Yeah, that's up to you. Um, You— I mean, I guess if I was, I would either do the back painted, well, especially if I was like messy like I was on here, um, or you could like paint it white and then put like in Sharpie or a paint pen like your memory, um, and write words on the back too. So pretty. Okay, so that, that is it for this Facebook Live. So we did the big reveal. I showed you how to blend. And if you want to learn how to paint this painting step by step, you can do so for only $20. Painting of the Month Club is open starting today, and you have through the end of June to sign up and get this. and you can cancel at any time. You're not locked into anything, um, and this one is just so fun and so summery, um, and I hope you guys are excited about it because I know you're gonna have fun painting it. So, um, I will not be back next Wednesday because that is the day before we leave for Honduras. So you will see, uh, me, um, in my stories if you guys want to follow along and be a part of the journey to Honduras. I'm going to be putting all of that in my stories and show you the entire packing process and organizing and everything that goes into it. It's, it's a lot of work, but it's so rewarding, and it's a lot of fun too. So that's what I'll be doing next Wednesday instead of teaching another lesson for you guys. But jump in, do this, paint some sand dollars, join us in Painting of the Month Club. You won't be sorry. You'll have so much fun. And don't forget, you can go to my YouTube channel or my Facebook page to watch past tutorials that I've done on Facebook Lives. So there's all kinds of fun things for you to work on. We just made— if you're not following me on YouTube, we also just made a new playlist of all my patriotic paintings that I've done on Facebook Lives through the years. So lots of fun things. For you to explore, and, um, we would love to have you as a club member. So, um, everyone have a great rest of your week, and I will see you soon. Bye.










