How to Paint a St. Patrick's Day Gnome Acrylic Painting Tutorial || The Social Easel
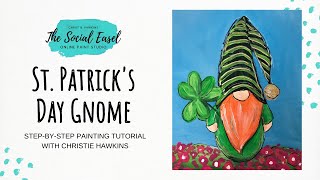
In this 2022 YouTube tutorial, Christie Renee Hawkins of The Social Easel walks viewers through creating a St. Patrick’s Day gnome on an 11 × 14 canvas using acrylics. She begins by directing viewers to download a printable template, then demonstrates how to transfer the outline onto the canvas with graphite/transfer paper, optionally reinforce lines with Sharpie, and set up a blue‑white sky background. Throughout the video she mixes colors, applies wet‑on‑wet techniques, adds multiple layers (background, grass, gnome’s hat, beard, clover, and flowers), and offers practical tips on brush size, paint consistency, and using paint pens for fine details. Christie engages the audience with live polls (e.g., beard color), encourages sharing via text or the Facebook group, and promotes her paid offerings: a $15 five‑day “challenge” that includes daily devotions and painting lessons, and the $47‑per‑month “Tribe Sisters” membership that provides three new paintings each month, guest speakers, and a full library of past lessons. She also mentions hiring an assistant for her Springfield, MO studio. The tutorial blends step‑by‑step instruction, community interaction, and marketing of her art‑education business.
Chapters
Hey guys, it's Christie with The Social Easel, and we are going to paint today. We are going to do this cute little St. Patty's Day gnome, and if you don't already have the template for it, you can download it by clicking the link in the description up above. So this is obviously just a template, and I'm going to show you how to transfer a template, how to outline it, and then we're we're gonna paint this little guy. So this is something that you can do for yourself, for the kids. I am gonna put mine— this is an 8.5 by 11 sheet— I'm gonna put mine on an 11 by 14 canvas board. You can get these really cheap at any of the craft stores or order them online. But you could do one for each member of the family, do these with the kids, and everyone can put their gnome in in whatever kind of land they want their gnome to be in. So we did a challenge in my group a few months ago on doing gnomes and putting them somewhere, and we had so many creative ideas. So hopefully you'll have fun with this, take this little gnome and turn it into a super cute painting. So that's what we're going to work on today. I'm going to show you step by step how to do that. So a lot of my paintings will come with a template, not all of them, like the flowers that I did with them this morning. That's not a template. Like, I just teach you how to do the flowers. Okay, so you're gonna get graphite paper, transfer paper. Yes, two in one day for some of my Tribe Sisters. Two videos in one day. You can get this again any craft store. It's called transfer paper or graphite paper. You can get it in different colors. I typically do black. If you're doing a black background, you can pick white transfer paper that you can do instead. So all you're going to do is take shiny black side that is going to go on the canvas, and I'm just going to position him. I want to have some ground underneath him here. I think we're going to position them just about like that, and then it's just super easy. You're just gonna trace over these lines. Now, I'm not like super careful about getting my lines exact. It's just to kind of give you an idea of where things are. You're gonna be able to cover these lines up with your paint. I'm gonna show you like what I do. Is outline them in Sharpie afterwards. You don't have to do that, but I like to do it because when you start painting, you don't have to worry about losing your lines. And if you don't have a template and you don't want to print off a template, you can eyeball it. Like, this clover is just 3 little hearts put together. Just kind of get an idea of where our ground is. Now that's kind of— let's get you a little bit closer here. Wrong way. So you can see the image there, and then what I like to do again is go over top of it in Sharpie, but you don't have to if you don't want to. While I'm pulling that up, I'm going to go ahead and outline this. Now, if using Sharpie scares you to do your outlines with, You could just do heavier graphite if you don't want to have those black lines to worry about later. So now I've got my basic shape on there. You can see a little bit easier. So I'm gonna do like a blue, blue and white kind of mixed background. So I'm just gonna grab some turquoise paint, and these are just craft paints that I'm using, nothing fancy today, just basic craft paints you can get anywhere. And we're just going to use a big round, and I'm just kind of mixing these colors together. And this doesn't need to be like a solid blue. We can have some variation in our sky. So don't be afraid of your paint, really load it up so that you can spread it easily. And you just want to make sure you're covering like any of the grooves of the canvas. Hold on, I got some dried paint here. Oh, Angela said she painted the Valentine's gnome and now she's gonna have to paint this one too. I love the Valentine's gnome. They're all so fun. I have Christmas gnomes, I have Valentine's, we're doing St. Patty's Day. Nina, you could paint the background first if you wanted to. It just depends. You just have to make sure it's really, really dry, that it's not wet at all before you transfer your design on. Okay, so let's get a vote on what color— I know what color I think I want to do. But I want to get some feedback from you guys. What color should we do the beard? Okay, I want you to give me a heart if you want it to be orange, kind of like a leprechaun, and give me a thumbs up if you want it to be gray— gray and white, like an old man. Don't forget to share with your buddies. It's a fun painting. If you know anyone with kids, the kids are gonna love this. Moms and grandmas, this is a super fun activity for you to do with the kids. Now you can see me going up right against that black line, right? I see a lot of hearts so far. I love the orange. Don't worry if you go over these lines a little bit. We're gonna be able to paint the green or the white or whatever we're doing on top of them, so it's okay if I overlap just a little bit. I'm not trying to be super messy, but it's okay if you are. Just a little bit. Someone said gold blonde. That would be cute too. I think it would be cute if you took this template. What if you took the template and then like did several on one canvas and made them all have a different color of beard? And we'll have a post in the free Facebook group for those of you that do this painting and you want to show it off. You can post it in there. And did you know you guys can also text me? So texting is not for customer service. It is to share your work with me. So, and then people who share their work with me via text might be featured on the page or in my Instagram stories. So if you painted this or another Social Easel painting and you want to share it with me and show me what you did, you can just go to www.textchristie.com. It will take you to it. You want to do that from your mobile device, or you can text 417 217-7044, and you can text me your paintings. That will also put you on the list for text alerts, live alerts. So whenever I go live on the page, if you want to make sure you're not missing it, you will get a text alert from me letting you know when I'm gonna go live. So see, it looks kind of crazy and messy right now, but you gotta trust me, it's all going to come together. So you just want a nice big brush for the background. Any size is fine, whatever holds a lot of paint and can spread the paint around easily. Now we're going to grab some greens here, and Michelle's asking about the Sharpie, if it's going to bleed through the paint. It shouldn't if your paint is thick enough, so you might have to do more than one coat. Which I usually do. If you have really thin paint, it's going to take more than one coat. One of my tricks is to always paint white over the lines first because it kind of tones them down a little bit once you can see where your outlines are. So once I do the green down here, we'll put white around all of this and then we'll go back over with the color, and that's also going to create a little bit of a base so so our colors are gonna stand out even more, like especially the orange, because I'm gonna choose orange. We're gonna do orange for his beard. Let me scoot this forward. I have so much dried paint on this easel. Here's a little pop quiz question for you guys. Depends on how long you've been with me, how long you've been painting with me, if you would know this or not. So I'm anxious to see what the answers are. Does anyone know the story behind the easel and where it came from? Let me know in the comments. Let's have a little hill back here. So like you can see, this green is super transparent right now. Green almost always needs a second coat. So I already know I'm gonna put a second coat on here. I think I'm gonna grab a little bit darker green too. Oh, several of you knew it! Oh, that's so fun. Okay, Martha was the first one. To guess it. It was my mama's easel. So my mom was an artist, my grandpa was an artist, and this was my mom's easel when she was in college. And then she gave it to me, and it was not teal green when she gave it to me. It was just old oak color wood. And if you know me at all, I like big bold colors. I love teal and and so it became my signature easel. This is what I taught all my paint nights on for years, but this became my signature easel, and I painted it the teal, the bright teal green color, and it has so much paint, so much paint piled up on it. Okay, so I'm going a little bit light here, and then I'm gonna grab some darker green. Now once all the grass is dry, I'm gonna add some flowers to it too. So right now all this is wet, so I'm still able to blend and it's not giving me just like lines of paint. Once this starts drying, you can't blend it anymore. So when you're working with acrylics, you have to have wet on wet to blend and your paints. So if I want it a little bit darker in the foreground here, a little bit lighter up above, even take some of your white and mix that with some of your lightest green that you have, even get it a little bit brighter up there. So don't be afraid to play with your colors and blend and mix and kind of see what you come up with. It's much more fun to look at with all the different colors in it than just a solid green background. That's what I want is for you guys to be creative and make it your own. So I'm trying to decide. I think I'm gonna put a second coat on the background, but I think I'm gonna switch to my large brush. So I'm gonna show you why I'm doing that, because you may not be able to see it from back there. See how that looks up close? So one coat of acrylic paint, still splotchy. Thank you guys for the stars. I'm still splotchy. I can see the canvas behind it, so I don't really like that. So So I want to put a second coat on here. So here's a tip for you. If you're new to painting though, and if you were to see that or see the streaks in it while you're painting it, if you tried to keep adding paint on paint, then it would get thick and gloppy. If you're blending, that's fine because you're blending, but it's not like super thick. It's just wet on wet. But when you try to cover and you're trying to put a second coat on, you want to let the first coat dry completely before you put the second coat on. And I'm going to show you why, because it's going to make a big difference in how the coverage looks on the painting. Okay, so we're going to go back to that blue-white mixture that I had, and then hopefully you're going to be able to see And it doesn't take as much paint the second go-round because you've already got a base coat down. See how I just keep moving back and forth and blending that in? This is just a large, like, 1-inch flat, but that coverage— like, if you compare the coverage of those two— splotchy, not splotchy. And again, it doesn't have to all be the same color. Have some darker areas in your sky, some lighter areas. Now look how much better that looks. Give me a thumbs up if you guys can see the difference between that. Erica said, true sign of an artist loses a brush, loses a brush in 10 seconds. Y'all, I It's for real. I need someone here with me to help me. We are actually looking to hire someone for the Social Easel, so if you are watching and you are local in Springfield, Missouri or surrounding areas, I am looking for an assistant. So I'll be making a post about that later for the local audience. What do you guys think? You see a difference? Thumbs up. So we're just doing a simple, simple background today. I'm getting a little more blue on there. And again, I'm not worried about going over these lines. I know if you're Type A and you're watching this, this is probably giving you anxiety right now. It'll be okay. That white is gonna cover for us. I just don't like it to look like it stops right before the outline. I'm just pulling that across that grass line there so it's nice and smooth. See, I'm thinking that looks a lot better. Okay, so the first thing I'm doing is I'm just going to fill this in with a quick light coat. I don't need this super thick. Don't get it all gloppy, just a thin white coat over our design. Now that's going to have a little bit of blue mixed in it because that was still wet. That's okay. So tell me, um, who you're gonna do this with. Are you gonna do it for yourself? Are you doing it with your kids? Are you doing it with your grandkids? What are you guys thinking? So you have this nice big round— this is an 8— just allows me to spread that paint nice and easy. If you go too small, then you've got little itty-bitty brush strokes and it's just harder to fill in. I love his little rounded bottom. I think it's so cute. That'll be fun. Yes, this would be a great Girls' night. Get your friends together if you can. Hopefully you're able to start seeing some people now if you haven't been able to. And if you can't, you can always do it virtually. You know, you could get on FaceTime with one of your friends and you could both pull up the Facebook Live and and watch it together from afar. So even down here you can see where I've got a little bit of streaking because green's just that type of color. So I'm going to go back over and just kind of pull some more greens down here. Let's create just a little bit of a shadow underneath them, a little darker green here. Now you don't have to do that, but I thought it would be fun to add a little shadow underneath them, show you guys how quickly you can do just something really simple like that to add a little bit of shading. Kind of hard when it's wet, it's all glaring. So if you're having fun with the freebie classes, this is a paid challenge, and I call them challenges because it's my challenge to you to paint something that you think you would never be able to paint. So this is a painting I did with my Tribe Sisters, which is my membership group, and and we had so much fun with it, and they turned out so good that I decided to turn it into a public challenge. It's only $15 to sign up, and we're doing something fun with this. So we're not just painting, we're going to make this devotionals and painting. So each morning, this is divided— this painting is going to be broken down into 5 days, and at the beginning of each lesson, I'm gonna do a mini devotional with you guys. So we're gonna have some Jesus and some coffee and some painting, and, um, that is my planned for this, and we've had so many women sign up for it, um, the replays are going to be available and you have lifetime access to them. So even if the time is not right for you, you can come back and do this. The videos are always going to be there for you that you can come back and do whenever you want to. So it's super, super fun. All right, so the white is still just a little bit wet, but that's okay because it'll just blend with our greens. What should this bottom color be? Do we want it kind of lime green? Do we want it kind of dark green? What are you thinking? I'm grabbing just a dot of black. Well, it was supposed to be a dot, and then it just squeezed out everywhere. I'm gonna start with this really, really— like, it's like a Kelly green, because I want it to contrast with that shadow I put underneath. So to get these smooth edges that I'm doing right now, you want to have plenty of paint in there, and then I'm pressing down and kind of pulling across, and I get a nice smooth edge that way. And we got to do the arms here. I think he's looking pretty cute so far. Jesse, I am not posting the colors, so yeah, just pick whatever you want. This one is called Festive Green by DecoArt, but you know, colors are kind of hard to come by these days because of COVID so I would recommend find whatever pretty greens your store has. They don't have to be the same colors as mine. So I'm just mixing some of my darker green with that color. Sue is asking how much to be a Tribe Sister. So my membership is only open a few times a year, but it is $47 a month to be a Tribe Sister, and that is 3 new paintings with me each month and a guest speaker, as well as the full library of all the paintings I've taught for the last 3 years and a whole bunch more. But that's the quick gist of it. Okay, I think I'm liking the little shading on him. What do you think? I don't want to mess with the beard right now or the hands because everything's wet. So I kind of want to jump around a little bit from there, and I think I want to go up here. I'm gonna take my dark green and pull a little bit of black into it. I do a lot of color mixing because I just can't ever find a dark green in a bottle that I think is dark enough. I always wanted a little darker. I'm gonna make his hat a really dark green, and then we're gonna paint stripes on top of it. And this is going to give us some contrast. We don't want them to all be one color. Let's pull that hat down. See, I'm pushing the brush down again to get that nice smooth line. See how, like, you don't have to worry about those black Sharpie lines we had in the beginning, especially with these dark colors, because they're going to be covered up. I got another little dried piece of paint on there. So I added a little extra black on that edge where it touches up to the other side of the hat. I don't know if you guys can see that with the lighting or not, but we're gonna make it a little bit darker there. That's kind of the underside. Of the stocking cap, and then I'll go back and pick up some more green. Let's add a little brightness to this side. Now again, we're gonna cover some of this with stripes, but I still want this little bit of light color over on this side. And you don't have to do stripes, you could do polka dots too, would be cute. All right, let's— I think I'm gonna make that little puffball. What do you guys think? A white puffball or a lime green puffball? All right, the golds might be winning. That's a new option. Just comment gold if you agree. Any metallic gold you can get in the store is good. Good suggestion, y'all. I'm thinking that's pretty super cute. This is a— I don't even know if they make it anymore, but this is Apple Barrel. So I just got this at Walmart. It's Sunkissed Peach. Just a dot of that. Okay, I'm gonna grab some of that peach, maybe even a little bit of white with it. I love the way the gnomes' noses just stick out from under their hat. It's so cute. We're just doing super simple little shapes here. Just a little semicircle. I'm gonna grab a little bit of orange with my peach there. I can't tell if you guys can see that. We're gonna move in a little bit closer. Can you see the little bit of orange I'm adding on the inside? and this is one of the liner brushes that I love. If you guys want a link to, like, all my favorite supplies and the paintbrushes I use, just go to thesocialeasel.com, and then at the top you'll see blog. Go to my blog. And in the right-hand column it has a link to my Amazon store. How many of y'all decorate for St. Patty's Day? He's just too cute not to do. This again is just a liner brush. It's like a really tiny round. Kim, I'm not sure what you're referring to. I didn't see hers. Kim, you were also saying, what brush do I use for outlining? I cheat and use a Sharpie because I can't get the outline done well. Okay, so again, liner brush for that, but one of my new favorite things instead of a Sharpie, because a Sharpie has a different finish than paint. So you can get paint pens, like a brush, a black paint pen instead of a Sharpie, and the finish is going to look the same as paint. The Sharpie kind of leaves like an iridescent kind of look to it. This is called Harvest Orange, but I don't think they make it anymore, so just a darker darker, vibrant orange. I grabbed a little bit of gold in my orange just to kind of give it a little bronzier feel in there. I love that orange up against the green. What do you guys think? All right, let's add a little variation in here. Gotta have some white mixed in, and I'm just doing long brush strokes. In the shape of the beard. Okay, let's add some stripes. I want some of these lime green. So I'm going to do these fairly quickly. I don't want them to be too precise and perfect. I'm eyeballing the space between. And just remember, it's like you're painting fabric, so it's not going to be perfect straight lines. It's going to bunch up in some areas, be straighter in others, so you don't have to worry about being too perfect. I love the stripes already. These kind of have them like angled off to the side because it's kind of a droopy little stocking cap here. Okay, let's go to our clover now. I'm gonna do kind of a mix of my lime green in that festive green, that more of a Kelly green. To be honest with you, I don't know why I didn't give him a four-leaf clover to begin with. That'd make sense, wouldn't it? He's got a big old giant three-leaf clover, though, so maybe that's lucky, because it's huge. Or maybe he's just a little bitty gnome. I'm gonna have this go over top my arm, so it's gonna overlap that. This is just a base coat. It's gonna take more than one coat on the clover. You guys hang with me for a little bit longer, and I'm going to show you how to do some fun little flowers. We're going to add a little color to this. We're gonna jump to flowers, so I'm gonna load up my hot pink here, and we're just gonna start coming in, and I'm gonna push down and just kind of wiggle it around, kind of like My word is smushing. I'm smushing it into the canvas. So I want you guys to listen to this tip I'm getting ready to give. Are you paying attention? Make sure when you're doing this you have variation. Some should be smaller, some should be bigger. It should not look like a pattern. If it's looking like a pattern, then you need to change it up. Variation is going to make your painting more interesting. We want some to overlap. They don't have to avoid each other. So I'm going to have some kind of clustered down here at the bottom. They're going to be more concentrated at the bottom and a little bit less the further up they go. Maybe like a really big one coming off the corner here. Now these may look ugly and like a hot mess right now, but you gotta trust me. Trust the process. They're going to come together and they're going to look super cute. So I'm adding some small ones tucked in there. So the faster you do this, the less you're gonna overthink it and the better it's going to look. So I'm gonna do a bunch of little ones out here, kind of like he's just in a field of flowers. You guys like the flowers so far? We're not done with them yet. Here's the other thing I want to show you, because I'm going to move this up close a little bit. And I kind of like that it does this because it's— the pink is like a little bit transparent, so the green shows through the pink in the thinner areas. And what that does is it basically does the job for us. It adds the depth and the shadows for us. And then once we let that dry, we can come back and make brighter pink areas but still leave some of that darker underneath. And then we'll add little centers in them, kind of make them more like poppies. I love poppies. I'm always painting poppies. I'm just looking at what is, what is dry that I can play with a little bit. Another idea, I can take some of that orange that I already had, even some of that white, make an entirely new color. Can you see that? So now we've got like this pretty coral. We can add some of that in, even add it on top of of some of the flowers that we already did for some more color. Don't worry, I'm not gonna leave it like this. We're gonna pull in some of the darker green with it too. But again, I just kind of want you to see how you layer, and that's why I jump around the painting and do different steps at different times, because I need to let that other Oops, got a little green in there. It's okay, we'll come back to it. I have to let that dry so that it doesn't become a muddled mess. Okay, so I think I want some white centers inside the flowers. But I have a blog post where there's all kinds of different lessons that I teach you, videos that go along with them. But we have several YouTube videos that that are attached to my blog post, or you can just go to the Social Easel on YouTube and see more there to see more of what I do and kind of what my style is. So what I'm doing right now with these flowers, I'm using the back end of my brush, and I'm just kind of pushing down and putting the centers inside. Now I'm not doing it on every single one of them. That one has a little bit of orange mixed into it, so we're just gonna leave that. But definitely, like, my bigger ones and all of these— just think of these as little blobs. There is nothing neat and perfect and clean about this style that I'm doing right here. Pat, I'm not going to add a rainbow, but you definitely could. I'm going to add some detail lines now, probably with 3 different paint pens. I'm gonna do gold and white and, um, gold and white and black. My brain would work. So when you're using paint pens, the thing you want to remember, you cannot use them on wet paint. So make sure whatever you are drawing on is dry. Otherwise, your tip will drag through the wet paint, and then you'll have to get it off. And sometimes I like to have the lines on the outside and the inside. Gold's my favorite. I mean, he should have lots of gold. I just feel like that goes hand in hand with leprechaun and St. Patty's Day. Can you guys see the gold showing up? Isn't it fun? So I can't add anything to that clover yet because it's wet. I'm priming my black paint pen here. There we go. And I like to add black because I think it just kind of adds— oh, this has got a little bit of paint or something on it. It's not Oh, you know what I'm doing? You know why it's not working? Because I'm pushing it down in wet paint on my easel that I forgot was wet. Well, I may have just messed that one up. Let's try a different one. All right, I got these new Arteza paint pens, and I haven't used many of them yet. We're gonna get the black one out of here, and if I can get this to prime— here, it's working. We'll add the black on, and then I'll be done for the day. But I hope you guys had fun. I've seen lots of ideas coming through of things you can do to add to this, so I want you to get creative. This is just a very basic version. You got lots of room— sorry, that's a weird angle— lots of room to get creative on here and add all kinds of things to it. When I'm doing the black outline— scoot you back in. I'm not worried about it being perfect either and like connecting everything, so it's okay for it to kind of be the idea of lines without it being like one solid line. Then I like to always add some little accent marks down in there. So it kind of makes this shape come off the page a little bit more. I'm gonna be real careful over here because I know some of this is wet. All right, what do you guys think? I think I like it. If you want to, you could add, you know, some little lines back here or even around some of your flowers. So just kind of play with it and see. If you do something you're not happy with, you can always come back and paint over top of it. So that's something I really try to work on with you guys when I'm teaching you about painting is to just kind of let loose and have fun. Don't worry about it. Don't take it too serious. Anything can be fixed. You can always paint over it. So there's lots of things you could do. You could also even write something up here if you wanted to write like, "Happy," you know, "St. Patty's Day" or "Good luck" or who knows. I don't know what you want to write up there. But you got lots of space to do all kinds of cute things— clouds, rainbows, a little pot of gold with a rainbow. So that is it for today. You guys want to join me for this challenge? This starts on Monday. You only have a few more days to sign up for it. It's only $15, and I'm breaking this painting down over the span of 5 days. So even if you are an absolute beginner and you've never painted before and it makes you nervous to even think about doing something like this, that's why it's called a challenge, because I challenge you to trust me and come and paint along with me. And I'm going to show you exactly how to do it. So the link is in the comments. We'll post it again at the end here. There's— sorry, there's like a fuzzy on the frame. So this one is 11 by 14. All the details, the color list, all the things are in the Facebook group that you'll have access to when you sign up for it. Can't wait to do that with you guys, and I will see you hopefully later Later this week. Bye.










