How to Paint a Tumbler | Easy DIY Hand-Painted Cup Tutorial
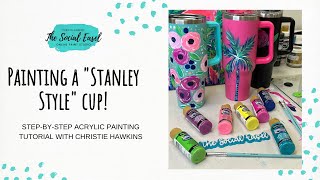
In this live‑stream, Christie Renee Hawkins of The Social Easel walks viewers through painting a Stanley‑style tumbler from start to finish. She introduces the knock‑off cup, shows the range of colors available in her store, and explains the choice of materials – primarily DecoArt craft acrylics (both thin and thicker bodied versions) and a numbered brush set she designed for cup painting. Throughout the session she mixes and applies bright floral designs, experimenting with color blends, brush pressure, and occasional Posca pen accents. Christie answers a steady flow of audience questions covering workshop timing, sealing options (Decoupage/Mod Podge, DecoArt DuraClear high‑gloss varnish, acrylic spray, and why epoxy isn’t used), hand‑washing care, and product details. She demonstrates practical tips such as wiping mistakes with baby wipes, using brush pressure for dot size, and stabilising a shaky hand. The stream also promotes related products (cups, paints, brushes) via store links, previews upcoming projects (hand‑painted lazy Susan, wooden trays, rock painting), and provides information about future live workshops (Summer Vibes, schedule conversion to time zones). The tutorial balances instructional detail with conversational interaction, encouraging viewers to experiment and join future community events.
Chapters
Hey everybody, it's Christie Renee Hawkins with The Social Easel, and I am going live today to start painting one of our Stanley-like cups. So if you don't know what these are, the name brand of the cup style like this is called Stanley, but we have the knockoff kind. So anyways, these, um, Stacy carries these. They're in our store now. So if you have fun watching me today do this and you want to do one of your own, we do have them available in the store. That link is also in the description up above of this Facebook Live. So I'm going to be painting one of these today. We have them in a bunch of different colors. Just a couple quick notes on what I'm using. I'm just going to use regular craft acrylic, so DecoArt, whatever craft acrylic you have. You could also use some of the thicker, thicker, thicker bodied acrylic as well if you want to. So either one of them is fine. The craft Craft acrylic is thinner, so it's not gonna leave as much texture behind on your cup. So if you want like a nice smooth surface, um, you probably want to go with craft acrylic. And then as far as finishes to protect the cups, I don't know if we'll get to it on the live today because the paint has to be all the way dry, but I'll just go ahead and share with you what your options are. So you can choose either you can do like a decoupage, again, whatever finish you want. This one is in matte, so if you just want it to look similar to what it looks like now, which is kind of like a satin, you could go with that. I do think they actually have a satin finish as well. If you want like a high gloss look on the cup, this is one of my favorite high gloss sealers and protectants. So you could do this, or I don't have it here with me, um, you could just do an acrylic spray. So any of those will help protect the hand-painted, um, cup from scratching and all that kind of stuff. And then of course they're going to be hand wash only, so you would not want to put these in the dishwasher because that's just going to be too much for them and it will knock some of the paint off and damage it. So I'm going to go ahead and flip the camera around so you guys can see the cup, and we're going to start painting some flowers on here. So I'm just going to flip you over and then I'll have to rotate the camera, so bear with me just a minute. A little bit higher so you guys can see. So let me know, um, in the comments what you think about the new paintings, if you like the bold, bright colors and style. Anxious to get your guys's feedback on that. And while you're doing that, I'm gonna start prepping my palette and getting some of my paint colors on here. I just went to, um, Hobby Lobby yesterday, and I always go to their DecoArt section and check out the new colors. This one was new. This one's called Electric Pink. It's super pretty and bright, so I had to get that. Um, this one's not new, but I love this one. This one's Sour Apple. Also, I don't know if you guys knew, but, um, when I went yesterday, I noticed all the DecoArt paint was marked down to 99 cents, and it used to always be $1.29. And, um, the lady at the register when I checked out told me they reduced the prices, so they no longer do the, like, you know how some weeks they— what was it, 40% off? Is that how much it was on those two? Anyways, they no longer do They're like, you know, it was like every other week they'd put them on sale. They don't do that anymore and they just changed the price instead. But I think 99 cents is a great deal for these paints too. So I'm gonna show you, scoot my palette over just a little bit so you can kind of see The colors, awesome. I'm glad you guys like the colors and the style. I think I want to— I've been painting on small canvases. Did I forget to bring my new painting? Um, which is really fun. One, just to have small, like, shelf sitter paintings, but I also like to use it as, like, my practice. And then once I do a small one, then I'm, like, deciding if I want to do really big too, because I got a lot of wall space here that needs to be covered with paintings. And we have a new lake house that we're going to be renting out that I'm going to be doing some art pieces for. So, um, that's going to be a lot of what we're doing inside Tribe over the next few months too. So I'm excited for some of those new pieces, but they're fun to do them small and then go bigger. What other color should I do? Maybe a purple. Oh yeah, that one's pretty. Stacy's here with me hanging out. She wants to see me paint the cup too. We may add some other colors as we go. What else? I may do— that might be too close. I was going to do kind of a minty color. Yeah, let me see that one. Oh yeah, Peacock Teal, that's a good darker one. Brenda said Jamaica agreed with you. Yeah, so I love, um, I love painting tropicals. I don't— I joke about it all the time. I have no idea why I live in the middle of the United States, because I'm meant to be at the beach all the time, but I can't, so I just paint it Well, that's true. I can't. Um, Debbie said— I'm going to pull this up here. Do you think participants will be able to complete their paintings during the streams next week? So it is possible, Debbie. Um, when— if you, if you haven't painted with me before, a lot of times I recommend to just kind of hang out and watch me so that you're not stressed or like trying to keep up with my speed. However, I purposely chose to do these on smaller canvases for this workshop. So my originals were on a 10 by 10. These are 8 by 8, these smaller canvases. So they shouldn't take very long. So even if you're not like following up with, um, like the time pace of each step with me, I really think you should be able to finish them, um, like that evening or the next day. And then we have some breaks in between, so you have like catch-up days, so they're not all back-to-back, um, classes too. So hopefully that helps answer your question. Cheryl said you could always move to the beach. Yeah, we have all our family here that would probably disown us if we moved that far away, so we'll just vacation there for now. So I'm gonna start this one. I think I want one more pink. I love all the different pinks. I also put a red on my palette because red's gonna look really good with this. And I have— I'll just kind of show you what I've got here. Um, and these, the yellow with the pinks and the yellow with the red, I can make like a pretty orange or coral color as well. Um, Sherry said, is that black or navy? That is black, but you actually just gave me a really good idea. A navy would be good. Just hand me that Ultra. Yeah. This one is Ultra Blue Deep. I love this color. And we may not use all of these, but I've got a lot of cups to paint, so whatever I did— this one's mine, so I can mess up on this one and get all my, all my kinks worked out before I paint the ones for the winning tribe sisters. Thank you, Debbie. Glad you are liking the paintbrushes. Um, so I am using my paintbrush set today that you can get in the store. They're numbered. These are acrylic. Um, I designed this set because these are the brushes that I use the most. So I'm going to start with my bigger round, which is my number 5. I'm really dying to see what this really bright color looks like. So I think I'm just going to start with some of my messy little flowers that I like to do. Pick up a little bit of white with that. And I plan on adding— if I can get them dry in time, I plan on adding some Posca pen marks on here too. So this is going to be— they're not going to be quite like this because this was with palette knife, but I'm going to just do some fun little Christie flowers on here. Um, Denise is asking about the Summer Vibes video in the vault. So it won't go in the vault, um, Denise. It'll go separate, um, in the library since it's a public one. Let's test this. Oh, that color is pretty. That one was Fuchsia Pop, that darker pink. And I still have some of that lighter one in my brush too, so I'll probably— you can kind of see the cup showing through there. Um, I kind of like a little bit of it showing through, but I may come back with another coat too. We're just going to experiment here. So whenever I'm doing these flowers, they're not perfect circles. So you can see that they kind of have some some curves around the edges of them. And yes, these are— Dina, these are regular, just craft acrylics, not the multi-purpose. Christina asked, do you prep the cup before? No, there is no need to prep anything. You can just paint directly on it. And just know, whenever I get quiet, just means I'm thinking, thinking about what I want to do next. This will be really cute, either just decorated, um, you know, painted all the way around, but it'd also be really cute to do some hand lettering on there as well. So I'm taking a little bit of that teal and adding it into the leaves. I thought that might be pretty. And then I think I'm going to add some little white dots, kind of like baby's breath around it too. Or do I want navy? Kind of want to add some little We'll do a mix so we've got some contrast on here. I'm trying to decide, what do you guys think? Do you like the look of A little bit of the cup showing through, or do you think it would look better with another coat of paint on it? What do you think? I think it's showing through. It kind of just adds, um, yeah, and a little bit of like dimension in it. They're voting another coat. We'll test it and see. Awesome, Melanie said she got a new cup for Mother's Day. She's so excited to decorate it. Tony likes the turquoise coming through. Marcy said it looks like watercolor with the cup shining through. Looks kind of cool. Um, yes, so, um, Claudine and Jill, you guys are asking about sealing it. I mentioned it at the beginning of the video, but there's a couple different sealers that you can use. You can use DecoPodge. In whatever finish you prefer. You can use acrylic spray, or you could use— what did I say first? Decoupage. Or, um, I have like— and there's lots of different varnishes, but you could use a varnish as well. So if you're wanting it to be high gloss, kind of like an epoxy look, which is like what my cup is here, that's epoxy. I don't do epoxy on cups, so that's not how I'm going to seal mine. I'm just going to do one of those options, and then you would want to just hand wash them as well. Um, Suzanne, I am in Central time zone. So here is the cool thing. We're going to be sending you guys a link in your email for the live stream, and when you sign up for it, it will send you reminders and it converts it into your time zone. So there won't be any confusion on what time you're supposed to show up. That was another added benefit to doing it as a live stream. I really like that little bit of turquoise in there. Oh, I just smeared my blue. Here is just another thing to think about if you're doing this and maybe you do something and you're like, I don't like that. Um, I'm just going to grab this baby wipe because I made it a little thicker than what I wanted to. Hey Gabby. Um, Lisa said you could use dishwasher-safe Mod Podge. I have not heard of that. It takes a long time to cure. It does, to be dishwasher safe. Oh, okay. Like days and days. Oh yeah. So I'm just using a baby wipe where I messed up that glue over here. Just wipe right off. Okay, I'm gonna do— while I'm letting that kind of dry. I'm going to do a couple extra coats on some of these to see what we think. I don't feel like the green needs the extra coats. It looks really good, but the pink is like a little more transparent. Um, Suzanne said, would a Clorox wipe be okay instead of a baby wipe? Yeah, I think so. Um, I don't see why it wouldn't be. You can also just get a damp, um, paper towel and and it'll wipe off. So whenever you're doing second coats like this, you do want to make sure that that first coat is dry, because if it's not, you're just going to be dragging your paint around. You're just going to be moving it. So you want it to be dry before you start adding in a second coat. So I think we can add in a little bit with And it's still— you can see some of that color coming through. Amy said she heard you don't want to put these types of cups in a dishwasher because it ruins the seal and it stops keeping your drinks hot and cold. Interesting, I did not know that. Yes, Stacy says you were right. Um, I never— we always hand wash these types of cups anyway, so I guess I just hadn't even thought about it. Let's get a little bit more of that bright color. What do you guys think about the colors? I'm liking these. I'm going to mix a little bit of orange and see if I like that on here. So I'm taking— I did a little bit of red and yellow, but then I added some of that really vibrant pink in as well. I kind of like that little pop of contrast. So I'm going to show you a trick. Instead of using— I'm going to get that paint out of that brush as much as I can. Sorry. Instead of using a brush and the bristles, you can also just flip that over to get perfect little dots. And the bigger brush you use, then obviously the different size those are. I think I'm going to mix up some more of that orange so I can add more on there though. So I'm just going to show you the mixing. Let's do some of that really bright, and then this is like a lemon yellow, so it's gonna give us a really pretty coral color. I like that better than when I mixed it with the red. I'm gonna use this brush, this is my number 1, and let's do a couple dots. With this, just so I can get some bigger ones too. So it's all about the amount of pressure that you put down. If you push down hard, you're going to get a bigger circle. If you just barely dab it on Then you'll get smaller. I'm liking the polka dots on there. I think I'm going to do a few white ones. If you have a hard time, if your hand is shaky and you feel like you can't make it stay steady, you can always hold your wrist or rest it on the table, and that will help give you a little bit more stability. Okay, so these are still wet up here. These are starting to dry. I'm going to go in with a little white and just add some little accent marks in here. Let's see, this needs some more paint. What do you guys think for the centers? Should we do black in the centers or the really dark blue? Can't decide. Now you could also— for this part I'm doing with the skinny brush You could also use a Posca pen to add these marks as well. Dark blue. Yeah, it might tie together a little bit better since we don't have black anywhere else. I think I need a different white Posca pen. Will you— I think inside that little closet there should be, from when we did the live event, there's a bunch of black and white ones mixed together. Stacy's gonna grab me a white Posca pen, and you could use a lot of different color Posca pens. I think I'm going to put another coat of the dark blue on like those little berry type things. Okay, so I'm going to take a little bit of black. And my blue and just make it really super dark. A little bit of black goes a long way. Hey Vanessa, yeah, so we are going to seal this. I don't know if I'll do it on the live, but we are going to seal it and I'll show you guys a couple— I'll do a little recap on the different ways that you can do that. I think that was the right choice. What do you guys think? I'm going to add a little bit more, the green leaves in here. And it's so fun to be able to take paintings and do them on a different surface. Instead of always doing on canvas. Let me know in the comments, like, what are some of your favorite things to paint on? Another fun project would be— I still haven't done this, it's on my list of things— like a lazy Susan to have at the dinner table, a hand-painted one that shield. They make great housewarming gifts for people, birthday gifts. But who wouldn't also love to get a hand-painted cup? You could do this on any of those, any kinds of tumblers out there. Yes, Sylvia, wooden trays are great too. I have done a wooden tray. Jilly said painting on rocks. Yes, we love to do rock painting. We go to a place called Cloud Nine and we paint rocks with the kids and then we hide them. And it's an ATV park, so when you're out driving around, you're always looking and trying to find people's painted rocks. So that's always fun too. Um, Gina said, what would you use to seal it for a lazy Susan? Same thing. Um, any, any of those sealers will work. So while this is drying, I'll just show you guys a couple that I have here. So this is DecoArt DuraClear. It's a high-gloss varnish, and it can seal this cup, it can seal wooden trays, lazy Susans, paintings, anything. Um, let me show you. I'm going to grab my peacock painting and show you what that looks like when it's dry. Zoom you out just a little bit. So this is the Dura Gloss— is it right? Yeah, Dura Clear High Gloss. So see that shiny finish? It's really, really pretty. So if you like the high gloss, like epoxy look, then you would want like a, a gloss finish. And this is one of my favorite ones, high gloss, so super shiny. Um, oh, you know what I just thought of? I had this sitting out and I haven't added any gold yet. And then you could also do DecoPodge. So it's a glue, sealer, and finish. This one is in matte. So it will dry like the paint is. That's a matte finish that the paint dries to. So you could seal the whole thing in that, and then again, you can pick any finish you want to. It comes in satin, gloss, matte, all the things. And then the third option would just be an acrylic spray. Um, so any of those three will work to seal it. Uh, Sherry said, do you seal all your paint? I don't. Most of the time I don't seal them. Um, I did on that one just because I love that peacock, um, and I just felt like she should be shining. But I usually don't unless they're gonna like go in a bathroom or somewhere where it's like high humidity or exposed to the sun, I don't, which none of mine are. Um, so I just hang them on my wall. So I'm just shaking up my Posca pen because it's a little runny. So that just means you need to shake it up. Always keep your lid on when you're doing that because it will spray that paint. Oh, it still looks runny to me. We'll test it and see. Oh, it's fine. You know, oddly enough, I think I like— usually I love Posca pens and they're so easy But I feel like I do better with a brush on here than a Posca pen. I feel like it's easy— easier with a brush because it's a curved surface, so your bristles just kind of pull alongside it. So I think I'm going to go back to my skinny brush and do my white highlights with that. Yes, Gretchen, they protect against water. So yeah, these are hand wash. Yep, I like the skinny brush better. You just never know until you try. All right, let me know if you guys have any other questions. We are wrapping up here. I'm not gonna seal it on the live today because I still have some wet spots, so I don't want to rush that. But if you have any other questions about this, um, or about the Summer Vibes Workshop, definitely get signed up for that. So you will get the link in your email to join us live, and we will have replays available through the end of May. Sherri said my white paint pens always seem so runny or water— I've had a mix. You usually— not until just a while ago, um, did I start noticing it with some of mine. I'm wondering if it's because they've been sitting for a while, but whenever I get new white Posca pens, they're always like super bright white. That's why I love them so much. So maybe they just really need to be shaken up a lot more is what I'm thinking. I think I want a little bit more green over top of this one. And just like always, anytime you do something and you're like, oh, I wish I wouldn't have done that, you can just paint over it. Like, I don't like where those Posca pen marks are, so I'm just gonna paint right over top of them. Um, Jamie said, will you please post a video of you sealing it for reference? So what we'll do, Jamie, I don't know if it'll be a video, but we will be turning this Facebook Live into a blog post, and the blog post will have all of the information on how to seal it, like all the steps, and we'll do pictures of all of that along the way also. But I think this would be pretty in lots of different colors. Too. I think red flowers would be pretty on here, or even if you did some like all the same in different styles— daisies, sunflowers. I will be painting the back side too, Bonnie, but I'm just not doing it on this live. So yeah, I'll paint the whole thing all the way around And then if you came in late, these are some of the other colors that we have available in the store. So we've got the hot pink, the baby pink, we have gray, we have black. I really want to see— I'm just going to do a flower on here really quick. I want to see what the pink looks like on the black because I think it's going to be so pretty. This would be fun. I can really go— look, that's like a neon. I think the teal is going to be really pretty on here. Those colors are going to be awesome. Oh yeah, Sherry, that's a good idea. She said my peacock feather would look really cool on here too. Like, honestly, any— like, I was even thinking I want to do one with my palm trees. So these are, um, let's move this out of the way so I don't get my wet paint messed up. But like, how cute would a dragonfly be on the cup, but I'm thinking like I want to do one with the palm trees on it because I'm obsessed with the palm trees. Um, so this would look really cool. Let's just do just a little one. We're just gonna do a little testing. Let's just play just a little and then I'm gonna jump off. Yeah, sunflowers would be really pretty on the black as well, I think. Um, Lisa, I have the link up above. We have them in our store where you can buy these cups if you're wanting to paint them. Um, Nonnie said, do these, uh, have logos on them? Um, these do not, so they're not the Stanley brand. It's just a generic, which I think is even better because then you don't have to deal with the logo. But I'm not one— I'm not gonna buy it for, for the logo either. Um, okay, so I'm just gonna do— I think this might be my favorite. I'm just dying to see what this looks like on the pink cup. Lisa, did you answer me and tell me if you preferred a color? I can't remember. If you did. Um, Nani, if you click the description of this video, it will pull down and show you the link to that, and then I think we can copy and paste that. In there as well. I love navy and hot pink together. It is one of my favorites. How cool is that? Hey Joni, when you go back and watch this replay, I go over, um, how to seal them. So there's a couple different options. You can do Decoupage or clear varnish. This is really pretty when you're doing this lime green and that blue before it's completely dry. It's mixing a little bit in some of those places and getting like a really pretty, almost like Emerald green color. How fun is that? I'm gonna make myself a little purple over here. So turquoise and pink make a really pretty, like, lavender color. Just a touch of that in there. So you got a little bonus today because I just couldn't help myself. I just really wanted to see what that looked like on here, and I love it. Um, so I am just using— yeah, I'm just using DecoArt Craft Acrylics. Um, I did not list all of them, but we've got Fuchsia Pop and Lemon Yellow, Sour Apple, all the bright colors. The brighter the better. Um, Magenta Electric Pink and Peacock Teal. And where's that blue? I did Ultra Blue Deep, and then of course white. So those are almost all the colors that I used. So just to kind of show you on— I don't want to set that down in wet paint. Um, just regular craft acrylic. It dries matte, but it doesn't say that on there. It's just— it just says Americana DecoArt. And then you can do a high varnish or high gloss varnish. Um, you can do decoupage, or you can do a spray acrylic to seal. So I hope you guys have fun with that.










