How To Paint Daisy Flowers-Online Lessons
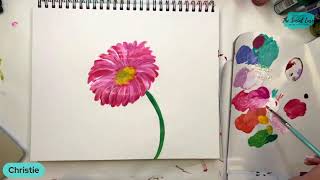
In this live Facebook session, Christie Renee Hawkins walks viewers through painting a pink Gerber daisy while simultaneously promoting her upcoming "Bold Blooms" paint party. After a brief series of technical hiccups, she introduces the project, explains the composition ("My Bold Limbs"), and demonstrates step‑by‑step techniques: selecting colors (Dragon Fruit, Fuchsia Pop, white), using a #11 filbert brush for petal shape, layering darker and lighter pinks for depth, adding a lime‑green center, and finishing with stem work. Throughout the demo she answers common participant questions about the paint party schedule, replay access, required supplies, cost, and membership benefits (Tribe members receive free access). She shares practical tips such as keeping paints moist with an ice‑cube‑tray lid, using Posca white pens for highlights, and working on a mixed‑media pad for practice. The session ends abruptly when she must leave to pick up her daughter, but she promises to post finished photos and invites further questions in the comments.
Chapters
Hey everyone, we are going live today. I'm going to teach you a fun and simple birdie. Um, I'm having just a couple difficulties right now that are messing up in my settings. Give me just a second. Okay, sorry, this is a chance to jump on here. So when you are live with me, go ahead and, um, the comments and let me know you're here. If you can hear me okay, that would be great. I'm just having a little bit of a, um, glitch here for my group. Bear with me just a second. Okay, perfect. Can you hear me? We're live in the group now too. We're live in multiple places. Um, I mean, one of my settings not correct on there. So I have never taught y'all a Gerber daisy before, um, so I thought this would be one, um, to do with you guys today. And while I'm painting the Gerber daisy, we can talk about my upcoming paint party. Is next Monday and Tuesday. Um, it's hosted on Facebook in a private Facebook group. However, if you cannot make those times that we're doing the party, you can come back and watch the replays at any time. What we are painting next week is this composition. This is called My Bold Limbs. I'm just going to kind of do a quick scan of that so you can see it, and I will break this down step by step so you can learn how to do this fun bouquet of flowers. And in addition to that, you are also going to learn a watercolor version. So we're doing a, um, our sessions on Monday and Tuesday at 1 PM Central Time. Again, replay is available after. And then Tuesday night at 7 PM, I'm doing a live Q&A, and while I'm teaching you a watercolor version, and you can use your acrylics just watered down to look like watercolor, or if you already have watercolors, you can use watercolors as well. So I'm going to be teaching you both versions there. We have an echo. Try and figure that out. Let me see. Everything is muted on this end. Hmm. Okay. We're just gonna have one of those days. All right, hang on just a second. I am— oh, that's really bad. Okay, hopefully if you guys can still hear me, hang on just a second. I know you can't see me. I'm just trying to fix the echo right now. And I don't know why this is still doing this even though I have the audio turned off. It will not let me mute my phone all the way. Hello? Okay, bear with me, bear with me. We're going to try to do this from my other phone. Maybe that was an issue. With that phone. Oh my God. Okay, goodness gracious, y'all. Let's see if we can fix this. What I love is that I just went live in my group and no problem at all, but I'm gonna go live here and it's gonna mess everything up. Okay. Okay, let's try this again. Maybe we can get it right. Nothing like a good few technical difficulties to start the Facebook Live off, right? Fun times. Okay, sounds great, looks great, we're good. Oh my gosh, like, I don't even understand. I have the settings exactly the same on that other phone as I do on this one, but you know, whatever, that's out of my control. So what is in my control is, uh, painting with you guys. So that's what we're gonna do today. We are going to paint a gerber daisy. Um, while we are painting this lesson, I'm here to answer any questions that you have about my Bold Blooms paint party that starts next week. So if you were not here in the beginning, this is the Bold Blooms painting. Try to show you the whole thing there. It's only $15 to sign up. It is a limited time offer, so once um, once Monday comes, like, we're taking the offer down. So this is, um, your one chance to get to do it for $15. And, um, you do not have to be there live. We're teaching it at 1 PM on Monday and Tuesday next week, but you will have replays available immediately after, um, that you can go back and view in the Facebook group. And then the following day after each video, we will have them uploaded onto our website where you will have your login that you can log in and watch them whenever you want to. Um, Lynn, you will get ads just because I'm on the SocialEasel page, so you can just X out of those if they're bugging you. Thank you, Tricia. Hey, Glenda. Yeah, so I am in my new studio space and there is zero furniture up here. Corey just finished the floors this last week, um, so you will have a little bit of an echo just because I'm in a big space like this, and that will get better once we get more of the studio finished. So I'm going to go ahead and start. I want to do a pink Gerber daisy today, so I'm going to go ahead and get some of my colors. What's left on my palette that you're seeing is just left over from the class I just did in my tribe membership, and we may use some of those again. Um, Lynn, if you are a tribe sister, there is no charge for you. Tribe sisters get the paint party for free. It is included in your membership. All of that information is in the face— or our tribe sister Facebook group. So always make sure you're going to the tribe sister Facebook group for any information for members only. So I'm going to get two different colors of pink. I'm using Dragon Fruit and Fuchsia Pop, which I believe is one of the new DecoArt colors. I'm going to start with those, and I've got some white. I'm going to grab a little bit more. Hey Patricia! So how many of y'all love painting flowers? I love them. I'm going to start with just this little oval that I've gotten here, and that is going to be the center of our flower. I am going to use a filbert brush for my petals. So I'm going out of— I just opened a brand new set of my brushes. So I'm going to grab the filbert. Had to open a new set, and my other set is at my home studio. So a filbert— this is the number 11 out of my brush set if you are painting with mine. Um, I designed this set to give you all the paint brushes that I use on a regular basis. So this is a number 11 out of my set. The filbert has that curved shape to the bristles. And filberts are great for doing flowers and petals, um, because of that shape. They're also good for clouds because they give you the nice rounded, um, look. So I'm going to start with just some of the dragon fruit, and we're just going to have— see how that gives you that nice Excuse me, and my allergies are super bad, so sorry about that. But it gives you that nice curved shape there. A couple petals kind of come in between, and what I love about the filbert brush is Just gonna pull these in. Just by laying the brush down, you get that shape. You're not having to do any special trick to do that. I made that one a little wide, but this is going to be the base of our petals. So if we have a couple wonky ones in there, it won't matter too much because they're kind of our under our underlayer here. Maybe have a couple showing on the side. Just pull those out. So by drawing that oval on there first, that is just giving me my base, right? Like it's giving me my, my center of that flower that I need. And then I can kind of come in and start adding. The gerber daisies have lots of layers to their petals. This one's got a little bit of an angle to it. So we have them kind of curving out just slightly. But can you see how just having this— the right brush for this is super helpful? So we're going to go a little darker on the bottom so we can create a little bit more contrast on top. I'm going to take— let me see if I have any of this still. Wet. I'm not sure if it is. I'm going to grab just a dot of black here and pull some of my pink over. I don't want it super, super dark, just a little bit. So this is creating a shade of that pink that I use, but it's going to also kind of give us the illusion of a little bit of depth. So we're going to go darker on these bottom petals, and then when we start doing the ones on top they will be a little bit lighter. So I'm not having to overlap each one of those petals. And then I'm going to go in the center here. I'm just going to leave this paint in my brush because I don't think it's really going to affect it too much. I'm going— I'm going to show you the picture that I'm looking at on Pinterest. If you don't have— and I'm not making this exactly like this, but this is the Gerber daisy, or Gerber daisies I should say, that I'm looking at. So some have that kind of center, some have a dark. You could choose which one you want yours to have. I really like the ones with the lime green centers in them. I think they're pretty. So I'm gonna kind of create a little bit of that center, and then we'll come back and start adding some of the top layers of the petals on. So, um, let me know what questions— while I'm starting that— that if you have any about the paint party, about what we're going to be doing in there. I'm just going to start dabbing this in, and I'm just using the same brush. This brush works just fine for the center of this flower. I'm going to be thinking of some of the questions that I have seen come across and try to answer those. The main one I've seen is that people asking about the time and if they're at work during the day, all that. We have people all over the United States that paint with me, so I want to start by saying there's no such thing as a perfect time that's going to make everyone happy. We have women in Australia, in the UK, Canada, and the United States, all the time zones. Okay, um, so I teach during the day so that I can be with my kids on the evenings and weekends. So we did have that question come up, like, why do I teach at that time? That's why. Um, but we don't expect everyone to be there live with us, so you of course can watch the replays immediately afterwards. They will be in the Facebook group, and then they will also be uploaded to our website where when you create this purchase, you created a login and you will just log in with that and then you will be able to access the videos there. When you sign up, your supply and color list is provided for you as well. So you're not having to try to figure out the colors on your own. Some of the other questions that I had were kind of like, you know, what are What are my expenses as far as supplies? So it's really dependent on what you already have to get started with. So if you've already got paintbrushes and paints and canvases, you're in pretty good shape. I did my painting on a 16 by 20, but you can do it on any size canvas that you want to. And then you just need some basic craft paints. So I use DecoArt. Most of the time. And these are— just depends on where you get them— anywhere from like $1 to $1.50 apiece. Hobby Lobby usually puts them on sale every other week. And so you need that. You need some— I recommend synthetic brushes. You can buy my brush set, or you can buy a brush set at your local craft store, Walmart, wherever. Um, and then one newer thing that you may not have already would be a white paint pen, because that is how we're adding in this really fun detail work inside of the painting, is with a paint pen. So the brand I recommend is Posca, and they have two different sizes. Actually, they have more than two, but the most common are either this wide one, which is a 5M or the skinnier one, which is a 3M. Either one of those or both of those is fine, but this is my, my favorite white, um, white paint pen because it shows up so beautifully on the darker colors. Um, what paper am I working on? I— this is called a mixed media pad. I'm going to show you what it looks like, and it's in my Amazon store if you want to purchase one. We have a link to my most used supplies there that I recommend, but you can use this for acrylic, watercolor, pen, pencil. It's kind of like a sketchbook for artists. So this is a great thing to practice brush strokes in, just to practice paintings in general, because there's something that, you know, kind of stops us when we're painting on a canvas. Like, we feel like it has to be perfect. So creating in like a mixed media pad, I feel like, just allows you more freedom. And you can kind of see here I'm just going to show you a couple pages. Um, it's for you to play with just different colors and brush strokes and, and test things out. So that is what I use mine for. I can do full paintings in it, I can do practice paintings, and just kind of play with things in here. So that is what I'm using, and I think I answered the question about the brushes. Um, just some rounds. I mean, I usually get like a basic brush set so you have everything, but, um, you could really do this painting with like a large flat and a round and you would be good. Um, Tricia said, how do you keep your paints moist? So one, you just want to make sure that you're not putting too much on your canvas, so you can just kind of keep adding to it. One trick, I'll show you this. I'm not using this right now, but I did this at my live event. This is fine for us to just kind of pause for a second. I kind of want these to dry before I add more to them so it doesn't blend together. So I did this at my, um, my paint, my live paint event last year, and we just used a ice cube tray and filled it with paints and then put this lid over top of it. This has worked amazingly well. You can get these on Amazon or in my store, but this works great for keeping your paints wet if you're wanting to do your painting over a span of time and you don't want to just use a palette. I use this palette paper again from Amazon, and I just start with a small amount so I can just add to it. and not waste too much. I don't usually keep my paints from one session to the next. I usually start with, um, fresh paint each time. I'm gonna grab a drink of water really quick. Anybody else have bad allergies right now? Mine are killing me today. Awesome, Karen said she's waiting on the FedEx truck to get all her supplies for her balloon class. That's awesome. I know, Tricia, isn't that a cool idea about the ice tray? I have to say, I got the idea from my friend Tamara Bennett with Southern Adornments. She teaches door hangers, um, and she had a different kind at her event that was a bunch of small little holes, but I knew I was just doing one big painting, so I started looking on Amazon of what we could use to keep all the ladies' paints wet from one day to the next. And I found those and they worked out amazingly. And then they got to take their paint home from the event if they had any touches, touch-ups that they wanted to do on their paintings. They were able to do that as well. Um, I mean, mine have stayed wet for months. It's crazy. It'll create a little film over the top because the air is there, but then you just kind of push through that and your paint's still wet. So It's a great idea. Um, so now I'm doing some of the Fuchsia Pop. I added a little bit of white to it, and I'm going to start adding my brighter petals over top of this. So the Gerber daisy, the petals kind of push down and then kind of taper in towards the center. They're a little bit wider and then get skinnier. And don't worry about how they look coming into your center right now because we're going to be adding more to that. Sometimes holding— I'm kind of holding that filbert brush on its side so you can push down where you want it thicker. It's going to spread out more and then pull back in. Can you see those brushstrokes a little bit easier? It's always hard when the paint is still wet, you get that shine on there. I'm gonna mix some even a little bit lighter over here. Wrong color. That one's really white. Um, what other questions have we had? About the paint party. I'm trying to think. Look how that's starting to look. So those darker layers underneath create a little contrast there. I'm going to come back in with a little bit more of this brighter pink. You just want to be careful to not over-blend. So you notice I'm just doing like these as separate strokes, because if you stay attached and you keep making the brush strokes, you're going to end up blending all the colors together. I'm gonna set this down for just a second. I'm gonna grab a little bit of a darker green with my lime green over here for the stem. I'm just going to use a round for this. I already had in my water, and I'm mixing those two because the, the Dark green is too dark, but I knew it was going to look pretty with that lighter green. Can create a little shadow with the darker green over on the side. Um, they are called Posca, P-O-S-C-A, Posca pens. And of course, I just got a call from my daughter Sophia telling me I have to leave to pick her up from school right now. She had an archery competition today and they just got out early, so surprise, this is going to be cut short, kind of going par with my course for the day. Goodness. Okay, so I'm showing you the center right here, and I've added that like lime green in there, a little bit more yellow. I'm going to do this in like 2 seconds, and then I'm jumping off here to go pick her up, and then I'm going to use the rest of my pink that I have in here. And Corinne, I can't— you're asking about what paint colors you have, if they're close enough to be as bold and bright as mine. I don't know what colors you have, so I can't speak to that, but you can try to match them using the color list that we give you. We have color samples on the side. Well, you are getting a shortened version of this Gerber daisy, so I apologize for that. She wasn't supposed to be back for another 30 minutes, so one more surprise for the day. Well, I hope you guys enjoyed that. I hope I was able to answer some of your questions, and, um, I'll come back and show you some finished photos of this. But the very last thing I was going to do is just do a little bit darker around those edges to give it a little bit more contrast between the, uh, the center and the petal. So I apologize for this being such a crazy, um, Facebook Live, but hopefully you still learned something. And, um, let me know if you have any more questions. We'll come back and check them in the comments.










