How to paint hand made Valentine's Cards with Christie
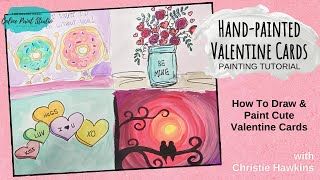
In this live tutorial, Christie Renee Hawkins of The Social Easel welcomes viewers to the new year and walks them through creating four Valentine‑themed card designs—donut characters, a mason‑jar with flowers and hearts, lovebirds, and conversation‑heart cards. She demonstrates sketching basics, encourages beginners by breaking drawings into simple shapes, and shows how to paint the sketches using either traditional watercolors or acrylics thinned with water to mimic watercolor. Christie recommends specific pens, brushes, and paints (Sharpies, Faber‑Castell waterproof pens, watercolor sets, acrylics) and points viewers to her Amazon store for supplies. Throughout the session she shares practical tips on brush loading, color mixing, layering, and adding details, while also promoting upcoming community events such as the Lovebirds Challenge, the Ultimate Beginner’s Boot Camp, a 2‑day birthday painting challenge, and a free Facebook group where participants can share their work. Personal anecdotes about her new puppy, family, and birthday plans add a friendly, conversational tone. The video ends with calls to action for email sign‑ups, text alerts, and future live sessions.
Chapters
Hey everybody, it's Christie Renee Hawkins with The Social Easel, and first of all, Happy New Year! This is my first live this year, so a little late at getting back to you guys, but I'm excited to be here. We've got a lot of stuff planned for this year already that I'm super excited about, so So I'm going to be sharing a little bit more about that with you later, but today I wanted to jump on and do some Valentine's cards ideas with you guys. So in a minute, I'm going to bring you over here and we're going to do some quick little sketches and painting, and hopefully it will inspire you guys to do some fun little Valentine's cards or maybe just some Valentine's art that you want to do. Um, yes, I am ready to be back. Let me know where you guys are watching from. Um, Who else is ready for 2021 and to get a redo for this year? So we are in full-fledged planning mode on the backside of the Social Easel. And like I said, already planning out like our first 6 months of the year, and I've got some really fun opportunities for you guys to get to paint with me a little bit more. and we have a, um, Lovebirds Challenge that's going to be coming up at the end of January. I am in the process of working on the Ultimate Beginner's Boot Camp for you guys. So if you are new to painting and you're like, literally, I don't even know what to do, I don't know what brush to use, what paint to use, all those things, that's what this boot camp is going to be for. So that will be coming in the next few months. So just to kind of give you a little teaser of what we have going on, I am going to go ahead and just bring you guys over, um, to the studio table and flip you around, and we are going to start doing some sketches. So today I've got 4 different designs that I'm gonna do with you guys. We're gonna do some cute little donuts, um, we're gonna do some lovebirds, and I can show you a few different ways to do the lovebirds. We are going to do mason jar with some— I don't know if you guys remember the spring one I did from last year. It was Mother's Day last year. If you haven't seen that, you can go to my YouTube channel and check that out. But we're gonna do like a Valentine's version of a mason jar with some flowers and hearts and fun little whimsical things coming out of it. And then a little card with some conversation hearts. So hopefully you guys are excited about that and are ready to paint and have some fun. And don't worry, you can always go back and check the replay out later. It'll be up on the Social Easel and eventually over to our YouTube channel. Any of the supplies that I talk about today, the pens that I'm using, the paint, all of that good stuff, you are just going to go to my Amazon store. And we have an affiliate store with Amazon where I put all my favorite things. So if you're not sure where that is, you can just go to thesocialeasel.com and we have a tab over there that will take you directly to the Amazon store where you can find all the goodies, or you can go to your local craft store or Walmart to get— so first, what we're going to do today, I've got some different pens that I'm going to be using. You can use Sharpies in all different sizes. These are waterproof. And will not bleed or mix with your paints. And then my favorite brand is this, uh, Faber-Castell. I don't even know if I'm saying that right, but they come in a set of 4 or 5. These are in my Amazon store, but these are waterproof. They come in different sizes. Like, this is my favorite one. It's like a brush, so it's like a thicker line like that. And then we've got like skinnier ones that make skinny little lines. So that is what I'm going to be using today. I may use some paint pens at the end after we do some of the actual paint color. And again, these are in my Amazon store. These are just black and white paint pens. You can get those anywhere. And then the method I'm teaching you guys today, we're, we're doing two different ways. So you can do watercolors if you already have watercolors, any kind is fine. They can be from the tube, they can be these cake ones. This is a really old set that I've had since college, but you can get— I have a watercolor set in my store. Any of them are fine, just an assortment of colors. So if you have some, you can use them. If you don't and you want some, you can get them. They're not very expensive. Or if you don't want to get more supplies, I'm going to show you how I use acrylic paint like watercolor. And this is a really fun trick and tip for you guys because you don't have to go out and buy more supplies. You can use what you already have at home, and you can pick any of your favorite colors. We're going to put them on our palette, and we're just going to add water to them. And when you dilute them down enough, they act as watercolor. So, um, whenever I teach this style, just know you can use either one. Okay, so we're gonna start with some sketches, and I want to show you guys this because a lot of people think they can't draw, right? I said I was gonna do this as a joke one time, but how many of you have ever said— just shoot me up a heart if you've ever said this— I can't even draw a stick figure. That is probably the most common thing that I'm told as a teacher. So guess what? You don't get to say that anymore after today. Because just as a fun little joke, we're gonna do one, and I'm gonna show you how easy it is because you can draw a stick figure. We're gonna start with the circle. Got a nice little body. Maybe this guy's walking. Maybe he's doing the splits. I don't know. Looks like he's doing a little dance. All right, that's it. Now you guys can do it. Make your own stick figure. You can't tell me you can't do it anymore. Wrong way, wrong way in the mixed media pad. Well, where the heck was I? I thought I had a blank page here. Oh, here we go, flipping it over. All right, so everyone can do a stick figure now, right? So now I'm going to show you that you can draw. It is easier than you think, and it's all about breaking it down into simple baby steps. You break anything down, you can do it. This is the same way I teach painting. Um, it is going to be the same way I teach drawing. So let's just start with just a basic donut. So these are going to be simple circles. So we're going to start with some cute little donuts. I'm just going to do 2, 2 circles, then a little circle in the middle. And you guys see, I'm not worried about these being Perfect. I'm not measuring. They're completely different sizes. Not every donut's the same. Then let's add some icing to it. We're going to start with just swirvy little lines. All right, so far so good, right? Not too hard. Now we have to have our inner line of the icing. What's your favorite flavor of donut? Sprinkles? Jelly-filled? Okay, so it doesn't look like much now, right? But we're gonna keep going. Let's make these into cute little characters. So I'm just doing a curved line down. You don't have to do curved, like a little hill, right, for his foot or her foot, whatever. We're just going to kind of make it a circle. So we got this little donut. Maybe we'll make the next one just kind of stand still. So I'm still gonna do two little legs here. This time I'm gonna do that hill on both of them straight down, just like that. And just have these hands kinda at the side. You could get creative on how you want your donuts to look. So we're talking about Valentine's cards, right? So I love that little— just using like donut, like don't know, you know. So you could add at the top of your card, don't know what I'd do without You. And then of course you could make that cuter, right? This is just to get— kind of give you some ideas. But we're not done yet. We've got to add a cute little face on here. How about that? Maybe some little eyebrows. And then you could do your lettering. This is just a quick Easy way to just kind of fancy up your lettering is just to add little serifs to it. Or if you don't want to do serifs, you could do little dots at the end of each one. Or if you want to get real fancy, you could find a font you like and, and trace it on. And then we've still got to do some cute little sprinkles too, right? So I'm just gonna do— now when I do this kind of style I'm not trying to be too perfect. It's just kind of a sketchy style. Like, it's even okay if I like have some little lines that kind of come outside of my shape. See how that kind of gives it some movement? You guys hear something in the background? In case you didn't know, I got a brand new little puppy for Christmas for Sophia. We got a little corgi and Her name is Pickles, and she's ready for me to go get her. So this is the joy of painting live with a brand new puppy. It's like having a baby. I'll be right back. I gotta go grab her now. I can't, uh, promise you won't hear a little barking too. She's a sweet little girl, and she's doing really good. She's being a good little puppy. Of course, you know, we get her for Sophie, but really Mom and Dad are the ones taking care of her. Okay, so this is idea number 1. So here's what I'm going to do. I'm going to go ahead and draw each design, and then at the end we'll fill them in with some paint. So this one's going to be— actually, you know what, let me go ahead and do the sketch ones first. My lovebird ones is going to be a little bit different. I'm going to use paint for that one. And these are super easy lovebirds. So let's do our mason jar with the flowers and the hearts. So if you haven't seen me do a mason jar before, they're pretty simple to do. We're going to start with a parenthesis pretty wide apart. Draw that line across. And again, I'm not trying to make it too perfect. I want it to kind of be sketchy. And then we're going to come out from here. If you want to give yourself kind of like a little dot at the end so you kind of know you're going to the right place, we're going to just curve it out just a little bit back to that point. And I just am curving the bottom, and then you can come in and add a curve kind of the opposite way too if you wanted. You could add one up there. This is going to all be covered up. And then I like to add little, like lines on the inside of the mason jar too. So then we've got to add our fun little flowers, right? So I always love adding my, like, greenery first, and I start with these big curved lines, and then you can do your fun little shapes. These are almost like teardrop shapes, little ovals, however you want them to be. There's really no right or wrong to that. And if you wanted to, you could even come inside and Give them some little lines or even a pattern depending on how fancy you want to get it. And then let's go ahead and add some of our flowers in. So I'm just doing— I kind of did that one on the outside. Let's start like in the middle. On this one. We're just gonna start with like a little squiggly circular center, and then from there I'm just gonna do a little wiggly line on this side, little wiggly line, kind of like that. And I know these don't look like much now, but once we add paint to them, it'll start coming together. What do you guys think? And then maybe we want some, like, some hearts kind of coming out of here. I gotta turn it. That's a weird angle. Let's see, like, even something like that, I'm not gonna stress that that has like a little extra lines around it or it wasn't exactly like I wanted it at first. We're just gonna add some more lines to our hearts. Maybe do a couple little ones. Maybe some little curly Qs. I don't like that one. And then you could do whatever, whatever wording you want on the inside. Maybe we just want to have it be— let's just do 'be mine.' Maybe we add little circles on the end of this lettering. You guys like the mason jar with the flowers and the hearts? Can you see the difference? So these were two different pens from the same set that, um, and these are in my Amazon store. So one was like the S, I don't know, remember what that stands for, but it's skinny. It did these skinny lines like this. This is the brush one. —so it's a little bit more like that. Now the next one that I'm gonna show you, we're gonna go ahead and do a little bit of painting. I'm debating whether I'm changing my mind. Just kidding, we're gonna keep sketching. So for the conversation hearts, these can just be super simple. You can just pick like 4 or 5. Maybe have one overlap there. And then I want on each side, we're gonna give it a little shadow. And then you can do all kinds, and I try to make these really just very basic What else? What else do you guys think I should put inside the hearts? We got 2 more hearts to fill. Kiss, that's a good one. Love is good. Okay, so we've got our conversation hearts. So you could leave them like this, or maybe you have, you know, something coming from them. Or what if we did little smiley faces on them. You know, you could do whatever you wanted to, or just kind of lay out some conversation hearts on a card. So we're going to leave it like that for now. Now I'm going to go to the paint. What I love is how these start coming together when we add the paint. These will be fun. And if you missed earlier, we're going to go back and fill these in. You can use watercolor or acrylic. Either one is fine, and I'm going to show you how to do both. So I'm going to grab some black paint, just a little bit. These are small. And then this is a lovebirds painting that I did a long time ago, um, That's really fun. You— this next thing that I'm going to show you, you guys could blow— I did this on a 16 by 20 for a paint class. So I had people do it themselves. I had people do it with their husbands and put two canvases together to make one big painting. So you can use it however you want to, but this is all about giving you guys some ideas today. And I love for you guys to take what I'm doing and then turn it in to your own. Okay, so for this lovebirds one, I'm going to show you, we're going to do like this circular kind of sunset, Valentine-like background. Oh, I do want to add a little purple on there. And this is just a really fun background that you can do. I'm gonna start in the middle with some yellow and white, and this is just craft acrylic paint. And then I'm gonna grab my coral and We can always go back and make that center bigger if we want to. Then let's grab some of this hot pink. Maybe a little bit more here. So you always want to make sure you have enough paint in your brush that it's gliding. See how that's gliding really easily for me? That's how I know I have enough paint. I get asked that question a ton, and there's not a specific amount. There's not a certain amount I can say it should look exactly like this and that's the right amount of paint. You do it based on how your brush strokes are working for you. So if it's gliding easily for you, that means you've got the right amount of paint in there. If it starts looking like that and it's like fanning out on you, you need to get more paint in your brush. I'm gonna mix a little white with my red here to get kind of a more pinky color mixed in. I want a little more pink in there. So I'm just continually going around in a circle. You do want to move quickly when you're doing this kind of painting because the colors will dry fast on you, and you want to move quickly while they're still wet. See how I'm overlapping wherever that last color was? Maybe even getting a little bit of red with my purple. Do any of you out there already do cards? Do you ever paint cards for people? If so, share what you use. I know Hobby Lobby and Michaels have lots of choices. You can buy just blank cardstock cards. There's watercolor cards. See, mixing that red and purple together gives me like this pretty, like, magenta color. I want a little more pink again. Let's go back to this color. I kind of like that. That's more of like a cotton candy pink. So you can just keep playing, playing with your background until you like it, what kind of sky you want. So we've got our background on there. Now it's time to add our lovebirds on. So you could wait for it to dry. I'm not going to for the sake of the video, but I'm gonna put a little branch for them to be on. Maybe have the tree kind of coming off the side there, kind of curve out of that trunk. Maybe do some curly-Qs off of the tree. I'm gonna switch brushes. I need a smaller one. Get a little bit more control with a smaller brush. And then just for fun, we're gonna add Another little branch up here. And you could just keep going, adding that however, however you want your, your trees to look. And if you don't like curly Q's, number one, practice them. Practice, practice, practice. You're not gonna get better without practicing. That's what mixed media pads are for, because it doesn't matter if you mess up. It's not a finished piece of art you're hanging on the wall. You're just getting your brushstrokes down. So here is how we do the shape of the lovebirds. We're gonna start with a circle. Okay, and then you hear me use this a lot. I like using parentheses in our shapes that we're creating. So we're just doing parentheses down to the branch. I'm gonna fill that in, and then the last thing I do is kind of bring that down to a point. And then we've got a silhouette of a lovebird. And then I do one sitting right next to it. You can make them the same size. So notice when I'm doing the parentheses, I'm going into the circle. I'm not going underneath it. I'm going into it. Maybe she's a little plumper. This is Corey and me. I'm the one who's gained 25 pounds since, uh, since COVID happened last year. It's all right, we'll get back there, girls. Maybe I'm just speaking for myself. What do you guys think? Simple enough? Not too bad. Simple little designs. And how fast did I do that? What was that, like 5 minutes? And you can take that same design and blow it up, make it big, put it on a big big canvas. All right, so let's get back to this, right? Let's start up here with our donuts. Um, I think I want to do the donuts with my watercolor. Debbie, I do not seal any of my paintings. You may have to ask someone else on that. You could probably just use acrylic spray sealer to seal your watercolor paintings. I mean, that's what I would recommend for acrylic paintings. I'm assuming it's the same for watercolor. So these are my watercolors. Like I said, this is my set from college. I've got a watercolor set in my store if you guys want to go look at that one. If you don't have watercolors, on the next part I'm gonna show you how to just— you're basically gonna use your acrylic paints and you're just gonna water them down a whole bunch and treat them like watercolors. Okay, so for the donut background, I got some different colors here. I might just play with— and this is just a little thing you can mix your watercolor paints on. To kind of get the color you want. That's kind of a donutty color. The more water you add to it, obviously the thinner it's gonna be. And the thing I love about this style is it's okay for there to be areas where the pigment's a little stronger in areas where it's a little more faded. And as far as brushes, you can use the same brushes for acrylic and watercolor also. There's no certain size, whatever you're comfortable with, whatever helps you fit in your shape that you're painting. And it's not about being perfect. It's not about staying in the lines exactly. That's kind of why I like this style. You could leave some white around the edges. You could let the pen, you know, maybe come out a little bit or go in a little bit. The looser you are with this style, honestly, the better it's going to look. I'm really excited. Sophie got several drawing books for Christmas doing cute little characters, and she loves anime and all Japanese cartoons, and she's totally into that stuff. And so we found her all these awesome drawing books that I'm gonna sit down and do with her, teach myself to draw these things too. Look how cute the donuts are already just by adding that little bit of watercolor to them. So now the big decision: what color do we do the inside? You know what, I'm gonna jump over and I'm gonna cheat. I've already got this pink over here that I like, so I'm gonna add a bunch of water to it. So you can mix. You can use some watercolor, then bounce to your acrylics. Same thing— if that pigment is stronger than what I want, then I'm just gonna grab a little bit of water. You can even take water directly to your page, your canvas. See how little paint you need to do this too? Okay, we did pink on this one. What should we do on this second donut? We got a blue, purple, yellow, blue. What do you guys think of this style so far? Do you like it? Did you know you could use acrylics like this to get a faux watercolor? Oh, someone said teal. I like it. You know I love teal. I'm going with teal. And I have this really pretty one in my watercolor set. I love this color. It's kind of a mint greeny teal. So see how I've got a lot— it's pretty watery on here, so I'm just continuing to kind of pull it around. Or you could paint on mixed media pad and cut them out and send people just to, you know, you don't have to fold it or anything. So which one of the 4 designs do you think you're gonna try, or are you gonna do all of them? Are you gonna send out maybe some Valentine's cards to your grandkids, or do them with your grandkids? That would be fun. Or your kids. So cute. Now I'm gonna get a little bit more water on here with that teal. I'm gonna grab a little blue too. We're gonna make it just a little bit different color, but I really want it watered down. I'm gonna jump over here, just fill this in real quick. Now you may want to do that like pink. I want to have some contrast because my flowers are gonna be pinks and purples. But it's so fun because it's kind of fast and messy. So cute. So I can't wait to see these. We'll have a post in the free Facebook group where you guys can post your finished work. Okay, so let's go back and add some sprinkles on here. Let me get some of this Blue. I'm using a super little brush now. Watering down some of my yellow over here. This one needs some pink. Maybe some teal dots on this one. Do the opposite. You know, I don't like that. I actually want that to be like a hotter pink. I think I like the pink on there better. And then I always like to do like a wash kind of over my background. Maybe we do like a lavender-y color here. Again, the pigment can be different in different areas of your background. You can leave white around your shapes. One thing you can do— I'm not going to do it right now because we're going to keep kind of moving on with the other designs, if you feel like you want— I don't always do it, but sometimes I do— if you feel like you want your black lines to stand out more, you can go back with your waterproof marker at the end and go back over some of your black lines that you want to stand out a little bit more. All right, 2 down, 2 to go. These next ones are actually pretty fast with the hearts and flowers and whatnot. I'm gonna just stick with my watercolor. Instead of getting more acrylic paint out. And I'm gonna start with all that greenery I put in there first. And you could do like a lime green. This is just a darker color that I have. And you don't even have to do these green. Maybe you want yours to just all be reds and pinks. You could just do different shades of that if you wanted. So I'm just going to go in all my flowers— oops, got to go in the paint first. And you can do different colors. You can do different colors inside the same flower. —so maybe I'll start with this. I'm gonna keep this all the same color, but then when that dries, I can come back and add a little bit more darker in some areas, maybe add a little bit of purple around the edges with the pink to give it some shading. Let's see how fast it is doing this watercolor technique, how quick you can make something super cute. So I just picked up a little bit of purple. I might just add it in just around some of the edges, and you can build with, with watercolor too. So if I want that pigment to be stronger, I can come back and add more to it. So you layer, let dry, layer, and it'll make it darker. And then if you want lighter, then you just water water it down. I'm thinking maybe just a super, super light pink background here. So that means I'm gonna add bunches of water to it. And I like the big fat round brush when I do that so it doesn't get the pigment too strong. Okay, last one is going to be our conversation hearts. I think I'm going to do a mint background on this. So you guys think they transformed a little bit after adding the color to them? The sketches were fun, right? But they look so much more fun with a little color. It's just a very freeing kind of style of painting. You're allowed to get a little messy. You're allowed to go outside of the lines. Embrace the imperfection. I'm gonna do these hearts. So I'm just gonna go a little bit darker. Color on that side. Okay, now we got to pick out some other colors here. Maybe like a minty limey green next to this pinkish red color. Yes, Tammy, you could. I almost said that earlier. You could make the conversation hearts into like a little balloon bouquet, kind of like what I did on my Valentine's gnome. Have you guys seen that from last year? We're getting ready to put that on sale too, so if you missed the Valentine's gnome from last year, you're gonna have a chance to paint that. That's a little too— I don't like that yellow very much. I'm gonna add just a tiny bit of this orangey color to it. So I'm just again getting a little bit darker for this. I'm adding a little bit of orange to my yellow to just go on that, that side that's giving it just a little bit of depth. Oh, that is just a brown. I just watered down some brown for the underneath the mason jar. All right, so I'm gonna do the last two— orange and purple. We're gonna do orange up here. Oops. And then let's grab some purple and we'll be done. And I want this to be a light purple. Conversation hearts are all pastels, so I'm adding a bunch of water to my purple to get it a little bit more translucent. We can always add more if it's too pale in the beginning. We can layer and make it a little bit darker. But I'm liking that color. And there you go. You've got 4 fun Valentine's designs that you can use however you want to. You can do them with acrylic or watercolor. You can put them on cards, or you can do them on a canvas or your mixed media pad. So the possibilities are endless for you. These would even make cute little— like, if you found like 5x5s or some little— the canvas boards, you guys know you can get those just cheap canvas boards. They come in like a multi-pack at the store. They'd be cute for that and make little signs just to prop up in your house. So like I said, we'll have a post for this later this week inside our free group for you to post your work from today. So I look forward to seeing what you guys did and came up with and how you tweak it and make it your own. Oh, do you guys want a sneak peek? Of something that I'm working on. At the end of the month, right before my birthday, we're gonna be doing a little celebration paint party for my birthday. My birthday's the 31st, and Corey is taking me to Colorado for my birthday. I'm super, super excited. We haven't been to Colorado ever together as a couple. We were supposed to get to go last year for our anniversary, and COVID canceled the whole world, you know, so we didn't get to go last year. So we're going for my birthday this year. But before I leave, I am going to be doing a 2-day painting challenge with you guys, and I'm still tweaking the final ideas, but I want to show you guys a preview of of what I've come up with so far. Here's what I'm thinking. We're gonna do lovebirds two ways. I'm gonna do— I'm getting ready to show you my pen and ink watercolor version, which is very similar to what we did today. And I'm also thinking about doing a canvas version with acrylic paint. So you will get two paintings inside this challenge that we're going to be teaching them live in a Facebook group and then of course you can go back and watch the replays whenever. So can you guys see this? It's kind of too far away. This is my first design. I feel like that's too far away. There. Is that better? What do you guys think? Would you want to learn to paint this cute little whimsical lovebirds and birdhouses? I hope you guys like it. It was so fun to paint. I did this yesterday, and of course, I just did— like, this was my sketch, okay? So I just did this in my mixed media pad, but I'm thinking I want to teach you guys this version, and then I want to make— I'm working on an acrylic version on canvas that I want to teach you as well, so you get two paintings and inside this challenge. So stay tuned for more details about that. Make sure you're getting emails from us. If you're not on our email list, you can jump over to thesocialeasel.com and sign up for our freebie that we give away, and that puts you on our email list as well. So you'll be sure to be the first to know. If you want text notifications for when we do challenges or when I go live on Facebook, you can text me and you can just type in like live alerts or notifications. It's 417-217-7044. And this is not to— this is to text me to get on text alerts, find out what we're doing, send me a snap of, you know, something you're working on. It's not for customer service. I won't reply to those. Because that's all handled via email. So it's 417-217-7044 and just type in text alerts or like I said, whatever, something you can say, hey Christie, I don't, it doesn't matter. It'll put, it'll put you on my text alert system and I send those out before I go live on the page. And then of course when we have something new, when my new blog post comes out every week, so you can be in all the know. So, um, that's what I got for you guys today. I'll be back next Thursday and we're gonna do another fun Valentine's project together. So I will talk to you guys then. Bye!










