How to Paint Hydrangea with Christie
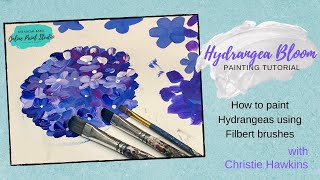
In this 2020 YouTube tutorial, Christie Renee Hawkins demonstrates how to use a filbert brush to paint stylized hydrangea blooms. She begins by introducing the filbert brush’s curved tip and shows several basic strokes—flat pulls, stippling, side‑edge commas, and leaf‑shaped marks—explaining why the shape is ideal for flower work. Christie then selects a limited palette of affordable DecoArt paints (Wistera, Periwinkle, Ultra Deep Blue, purples, and white) and outlines a loose circular base for the flower. She emphasizes loading the brush with multiple colors, building layers without over‑blending, and using the brush edge to create petal shapes. Throughout, she offers practical advice: practice on a mixed‑media pad, keep brushes wet to avoid muddying, vary pressure, and consider light source but feel free to paint intuitively. She also references her paid Inner Tribe tutorial ($37) and promotes her Amazon brush set. Viewer questions about drying time and light source are answered, reinforcing the “don’t blend, layer” philosophy. The tutorial blends instructional content with motivational encouragement, positioning the filbert brush as a versatile tool for abstract floral painting.
Chapters
Hey everyone, we're back. We're gonna do some brush technique today. So today I'm teaching you about the filbert brush. So if you can see these here, the filbert brush has this curve on the end instead of being straight across. and we've got a couple different sizes here. So I'm gonna show you some quick, um, techniques that you can use the filbert brush for, and then I'm gonna show you how to paint hydrangeas. So let me know when you're on. You guys can see everything okay? I think we're good over here. Try to clear some of my stuff out the way. How many of you are familiar with filbert brush? Have you used it before? I'm gonna grab a couple colors of paint here. We don't need a ton. I love this color. This is Wisteria from DecoArt, and then this one is Periwinkle. So I'm just kind of getting some, you know, hydrangeas. There are a lot of different colors. My favorite ones are this color. So this is a full tutorial I have taught inside the Inner Tribe, but we're just gonna go over some basics today. And you can purchase that if you are just wanting a single tutorial, that one is available in my store for $37. Let me grab— let's do this Ultra Deep Blue here. So when you're doing the hydrangeas, you want to have some contrasting colors. So again, you're wanting to build layers in this painting. Let's do another purple. I love all these colors. Oh, this one broke. I don't know if I can get that out. The lid snapped off into the thing. Look at that, the lid broke off into the thing. I'll pick a different purple. I'll mess with that one later. So we've got some purples and blues, and then I'm gonna grab some white, and then we're gonna start playing. I will tell you this— don't get discouraged if you don't get something right away. This is like anything in life. Sometimes it just takes practice. Some things come to us easier. Things don't, but the more you practice something, the better you're going to get at it. So let's just go over some just brush strokes first and different sizes. You don't have to have all these sizes. This is probably my favorite one. This is out of my brush set in the Amazon store. I love this size, and like, that's similar to the size that I used in that painting I just showed you. But you can do all different different sizes. So let's just do some little brushstrokes here. So the thing I love about the filbert is that it's got that curved edge on the bristles. That's what makes it so great for flowers. So you can just kind of press down and pull. You can do like a stippling with it. You can do— so this was me holding it down flat, right, like this. That was a pull, so I pulled it. You can also do just a press, and then again holding it flat or turning it on its side and doing like the little commas. So there's a couple different ways you can play with them. So those are just some basic little brushstrokes you can do. You can also, like, let's do just like a little leaf over here. We're gonna have a blue leaf. I like to start with my line. So see, you can just— you don't need a round brush to do that. You can use the filbert. For that. And then we kind of come out on the edges and see again, it's got that kind of curve to it. So you get those pretty little waves. If you wanted to do— let's pick up another color just to make it fun, just so you can kind of see those brushstrokes in there a little bit. So just some fun, kind of a leaf-like shape using that curve that you naturally get with the filbert brush. So we've got a pretty blue leaf over here. So those are some different ways that you can use it, but we are going to do a hydrangea today. So I like to start with a darker base color, and we're just gonna make a big circle. And you could even start darker than this if you wanted, or maybe you want like a dark purple instead of a dark blue. Or there's hot pink hydrangeas. Maybe you want a hot pink one. So I'm just kind of doing like a loose circle shape. It doesn't need to be a perfect circle. This is just kind of like a base for us to get started with. Okay. And then we're gonna just jump into another color. Don't be afraid of your paint. That's my number one rule if you're just getting started. This is just really affordable craft paint. You're not investing a ton in your supplies, so don't be afraid to use your paint up. We're talking 50 cents to a dollar a bottle, and you're gonna use just little squirts of it. That little bottle is gonna last you a while. Don't be afraid to load your brush up. So I kind of showed you up here just this basic kind of pull down. Now I've got some of that light blue and some of the dark blue in there at the same time. So this is kind of like our basic shape that we're doing for the hydrangea. The petals, you can do some with, you know, I don't know honestly, like, do they have 5 or 6 or 4 or whatever? It doesn't matter in the painting. We are not— again, my style, I'm showing you my style. There's a million ways you can paint this. My style is more abstract. This is obviously not realistic, but you can still tell that there are sunflowers, right? Sunflowers? Hydrangeas. Let's get the flower right. So that's your basic, basic technique for the petals, okay? And I can even make them skinnier, and I don't want them all perfect either, by the way. Now I'm going to use the side. So that was me holding, pulling pulling straight down flat. You can do it on the side and see how you get that pretty look. This is why I love having two different colors or more in your paintbrush, because then the brush strokes do the work for you. You get those pretty shades of blue in there. All right, so you want to see how we're going to build this? I'm going to start with this color and then it's going to be really, really messy in the beginning. And I don't want you to overthink it. I don't want you trying to like get the shapes perfect because all of this is going to be background and then we're going to overlap it. This is where, um, this is a process. This is a building process. So you have to be patient along the way. Number one, we don't want to see this outline. Okay, we want to cover that up with our petals, so we're just going to start real messy. See, I'm not even worried about those being like a starburst like that because this is all background. Can even pick up a little bit more blue. So I'm just doing these messy brush strokes along here. Because we want to cover up that circular shape that we have. Again, I'm trying to always use that edge of my filbert brush to get those petals. Can you see how it's already starting to form? See the shape of the hydrangea coming together with just something as simple as me outlining that circular shape. So again, we want layers with this, and this kind of goes— ties in. I talked about in the last video, I'm going to teach you the art of not blending. And comment the word info if you need the links to this, the YouTube video. This is, um, but you guys see that? Then we're just going to keep building layers. That's what I was talking about. You want to not blend. So see how I'm just overlapping, building layers? Here's what I'm not doing. So let's say we've got them like this, right? I'm not doing this. Then it just becomes a big blob of nothing. No contrast, no definition, because you're over-blending. You have to— you can't leave your paintbrush connected to the paper. Even if you were doing the same brush strokes as me, you're doing this, right? But see how I'm lifting up in between each one of those? If you're doing the brush strokes, I can't even make myself do it, and you're staying connected to the canvas, you're just continuing to blend. So we want to not blend. I'm thinking this already is starting to look like a hydrangea, and I've barely even done any of the brush strokes. But this is what I give credit to the brush for. This, this is why I choose a filbert. So now we've got these pretty little petals inside of here, right? So now we're going to come back and add a little more definition. And start making them come together. So this is a forward-facing hydrangea. Let's pull in a little bit of purple. Notice I'm not rinsing my brush in between. I'm just continuing to add color to it because it's going to give us those pretty brush strokes with mixture. Look at those pretty mixtures of the purples and blues together. So I'm doing this in a mixed media pad. This is what I want you guys to have to practice in, because this is just your practice pad for you to practice brushstrokes and play around with it and continue to work at it. But I want to start putting in some purple in here, and it doesn't have to go all over, okay? So you want to have areas of light and dark. It shouldn't be all dark, all light, like, uh, this color going everywhere. So let's just say we want to concentrate this color more on the top right side. Now I'm still just layering brushstrokes. I can really load it up so those have mixed with those blues underneath if I want it to stand out more. See how much paint I have on there? And I'm not putting a ton of pressure down, and then you get those bolder brushstrokes there. So let's actually make like a petal shape. Again, I've loaded this up with more of that purple. We'll have one right here. So one brushstroke, two, three, four, 5. So we've kind of got like our little starburst shape there, and then we're gonna give it a little white center. So here's my trick for that: flip your brush over, use the back of the paintbrush, and you're just gonna put a little dot there. So that's how we're gonna get— not all of them are gonna be like that. Again, we want some variation. In here. Beth said, does it help to let each layer dry first? It may help you. This is drying pretty quickly. You can see where it's shiny, it's still wet. Where it's matte, that's already dry. I want some of those colors to pick up some of the underneath colors. I don't want it to just be solid purple on top, so I want them to mix a little bit. But if you're having trouble and it's becoming like muddled like this, number one, make sure you're not staying connected to the surface and that you're picking up and putting down, picking up and putting down. Okay, and making sure that you have plenty of paint for those bold colors to come through. So if you just have a little bit in your brush and you go to make that brush stroke, it's not going to be that bright. Color. Let's do— so I'm gonna grab some of that bright purple and then some of this, like, I think it was called Periwinkle. And I just start randomly. You guys see how quickly I'm doing this? You don't need to overthink this. So yeah, we do 5. I just had to get in the rhythm. I do 5 petals for each one. Again, these can overlap. They're not all identical, and you can even start pulling in some darker blue again if you want. Let's pull in some of this really light wisteria. So it makes sense how we're starting to stack those. So let's say I want to pull in some of that dark again. I need to get a little bit more. I ran out. Let's do some darker on the bottom. I'm twisting my arm around to get those. So just kind of playing with lights and darks and color. Okay, so I'm gonna go back to my little white centers again. I'm not doing it on all of them. Some are smaller than others. And then we've got a fun little hydrangea bloom. Dana said, this is a good question, do you have to think about light source and shadows or just have fun with it? It is totally up to you. And here's the thing about painting, you make it what you want. It's your world, it's your painting. You can decide if you want a light source or you can just have fun and just make a bunch of hydrangea blooms. It's gonna be beautiful. But like when I taught inside my membership, inside the Tribe, last week, I literally taught them how to make a still life, how to look at where the light source is coming from. So I have a picture of it here. See the light hitting right here? So you can decide, again, in your head— this doesn't have to be a realistic thing— you can decide, okay, well, I want my light source coming from this upper corner. Okay, so if that's the case, let me go back to this smaller one. Now, I didn't pay too much attention to that. I wanted a little darker on the bottom, but I didn't make specific highlights up here. But if I wanted to have a little bit of highlight, I could focus a little more white mixed in on that top portion of the hydrangea, and I could make it, you know, really focus on darker underneath. For that contrast, but a lot of times I just have fun with it and I don't worry about where my light source is coming from. Hopefully that helped you guys and you enjoyed that lesson. All right, I will talk to you guys later. Bye!










