How to Paint Leaves | Easy Acrylic Painting Tutorial for Beginners
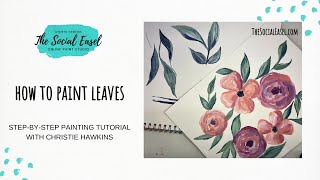
In this live tutorial, Christie Renee Hawkins demonstrates how to paint realistic leaves using acrylics, focusing on brush selection, pressure control, color mixing, and layering techniques. She begins by sketching loose leaf shapes with a Sharpie, then shows how to use an angled brush to create tapered strokes, adjusting pressure to vary line thickness. She explains the use of small round and liner brushes for points and filling, emphasizing the importance of loading sufficient paint. Hawkins mixes her own greens by combining navy, dark green, and light green, creating mid‑tone and tint variations, and illustrates how to layer dark, mid, and light values for depth. Throughout, she offers practical tips—such as using a mixed‑media pad for practice, keeping brushes rested for control, and ensuring ample paint on small brushes. Viewer comments are addressed, and she promotes her Painting of the Month Club, detailing membership benefits, sign‑up windows, and a giveaway of a 15‑piece brush set. The tutorial balances technical instruction with encouragement, urging viewers to enjoy the process, embrace “happy accidents,” and practice regularly to improve.
Chapters
So obviously that's the original, and then I am just on— I'm just gonna scoot this under here— I'm just on a mixed media pad here. So I'm just going to grab a couple different paint colors here. These are not specifically the ones I used in this painting. I just grabbed what paintings— or I'm not— paintings— what paint I had here at the studio that is similar to what I used in the leaves. So I've got a little bit of a dark blue. This one's navy. And I do want— you get the actual color list that I use, and we put color swatches on the side. So if you don't have that brand where you are, or you can't find it in that brand, that you can have those swatches to either hold up on your phone, or if you print it off and take it to the store with you, um, that you can mat— like, hold paint color up to and match it. Um, but what I always tell you is pick what you like. Pick your favorite greens and blues. You can't go wrong. They're greens and blues. They're going to be pretty when you blend them together, regardless of which colors you choose. So I've got 3. I've got like a really pale light green that matches my ring, I just noticed. Um, and then we've got like a dark hunter green and then kind of like a navy color. And then I'm gonna use my brush set. Let me see, I might do a couple different ones with you guys just to show you some different ways that I do my leaves. Um, so I'm going to use my small angled, which is the number 6 out of my set, and then I've got 2 of my smaller brushes. My 1 and my 3 are kind of like small rounds or liners. That's what you would call those. Awesome, Becky, I'm glad she said I used the swatch at the craft store. It was really helpful. Good. Oh, thank you for that tip. Um, Mari said if you can't find the live, you can go to the top of Facebook and in the search area type Social Easel and scroll down, and the live will show up that way too. I never do that. That's good to know. Okay, so I'm just going to scoot my palette off to the side here. And the first thing I like to do— let me see if I have— I thought I had my pencil up here. Hang on just a second. Well, for today I'm just going to do it with a Sharpie. It'll be easier for you guys to see anyways. So if you're looking at the original leaves, when I started this painting, the first thing I did, I did it with a pencil, was I just kind of sketched kind of what I wanted my leaves to look like. So you have some freedom in that. But I know for a lot of people say, I can't draw. But you can, I promise you can. You just have to get practicing at it. So, and I draw, see how I'm like real loose. And sketchy. I don't draw with like hard lines like this. I just want it nice and loose, um, and I just kind of play with my shapes. I like them kind of flowy, not like perfect almond-shaped leaves for this style. And then maybe have like a stem coming off and another one over here. You can just kind of play with it. Okay, so that's the first thing I do. Like I said, you can sketch in pencil, you don't need to do it in pen. But for today, that is how we're gonna do it. Um, Vicki, the palettes I'm using are also in my Amazon store. I like these because they're just like— it's just a pad and you just rip them off. Of course, now I got paint on there, but that's okay. I'm just going to scoop this back over here and then fold this over. My table is going to have paint on it. Okay, refocus. The camera was zooming in up close there. I like that. Katie said leaves are like smiles, no two are alike but wonderful. So if you're just joining us, I'm giving you kind of a sneak peek at what we're doing in Painting of the Month Club, which is our Romantic Florals, and I'm just doing a small technique lesson with you today on how to do leaves and different ways I do them. So one is with an angled brush, and I'm loading it up in my dark blue right now. And I'll just use this one for an example. I'm just kind of pushing down and then letting up, and I'm using that tip of that to kind of get that point. At the end. So if this is something that you struggle with, this is why I recommend a mixed media pad. Before you ever actually do your painting, you can come over here and just start practicing. So I'm flipping the brush around and using that angle as my point. And you can just keep practicing until you get comfortable with it. So I want you to notice when I'm doing this, I start off, I'm not pushing down super hard until I get to that middle. So I'm kind of laying it down, not a lot of pressure, and then you see me kind of push down and it fattens, and then I let back up again and pull it to a point. And then I'm going to flip the brush around to get that point better, and then I can go wider in the middle again. And push down. So that's an example of some ways that you can do it with an angled brush. Now, if you want it super pointy, you could come back in with your liner brush and come in on those tips. And you're just— I'm resting my wrist on here. And that allows me to have more control of my brush, and I'm not pushing down very hard. Like, you see the amount of pressure? I'm not pushing down like this. Okay. Because whether you have a skinny brush or a fat brush, you can get big brushstrokes or skinny brushstrokes depending on the amount of pressure you put down. So if I'm pushing down lightly, it's a skinny line. If I push down hard, it becomes fat. So a lot of people will tell me, I'm really terrible at skinny lines, I can't do them. And that is just practicing and getting used to playing with how much pressure that you are putting down on your canvas when you're painting. So let me know if that little tip helps. And then I'm going to show you why. You're probably wondering why in the world we have navy leaves here, but I'm going to show you why. And then obviously you can come in with the skinny brush. This is why they're not great for filling in. So usually what I do— these are really good for points, but I grab one of my rounds. And I can do my centers with a bigger brush and just kind of fill in that shape so I'm not, you know, struggling with a tiny skinny brush trying to fill in all that area. And then I can come back with my liner brush, and you still always want plenty of paint in there. A big mistake a lot of people make is when they do little brushes, they think they need a little amount of paint. You still need plenty of paint so that it can pull and make the full brushstroke. So then you can get those points as pointy as you want them. Everyone's is going to be different, and they don't— just because mine are pointy doesn't mean yours have to be. These are the little details that sometimes will trip us up when we're painting, and we get so focused on the details that we kind of miss the joy of the painting. So I want you to try not to be in that headspace and just enjoy The fact that you are painting, that it's relaxing, and that you're practicing, and every time you do it, you're getting better and better. It's really about just focusing on enjoying the process and the experience of painting and just playing around and seeing what happens. And don't get upset if you have like a little mistake, because a lot of times in paintings, those little mistakes, as Bob Ross would say, are happy little accidents, and they end up giving your painting character. But look, aren't those looking pretty? So that is with one of the smaller rounds or liner brushes. So that is the base of my flower, but obviously not what they look like in the original. But can you see that dark color in there? So I did have a little bit of dark blue in those leaves. I'm gonna put that down and grab my round, my bigger one, to mix some colors with. So I'm going to take my blue, and I can take a little bit of my green here and just kind of play and make some different colors. So now I've got like kind of a dark foresty green, and maybe I want to throw some of those brush strokes in. And then we've got this really pretty light green. Now I could have rinsed and not mix these colors, but like, why not just mix them and see what pretty color of green we get? I love this color that this created. This is— if you were to buy this color in a bottle, it would be called like, um, Desert Cactus by DecoArt is really similar to this, or like a sage green. So it's this really light green with a little bit of that blue and dark green mixed together. So you just never know what colors you're going to get. And what I love about color mixing is that really makes your painting completely yours and unique, because that color that you created, no one's is going to be exactly like yours. And so now I have this great mid-tone color, right? I have my really dark, I have my mid-tone, and then I have my light, which I can even make lighter by adding some white to it. And so that's going to create the different layers. I'm just going to kind of brush over some of these, and you're going to get a mix on here because in some spots my paint is still wet, and so it's blending with that green from underneath. Let's go ahead and fill this one in. So you push down in that middle with my round. I can do the same thing. Push down and fatten in the middle. Okay, and then we'll come back to that point on the end. So I'm just going to take some of this color and just throw that into my leaves, and I'm not covering the entire blue, right? We're letting some of that blue come through. I absolutely love color mixing. It's one of my favorite things about painting is just seeing what new colors we can create. And sometimes it'll surprise you. You're like, man, I did not think that's how that was going to turn out. And I have extended lessons on color theory and color wheel, um, if you're really interested in learning that. So then I'm going to go back to my liner and make sure you guys have shared. If you're new and hopping on, um, we are giving away a full brush set of mine. So a full 15-piece brush set is being given away. The contest is running through the weekend, so on Monday we'll announce the winner, and all you have to do is share the video and then come back here in the comments and type the word share. And then we will be selecting someone on Monday and we'll tag you in the comments if you're the winner. And then you can email in our customer service with your address and we will ship you out some happy mail and you will get a brush set. So now I'm going in with that lightest green. And see, like, even here I can still change the shape of my leaf if I want to. And we've got that contrast of the light and the dark, and I'm just coming in with light brush strokes. Now this one, I'm going to come back with some dark because I started light with that. So you can go back and forth. Just because you started with dark doesn't mean you can't come back and add more. So if you get your greens on and you're like, oh no, I liked it better before, I liked it when it was dark, that's the great thing about acrylic painting is you just let it dry and go back over top of it again. Let's pull a little lighter in here. So that is using that lightest green right out of the bottle, but I'm going to take a little bit of white and make it even lighter. So that's going to create a new tint of that color. So I've got some white over here on my palette now, and I'm just going to grab some of my green and just bring it over here. That way I'm not mixing all of my colors. I want to have a variety of greens, and it'll be the same with your flowers. I want to have a variety of colors on my palette, and I don't even necessarily mix all the way. It's okay for your brushstrokes to have streaks of different colors in them. But think of how many different— just think of like a value scale, black to white, all the shades of gray in between. Think about that with your colors. You could keep making this lighter and lighter and lighter. I'm just kind of pulling some of that light color in. Just come back and reload your brush. But once you start doing it, it just gets really relaxing. I could just fill a whole page of painting little leaves like this. So you can sign up now for Painting of the Month Club. Again, it's only $20 a month. Sign up starts today and it ends at the end of the month. You have to sign up before April 1st in order to get this full tutorial, and then it is delivered directly to your membership hub. Um, no live lessons. These are all pre-recorded, so you can do them at any time that you want to. You're not having to, you know, do it on my schedule, and you have lifetime access to them. So once you buy these tutorials and Painting of the Month Club, they're yours, and you build this amazing library each month with a new lesson that I handpick. I specifically pick each painting because of the different techniques that I know you will learn in them, and then those are delivered again on the 1st of each month. You have a full supply list. If there is a template needed, you will get a template. But I don't always do templates, like with this one, because I just show you how to do them. So let me know in the comments if you have any questions. Um, the other thing I love about Painting of the Month Club is that if you are someone that is limited on time and you're like, I would love to learn how to paint, but there I just cannot fit it into my schedule this is only one painting a month. This is a great place to start out. This painting is only going to take you— I mean, everyone's a little bit different, but this painting shouldn't take more than around 2 hours depending on how fast you are and, you know, all of that. So that is like— think of it like a couple 30-minute sessions a month, a couple times a week, maybe once a week. So you can easily fit it into your schedule. And you're learning a new skill, you're doing something for yourself, you're relaxing and just having fun learning how to paint. So we would love to have you as a member. And if you are a current Painting of the Month Club member, if you haven't done so already, make sure you put that in the comments because one Painting of the Month Club member is also going to win a brush set from this Facebook Live. All right, let me know in the comments what you guys think. If you have any questions, um, Renee, um, let me pull your question up here. Renee said, is it possible to sign up any month of the year for Painting of the Month Club? I have to wait until I get out of my cast. So Painting of the Month Club is opened each month from the 15th through the end of the month, but the paintings change. So what you could do if you love this one, Renee, even though you're in your cast right now, you can go ahead and sign up for Painting of the Month Club so you don't miss out on this painting. And then when you're out of your cast— we're frozen. Okay, when you're out of your cast, then this will still be in the library waiting for you.










