How to Paint Poppies || The Social Easel
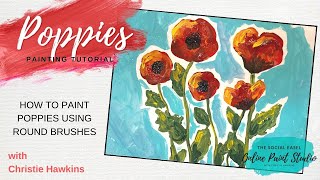
In this instructional video, Christie Renee Hawkins demonstrates a quick acrylic painting tutorial focused on creating poppy flowers using primarily round brushes (of various sizes) and a liner brush. She walks viewers through selecting basic colors (red, orange, green, black, yellow), explains the transparent nature of acrylic reds and how to layer and mix colors (including using opposite‑wheel colors for shading and adding highlights). Hawkins emphasizes brush pressure and paint load to control stroke thickness, shows how to create loose, irregular petal shapes, add stems, leaves, and black centers, and offers tips for shading with burgundy mixes or tiny amounts of black. She also discusses practical tips such as loading enough paint, handling liner brushes, and allowing overlapping strokes for realism. Throughout, she encourages community participation via a free Facebook group where learners can share their work and join challenges. The video concludes with a preview of the next lesson in a flower series (hydrangeas with a filbert brush) and a call‑to‑action to comment “info” for additional resources.
Chapters
Okay guys, we are gonna do a quick lesson on how to paint poppies with just one style of brush. So we may use different sizes, but they're all rounds. So I'm just gonna grab a couple here just to kind of show you all the different sizes that you can have and how we're going to use them. I'm going to get you pulled up here. Everyone see okay? Trying to get this a little bit straighter. Hi again, Gloria. Anyone else love poppies? I love poppies. They're one of my favorite flowers. I have painted them several, several times. I have not painted them in a long while though, so I'm excited about doing this with you guys. I'm just gonna get a little bit of red. Any red. You guys don't have to worry about name brands or anything like that. Any red is fine. There's all different colors you can choose from. I'm gonna get a red and probably an orange because if you look at— there's several different types of poppies, but but a lot of them have some orange in them too. And then let's get some green for the stems. We'll go with that one. And then we need a little black. Okay, so we could start with the background first, but, um, we're just going to start with the basic shape of poppies. I'm gonna start with this really fat one so you guys can see if you have a really big brush how fun it is. So we're just gonna do, like I said, very, very basic shapes here. I'm just gonna push down. I've loaded this up with a lot of paint, and I'm just gonna push the brush around. I like to call it smooshing. I'm smooshing the brush around. I want irregular shapes, okay? I don't want perfect circles because they're not, they're not perfect. And then maybe we have one over here that isn't quite open yet. So see, I'm just kind of pushing the paint around. Now you will see red is very transparent, so we're going to end up using some layering in this. I'm going to see if I turn the light down a little bit, if it gets that glare off. How's the lighting to you guys? I always think it bothers me more than it bothers you. So we've got our nice fat one there, but let's say you want to do smaller one. This is just a round Number 2. Let's just add maybe some little ones here. So you'll see this is the same style I use in this chapel painting. It's the way I did these in the front. Katrina said, is all red paint transparent? Is there anything you you can add to the red to make it less. Um, pretty much all reds are transparent. Blues, purples, those are just colors that are very transparent. So when you're working with acrylic paint, you just let it dry in between layers, and then when you put your second layer on, it's not transparent anymore. Another thing you can do is add just a touch of white to it, but it will change the color a little bit. So I usually let this dry and then add another layer, which is what we do with a lot of those colors. Oranges are the same way. So it's just kind of, again, trusting the process and just knowing that it's going to look this way right now, but it's not going to stay that way. So let's add a little bit of the orange in here. Now here's what I love about this. Do you see how quickly I'm doing this? This is just to get some different areas of color in here. It doesn't matter what, what you do, what it looks like. You're gonna see this once I build. This is one of those really fun things to see the poppies kind of come to life and how much they change. So we've got some orange and red in there. Let's make another orange one over here, then maybe just add a little bit of red to that. So those are using— that's like a number 2. I've covered this up with too much paint, but it's a big fat round. You don't have to get too, uh, focused on the numbers of your brushes. Just look at the size and then look at what what you want to work with. So the numbers don't matter, and honestly they change between— depending on what brand that you use. Um, any questions you guys have about what I'm doing, just comment info and you will get a messenger with all the links to all the things. So products, more tutorials for me, my blog post where we go into more detail about brushes, you can go check that out. Okay, so now I've got my smaller round. This one is a 1, and we're just going to add— poppy stems are fairly skinny. So what I want to show you with rounds up here in the corner, regardless of what size your round brush is, it has more to do with the amount of pressure that you put down. So I'm just going to lightly drag this. Okay, barely any pressure, right? Just lightly dragging that across the canvas. Or if I come right back and I push down hard, and you'll see like the bristles when I do that, they're barely going across the canvas. When I push down, see how they flatten out? and you get— you gotta keep loading paint up. Don't be afraid of your paint. You're not gonna get the brush strokes you want if you don't get enough paint in your brush. That's one of my number one tips for people starting out. So see how same brush, but I push down hard, so it's thick versus if I just drag it, it's thinner. So it'll be the same thing with your others. It'll be the same thing with the liner. Let me show you with the liner. Even though it's super, super skinny, you still have to pay attention to how hard you're pushing down. When I'm working with liners, you'll see how light I hold this, and you can just drag. Now if you want— those are really, really wispy. I'll just load up my paint again. But same thing here. You can push down hard and you can still get a thicker line. So we're going to do a couple with the round and then maybe a couple with the liner. So where it gets like that, I'm not going to worry about that. I just get a little bit more paint and come right back to it. Now I do try to hold mine pretty straight up while I'm doing it. If you lean it too much, it it changes the way the brushstroke goes. So this one is going to go through here. We're just going to stop, jump down, just loading up my brush again. I like to get both greens on there at the same time, and I'm not worried about that overlapping or anything right now, and I'll show you why in a second. But that's kind of what they're kind of all bendy and wavy and they're not perfectly straight. So that's another reason I like doing poppies. So let's do some leaves on here. See how much paint I have in there? I've got it really loaded up. Just kind of push it around. They're just kind of messy looking leaves. I'm not trying to make them like a particular shape necessarily. See how quick you can start turning it into a flower? Again, I have both greens on my brush right now so that I have some nice variation in there. And I can still come back with highlights and all that other stuff. What do you guys think so far? Not too, not too difficult, right? Nothing too tricky. Okay, so I'm gonna put that in water. I'm gonna grab my liner brush to do these smaller ones. See, I'm kind of holding it straight up and down as much as I can, and I don't worry if I run out of paint. These brushes don't hold a lot of paint, so you're going to have to reapply. You're going to have to load it back up. Let's have them, you know, overlap a little. Don't be afraid to let your things overlap. That's gonna add to your painting. It's gonna make it more realistic. Everything shouldn't stand apart and not touch, right? Because if these were growing wild, they'd be all over each other. And then since I've already got the liner brush, we'll just do the liner brush for a few leaves here. So if you guys practice this, I want to see it. So the way that you show me the art that you are working on or that you've done from my videos is by joining the free Facebook group. And then we will have posts in there, like either just to show off your work, or did you paint the poppies with me? I want to see your pictures below. So that's how we share our artwork, and then you're gonna have that awesome community inside that free group that's gonna cheer you on and get to see your, your paintings as well. And make sure you guys are in the free group and then set your notifications for the free group because we're gonna have a special challenge that happens just inside of there that you're gonna start hearing about. I'll be making the announcement for that. It'll be posted over the weekend, and you're gonna want to make sure that you get signed up for it. So that's just some basics on the leaves and the stems. Again, just using rounds and liner brushes. Oh, let me move it up a little. Yeah, this just goes straight off the page. So if you were making this a composition, this is— I actually have a painting like this where they just go off the page, off the canvas like that. You could choose what you wanted to do if you want to put them in a vase, or if you want to add grass down here and make it look like a field of flowers. There's A million different ways you could do it. Okay, so I'm gonna go back to this liner, and I want to show you there's two ways we can start adding some shading to our poppies. Red and green are opposites on the color wheel, okay? So that means when you add them together, they create a neutral tone. Basically, that means it's going to dull down this bright red. So I'm going to take some green, mix it with that red. And look at that, you've got this really pretty like burgundy color. So we can use this to add shading, shadows, into the painting. This is one of my favorite things to do when you're working with colors, is use the opposite on the color wheel instead of just adding black to it. So let's add a little bit down here. This poppy, you know, they have that black in the center, so when they haven't quite opened up yet they're darker down here. And then maybe here again, I'm not like super worried about where I'm putting this, but we're just gonna have some darker areas. And again, it may just look like a bunch of like messy brushstrokes right now, but this— you guys are gonna see it when it comes together. When I add that center of the poppy, it's all gonna make sense and look really cool. So I just don't want to make them too, like, one note. Let's play with our colors a little bit. So that's one way, or you could take red and a tiny itty-bitty tiny bit of black. Black is super powerful. See how little amount I got in there and how dark it makes it? So it's a little bit different than this color, more of like a brownish black. So I still want to go back. We've added some shading in there. I want to go back and with some more red. I'm gonna grab my bigger round here, and I like the texture on here. I like the thickness of the paint. I'm just gonna come back with some bolder red again. It's gonna make that come through a little bit more. Nice and thick. Don't be afraid of your paint. And then I may even add— I've got the orange here, but I want just a touch of yellow to it to bring out the brightness. So I'm just gonna wipe this off. I do a lot of color mixing in my painting. So now I've just got this pretty brighter orange, and watch, this is going to add the highlights. And now we're getting ready to do my, my favorite part. So I'm going to go into the black. Make sure all the water is out of your brush. And we're gonna start with the ones facing us first, and I'm just gonna start dabbing that black paint in the center there. This one's gonna be a little bit smaller because the poppy's a little bit smaller. Now I'm doing this while the paint is still wet, so it's picking up some of those reds, mixing it in. And I'm fine with that. This doesn't have to be perfectly black. Aren't those pretty? See how that just changes it immediately once you add the black centers in? And then on these, we're going to start with black at the bottom, and I'm very lightly— you could switch to a smaller brush if you needed to— I'm very lightly just gonna— they kind of look like little streaks coming up. And that's how we do our poppies. So you can play with your colors when you get these on here. If you're not quite happy with how the colors lay, just come back and keep playing. Just because you put the black in doesn't mean you're done. If you want more red over here and less black, or maybe a little bit more orange up here, you can still keep playing with it. Aren't those fun? Then maybe here we want a little more dark coming up. Make this little curve right here so it kind of looks like, you know, a front petal, and then that orange right behind it. Kind of separates. And then one last thing, if we wanted to, I could jump back to my liner brush and I'm going to grab that yellow that I had. Debbie, all of these always stay on the Facebook page, so videos never go away. You guys just go to the videos tab on the Facebook and you can watch from the beginning. If you came in late. Want to add a little extra color on here, maybe even a little along— this is why I love the liner. See, you can get these slight little details. Look how that little pop of yellow, the difference that makes. Again, these are just messy little brushstrokes I'm doing. I'm gonna hold this up closer to the camera so you guys can see this. This is nothing super detailed or specific. I have a very loose, more abstract style. I'm not trying to be super realistic. I like this style of painting. I'm always amazed, those little accents, what difference they make. We could even add maybe even a little more yellow up on these edges, the light coming in from this side. So let's add a little more brightness over there. And then if you wanted to, you know, you could do kind of like a wash background, whatever color you want. Let's just do I'm just gonna grab some of this like teal bluish color. I'm actually gonna get some water in my brush just to water it down, but I could just kind of come around. Or you could do this first. Like, I'm just playing in my mixed media pad, so I'm not, not concerned about this being perfect. Or being a full composition. You can make it what you want. We could come in between here and add a little pop of blue here and there, or you could leave it white. And the thing with mixed media pads is, say you really love something that you've worked on in here, you can tear these out and frame them, or maybe you just really love a specific flower you did. Cut the flower out and use it in a different piece of art. Use it in like a mixed media piece of art and glue that flower down on top of something else. Any questions from you guys before I jump off here? I'm getting ready to go have lunch with my girls. One of the benefits of us not being in school on Fridays We do get a little extra time together. I kind of like this look of the, the white and the blue together. I do think this would be kind of fun to cut out and put on something. What do you guys think? You reuse this in another piece of art? All right, so again, this will be up for replay as soon as I jump off. Just go to videos or scroll down the Facebook page and it'll be there for you. And then next week we're gonna do a different flower with a different brush. So we're gonna do a flower series for the next few weeks and I'm gonna show you a different brush for each one. I believe we are doing hydrangeas. Next week with the filbert brush. So if you haven't used the filbert brush, you're gonna get to learn all about that next week. Just comment the word info for all the links, all the things about painting with me. Alright, I will talk to you guys soon. Have an awesome weekend. Bye!










