How To Paint Snowmen with Christie
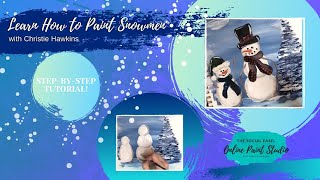
In this 20‑minute acrylic tutorial, Christie Renee Hawkins walks viewers through creating a rustic‑style snowman scene on a mixed‑media pad. She begins by laying down a blue‑tinted snow background, explains why adding a touch of blue gives contrast, and demonstrates how to build the snowman’s base using a round brush and burnt umber for shadow. Christie shows how to let layers dry before adding a second white coat, then adds a simple evergreen tree using a stamping brush technique. Throughout the video she teaches color mixing for tints and shades, details the creation of eyes, noses, scarves, hats, and a faux buffalo‑plaid scarf, and shares a paint‑splatter method for realistic snow. She offers practical tips on brush loading, correcting mistakes, and the forgiving nature of acrylics, while promoting her online classes and encouraging viewers to share their results.
Chapters
We are going to paint a snowman today. So I've got myself a little background painted on here already, and we're just gonna keep it with simple colors today. So I'm just gonna go ahead and paint a little snow on here just to give us a base. I might grab a little bit of a different color of blue just to change it up a little. I always like to add a little bit of blue in my snow so it's not just plain white. Give it some contrast. And if you get too much, you can always just go back and add some more white over top of it. So I'm just doing this on my mixed media pad today. If you don't have one— oh, I just mixed that with my brown. That white shot out faster than I thought. If you don't have one, you can get one of these in my store or at your local Walmart or craft store, but these are awesome to do practice paintings in before you're ready to commit to a canvas or a board, whatever it may be that you do. All right, so we're gonna jump in and get started. I'm just using a number 2 round here. So I think today we're gonna do a little bit more— a lot of my stuff is very bright and cheery, but I love rustic snowmen too, so we're gonna do a little bit more of a rustic snowman today. No, I think that base needs to be a little bigger here. So you can do— there's a couple different kinds you can do. You can do the 3 stacked snowman, of course, that's kind of like the traditional, or you could do something a little more folk arty. Maybe do one— we'll have one over here. Kind of more of an oval base, almost like an egg shape, and then do a small little circle on top. So there's all kinds of ways you can do these. So maybe we'll do a couple. So we've got our base down here. See how I'm just— I'm loading my brush. You want to have plenty of paint in there, and you're just going to swirl it around. Get those edges nice and smooth. Just get plenty of paint on there and just kind of push that brush out as you're going. So just like that. So I'm gonna pick up a little bit of my burnt umber because again, I don't want these to be just plain white. We're gonna give it a little bit of a rustic feel today. I'm gonna come underneath here just a little bit, add a little bit of that shadow in. Maybe just a little bit more. And you never have to worry about if you're getting too much on there because you can always go back and add some white to it. So don't ever stress about that. So we're just getting those quick little base shapes on there. And then I'm gonna come underneath and we'll add in a little bit of shadowing underneath here. Maybe just get a little bit of that brown to tone it down. All right, so I've got my base down, got a little bit of shadow in there. You know what, I'm gonna show you guys while I— I'm gonna let that dry a little bit before I go back and add some of my second coat of white to it. And if you're new to acrylic painting, when you're working with layers like that, you always want to let the first layer dry before you add the second layer on. So I'm just gonna let that dry first, and I'm gonna show you guys how to do a super easy Christmas tree. It's a little evergreen that is very, very simple. I'm gonna grab a little bit of brown with that. So I'm loading up my wash, and I'm just gonna come in here and give them a little tree. Grab a little bit more paint. So just by using the brush almost like you're stamping it on there, you can get this really cool kind of evergreen effect with your trees. So the higher I get, I'm gonna start rotating it so I get to this nice little point. You can decide how thick you want it to come out there. It can be really skinny, it can be really fat towards the bottom. And then I want to create a little shadow underneath this as well. I'm just going to drag that into the snow. So now I'm going to grab— I'm going to dry that off really quick and get all the blue out of my brush, and I'm going to grab some of the white And I'm not gonna get as heavy with this. I'm putting less paint in there, and I'm gonna start stamping the white all throughout the blue. So you can do this two ways. You can wait for it to dry a little bit, or you can do it while it's wet and you kind of get that mixture. So I like to do it when it's still a little bit wet, just so it's not just complete stark difference of the white and the blue. You get that little mixture in there, and then once this dries— see how you get this really pretty pale blue in here? Once this dries, you can come back, and if you really want that really bright white in there, you can come back and add some stronger brushstrokes with just the white. So you can see how quickly— how fun is that? You guys think you can do that? Just grab yourself a 1-inch flat brush or skinnier. It doesn't have to be that big. All right, so I believe, yeah, our snowmen are dry. So I'm just gonna come back now and add a little bit more white. We're gonna leave that kind of brownish tarnished look around the edges, and this doesn't need to be perfectly blended either. Again, we're kind of going for a little more rustic And obviously this painting is not really to scale. The tree and the snowmen are the same size. I'm just showing you guys a few things in between. Just kind of smooth that in just a little. All right, so I'm gonna leave that there for just a second. I'm gonna grab a really skinny detail brush, and I'm gonna grab some of my burnt umber, and it's got a little bit of white in there too, and we're just gonna add these little, little stick arms. Maybe a couple little branches shooting off at the end. Maybe this guy will have his reaching up. So by getting the brown and the white on there at the same time, you get that nice mixture of the two colors. So it kind of does the shading for you instead of just being one solid color. You get that mix. Of both of them. So I'm just gonna add this little hat on. All I did was come and make kind of a messy little rectangle here. I don't want anything about this painting to be too perfect or too exact, so we'll just do it just like that. And I think for this other one. So I think for— what color stocking cap? I want to put a stocking cap on this guy. What do you guys think? Maybe red? I sell individual online tutorials as well. There's a new one going up next week with the snowman in the truck that you guys will be able to access. And so basically all the classes that I teach to my online group, I then edit those videos and upload them, and you guys can buy them as individual classes until the group opens back up again. So that's another option for you. So when you guys saw me do that scarf really quick while I was talking, but think of it like this, you're doing a a parenthesis. So you're doing a parenthesis around the neck and then you're just connecting those curved lines. So we'll kind of have that swoop across here. And I'm going to grab just a little bit of white to kind of throw in, and then I'm gonna come back with a little bit of black around the edges too, to give it a more— an older, old-fashioned kind All right, I think I'm gonna do— I think I'm gonna do green. Let's keep it Christmasy for right now. So I'm just gonna come over here on top of his head. Kind of curve it over. We'll come back and add some white fluff to this too. I pick up a little bit of white with my green in this too. Anytime you add white or black to your colors, you're just creating tints and shades, and it just adds a little bit more to your painting, gives it a little bit more dimension instead of it just being a flat color. So we'll start like that, and then I'm going to let that dry a little bit, and we'll come over here I think I'm gonna add a little green band to his hat here. So, little trick for the eyes— this is my little trick to get great little circles without the fear of pushing down too hard with your brush and getting something bigger than what you want. Flip your brush around, use the back end of your brush. And I don't want these eyes too perfect, so we'll do about like that. And you can just dab down with that. Let's give him a little coal mouth too. You know what, I'm gonna change it. I'm gonna change it on this snowman. I'm gonna give him a skinny little smiley face here. He still needs a scarf. They look kind of funny without their noses right now. You know what? I think I'm gonna give him a navy scarf. So you guys see how I just did that parentheses, just like that, on both sides, and then you're just connecting the two. Grab a little bit of white in there. And the great thing about acrylic is you guys could paint this on anything. So one of my challenges for my group this month is to I want them to get out of the box of just painting on canvas or just painting in their mixed media pad, but finding a different thing to paint on. Maybe it's a scrap of wood or an old window or an old book. There's so many things out there that you can paint on, and it just makes it more unique and more fun. So I'm gonna jump back over here to a different brush, and I'm gonna grab a little bit of white to add our little fuzz along the edge of this. So I've just got white in my brush, and I'm just gonna stamp it along the edge there to make it nice and fluffy. Then I'm gonna lay that down. We're gonna grab— where's the round I'm looking for? We'll do the same thing for the little cotton ball at the end. And I'm gonna grab a little bit of my burnt umber with that, just to give it a little bit of shadow here. And I think we're gonna come in underneath their eyes just a little bit, maybe a little bit lighter than that. Smooth his face out a little. So if you ever do something when you are painting with acrylic, all you have to do— if you do something and you mess up and you want to go back and fix it, just let it dry a little bit and then you can go back and paint right over it. So this is why I love working with acrylic, because nothing you do is too permanent. You can always come back and edit it. So now I need my skinny little brush again and some orange. I don't want it too bright, so there's a couple ways you can tone down your orange, you can add the opposite to it. So I could add blue to my orange and it's gonna tone it down, or I can give it a shade with a little bit of black. So I've got like a reddish-orange mixture here. Grabbing some of my red because I don't want it too bright. So I've got like a nice red-orange there, and I'm gonna grab just a tiny little bit very, very small amount of black in there that just kind of tones it down and mutes that color just a little bit. Give him a crooked little nose here. So I'm gonna come back on my scarf a little here. Told you I was gonna get a little black to kind of tone that down on the sides, but I want the red to still be wet when I'm doing that so it's not too drastic. So again, if you ever get too much black, you can kind of blend it in a little bit, or you can let it dry and you'll be able to paint over that. So just blending that in, and then I'm going to do the same thing over here with my blue. I'm gonna come in here and add a little bit of shadowing up here to my stocking cap as well. And I want to add some white highlights over here on the hat, so I'm just kind of lightly just dragging my skinny brush on there for some highlights. We can do the same thing over here. And I'm gonna show you guys how to fake a buffalo plaid on your scarf. So this is taught— if you saw my painting with the red truck and the snowman, this is how he was, except this is a little more rustic version of him. So we're gonna start with stripes all the way down. Just kind of pull that line underneath and on top. So I'm just going to quickly line my edges. These do not have to be perfect. These lines don't have to line up perfectly. It's just to kind of give the idea of that outline. Sometimes when you're painting, it actually gives it more character if it's outside the lines a little bit. So we're gonna start like that. So it just looks like stripes right now, and then we'll come in and add them going the opposite direction. And I love the scarves because you don't have to worry about the lines being perfectly straight. It's okay for them to be wavy because it's on fabric. So they wouldn't be straight anyways. See how that's starting to look like buffalo plaid? But much easier than actually doing buffalo plaid. So there we go. I think he's about done. I think I'm changing my mind on the stripe on his hat. I think I want it to be red. I don't like the green up there. So that's just a perfect example. You can change your mind. Just because you paint something on there doesn't mean it's permanent. You can come back and change it. I'm gonna add some little green stripes on this guy. I'm not gonna do it quite as perfect as I did it on that. I don't want it to be quite the same. Have a little green and blue mixed in here though. Just kind of faking a little pattern here. I think I want a little bit more shadow underneath them. You'd be surprised how adding a little bit of shadow in the snow makes such a big difference, especially when you step away. I always tell my local classes this— when they're painting it, they're like, oh my gosh, that's so dark and it doesn't look right, but when you hang it on the wall, it does. So there we go. What do you think of our little snowmen? I'm gonna add some little black lines up here on their noses. I don't want too many. I may come back and mute it down just a little bit. Glad you guys like them. I'm gonna come back with a little bit orange in here. And I think maybe they need a little white highlight. All right, you guys want to see a little trick for some snow? I'm gonna show you something that I can't do in my local classes because it's too messy, but I love the look of it. And if you haven't done this before, it's fun, but it's messy. So I am going to load up my brushes here, make sure it's clean before I do it. So this is like paint splatter. So what I'm gonna do is grab some of my white and and I'm gonna make it really, really watery. So just like that. And then I'm gonna start tapping over the canvas, and you get that really fun snow And you can add as much or as little as you like. Now, if you're a little, um, if you're a little OCD, this might be just a little bit too much for you because it is completely random. You can't control where that snow drops, but it sure does look cool, and it looks a lot more realistic than adding perfect little dots on there. So we'll just go just like that, maybe add a couple little highlights in here. So what do you guys think? Super cute. I hope you had fun painting the snowman with me. I had fun doing it with you guys, and if you create one, I want to see it. So post it in the comments or share it with me in Messenger, and that will be awesome. You guys have a great night and a great weekend. Bye!










