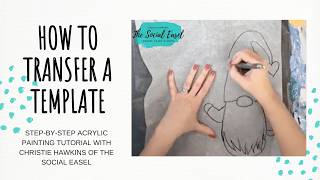
In this concise tutorial, Christie Renee Hawkins demonstrates how to transfer a printed template onto an 11×14 canvas or canvas board using transfer (graphite) paper. She walks through gathering supplies—transfer paper (roll or sheets), tracing paper, Sharpie, ballpoint pen or pencil, and the canvas—then explains how to tape two printed sheets together to match the canvas size. She shows how to place the transfer paper shiny side down, trace the image with enough pressure, and lift the paper to reveal the transferred lines. Hawkins recommends optionally outlining the transferred lines with a black Sharpie to prevent them from being lost under paint, and she notes that the lines can be left as‑is if preferred. Throughout, she offers practical tips (e.g., using a ballpoint pen for pressure, not worrying about exactness, using canvas for thickness) and references her membership class where she taught a freehand version and an upcoming live class. The video ends with encouragement for viewers to try the technique and a reminder of the next week’s class.
Chapters
Jump on really quick. I meant to do this the other day and the hours got away from me. Some of you were asking how the transfer works. So you have the templates that you can print off for your Valentine's gnome. Mine is just a traced version. Yours is going to be 2 computer sheets of paper that you're going to tape together to make the 11 by 14 size. Okay, so this is just copied straight from my original painting. So I just use tracing paper. And just keep in mind, this is another thing you can do if you're wanting to copy words from something or an image from a calendar. Just trying to give you some ideas of how you can use transfer paper in your art. All I did was cover this with transfer paper, traced it with Sharpie, and now I'm going to use this to put my template on. This is an 11 by 14 canvas board. I recommend using canvas just because it has the thickness to it, but if you want a cheaper alternative, you can use canvas board instead. You can get a 5-pack for pretty cheap at the craft stores. So Okay, again, you're going to tape yours together. You'll print that template off. It'll come in 2 sheets. This is transfer paper. It'll either be called transfer paper or graphite paper. I have a roll of it. You can also buy it in sheets, again available everywhere. I have a big pack in my Amazon store if you're wanting a big pack of it. So you are going to start by laying the transfer paper with the shiny black side facing down because the graphite is going to come off of that onto your canvas. So I'm just going to line this up because this will probably be the, the one that I used to teach you guys on next week. Are you guys excited? Okay, so I've got my image on here and then all I'm going to do is just trace it. I use a ballpoint pen. Just because it puts a little more pressure down. Ballpoint pen or a pencil. You want enough pressure that it doesn't break through your paper, but that it creates a heavy enough line for you. And I don't worry about it being too exact, so you can kind of see I'm moving quickly here. You want just enough for it to give you a really good idea of where your lines are, but don't worry if it's not exact because your paint will cover it up. Then I'm going to go ahead and do the heart in the middle. So your template comes with the balloons drawn on as well, so So I didn't do that here today. I just freehanded them when I taught it in my membership the other day. So these are my two versions. This is my freehand version and this is my original, but you guys have the original on your template as well. So if you don't want to freehand your hearts, you don't have to. Okay, so let's take that off. And there you go. That's like magic. So that is how you transfer your template onto your canvas, canvas board, palette board, whatever you decide to paint it on. And now it's ready to go. So what I would do from here, and what I do when I teach my classes live, is, um, go ahead and outline this in black Sharpie. You don't have to do all the lines. Like, if you don't want to do the beard, you don't have to, but where the lines are that you don't want to lose You want to make sure paint didn't cover them up and you can't see them. I outline it in just a basic Sharpie just so I don't lose it when I start putting paint on, because if you paint right over this, you may lose the lines. But if you Sharpie over it, you won't. And we're going to be coming back and putting black outlines all around it. So that's the original. Let me show you in this one. So this one had the Sharpie lines, but you can't see them. If you really stare at it, you can in some areas, but I've covered it with paint and accent marks. So it's up to you whether you want to put the Sharpie on there. I like to do it just so I don't lose the lines. So that's it, just a quick, quick little tutorial for you in case you have not used transfer paper before. So hope you guys are excited for next week. I will see you then. Bye!