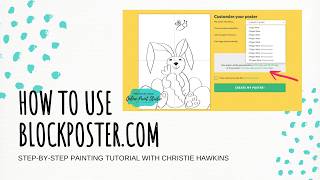
In this tutorial, Christie Renee Hawkins demonstrates a quick workflow for taking a reference photo or a JPEG template and enlarging it to fit a larger canvas or painting surface using the free online tool BlockPosters.com. She uploads an 8.5 × 11 in Easter‑bunny image, shows how the default setting creates a three‑page‑wide portrait poster that would print at roughly 25 × 30 in, then adjusts the layout to two pages wide to achieve an approximate 17 × 20 in size—close to a common 16 × 20 in canvas. Hawkins explains that exact dimensions cannot be set, but users can fine‑tune the final size by adjusting printer scaling (e.g., 75‑80 %). She toggles between portrait and landscape orientations, noting how landscape splits the image into more pages and results in a larger overall print. After agreeing to the terms and creating the poster, she downloads the PDF, reviews the page thumbnails, and prepares to print each page. The printed pages are then taped together to form a full‑size template, which is transferred onto the canvas using graphite paper (she references a separate video for that technique). The video concludes with a brief recap of the process and a reminder of the method’s limitations.
Chapters
Hey guys, it's Christie Renee Hawkins with A Social Easel, and I'm going to show you a quick way that you can take a reference photo or a template that I offer in a JPEG format and make it larger to fit whatever size canvas or surface that you want to paint on. So we're using BlockPosters, just blockposters.com, and we're just going to go to Getting Started or Get Started, and we're going to upload our image. I am going to use this bunny that I just did for Easter. So this was just a regular, you know, like 8.5 by 11. If you just printed it off normal, it automatically sets it to 3 pages wide with portrait setting. And you can see the dimensions right here. So that's telling you it's going to make it 25 by 30, roughly. We don't want it that big. Let's go to 2 pages wide. And this is about 17 by 20. Okay, so that's pretty close to a typical size canvas that we paint on, which is a 16 by 20. So I would probably go with that. You're not going to be able to specify exact measurements. Um, But you could do this and then mess with your printer settings to even like make it only print 75% of its size or 80% of its size. That's something you can do on your own printers. But this is going to be pretty close for you to fill in on a 16 by 20 canvas. And then if it's a little big, basically that just means, because you're not going to have to trace all these flowers or everything on there. But it's just going to make your bunny just slightly bigger than what mine was in the original. So that is in portrait. If we switch to landscape, see, it changes it and it makes it bigger because it's dividing it up into more pages. Those are how the pages are going to print, and then you'll tape them together. So let's switch it back to portrait because that's going to be kind of what we want to be able to print off. And then you're going to click agree to the terms. And you're going to hit Create My Poster. And then we're going to go to Download. I'm going to go ahead and title that so I have it. And then— I don't know why that came up. That's not what I'm trying to do. This is what it looks like. So on page 1, it shows you what your image was, and then you can see over here in the side column, it's going to— those are all pages you're going to print off, and then you'll tape them together to get your template together. And then you just need graphite paper to transfer it on to your canvas. And I have another video if you've never used graphite paper before on how to use graphite paper and how to do a transfer. And that's it.