Join me for Tips & Techniques Tuesday! I am working on Mixed Media Gratitude Pumpkins!
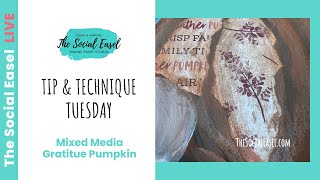
Christie Renee Hawkins demonstrates mixed media pumpkin painting using wood panels, scrapbook paper, stamps, and bubble wrap to create texture and depth. She shows color mixing with complementary orange and blue, layering techniques, and invites viewers to join her Tribe membership for monthly live lessons and 180+ tutorials.
Chapters
Hey everybody, um, we are going live today for my Tips and Techniques Tuesday, and today we are going to do, um, some mixed media tips and techniques. So I'm working on a new painting for my Tribe. For those of you that don't know, that's my VIP membership where I teach every month. So I'm working on a new painting for them for October, and we're doing mixed media pumpkins. And I thought it would be fun to kind of take you guys in, show you some of the techniques that I use. If you're not familiar with mixed media, I'll go over all the details about that too and explain to you what it is. Um, so this is— can you see this little board. Um, this is— I think it's like a 6x6 just wood panel. Um, I just got like a 6-pack of these. I think it was from Michaels. You can get them at Michaels or Hobby Lobby. Um, so that is going to be what we're working on today. And then I've got a bunch of just different supplies. Part of what I do in mixed media I'll grab my, um, Be the Light bird as an example, um, is use a combination of a bunch of different things. So we used some like music note paper in the background of this one and, um, some tissue paper, some stencils. Um, I cut out some scrapbook paper, and then of course we use paint and paint pens. So in its simplest form, that's what mixed media means. It's just a mix of a bunch of different mediums. So a medium is paint, a medium is paper, chalk, markers— you kind of get the idea. So this is obviously one that I've already done and is completed, but I haven't done a mixed media pumpkin yet. So I thought this would be a fun one for me to do in Tribe next month, and I would jump on live with you guys today just for about 20 minutes, just to kind of give you some tips and techniques on how I start a mixed media piece. So you won't see the whole thing in completion today, but I'm going to show you how I start working on it and some of the tips I use. And if you are dying to see the rest of the painting, you can join our waitlist because Tribe is opening to new members October 1st. So in 19 days, we are opening doors to new members. I have a really big fun party that we are going to be doing all week long where you guys are going to get to learn to paint this. I was working on this, um, today. So this is coming up too, so stay tuned for details on that. All of that is going to be in conjunction with the opening of Tribe. Now I can't get it straight. Give me just a second. Okay, we got it. All right, so I'm going to flip you over now and give you an aerial view of my workspace so we can start working on our pumpkin. Just give me just a second. It may be a little weird for a minute until it gets settled. Okay, are we good? So you can see my mess of workspace here. Okay, so I see someone saying they don't have volume. Everyone else has volume, right? Because mine is showing that we do. So this is going to be the little wood panel that I'm working on. This is a, um, obviously, um, scrapbook paper had. I bought this, I think it's been a couple years now, on clearance. You can obviously right now, um, well actually Hobby Lobby usually puts this stuff 50% off leading up to the holidays too. But I absolutely love all of the paper inside of here, and I'm always looking to buy things like this when they're on sale because I love using them in my mixed media pieces. Like this one, it would be super cute with all the words in it. Um, and then I've got some different size stamps over here, letter stamps. So I'm wanting to make these like gratitude pumpkins, so maybe thinking of putting some words in there about being grateful, or maybe a Bible verse. There's so many different ways that you could do this, and a lot of times I like to stamp my words on my mixed media piece um, instead of writing them on there. A couple other things that I have handy may seem weird, but I have some bubble wrap. This is really fun for just creating texture in your paint. And then I also have some pastel chalks here. So sometimes when you're doing I'm just going to pull a piece of this out for an example. Let's just tear this one. So sometimes when you're doing— like, let's say I stamp the words fall on here and I want to give it a little bit of aging, I can take my pastels. Obviously you can do different colors, and I can go around the edges of my paper. Now you can decide if you want that, you know, perfectly straight. I tend to like mine torn a little and give it more of an aged look. So this is fun to have, and then you can put this on top of your paint as well. So you can use pastels mixed with your paint. You just want to let your paint dry first. What else do I have here? The most important thing is something to adhere our mixed media piece to our surface. So again, I recommend a wood panel or a hard surface for doing this instead of a canvas. You can do a canvas board, which is just a solid board instead of— a regular canvas has give. To it. Okay, so I don't usually like doing regular canvases for mixed media because we're doing a lot of pressing and pushing into that, and we want paper to adhere to it. So I like a nice hard surface, so I'm using a wood panel instead. And just let me know if you guys have any questions as I'm going along talking about it, because this is going to be just a quick overview of some of the different things that I use in my mixed media pieces, and then we're going to start placing them together. But if you're joining late, we won't be doing the full painting today. This is going to be one that I do inside of my tribe in October, and I just wanted to take you guys along today to show you some of the techniques that I use with mixed media. Um, what else? Of course, pens. These are all waterproof black pens that I can use for detailing. Then I also have like my Posca pens, which are actually paint pens. So there's paint inside of those. I incorporate those into my mixed media pieces. Um, and I think that's about it. I'll probably think of something else along the way. Tissue paper, which I don't have here. Um, I do that as well. So really anything that you see that you're like, oh, that's cute, and you can adhere it to your work, you can use that. You could use confetti or glitter. Um, There's lots of options for you. How many of you watching, um, have done a mixed media piece before? Let me know over in the comments if you have. I'm going to move this sign out of the way, and I'm already thinking when I pulled out this pad of paper. I was already looking at this thing. You probably can't see that, it's pretty small. Oh, this one's good too. So anyways, I'm thinking about doing like a blue background. There's another— this was the other one I'm looking for. So whenever I am doing mixed media pieces, it is really just you experimenting. So I want you to like go back to the little girl inside of you who just loved creating and playing. You don't have a direct path that you're going on. You are really just seeing what happens and seeing what you like and then changing your mind if you don't like it. So what I was thinking originally is tearing some of this paper off. I think that is what I'm going to do and kind of adding it in to our background here. So I usually like to hand tear my pieces because I want them to kind of have those rough edges. I wish it— I wish I wouldn't have torn that T off right there. Maybe I'll do this. This will be kind of cute because it'll also kind of look like leaves falling through the air behind the pumpkins. Kelly said, I love getting messy. Me too. So if you don't like getting messy, you may want to get some gloves to do this with. I usually use my fingers when I'm spreading the— this is decoupage. You can use Mod Podge decoupage, it doesn't matter. And then they just have different finishes. This one has a gloss. I'm using a sponge applicator to put this on with because I don't want to get that glue and that sealer in my good brushes, so I'd rather just use something that I don't care about quite so much. Um, so I'd mentioned I like rough edges, so even though, you know, this would fit right here, I, I want to peel it a little bit more. And I actually like a little bit of the white paper to show because then when I paint over top of it you get a little of that edge. Lisa just did one last week. Mary has done one. Regina said, I've never done mixed media, didn't know what it was. My daughter just told me. Yeah, so I— that's why I like doing these lessons, because a lot of times people don't know what that means, um, and it's, it's really much simpler than what you would think. It just means a bunch of different mediums that you're mixing together. So I'm just kind of playing with this a little bit. I could make my pumpkin a little bit shorter, but I think I'm just going to continue to tear this a little so I can fit it up here. I can always add more leaves on if I want to. Later. So I will be completing this piece inside of my Tribe in October. So Tribe sisters, you will get to see the entirety of this inside the group. If you are not a Tribe sister and you'd like to get to paint with me every single month, we do two new paintings every month inside of Tribe. I'm gonna apologize ahead of time for the loud noise because I have to hit this to break the seal on the decoupage. Um, we do 2 new paintings every single month live in our private group, and then you also get immediate access when you become a tribe member to over 180 tutorials in our library. So it's kind of like a Netflix library of paintings. I think we may be close to 200. I actually need to go in there and count. So what I'm going to do is just take some of my decoupage and just put it directly on my wood. Now you could prime your wood if you want to first. I usually don't. Um, But you definitely could. Priming it would stop the paint from soaking into the wood quite as much, but I'm not too worried about that. And you can paint over this once it's dry. So think of this as just like glue, but you can also use the Decoupage as a sealer when you're all the way done. So you can coat your entire thing once it's completely done with this, and then It will have a nice gloss finish if you choose the gloss one and keep your painting protected. I love these small sizes too because you can make them like little shelf sitters. Just tuck them in with your other fall decorations and it'll be so cute. Let me move that out of the way. So yeah, Carol, this is a, um, just a wood panel that I'm using. Oh yeah, Christina said she picked up some paper napkins. Yes, you can use napkins in mixed media art as well. I actually have the perfect little color right here that I think I may use in the background. This is a palette I was using earlier. This color is called Tropical Blue, so I think I'm going to get a little bit of that and a little white on here. I'm not sure what other colors yet. I just happen to have some handy fall colors here. This is Warm Sunset. I love this color of orange from DecoArt, and I'm going to tear and put some pieces inside my pumpkins as well. So the first thing I wanted to do is show you guys how I do the background. We may play a little bit with some bubble wrap and kind of add some texture to it and see if we like it. The thing I want you to remember when you're working with mixed media, or really any piece of art in general, you can always change your mind. If you do something and you don't like it, you can change your mind and paint right over top of it. Karen said, did you trace the pumpkins on the wood? I just drew those on there. I was just doing a loose sketch to kind of get an idea of where I wanted the pumpkins. And, um, was it— oh, Bonnie said, is the wood panel ready to hang? Yeah, it's just got like a half an inch little inset there, so just a tiny little nail and you're ready to go. So I'm going to grab a little bit of that blue that I got. Now this may seem strange to you, what I'm getting ready to show you, But you're going to get a little color mixing lesson in this too. This is really, really bright. So that's way brighter than what I care for it to be. I'm going to go in a little bit closer here. See how much brighter that is than that blue? So there's a couple things I can do. The first thing I'm going to do is take the orange that I put on my palette, and I'm going to mix that with my blue. Now, one of the reasons you would want to mix opposites, because orange and blue are complementary colors, is because they tone each other down. So it's desaturating that blue and muting it, so it's giving it a softer color. Look at the difference between that— those two colors straight out of the bottle, and then adding a little bit of orange to it tones it down and makes it a softer blue color. And then if I want it lighter, I'm just going to grab a little bit of white. I love color mixing. That's something that we work on a lot inside the group. Look at that, it's almost the exact color of the paper. Maybe we need a little bit more green, but I'm not worried about matching it exactly. I am just wanting to get a similar type of color to that. Now I could use a paintbrush for this. You see me just kind of going along the edge. I'm just going to kind of avoid the shapes of my pumpkins right now. We could go in and trace those in Sharpie or something if you really want them to stand out. But for right now, I'm not too worried about that. So I could do this with a brush, start filling in the background. Or if I wanted to create some even more fun texture, I could take a palette knife, which I was just playing with earlier. Mix up some more muted blue. How many of you would have thought to mix your orange and blue together to get a different color, to tone it down a little? Once you start learning how colors work together, it becomes pretty fun to experiment and play. With different colors. So this obviously creates a rougher texture. And when you're working with mixed media, it is also definitely one where you really have to trust the process and know that you're going to go through stages where you may be questioning your choices, but you just have to keep moving. Just have to keep moving forward. I'm going to get a little bit of water on my brush. So that was really just for me to show you that technique, but I'm gonna kind of brush this color in a little bit more and then just kind of soften the edges. Where it meets that paper. Baby wipes are also handy to have on hand, on hand when you're doing mixed media. So don't forget, I already sealed that right with the gloss, so I don't have to worry about it tearing the paper by getting wet. It's already sealed. Okay, so now you could use a paper towel, which I'm going to use. This one's already a little bit damp, or you could use a baby wipe. I can come in and wipe off any excess I want on there. So a little bit more of the word. Comes through. Hey, Roxy said, I'm a new tribe sister and this is so exciting. Can't wait to try all these different tips and techniques. I'm glad. I'm going to get a little bit more water and continue down here. So this is kind of just like a, almost like a wash right now. And you don't have— your background does not have to be all the same color. You can have mixes of different tones and shades and tints in there. Now let's just, for the fun of it, see what the bubble wrap looks like. Now we could just do this and just create some texture, okay, so you see some of those little circles on there, or we could even put a little bit of color on our bubble wrap and add some texture that way. But the great thing about this is you can kind of keep working back and forth between your paper and your paint and all of the different different things. Where did I set this? So like, I was thinking if maybe I wanted to add, you know, more of the leaves on here, I could come back, tear off another little leaf for over here. A lot of times I like to pour this into the lid, especially if I'm just getting a little bit. Makes it a little easier to work with. And you can also use, um, paint. See how I'm using my fingers? But if you don't like to do that, you can put gloves on first. And just putting that in there. I lost my train of thought. What was I just telling you guys? I was talking about pouring that in the lid. Help remind me, what was I saying? That's what happens when I'm trying to work on something and tell you guys something at the same time. I think I want This little maple leaf over here too. And at first you may think, I don't really get it, like why is she just putting that on there? It just kind of looks like it's standing out and it doesn't really mix into the painting yet. Okay, it doesn't mix in yet, but I'm going to pull this one back out to show you how once all your elements are on there and your finishing touches— see how the stencils and the tissue paper and the scrapbook paper, all of that is in the background? Even like all these little like pebbles that are behind my bird, that's scrapbook paper, but it looks like little brush strokes that I put back there. So you just keep working and playing. Um, Mixed media pieces usually do take time, so don't be in a rush to get through it. It's not about speeding through the process, it's just about enjoying it and having fun with it. Something about— oh yes, thank you, you could use paint. Yes, you can use, you can use paint to adhere pieces of the scrapbook scrapbook paper on there as well. Okay, so I'm gonna go— and I know I'm already over my time here, so I'm not going to stay on too much longer, but I'm going to show you the start of what I'm going to do with my pumpkins. Again, I want my orange to be toned down a little bit, so I'm grabbing some of that blue and mixing it into my orange. Plus, I already had blue still left in my brush. Now I don't have very much on my brush at all. I did not get a ton of paint on there, so you're gonna see it's not going to spread super far. So I need to load up and get more. You always know if you need more paint on your brush. I'm loving this color though. If it pulls and it doesn't glide easily, that's how you know to get more paint on your brush. You shouldn't have to fight to get the paint to spread. Now I'm just getting a little bit of water. You want to be careful with getting too much water because it will dilute the paint too much unless you're purposely going for like a watercolor-like look. Then you could, but it'll break down the paint too much if you're wanting it to stay truly like acrylic. Let's get a little brighter in the middle here. And so even the details of the pumpkin, they really come out with the more layers and more paint we add to it. So I can add some lights and darks to it, and it starts kind of taking shape. But when we go in with the finer lines and the grooves of the pumpkin, maybe some paint pens to accentuate that, it's really going to start taking shape. I'm going to get a smaller brush to go around the bottom here. So I'm even going to go a little bit darker on the bottom, so it's okay if it has a little bit more of that blue in there. So watch how I do this right now. Say we've got the top here. Those lines are going to come from the same point up at the top. You can start seeing the shape of that pumpkin come together a little bit. Mixed a little white and my orange mixture so we have a little lighter color coming over here. So you can see how it's starting to take shape a little bit. Now the last thing I was going to show you— I obviously still have a pumpkin down here I'm going to do. He's overlapping the other guy. We'll just paint his shape in real quick. A little fat squatty pumpkin. And I'm just letting it mix with whatever's there. I'm not worried about what color this is. I can always go back and change it. So think of these right now as like placeholders. Doesn't mean it's going to stay this way. We just know that's where our pumpkin's going to be. So what I was thinking for the inside— this is what I was going to say, the last thing I was going to show you guys today is how obviously we have some paper in the background, and, um, but you can also work it in to your pumpkin. So I was thinking since these are going to be like Gratitude mixed media pumpkins. I was thinking some of— well, we already have the thankful up there. I was also just thinking this would be cute. I'm just going to tear a little bit of this so you can tear different sections of paper to go in the different grooves of the pumpkin. It doesn't even have to show the whole world— word or world, whatever. Um, It's just going to be super cute. So if I put that one there, I'm going to tear that so it doesn't— like that. Probably easier to just do it on the back. I'm really not getting too awful messy today. And then I would keep tearing. Now I'm, I'm going to choose different papers for each section. Now you could do them all the same if you wanted to. And I'm just trying to tear them to the shape of that section of my pumpkin. It doesn't have to be exact, but you kind of get the idea of what I'm doing here, right? It's gonna be so cute. Let's tear that. Maybe we even have another little piece up there, and then you can decide how much of this you want to come through, how much of that color. I'm going to get a little bit more orange, and we're just going to do a quick wash over top of it for right now. Don't forget, you can wipe some off. I'm going to get a little water, just kind of create like a wash there. All right, do you guys have any questions for me before I jump off for the day? Oh, I just remembered I have one more thing I want to show you, not paint related. But I was going to do this last week and the week just got away from me and it didn't happen. But we have brand new products in the store and I was going to show you guys today, I've got enough time, some of those new products if you want to see. So let me know in the comments. I'm just getting— just dipped that right into my paint water, just get it a little wet. Look how cute that is already turning out, and we just got started. I'm loving the red right there and the light color of the white is good because that's where more of a highlight would be showing up. Roxy said, I just want to go do this and forget about everything else I have to do. This is the fun stuff, right? I could definitely, definitely keep doing this. Okay, let me— I'm going to leave you guys here for just a minute to check this out and look at it. I'm going to go set my stand up over there and switch places so I can show you some of the new products that we have in the store. Oh, this is one we will be adding. It's not in there yet. I don't know if you guys can see. So I'm going to be adding some inspirational pieces in the store too, devotionals and journals. Um, this is a little leather bracelet that says Faith over Fear. So if you want to be notified as we put new products in the store, we're adding stuff basically every single week from now until Christmas, um, because it's, it's that time of year. Um, so text me and get on our text list so you can, um, be the first to know when the new products go in. You can just text, hey Christie. I'll throw my number up on the screen, um, for you. I'm just going to throw this one up. This will give you text for live alerts too. And then I'm going to go throw up the stands and we'll show you the new collection. I'm so excited about this piece. I really don't want to quit doing it right now. Okay, so I'm gonna stop the camera for just a second. It doesn't mean I'm gone, so just, just bear with me, um, just so I can get you guys, um, settled over there. I'm still here though. Hold on just a second. Okay, I don't know why it glitched. Can you guys see me? And hear me, most importantly. I'm glad you guys like the bracelet. Um, Carol said, is this every Tuesday? So the Tips and Techniques Tuesday is every Tuesday, tentative on if I'm in town. If I'm traveling, um, which we do quite a bit, then we won't do it that Tuesday. But we always let you know via email and then obviously with text alerts too. And then we send the replay every Wednesday in our newsletter, a link to the replay. Okay, perfect. You guys can see and hear me. So this is the other section of my studio. This is my sign that was from my live event last fall. And I thought this would be a cute spot to show you, um, the new products that I'm so excited about. Carla said, can you talk about the Kids Can't Poke program? Any samples we can watch before buying? Carla, if you just go to the social easel.com, all the information about that is on there. If you scroll down to the bottom, there is a link. You'll see my daughter surrounded by a bunch of the kids' paintings, and you can click that and it will take you to more information about the kids' paintings. Thank you. I need to get the link from my— my niece made these, and I need to chat. I was thinking about that when I put them on this morning. Um, Jill said, I like your earrings. My niece Olivia, um, makes jewelry, adorable, beautiful jewelry, and I got these in a lot of different colors. These are the skinny crosses. She also has bigger ones, so I'm going to get with Olivia and see whether I can just get some links to share with you guys, or if I can buy wholesale from her and put it in the store. So I will let you know, um, as soon as I hear from her. I'm going to get this banner off the screen so I can see your comments. Okay, so I'm really excited about this. This was a new design that I created. It's called Better Together. So I have an entire collection. You can text the word shop to that number that was on the screen. It will send you a link directly to my store. So the website is easy to remember though, it's shopsozialeasel.com. Um, and all of these items are going to be there for you, and then we'll drop link in the comments as well when I get back to the computer. You can also just go to thesocial easel.com and then click the word shop at the top. It will take you to the store that way as well. So see if you guys can see this. I may need to scoot you in just a little bit closer. I'm opposite on So this is the new design called Better Together. This is in a new hooded sweatshirt. We haven't had the hooded sweatshirts before, so we're really excited about this. We have it in a regular sweatshirt, we have it in a t-shirt as well, so there's lots of different options for you. But I created this because I truly believe that we are better together. We want to surround ourselves with people that love us, support us, are encouraging. That's what my tribe is all about. So when I created this design, it was with them in mind specifically, but it is for anyone. So we have the sweatshirts, the t-shirts, all of that. I'll try to leave on screen. I'm scared I'm going to break this little guy here. I'm much more comfortable behind the camera with my paints in hand than doing this. And then we have the little wine tumbler, which is fantastic. You don't have to put wine in it if you don't want to. We have the coffee mug that says Better Together on one side and Social Easel on the other side. And how perfect do those earrings match with the sweatshirt too? Okay, this is one I think you guys are going to be really excited about. I'm going to save that one. I love a good hat. I especially love trucker hats which have the mesh background. So this is Get it straight on there. Our Better Together hat. So cute. This is the one I thought you guys would be really excited about. Ready? We have a tote bag. So this is something you guys have asked about for a long time. For us to carry, and I'm going to show you the other one that we have too. But this is perfect for all of your art, art supplies while you're traveling, or if you just want a cute bag. It has this design sublimated on the front. You've got an outside pocket that Velcro shut. The inside is enough to fit your laptop, your mixed media pad, your brushes, your palette knives, your paints. You can fit everything in here and wear it on the go. So we have it in two styles right now. Um, this is obviously the Better Together one, and then our other super popular design from last fall was the Blue Pumpkins. And we have this on shirts, we have this on table runners, we have this on placemats. I'm getting ready to show you those. So whether you love the blue pumpkins or whether you want the Better Together, both options are available on that bag. We also have a new little zipper tote in the Better Together design. Now this is not big enough for your brushes, because when you buy my brushes, they come in a bag, and that's what I use to carry them. See if I have one over here, um, to show you, but I'll show you that one in a second. But this is perfect for either if you just want it for your makeup and stuff, but what I'm thinking it will be good for is all your pens. So a lot of times when I travel, I don't want to bring all my acrylic paint because it's so many bottles. I bring my, um, I bring my watercolor set. Sorry, I got hair coming out of here, it looks kind of funny. I bring my watercolor set and then I bring my waterproof pens, so my Posca pens or my black waterproof pens, and I keep them in a bag like this. So it's perfect for your pens. Let me show you just to give you an idea of the size. So any of, any of the different pens that you use in your art. So you've still got a little room to give, but my brushes are too long. Let me show you what my brushes come in. And these are still in the store as well. This is my brush bag that I designed. It's a drawstring. This is— includes 15 brushes inside of it, but it's big enough and roomy enough you can kind of stretch it out. I keep— when I travel, I keep my brushes and my palette knives in here so they're all cinched together and ready to go. Then you could have your pens and your paint markers inside of this bag. How cute! What else do I have? It's like a goodie bag here. I can't remember everything Stacy put in it. Melissa said, I keep my palette knives and brushes in that bag too. Look at these placemats! How cute are these? This is kind of like a— I don't really want to call it a burlap because it's softer than that. It's kind of like a heavy canvas, but it is kind of like a cream burlap, but it's soft. But these are beautiful. They come in a set of 4 in the blue pumpkin design. And then last but not least We have the Better Together in a baseball tee because I love a good baseball tee. So there you go, and there's a whole lot more that I didn't show you here today. So go to shopsocialeasel.com or just socialeasel.com and then click shop. You'll see all the products. We have all of the Better Together, that collection, in one area for you so you can browse and look at all the different, um, products that that design comes on. Then we have, um, the blue pumpkins as well. And then of course we have my palette knives, and, um, we have my brush set. We have, um, I'm drawing a blank on everything we have in the store right now. We have stickers and magnets and all kinds of fun stuff. Um, Jill said, how much is a leather bracelet? I don't have any of that priced yet. I literally just got all of my product yesterday, so as soon as that is in the store and up, you guys will know about that as well. I think you're going to be very excited about that section of the store. This will be a completely new section, um, that we don't have in the store yet that is going to have devotionals, journals, inspirational jewelry, um, all of that. Kind of stuff as well. I'm really, really excited about it. So lots of fun things heading into the holiday season that are going to make great gifts for people too. So hope you guys had fun learning some mixed media. Hope you had fun seeing some of the new things that I have in the store. And if you purchase the things, make sure to send me a picture with your goodies. I love seeing you guys in your hats and your sweatshirts. And whenever I send out happy mail to the Tribe Sisters, it makes my day to see you guys take a picture with the gifts that I send you. And if you really have your eye on a couple things that you're like, man, I really want that, make sure that if you are a Tribe Sister that you are doing our current challenge right now, because everyone who completes that challenge is going to get a $10 gift card to the store that you can use on whatever you want. But if you're not in my tribe yet, if you join our upcoming Fall Sunflowers Galore that is coming up, we are going to be doing gifts all week in that workshop as well, and you'll have a chance to win gift cards to the store for these products as well. So hope you guys are excited. Um, Sherry said, would you repeat The phrase, the text for, um, you could— it doesn't matter, um, if you— oh yes, shop. Yes, it does matter if you text the word shop to 417. I'm going to put the number back up even though that word is not there, but that's the number. If you text the word shop to that phone number, it will send you the direct link to my store. I just didn't have time to create a banner for that yet before I jumped on here. Oh, thanks, Regina. Thank you, guys. That was fun to get to share that with you. Um, what do I have coming up? So keep an eye on your emails, make sure you're following this page, the Social Easel, on Facebook, because over the next few days we have lots of things that we're going to be releasing for fall because I have a big October planned. October marks our 10-year anniversary of The Social Easel, which is just crazy, crazy, crazy, crazy to me. 10 years ago— I'm not gonna cry— 10 years ago, we were starting this business, um, from my kitchen when I did a paint party for Kylie. When she was turning 10, and it was her 10th birthday, and she wanted to have a paint party, which is really funny to me now because she won't even pick up a paintbrush. But back then she would, and we did a paint party, and one of the moms came and she was like, you could totally do this as a business. And I was like, oh, I don't know, I just was doing it for Kylie because, you know, I was that mom who did all the birthday parties, and, um And then my girlfriends were chiming in and they were like, do it, I think you can do it. And so they all came for a guinea pig paint party at my house 10 years ago, 10 ladies around my dining room table, and that was the beginning of the Social Easel. So, um, and here we are today, and I have followers literally all over the world and members in Australia, the UK, Canada, the the US, probably even some places I don't know. And it's all very overwhelming, and I'm very thankful. But we are going to be celebrating all month long and leading up to October. So turn your notifications on because there's lots of fun stuff coming your way, whether you are a Tribe Sister, whether you are a Painting of the Month Club member, or whether you are brand new to following me. We have lots of fun things in store to celebrate 10 years. So, super excited. Thank you guys for being here. I will see you. That's what I was gonna tell you. I'll see you again on Friday, 'cause one of the announcements is coming Friday. So I'll be back on Friday afternoon. Bye.










