Learn How to Paint with a Palette Knife!
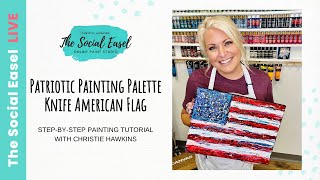
In this 1‑hour live session, Christie Renee Hawkins of The Social Easel walks viewers through creating a loose, abstract American flag using only palette knives. She begins by showing how she preps the canvas—gessoing an old painting, applying modeling paste for texture, and planning the composition with a quick sketch. Christie explains the differences between gel medium and modeling paste, demonstrates how to thicken craft paints with gel medium, and shares her color‑mixing process using cadmium red, phthalo blue, titanium white, ultramarine, pyrrole red, fluorescent highlights, and 24‑karat gold. Throughout the demo she teaches key palette‑knife techniques—wet‑on‑wet blending, wet‑on‑dry layering, impasto strokes, and splattering (including tools like a toothbrush and Liquitex freestyle flat). She also discusses practical considerations such as canvas size (12×16), framing options, and how to adapt the method to wood surfaces. The stream is interspersed with live Q&A, where Christie answers questions about medium behavior, texture drying times, product usage, and offers advice for beginners hesitant about palette‑knife work. Promotional segments highlight a limited‑time $15 sale on her 5‑piece signature palette‑knife set, a 15‑piece brush set, and the re‑opened Summer Vibes workshop. Community members share their experiences, and Christie mentions future plans for Painting of the Month Club, art prints of the finished piece, and additional patriotic project ideas. The session ends with a recap of the finished flag, encouragement to experiment, and reminders about upcoming live streams.
Chapters
Hey everyone, it's Christie with The Social Easel, and we are going live today to do a patriotic painting so that you have plenty of time to do it in the month of June and be ready for Fourth of July. So, um, I am going to flip the camera around in just a second, but I kind of wanted to show you, um, I've kind of sketched, um, out some of my ideas. I do this a lot when I'm prepping a painting, so I'll be doing it live with you guys for the first time and sharing all my steps with you. And we have a special for you this month only. We are doing— we're doing this painting with palette knife, and we're also using palette knife inside of my tribe right now for an abstract lakes that we're doing. So we thought, what a perfect month to put the palette knives on sale. Um, so right now you can get my signature palette knife set for only $15. They're normally $24.99, and that discount is taken off when you go to the cart. So we will drop that link in the comments for you, and you can always just go to shop. So social easel.com to grab those. And if you haven't been to the store in a while, um, be sure to visit it because we have added a ton of new products. We've got stickers and magnets. Of course, I just put my sticker on my laptop, I can't show you, but we've got stickers and magnets and keychains, new t-shirt designs, and then of course, um, your brushes and your palette knives. So they are on sale for $15. Through the month of June you can get these. And, um, I am going to go ahead and open them up and just kind of show you the different sizes that come in them. Um, and then we're gonna jump in and get started on our flag today. You'll see that flashing. I don't know why my light is spazzing. Okay. Okay, I think we're okay again. So inside the palette knife set, you've got a 5-piece set. You've got your large one, then you've got a little bit skinnier, a little bit wider. You can do different shapes with this. That's kind of like a diamond shape. This is really good for petals and clouds and anything that you want that rounded edge with instead of a straight edge. I think of this as like the equivalent of a filbert paintbrush because it's got that same curve that a filbert does that I love using for clouds. And then this guy is probably my absolute favorite one. He's itty-bitty, but I love this one. I use it all the time for details, for flowers, for petals. I mean, this is like my absolute go-to. So we'll be using a variety of these today, um, in the lesson. But I'm gonna go ahead and flip you guys over if my light will cooperate with me. All right, how does that look? Let me know if that is Good for you guys. Let me know in the comments if you have ever painted with palette knives before, or if that sounds a little scary and maybe new to you. If you haven't painted with palette knives before, I highly encourage you to try it out because most of the women who I have taught over the last 5 years online once they've tried the palette knife, which, by the way, this was done— this packaging was done— I did those palette knife flowers. Once they tried it and loosened up and just were allowed themselves to play with it, they fell in love with it. So it's a completely different look and technique than painting with a brush. But we're gonna, we're gonna go over some techniques today. So if you're brand new to it, don't worry about it. I'm gonna walk you through everything today. Debbie said, I never have but very interested in trying it. Good. Let's see, Susan has never painted with it. Teresa DF says, I love the palette knife but not great at it, so eager to learn. Carlos said palette knives and credit cards are so much fun. Yes, you can use credit cards, gift cards cut up and use those like palette knives as well. Cheryl said it is so fun. Awesome. Well, I'm glad. And for those of you that haven't tried it yet, we're going to do it today. And then of course, you can access this replay just by coming back to my Facebook page or by visiting my YouTube channel and it'll be there for you. So the first thing I actually wanted to go over with you guys is kind of how I prep for a painting. Um, sometimes I just go straight to canvas, but usually I already have started like thinking about what I want to do, and it's good for me to just get it on paper. It kind of, one, helps remind me of all the ideas that I had, so I can write those in the side and then just kind of do like a loose sketch over here. So for this one, it is going to be a very loose abstract American flag. Um, and by the way, feel free to pass on this video if you think this is fun and you want to share it with your friends. Um, but we're not going to paint 50 stars on here. There's not going to be exactly 13. Stripes. This is going to be a loose interpretation of the flag. We're gonna— I've already textured— textured, if I could talk— I've already textured this background, and you may see a little hint of a painting underneath there. See those 3 circles? So, and we'll be sharing this video soon, but I gessoed over an old painting. So this is a great way to repurpose paintings that maybe you started on and you never finished. I do that a lot. And then I have a stack of unfinished canvases in my closet. And so I did a video the other day that we'll be sharing of just how to gesso, why you gesso, and that's what was done here. So I've gessoed over this, and then in addition to that, I've added modeling paste over this with palette knife to give it this texture. So it's got these scrapes and stuff in it, and you're going to see why I did that here in just a minute. So the first thing we're going to do is kind of put a wash over it, and you're going to see all that texture and depth come through, um, from my pre-prep of this. Um, so in my notes, I've kind of written that I want some dark edges. So after we finish the flag, I'm going to come around with a dry brush, and I'm going to show you that, how to get some dark edging along. We're going to do all of our painting with palette knives today. We may use brushes for some little accents, I'm not sure yet. Um, obviously it's going to be a textured background. We're going to paint it dark first, and then for the stars, um, and just for, um, added interest to it, we're going to be doing some splatter paint. So those are some of the techniques that you're going to be learning today while I do this with you. Peggy said donuts and the flag, now that's all American. Very true, very true. Um, so obviously palette knives we're going to use today, and then I'm using heavy-bodied acrylic. Do not feel like you need to go out and buy all of this. You don't have to. Um, I'm just going to show you another way that you can do this. If you've only got craft paints at home and you want that thicker texture, you can use palette knives with just craft paint, even without adding anything to it, just to create the texture and the look. But if you want to be a little thicker and, and, you know, come off your canvas a little bit more, be more what they call impasto style with that thick, heavy paint, You can add medium to your craft paints. So it's just going to look like this. I'm going to show you just two different brands because it doesn't matter what brand you get. These are both gloss. So this is a gloss gel. This is a gloss super heavy gel. So this is even thicker, but you can also buy them in matte finishes as well. So depending on whether you want a gloss finish or matte finish, But you can add— it's called gel medium. Most of the time it just says gel on there though. Okay, so gel medium, and you can get it from any store. You can get it in my Amazon store as well. So if you have— I'm just going to show you really quick. Let's see which one of these I have open. Okay, this one's open. If you— let's just use my white craft paint. Okay, so I've got the Americana White. And I'm just going to go ahead and squirt some on my palette. Now you can see by this, I want you to look, that's thin and it runs, right? Nothing wrong with that. I'm just showing you the consistency of it. But let's say we don't want it to be runny and thin, we want it to be thick. So I'm just going to take what's on this lid here, use this up, and you're just going to scoop up your gel medium and you're going to put it right on top of your paint and you're going to mix them together. Now the important thing to remember about this, and I have a whole blog on the difference between gel medium and modeling paste, gel medium, whether it be matte or gloss, does not change the the color of your paint. Okay, so when you add this, when you add gel medium to any craft paint color you have, it is not going to affect the color of your paint at all. It is just going to make it thicker. If you added modeling paste, which is what I use to create this texture here, it would change the color. It adds white to your paint. Okay, so see the difference in that now? And you could even add more if you wanted it thicker, but that paint is not moving, is not going anywhere because we've added gel medium. Okay, so that's what you would do if you don't want to buy heavy-bodied acrylics but you still want that look and style. You can buy gel medium and add it to any of your craft paint. So So let me know if that's a helpful tip, if you, um, already knew that, or if that was new to you and you're happy to learn. Good morning, Sally. Oh, Carol, that's a good idea. She said, this inspires me to do a Canadian flag. The maple leaf would be a challenge. So what I would do, Carol, is just get, um, like a silhouette of a maple leaf and trace it on there so you have an outline. So Mary, you asked while I was talking about that, will it lighten the colors of the acrylic? So no, modeling paste will not, um, and modeling— or what did I say? Gel medium will not, and modeling paste will. Yes, um, Deb, let me pull up Deb said, did you do the lines on the modeling paste before it dried with the palette? Are you talking about the horizontal lines? I just sketched those on really quick with a pen after it was completely dry. Now all those rough lines that you see up there, I did that with a palette knife. Drying time for gel medium— gel medium does extend the extend the drying time so it stays wetter longer, but not by like a ton. Susan said, what is the longevity of craft paint acrylics and the gloss? I'm not sure what you mean by longevity of it. It's not going to change once you put it on your canvas. Awesome, good. I'm glad that was a good tip for you guys. Sally said, I'm loving the heavier paints. It's easier to load up on my brush. It is. They're just fun. It's just fun to change things up and work with different mediums. Okay, perfect. So that is what you would do if you don't want to go out and buy heavy-bodied acrylic. So I just have obviously a sampling of some reds and blues here as well as white. I did forget to grab grab my black. Hang on just a second. I don't know how much black I'll actually use. I may just use my craft— my DecoArt black for any of the dry brushing and stuff. I don't have to have thick-bodied acrylic for that. Um, so I don't know if I'm going to use all of these colors. This is what I'm gonna start with, but I have the phthalo cyanine blue, titanium white, cadmium Red Deep, Ultramarine, and then this Pyrrole Red. Um, and then just for fun, I was gonna possibly add in a little bit of Fluorescent as like a highlight. We'll see, because I thought about doing the same thing with a blue, maybe getting like a brighter teal or blue. It's just some fun highlight and contrast to make it a little bit different and not so traditional. Um, so I'll let you know as I use those colors and, and we play with it and figure it out. And I'm going to go ahead and just start getting some on my palette, and I'll probably even add a little bit of black to my blue. We'll see, it might be dark enough for me, but usually I like to add a little bit more. I'm going to pull this over here so you guys can see everything I'm doing. Let's do the cadmium. So if you haven't painted with me before, I usually like to have a variety of colors. I don't like to just paint straight from the bottle onto the canvas. I usually like to color mix a little bit and just play with things and, and see what happens. So that's kind of going to be what we do today. I'm going to go ahead and grab another blue that I'm thinking about adding. I think possibly one of these, either the light blue permanent or the turquoise. I think I'm going to put a little bit of turquoise on here, and we're just going to see what happens. So I'm going to go ahead and put that in my cup for now. I'm going to set this aside because this was just for me playing. I knew I was going to paint over this. So I'm just going to do a quick, um, base and cover my canvas with some black paint. Oh, this one needs to be shaken up. Let me grab the one I know that is already ready. So that fluorescent one that I added in, how many of you did the Summer Vibes workshop with me. We introduced some fluorescents in that workshop, and, um, I just love them now. And so that's what made me think maybe I want to add it in. If you did not— I have good news, you guys are going to be so excited— if you did not get to complete the Summer Vibes workshop, or maybe you didn't even get signed up for it the first time, We have decided to extend it for summer. We had so many requests, so many emails and questions on our social asking if we could still extend it. I was only going to do it for that last week of May, but we decided to extend it all summer. So I'm going to have Lynn drop the link in the comments. So if you missed out on Summer Vibes, you can still access it. What I love about The way that we're able to do the replays is it— I created a playlist for you. So when you sign up, you're going to get an email with the full supply list, all the templates for the paintings, as well as a playlist with all 6 videos from that week. So it's going to be super easy for you to access and go back to to. So we hope you guys are excited about that. We are excited to extend that offer for you because we had so much fun that week that I didn't want to deprive you guys of it this summer. There's such fun summer paintings. I'll show them to you here in just a second. If I forget, remind me. So do you guys see this cool texture? That is by prepping the canvas with modeling paste before and scraping all that on. So this painting is not just going to be a smooth painting, it's going to have this really neat texture with it. Melissa says Summer Vibes was so fun. Laura loved the fluorescents in the Summer Vibes series. It was seriously so much fun just to see how much they change, um, change the painting, how bright they are. Um, Deb, you're asking to post, um, the number to text for lives. Lynn, can you throw that up on— Lynn's hanging out with me today. She's another one of my team members helping me in the comments here. So if you don't want to miss when I go live on the Social Easel page, this is free for the public, um, just on our page. You can text live to that number that's on the screen. We'll leave that up for just a second and it will notify you about 5 minutes before I go live on the page. We have been trying to do Wednesdays at noon. I tried to yesterday, as many of you know, and there was some kind of glitch with my phone and the streaming service and it just was a black screen. Screen. It would not let me connect no matter what. So we are doing it on Thursday. But if I am in town— we're traveling a lot this summer— but if I'm in town on Wednesdays at noon, that's Central Standard Time, I'll be live with you guys this summer. So I'm gonna even just grab a little bit of water. It's just going to kind of push that into our grooves. And if you're wondering why I'm doing this, why am I painting it black? It looks really cool to see the black come through our other colors, and I can even leave some space in between my stripes on the flag, and it's just a— it's a cool accent. So I'm just getting a little bit of water. It's going to push that in to some of those deeper grooves. And I'm using my filbert brush out of my brush set to do this. It's just a great big brush for when you've got large areas you've got to fill in. Let me go ahead and close this gloss gel while I'm not using it. Oh, Amber said many people had trouble yesterday. Well, good, so it wasn't just me. I didn't know what— that has never happened before. It was so weird. And if you guys are looking for other, like, Fourth of July or patriotic painting projects to work on, don't forget you can visit my blog at thesocialeasel.com. Um, or again, our YouTube channel to see past ones from the past few years. We've got lots of cute ones. Um, we have a mason jar filled with flowers and an American flag. We've got a little patriotic gnome, so all kinds of styles. A mixed media rustic American flag. And we're getting ready to put a blog together that is going to highlight all of those in one blog. So I'm going to paint my edges black as well because I know I'm going to have that edging that I talked about at the beginning of the video. I'm just going to put a quick base coat on now. I know I'm going to come back and add more later. Um, what size canvas am I using? I— let me measure it really quick because I think, I think it's a 12 by 18, but I can't remember. 12 by 16. 12 by 16, which is kind of a random size I don't use a lot, but I had it left over because I repainted this. So I was going into my stockpile of old canvases. And I thought that'll be perfect for a flag. Now, if you plan on framing this, you don't even need to paint the sides. You can always just go buy an open back frame from your craft store and just put your canvas inside of it and hang it on the wall. And you don't even have to paint your edges. Or maybe you want to do a design on your sides if you aren't going to frame it. There's lots of different ways you can do that with your art. No right or wrong. Awesome. Thank you, Lynn. She put a link up there for you. It'll take you to those patriotic ones. Susan is asking what size— what size canvas do you recommend? I know a true canvas would not be great. Well, this is a canvas. Mine is 12 by 16. What would be best for outdoors on the porch? You can put canvas outside. You would just want to seal it with a protectant if it's going to be outside instead of inside. But this project would also be great on a wood pallet, like a pallet board, or just a wood surface as well. Yes, Peggy said, um, when you get a chance, will you do a video Showing us your studio layout and paints. I will. It is not all the way done yet. We are a constant work in progress, but I can show you later, not in this video, but in another one, kind of where we're at in our progress. I'm really hoping to get some things done this summer. Hey Debbie, that was done with modeling paste prior. And so when you work with modeling paste to create that texture on the background, she was asking how, how I got that look. You want to— when you add modeling paste with your palette knife, you want to make sure that you give it at least 24 hours to dry before you come back and paint. Vicki, that is— if you are in Tribe, which I'm assuming you are because you're asking about the bear painting we did, my husband makes those palettes for me. So you can't find those in the store, but we do have the instructions inside Tribe, um, that show you how. Trying to get this camera straight here. Okay, we're good there. Let's grab— I'm gonna start with— actually, I may start with this one I have in here. I'm just gonna wipe the extra white off of that. So you can see how it's drying right now. Anywhere that it is matte and it's not shiny, that's all dry. Anywhere it's shiny, it's still wet. But I'm going to go ahead and do our blue corner because that won't matter. If that mixes with black. I'm already liking it. Or we may just let a little black show through. This is gonna look so cool. And you're gonna notice I am not being super nitpicky with this. This is not about precision palette knife, um, art. It is a messy, looser style, so it's definitely more of an abstract. See, there's a little bit of white on there. I actually like that. That's what we'll call a happy little accident here. So that's about where I had it sketched out. I don't even think I'm gonna make really crisp, clear edges with that. I am gonna grab a little bit of white and throw that in because I liked the way that looked. Can you hear those scrapes? Who else loves listening to the scrapes of the palette knife? And then the other thing I want to remind you when you're working with palette knife— I'm doing wet on wet right now, right? So these colors are blending together. So you see that little bit of white blended with the blue there. If we wait for it to dry and scrape white over it, we're going to get a completely different look. Look. So keep that in mind when you're playing with palette knife. You can create different textures and looks based on whether you're doing wet on wet or wet on dry. But I definitely am really liking that white added in there. I know, I love them too. Okay, so I'm going to leave that in the water. I'm going to use my longer, skinnier brush out of my palette knife set. Again, if you joined us late, my palette knife set, you get a 5-piece set. It's normally $24.99. They are on sale for $15 this month only. So we have a special sale on our palette knife set. You get all 5 for only $15, and Lynn can throw that link back up for you. So I'm going to start with my cadmium deep. Red. And when you're working with a palette knife, you want to put it on the backside. Okay, so this is the front. You want to put it on the backside. And I think of it like icing a cake. Gonna move my stuff out of the way because I have a big long stroke that I'm doing here when I work with it and I don't want to bump into something. And just going back and forth. Now if you want to, you can measure out and kind of plan this out. I'm probably just going to wing it. We're gonna see what happens. But I am telling you, I really am liking my idea to put the black down first. I think that's gonna be really cool showing through. Oh, awesome! I love that. Chantel said, I have never done palette knife. Last night I wanted to practice using it and it was awesome. It was so relaxing. I agree. Linda, we do not have a sale on the brush set right now, just the palette knife set for this month. Oh, that was— she had a typo on there. It said brushes. She meant to put palette knives. Palette knives are on sale for $15 this month. Okay, so that is just the cadmium red. While we're here, I just want to stop for just a minute and throw in some of these other colors because I want to see what they look like. That's not even the fluorescent, and can you see how bright that looks? That's cool. But let's take a little fluorescent and throw it in. So scoop up on the back. You guys see that? Is that focusing? Sometimes I have to— there we go. Now if you don't want it, if you want just a long line or like a section of fluorescent that stands out on its own, you're not going to put as much pressure down. So I'm just going to come in and just lightly drag it. And sometimes you'll see me flip it over. I'm just getting the excess that goes on the front and pulling it over on the back side. Oh, thank you, Jackie. Thank you, that's such a good compliment. Um, she said she's been painting with me since last year using whatever brushes. I recently purchased your brushes and wow, what a difference. Thank you. Yeah, so I designed that brush set, um, with all the brushes that I love using, um, and the type of brush that I like, which is synthetic bristles. But I also just love them. So it's a 15-piece brush set. You can get that in the store if you're shopping for that while you're grabbing your palette knives. And even not on sale, it is a great deal because it is $40 for the 15-piece brush set. So you're getting 15 paintbrushes for $40. And the other benefit is that's what I use whenever I paint. So if you're always curious what brush to use, you don't have to be curious anymore because I use my brush set when I'm teaching, so you know exactly what I'm using. So I'm making this a little skinny right now. I'm going to make it wider, but I think I just want to kind of finish my layout here. Again, I'm not going to be worrying about whether my lines are perfectly straight or even. We're just going to kind of play with it. Also very fun to do things fast if you don't normally, if you tend to be really precise and slow and meticulous. Jump in with the palette knife and it'll help break you of that and get you a little looser. And I think of it like this: it's not going to be even. We don't care if it's even. Think about a wave, a flag waving in the wind. Let our lines be a little wavy. Quintalyn said, I'm going to buy the brush set if it's the last thing I do. They're in my cart, but I have to remember my password. So I'm going to bring that up really quick because a lot of people get confused. And if you've bought things with me, if you're in one of my memberships, so if you've bought tutorials like one-off lessons like workshops, or if you're in Painting of the Month Club or Tribe, that is for our website, that is for our membership portal. We have a completely different website for the actual store, so you would create a new password. It's not the same as your login for your membership or your tutorials. And if you forget it, there's just a link there that you can reset it, so no worries if you forgot. Going in and adding some of the brighter back in. And what I'm doing right now doesn't mean that's what it's going to end up like. Okay, these are just steps. I can come back, I can add more. We'll make those decisions when we get to that point. What do you guys think so far? Are you liking Yes, the discount comes off when you add it to your cart. It's going to look like it's regular price when you're in the store, and when you add it to your shopping cart, it'll take the discount off and be $15 for the set. Carol, my products are only through my site. They're not on Amazon, so you would go to shopsocieleasel.com The only things I have on Amazon are like products I buy like from there. Anything that is mine that I custom designed is on my, my personal shopping website. So we have white obviously, but I'm thinking I might want to add a little bit of cream. Like ivory in there too. This one is called Milky White, and it's just kind of a buttermilk off-white cream type color. So I'm going to put some of that over here. With my white. And I'm using— I was just showing earlier at the beginning of the video how you could make your craft paints thicker, but I'm just going to go ahead and use my thick-bodied white acrylic as well. Um, Carolyn, there's no discount code. It will take the discount off when you add it to your shopping cart. Okay, let's go in with our white here, and I can mix all that together. That's not going to hurt anything for those to be mixed together. I'm even going to let there be a little bit of blue peeking through in some areas of our white because I like color. Now, if you want it nice and clean and you don't want any of your colors mixing in, you're going to want to let it dry and really avoid that red. It's obviously still wet. I don't mind the mixture. And of course, you can let the first layer dry and come back and add more paint too. I'm really liking how the black shows through. I'm using a lot of paint on this one. I love it. I feel like it's been a while since I've played with a palette knife. You forget how much you love it sometimes. Let's put a little touch of blue in there just because. Mm-hmm. I like that. Isn't it fun to not be perfect? It's so much more fun. I kind of like that scrape of that red in there. So if you're really wanting to venture out of your comfort zone, I would encourage you to do this project. Because if you are a perfectionist, you're going to struggle with this at first, but you just have to trust it and keep, keep going, and then you'll learn to fall in love with the messiness of it. And not every stripe has to be the same. That would also be boring if every stripe was the same. I'm definitely making a mess though. That's how you know you've had a good day— lots of paper towels. Don't you think it's more interesting to have a mixture of colors instead just perfect colors right out of the tube? I think this would be really cool as a gigantic big painting as well. Yes, Mary, I love that America is a mixture of people. I love it. Just using up all that white, getting ready to reload, reload my palette. Oh, I love that blue coming through under that stripe. Yeah, the blue and the white is just doing it for me. I love it. Yes, a big— this would be, you know, we have Father's Day coming up too, and I mean, most, most guys here, they're pretty, uh, pretty patriotic, I think. A husband, a son, someone who serves in the military would love to receive something like this as a gift, especially like a big one they can hang on their wall. It's a great Father's Day idea. You know, a lot of what we paint tends to be a little more feminine and girly, but I'm thinking some guys are going to dig this. Man, I just love that blue in there. Don't you love it when you have an idea in your head and then you start doing it and it actually turns out the way that you want? Because, um, in case you missed it at the beginning, I have not done this before. I'm doing it for the first time live with you guys. It was just an idea I had in my head, and I'm loving how it's coming together. It's looking so cool. Let's take a little bit of this up here, my leftover. So I'm always holding it, you know, face up, and you can see like how I hold it on the sides. I'm not gripping it tight and dragging it. It's just a loose, loose movement. I'm liking that. That's fun. That wasn't in my plan, but I'm digging it. See, sometimes it all just comes to you while you're creating. Can't plan out all the things that happen. Don said, I'm a gripper. Loosen up, roll your shoulders back, shake it off. Um, Lisa, let me throw your question up here. Lisa said, hey Christie, can you also create this on, say, like a piece of wood? How would you get the texture on the wood? Yes, you can definitely do it on a piece of wood. Um, depending on the wood that you choose, it's already going to have texture. It's going to have those grooves, um, from the lumber itself. So you may not need to add more texture to it, but you can, you can put modeling paste on wood the same way that you do on canvas. So I'm going to go back with some red here. Oh, that made a pretty color. I need more red. Yeah, what do you guys think of the color choices? I'm liking it. Oh, I haven't even added any of the ultramarine blue yet, and I love that color too. So now is where I'm kind of going back in, making some choices, adding some paint in. I love the messy look of it though. That groove right there is constantly— it's like bumping me, so we're going to have a little bit of wave in our flag there. What do you guys think of this? Did you like the blue up here? I'm loving it. Oh yes, Susan, we are adding gold, my friend. There will definitely be gold in this. I think I'm going to challenge myself to use every bit of paint I have on my palette right now. I love the warmth of this milky white. Do you see that separation from the regular white? I love that. You definitely— if you're putting as much paint on your palette as I am on mine, you are definitely going to want to let it dry flat. You can also turn— like, if you want some skinnier lines or elements in it— I didn't mean to get black on that, but we'll let it be. You can use the side of your palette knife too and add skinny lines in. Let's get some of this ultramarine that we haven't used yet. I want you guys to see this texture. Look at that. What do you guys think about— oh, our internet is doing something a little glitchy there. Um, what do you guys think about me making an art print of this? Would any of you be interested in that? I think this would be a very cool art print as well. I am covered in paint and I love it. Okay, I'm going to take this ultramarine— yes, it's mixed with a bunch of whatever's on my palette. We're going to throw some of that color in here too. So you see how light I'm holding that and just quickly kind of pulling across. I love all the colors up here. Look at this. So that's the kind of stuff like you can't plan, it just happens when you're playing with a palette knife. And you may not even realize you have— look at all those different colors on the back. It's fun. Zoom in. Look, I love it. Just tap it down, add some of that in random. Yes to the art print. Yeah, we can do, um, 8 by 10 and 5 by 7 right now. Cheryl, it would be a cool garden flag. Let me talk to Stacy about that. That might be something we can do. Um, Sherry said, what color was the blue on the base? On the upper, it was this darker phthalo blue. Um, Vicki said, what do you mean by art print? I mean, like, I would print— like, you could buy an original print of mine. So this is my original print painting. I would turn it into like an art print like you would buy in a store. Except it would be my painting. Christine said, how would I scan my own to make an art print? That is a whole nother lesson. You don't even have to have a scanner. You can take a really good quality photo to make an art print as well. Gosh, I'm really liking how this looks. I don't know how much more I want to do to it, but you know, originally I was going to pull some black around the edges, and I kind of just like how it is, um, right now. Um, okay, gold. I thought I had my gold over here. Hold, please. I'll be right back. So my favorite gold is 24-karat gold by DecoArt. It's just super, super shiny. Extreme Sheen. It is extreme. I love it. I grabbed these as well. I just am gonna put them on my paper to see what I think, but I thought about adding a little bit of sparkle to it. That's a maybe. This one is Magic Gold. I haven't used it before, but I want to see what it looks like once it dries, because usually I don't care for, um, colored glitter, but this one might work. We're going to start with just the metallic. Um, Gwendolyn said, would the art print have the texture to the touch? No. So an art print is literally like photo archival paper printed, so it will be smooth. But depending on how you take your photo, you will still feel like it has that texture even though it doesn't feel like it has that texture, if that makes sense. Um, okay, so for my gold, I'm just gonna grab— because I want to splatter the gold, so I'm going to shake this up really good. So I bought this fun splatter tool. Um, I believe this is in my Amazon store. This is a Liquitex, um, Liquitex Freestyle Flat is what it says, but these are like plastic hard bristles. They're super fun. Um, so I could try it just like this. This is, this is going to be messy, by the way, so I would like move your stuff out of the way. I'm really good at splattering everything I own, including my clothes and my phone and my computer. Um, but I'm just going to do a little. So you could do it on here. Nope. Not enough water. Definitely needs to be watered down. I was thinking that was thin enough that it would work, but it was not. So that's kind of what's going to happen if you do this. Okay, you can also just like load a brush up Again, plenty of water. It doesn't matter that your water is dirty. It's gonna mix into the paint. But you want it nice and watery when you're doing splatters. Yes, you can use a toothbrush as well. There's lots of different ways you can make splatters. So I'm getting this nice and watery, and then I'm gonna tap it. I feel like I have more control with the tapping of the brush than I do the splatter. I'm gonna do the tapping. Hey, we did this in just under an hour because I did a lot of explanation at the beginning. That's pretty good. Ready for the splatter? I'm gonna move you in a little bit closer to see if you can see. So I think I'm going to add a little bit of white splatter up in the blue to kind of represent the stars. Shaking off my extra All right, so for that, I'm just going to do it on here. I'm just going to get a little bit of white craft paint because you want it thin. Um, Gwendolyn said, I have an art print that looks like gel medium added afterwards. So yeah, so what some people do— I have some prints like that too. It's not the print itself. They went back with a finish, like a varnish, and added the brush strokes and that look to it. So if you wanted that, you could order an art print and then go over it with a varnish to create that, like, brush-like texture. Okay. I think we're done. What do you guys think? I think I quite like it. I was going to do the dry brush on the sides, but I don't think I'm going to, you guys. I think I'm going to leave it just like it is. I'm very happy with how it turned out. I hope you guys enjoyed it. Um, if you did not get to do, um, two, two things. If you did not get to do the Summer Vibes with us, we have it where you can still sign up. I'm going to show you what those Summer Vibes paintings are really quick. I'm going to go grab them off my wall. Um, and then one more thing. So these are the Summer Vibes paintings. We have the vibrant palms. These were all done with paintbrush. The tropical flowers and our abstract dragonfly. We had so much fun in this workshop. It's 3 full tutorials for each one of those, and then it's 3 kind of interview style Lives with me, some tribe sisters, my team. I give you a behind the scenes of what it's like to be a part of our membership. But so we had such a high demand for people who missed out on it or didn't get the paintings done that we've extended it for summer. So if you missed out on the Summer Vibes workshop and you still want to do it, you can. We opened it back up. I will have Lynn throw that link up in the comments. And then last but not least, if you don't have palette knives and you want my set, they are on sale in my store. They're normally $24.99 and they are marked down to only $15 this month only. So be sure to grab them while they're on sale. And then, um, I will be back, um, next Wednesday, um, to reveal our next painting for Painting of the Month Club, and we will do a fun little tutorial, um, with that as well. So, um, such a fun day painting today. Thank you guys for coming and hanging out with me, and I will see you soon. Bye!










