Learn How to Shade Trees with Christie
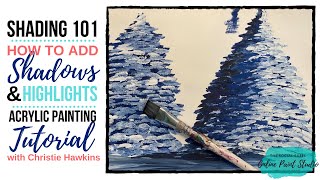
Christie Renee Hawkins teaches how to shade trees in acrylic by identifying a light source, then layering shadows and highlights with a stenciling technique using vertical and horizontal strokes. She uses two blues and white, loads the brush heavy, and staggeres strokes for a natural look.
Chapters
This is Christie with The Social Easel, and if it's the first time that you're joining me, I teach women how to paint with acrylic paint. So today I wanted to hop on and show you guys just a short little lesson on shading. So one of the common questions that I get a lot is asking how to create that, how to do shading, highlights, shadows, knowing where the light source is coming from. So I'm going to walk you through that today and we're going to use trees as our example. So I'm going to change my post here really quick. So when you guys comment, you will get a message from me that's going to have anything I talk about in the video today. It's going to have the links for you. So if you want to learn more about painting, you're going to get a message from me and you can just click on those links in that message to, to get that information. So we've got that up and going. So what I want to show you first today— so I taught this full painting in my Tribe membership last week, and it was such a good lesson that I wanted to take a little piece of it and share it with you guys. Because it will help turn— and I posted a picture about it too and talked to you guys about it— but it'll help turn a very basic tree into a tree that has a little bit more dimension. So I'm going to show that to you. So first I want to show you the two different paintings. If you missed my Facebook post about this, okay, so Same painting, sort of. I decided to change it up a little bit for my tribe when I painted it. So right off the bat, can you tell the difference between this one and this one in the trees? So I want you to just focus on these trees right here and tell me if you see a difference or not. I'm betting you will. But this is gonna be what we talk about today. So that's gonna be our quick little lesson. I'm gonna put this over here, and I will be flipping you guys around in just a little bit so you can see a little bit better. Yeah, it's a good little lesson, and it's not always necessary. I want to say that first of all. Paintings can be whatever you want them to be. In whatever style you want them to be. I don't necessarily shade and add highlights to everything that I do. A lot of them, like for example, the Valentine's gnome, I didn't add shading and highlights on here. So I taught this today in the membership. I'm going to hold this up really quick for you. So if you want to paint this little guy, the link is up You can join us next Thursday night and we're gonna paint this live in a group and it's only $20. It was so fun to teach it in my group today and next week I'm teaching it to you guys and you have the opportunity to paint it for only $20. So the regular price of my online tutorials is $37 and you're getting to do it for only $20. So if you can't be with us live next week when I teach it, it'll be in a private Facebook group. You get access to it 24/7 after that, so you don't have to necessarily plan your calendar around my live if you want to do that painting. So I've just got a couple colors on my palette. I'm just going to do two shades of blue and white, and that's all we're using for these trees. And I'll show you the difference again once I flip you around. Make sure I have the volume down on here, so I don't hear myself when I pull it up. All right, so I'm gonna grab you. I'm gonna move you over here. We're gonna talk about shading today— shadows, highlights, all that good stuff. I'm not moving that palette again. I got pink paint all over myself a second ago because I didn't realize I had set it in some. Okay, so these are the trees that I'm going to show you. We're just going to do one tree. I'm going to do one tree with shading on it, and I'm gonna do another tree without. So this is without shading, just me quickly going over, adding some snow to the tree. And this is with shading, so you can kind of see the difference. What do you guys think of that? Can you see that it's pretty noticeable? Maybe one looks a little bit more realistic than the other. Let me know what you think. So I'm gonna do them side by side. This is just like a 3/4-inch flat brush. This is from one of my favorite art sets— or art sets— paintbrush sets. It's called Addie's Art Set in my Amazon store. They're great, great brushes. If you missed my Facebook Live last week, I talked specifically about what supplies you need and what types of brushes you need, so jump back over and watch that video. If you missed it. And you can also join our free Facebook groups. So let's start. We're just going to kind of do this two at a time. Okay, so I've got two lines. If you've never watched me do trees before, this is just one of my go-to easy trees to start practicing with. And I've just got my brush loaded up with plenty of paint. I'm gonna hold that up so you guys can see. One of the most common mistakes that people make with paint is they don't get enough paint in their brush, and so then they wonder why their brush strokes don't look like my brush strokes. Okay, so number 1 tip: make sure you got plenty of paint in there. We are going to start— we're just making like evergreen trees today. I'm going to start just dabbing. Think of this like stenciling. I'm just using the corner and I'm kind of making it a little bit pointed at top, at the top, and I'm holding my brush vertically, okay? So it's parallel with this line. As I start going down, and I want my tree to come out like a triangle, right? I'm going to start rotating my brush and then staggering it, okay? So Again, think of it like stenciling. I'm just dabbing. These are not actual brush strokes. Okay, reloading my brush, adding more in here. And you can decide how thick or how big you want your tree. Whatever blue you have handy is just fine, or green. I'm really like— I love doing blue winter trees. So can you guys see close enough what I'm doing here? I'm just kind of pouncing my brush. I'm covering up that line. That line that I did in the middle is just a reference point for me, for you to know that's kind of where the middle of your tree is. Now I keep my lines straight. You could curve— they don't look as realistic. I see this a lot, people will do this. I'm going to cover this up later, and it just doesn't look as realistic as holding your brush a different way, changing the direction that you're making your brush strokes. So hopefully that makes sense. I'm keeping it horizontal. You can push down lightly and get skinny lines like this. You can push down a little bit harder and get bigger brushstrokes. So stagger, have, have some differences in there. Don't make it all the same. This is just a big old tree here. What I mean by rotating my brush is I'm holding it vertically right now, straight up and down, and I'm rotating it to where it's horizontal. So vertical brush strokes and then rotating it and making horizontal. So I'm dabbing lightly and then rotating it. See how I'm turning my brush? That's what I mean by rotating. So I'm gonna jump over here. We're gonna repeat the process. I'm gonna cover up my— this is my do not make them like this tree. I'm gonna cover that up. I'll hold it this way vertically, and I'm kind of dabbing the corner there. Okay, like that, and then I'm rotating it. So that's what I mean, like holding it vertically and rotating it. So hopefully that clarifies a little bit. But I'm going to put these side by side. The, the base of them is exactly the same. And I could make this one maybe angled down a little bit more. The middle doesn't matter so much. So I'm just kind of pouncing away here. So we've got two pretty full trees here. Okay, so the next thing I did, and again I did this for both trees, we're going to come in— I left the blue in my brush, and now I'm going to come back over top And I'm gonna start adding the white in. Now my blue is still wet underneath right now, and that's fine. I actually kind of like it to be because you get those mid-tone blues in between. So you can kind of start seeing how right away You get some snowy trees here, and they're super fun and easy. So I'm going to kind of start out with both of these being pretty similar. And then I'm gonna show you— then I'm gonna go back with this one and focus on the shading. Okay, so I want to leave some dark areas. I want some of this light blue in between here, and then I want some brighter white. So just a fun, quick, easy tree, right? Diana, I use craft paints. So my favorite brand is DecoArt, and people have asked me what finish. They're just the regular ones. They don't have any special finish. They don't say satin or matte or anything on them. So, but you can get just, just regular craft paint. You can get it at Walmart, Hobby Lobby, Amazon. Wherever you, wherever you shop, and you can just pick your favorite colors. So I'm going to do this one a little bit faster, but I want you to notice— do you guys see how I'm kind of staggering? I don't want all my brushstrokes to line up exactly the same, and I do want you to pay attention to the speed that I'm painting as well. Because, um, so for those of you that are new and don't know, I've been teaching local paint classes for the last 6 years. And so when I'm going around and helping students in class and they're frustrated and they can't figure out why it doesn't look like mine, I'm moving much faster, which means my brush strokes are more sporadic. They're not overly planned out, right? So what I see when I look around is I come around and people are doing it really slow, like this, and it looks like dash marks, and every brush stroke is identical to the one behind it and above it. I hope that makes sense. So you want to stagger. You want to push down harder in some areas, lighter in others. Some are going to overlap, some are not. All right, so we've got pretty identical looking trees right now, right? I'm gonna rinse this off. Which one do you like the most so I mean, they're pretty similar. I'm gonna pick one and I'm gonna add shading to it, and I'm gonna leave the other one the way that it is. So again, if you're looking back at my original original, this is pretty much what they look like, and it's still pretty. It's still a pretty painting. They still look like trees. But then you see it with a little bit of shading, and and it looks completely different. So that's what I'm going to show you guys. I'm gonna leave this one. I like this one a little bit better. I'm gonna make this one the one that I'm gonna edit and change. Okay, so Real quick, let's just throw some snow underneath here because I might want to throw some shadows in too. Let me get a little bit. So all I'm doing for the snow, I've just grabbed a little bit of blue and then I'm gonna load up my white. See how much white I have there? Lots of paint. It should glide super smooth and easy for you. Just so our trees aren't floating in the air. And then this is the one I'm going to leave, but I'm just going to pull a couple brush strokes back over top of that snow so it's on top. Okay, so I'm gonna get— this is kind of like a dark navy color, and I'm not necessarily going to push down all the way with my brush, but my light source— okay, so we talk about light sources. Decide where your light is coming from in your painting, whether you are doing a still life with a vase of flowers, whether you're doing a landscape, the light's coming from somewhere, right? if it was a sunrise, it'd be coming from right here. Mine is just going to be midday sun. I'm going to say my sun is over here in this corner. So the light is shining this way. So the light is going to hit this side of the tree, but not the left side as much. Okay, does that make sense? And then we'll kind of have some middle ground area. Same thing with your shadows. Since the left side is going to be where the sun doesn't hit, we want this to be darker. And we're going to have some shadows kind of cast out underneath the tree here. So I'm going to start dark first, and the thing I like about this is because you can go back and keep editing this as you go. I'm going to start with a little bit, and I'm just adding darker blue along my edges here. And again, it doesn't have to be solid. We can still have some differences in light there. We don't want it to just be one blob. If you guys are having fun learning with me, if you don't mind sharing the love with your friends, you can just hit that button right below the video and hit share. I would greatly appreciate it. So now I've got a little bit lighter blue. It's my mid-tone. So I have a dark blue and then just kind of like a middle-of-the-road blue. That I'm starting to go around with. This tree is really, really big. All right, so got that. Now I'm gonna go into my white, and I'm mainly gonna focus it on the right side of my tree. A little bit hard to see because I'm painting on a white background. I don't know how well you can see that. Can't you see the difference already? Hi. Hi. So what do you guys think? Can see the difference pretty good, right? And then we can take it a step further by going underneath here and adding some shadows in. I'm gonna get a little bit darker, so I'm gonna go back to my original to show you guys So see how that— it was able to help create that edge right here. So I left this kind of like mid-tone because I didn't want it super bright white right here, but I left it kind of that mid-tone blue and then did the dark right next to it. And if you want like a super dark blue, you can even add a little bit of black to it. So I'm going to show you just so you can see. And I mean a little. You need like a dot. So I've got my black and blue here, and I'm just gonna mix them together, and I've got like a really, really dark navy. So let's just play with it, see if we can tell maybe even a little bit more on this far side, and then I'm going to use it for my shadows as well. It's just very, very slight. And then I'm just going to pull some of this snow back out over top of that again and go back to my white. Bit of my tree back over here. And I can always get carried away with white and add some more in there, but hopefully you guys can see the difference in that. If you want to learn how to paint this adorable little guy, this is going to be a pop-up paint party we're doing next Thursday night at 6 PM live. In a private Facebook group, $20, and then you have full access to this. So that means 24/7 access after the live. So if you can't join me live, it's fine. If you teach paint parties, you have the rights to teach it at your local paint parties. Um, and it also includes the color supply list and the template. So everything you need for this painting, along with obviously step-by-step instructions from me. So it's only $20. It only happens one time. It's next Thursday. So even if that date doesn't work for you, you can sign up for it and get access to that tutorial. So that's it. Just comment with what you want. You'll get a message from me, and I'll be back on either Thursday or Friday this week with another Facebook Live for you guys. Have a good night. Bye.










