Learn the Basics in Blending with Christie
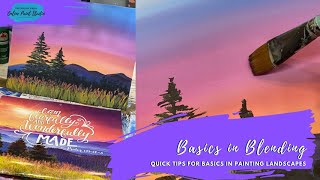
Christie Renee Hawkins teaches acrylic blending for landscape paintings, showing how to load a brush with paint, blend sky gradients, and layer foreground, midground, and background. She emphasizes working fast because acrylic dries quickly and keeping your brush wet to avoid muddy colors.
Chapters
Hey guys, it's Christie with The Social Easel, and I'm gonna teach you some painting today. For those of you that are new to The Social Easel, I teach women acrylic painting each month, and we are gonna do a quick lesson in some blending and some landscapes today. So So landscapes are what I'm focusing on this month in my Inner Tribe, which is my membership. And so I thought I would jump over here and show you guys some quick tips on, um, techniques that you can use in your own landscapes. So I'm going to pull you up on my iPad really quick. So I'll show you what I just taught. I just got done teaching in my Inner Tribe. Um, This is the landscape that I taught them. I'm not sure if you can see the whole thing. This is one of my favorite paintings. I taught this at a local paint night years ago. I've taught it several times, but it's still one of my favorites. So that's what the ladies got to learn in the group today. Um, and I have some leftover paint, and instead of letting it go to waste, I thought I would jump on here with you. You don't get that full painting, unfortunately. That's only for the tribe members, but I am going to share some technique with— techniques with you that you can use in your own landscape paintings. And this is easy. This is like beginner, like if you've never picked up a paintbrush before, that's okay. So I'm going to start with a big flat. A large flat is your best friend for landscapes, blending, blending in general. I've got these brushes in my Amazon store, so I can put that link up for you guys. I'm not gonna use all these colors, but I had way too much— I put way too much blue on my palette for that painting because I didn't need that much in the sky. So we're gonna do a different kind of sky. I'm gonna show you a quick sky and a quick ground just to get you used to how much paint to have on your brush. You know, uh, how, how to blend out, kind of like, you know, the key of blending, like really getting blending down. Because once you get blending down, you can do a lot in your paintings. Let's grab this. This is like a fuchsia. I think I'm gonna do this little color palette here. We may add to it. All right, so large flat. When you are working with blending, you want to have a lot of paint in your brush. So even this right now, to most of you, may shock you how much paint I have in there, but that is the number one thing that I see people struggle with when they start painting with acrylic paint is they're like, you know, it's like we're scared of our paint and we feel like we have to ration it. Like when I'm teaching, I'll see people who haven't done it before and they'll do this and then they'll even like take some off and like that's how much they have in their brush. So you can see the difference, right? So I'm going to show you, I'm going to get a little bit of blue on here with this. So I've got a bunch of white and a little bit of blue on the end, but here's, here's why a lot of paint is important. That's all I can do. So I can't blend very much, right? Doesn't do much for me. I have a lot of paint in my brush. I can go back and forth. There's plenty of paint on my canvas. This is all wet. That's the key. You're able to keep blending. So see the difference in having a lot of paint in your brush? Versus not. Okay, so that is tip number 1: lots of paint. Tip number 2: when you are adding colors to your sky, whatever sky color you want— so I've just picked up a little bit more blue here, go on my edge, still with the back and forth, just horizontal brushstrokes back and forth. This is all blending. Nice smooth transition. You can't see where the lighter color stops and the darker color ends. It just transitions from one to the other. The reason I'm able to do that is because my paint is wet and I have plenty in my brush so I can go back and forth. Um, so let's add a little bit of pink to it. Let's make like a sunset sky. So what if we just did this? That doesn't look very pretty. It just looks like we have stripes in our sky. So we're going to keep blending it out. I'm going to grab a little bit of white with it too. Let's add some white and pink. So again, really loading that brush up. Now where these two meet, I'm going to keep going over top of them. Look how beautiful that is already. So you're blending those two colors together so you've got that nice transition. But you see how many times I'm going back and forth? And you want to work— you can't be slow with blending with acrylic paint. If you were painting with oils, yes, because oils take days to dry. Acrylic paint takes minutes to dry, so you want to make sure you have enough paint and You want to make sure you're blending fully and you want to make sure that you're moving quickly. But isn't that so pretty? I love that. Got a little dry paint glob here. So does that help you guys, just kind of seeing how much paint I have? Loading up again, just getting a little bit brighter pink. And you can always go back over and make it brighter if you want to. Just a really pretty transition. Um, so I'm gonna rinse this because I want to add a little bit like of like orange in here. And if I did that and I still had blue in my brush, then I would get a really murky like brown color, and I don't want that. Blue and orange are opposites on the color wheel, so if you mix them, you get a neutral, and we don't want that in a sunset. I'm gonna grab— this is— oh, you know what, I have some on my palette here. See if I have enough of this. Had a little orange left over from my painting. We'll get a little white and a little orange. I might have to grab some more, but we're gonna start with this. It's not very much. I'll just use this color since I already had it out. Let's grab a little bit more. Now this is darker than normally what I would do, but we're just gonna use what we have. So same thing. It's actually really pretty next to that hot pink. And you can lighten it up if you want to. I can pick up some white, add that in. The longer brush strokes you can make, the better, so you don't see where your brush starts and stops. And I am just using regular craft paint. So I get that question a lot. Any brand— DecoArt, Michaels, Apple Barrel from Walmart— doesn't matter. Any brand is fine, and you can interchange them. You don't have to use one brand for an entire painting. Let's do some yellow down at the very bottom here. But this is just a good exercise to practice blending, and then we can just turn this into— like, so right now, yep, we're just blending, nothing special, right? But I can turn it into a landscape. I'm gonna do, you know, like when shadows at night, when the sun's setting, the grass isn't going to look green anymore because it doesn't have the light reflecting off of it to look green. So we're gonna do a really dark blue ground here. So here's my trick for getting a nice smooth line in your landscapes. I'm right-handed, so I start on the left. Again, I had lots of paint in there. Let's get a little bit more, and I'm just pushing down and pulling across all the way. Nice smooth line. And again, I'm able to do that because I have enough paint in my brush. If I didn't, I would have run out before I could complete that line. We could even make this more black, like this is a silhouette painting. But notice how I just keep loading my brush back up and I keep moving and blending as I'm going. So we've got our foreground, and we've got our sky back there. Now we could, if we wanted to, maybe add like some trees along the horizon line, or you could do a mountain. Let's look. So I'm just grabbing this calendar here. This is just good inspiration for you guys, um, who struggle with like you don't know what to paint. Um, and I encourage you not to— I mean, if you're doing a lesson, yes, but to not just look at other artists' paintings and copy them, but like learn to make your own or look for other resources like photos so that you have a source of inspiration. So I mean, my color schemes are pretty similar to this, or they're similar to like this one. Let's flip over here so we could do something like that. So I could even change this up and add like some mountains back here. Shall we try that and see? All right, so again, I'm not trying to make this identical to this, okay? So this is kind of like what my reference is, but I'm using it as inspiration. So my sky is not exactly the same as this sky. But I can do something similar and I can play with it a little bit. So I switched to— I'm just using an angled brush. You don't have to use an angled brush. I like them just because you can get points with them. But so like, if you look at these mountains here, they're like different shades of blue. Maybe a little bit of like violet mixed in there. So let's do the same. I've already got blue on there. It's not super dark though. I'm going to— we'll just use this one. This is Purple Pizzazz, and I could always add black to the blue again like I did here. But we're just gonna play a little bit. So I love mixing colors too. Don't worry about— I get tons of questions about what color did you use, can I have a color list for that? Don't worry about having the exact colors. You pick your favorite colors and pick what you love and make it your own. You're not gonna mess up by picking a different shade of blue or pink or purple. Alright, so I've just got some, like, little peaks and valleys, right? We'll just start here because I'm probably gonna overlap this. Just kind of pull that down. Nothing too fancy or intricate. Just smooth that into my horizon line that I'd already created here. Maybe get— I'm gonna get a little bit of black. With that. It's a little bit darker on that one side than the other. Maybe a little bit more blue as it comes over here. These even on the calendar, they kind of start fading to like a white, like so there's a little bit of light off over here. So let's pick up a little bit of white and our purples and our blues. So that's one kind of layer of mountains, and then I could do another layer, just a little bit different shade. I'm gonna do some blue and white. You guys have too much reflection on here. How many of you are already in my free Facebook group? So I have a free group, which is where basically I will reshare these videos. They go into like the Units tab in there where you can easily just kind of go in and pick some of these tips and stuff that I've shared with you guys. and you can access them. And then it's a place for you to share your paintings. So if you're practicing at home, you don't want to, you know, have to share it to my page or, you know, maybe even post it on your own personal page, but it gives you a place to share with a community of people doing the same thing you're doing. I'm just gonna do just a little bit here. Again, I'm not trying to make it exactly like this, but they've got these little trees So I'm just going to stagger. It's like a dark greenish black I've got going on here. It's going to overlap our mountains a little bit, kind of like a mid-ground. And I'm just doing a little quick version here. And then we've got like this yellowish green in the front. I think I need a different green for that. That yellow is too, too yellow. We'll grab a little bit of this one. And I'm really terrible about leaving my bottles open, and then they get that little dry plug of paint. So if you don't want that, close your bottles, and then you don't have to deal with that. So I'm just gonna grab a little bit of this green and yellow here and add this foreground section. And I'm using the angled brush again. I just like this because you can get these little wispy brushstrokes with it. Pick up a little bit of yellow here and there. So we're creating layers in our painting— foreground, mid-ground, background. And I'm quickly just going back and forth here. Sorry for the cord, I'm charging my iPad while we're doing this. But this is— don't feel like you have to do this. Like, if you just want to practice and just do the sunset and the landscape, you've still got a super simple landscape. You could add a silhouette of a tree or, you know, a little person or a dog, whatever you wanted to. But you can take this simple— these simple techniques and apply them to whatever kind of painting you want. I'm gonna switch back to my Flat and my black here, and we're just going to do some super simple trees. How fun is that? Just using a flat brush. Oh, I got paint there. Well, I may have to blend that back out in a minute. Let me know if you guys have any questions as we're kind of going through this. And this is going to be behind this grass, so I'll end up pulling that back over top again. And they've got 3 on this one here. I don't know if I'll do 3, or I may just do 2, maybe make that one a little bit higher. So I give myself like a vertical first to go off of, and then I'm just using the corner and I'm like slowly rotating my brush. Add a little of this lighter green over on this side. This is such a Bob Ross style painting. I'm embracing my inner Bob. All right, so they have this pretty— that's not gonna work, I have too many colors in there. It's like pretty pinkish reddish stuff on this foreground. I think I'm gonna add a little bit of that in. And I think the community is the best best part of that. So I'm just going to come in again. I'm going to overdo, redo this to pull this back over top, but I kind of want to add in this peachy little color in here. I like, I like the way that looks, and it's real messy. This is that, like, they don't really look like anything, right? So I mean, it's just little brush strokes, but then when it all comes together, it does. I'm just going to stagger this across So all I've used in this painting is a flat brush and an angled, and honestly, I could have just used a flat for this too. We're gonna come in and then just pull that grass right over top. So I'm just using this skinny side. Try to look up here and see if you guys have any questions. So hopefully that helps you guys out a little, gives you something fun you can work on. You don't need a lot to get started if you're scared to get started in painting. Don't let fear stop you. It's so fun and so relaxing and it's good for you. Give you a little breakaway from the world, a little de-stressor. And main thing, just to not worry about it being perfect. This is supposed to be fun and you being creative and you learning. But I have all my favorite supplies are in my Amazon store. and I can't find my small mixed media pad. Hold on, here it is. So I love— this is an 11 by 14, and I usually get an 11 by 14 mixed media pad, but it's used up right now. But this is what I would recommend getting to get started because it's like a sketch pad for paint. So it holds your acrylic paint and you can paint in it and sketch in it and do whatever you want to. So you don't feel so committed, like Sometimes I think when we paint on canvas, we feel like it has to be perfect, or we can't just paint something and then not like it. Well, in your mixed media pad, you can paint 20 pages of stuff that you're just practicing brush strokes and not painting a scene, just getting the brush stroke down. So it's super, super helpful if you're just getting started. But the brushes I use, a mixed media pad— sorry, my voice is cracking again— all that good stuff is in my Amazon store. So hope you guys had fun. Sorry I couldn't actually show you my face today, but I look too terrible because I don't feel good. But hope you guys enjoyed that. That was a fun little painting to do, and I want to see them. So join the free Facebook group, show your work in there, and share your version of whatever landscape you decide to do. I'll see you guys in there. Bye!










