Learn to paint a pinecone!
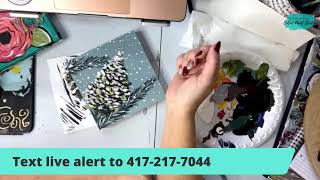
In this 2021-10-29 Facebook/YouTube live session, Christie Renee Hawkins of The Social Easel walks viewers through a step‑by‑step watercolor/acrylic painting of a stylized pine cone. She begins by reminding the audience of a previous lesson on modeling paste vs. gel medium, then introduces the pine‑cone project as a winter‑themed, quick‑to‑complete piece. Throughout the broadcast she demonstrates color mixing (burnt umber, black, brown, gold, white, hunter green), explains brush selection (flat vs. filbert, liner, spotter), and shows techniques for building shape, adding highlights, shadows, and snow effects. Christie engages with live comments, runs a “happy mail” giveaway (original artwork + “Be the Light” keychain), promotes an upcoming $10 three‑day workshop “Funky Winter Flowers” (Nov 3‑5) with live Q&A sessions, and advertises her membership “Tribe” launching Nov 9. She also provides logistical details for replay access, text‑alert sign‑ups, and links to her Amazon store for supplies. The session emphasizes practice, the mental‑well‑being benefits of painting, and encourages viewers to share the video to enter the giveaway.
Chapters
Hey guys, how's everyone doing today? It's Christie Renee Hawkins with The Social Easel, and we are here for another quick little lesson. I'm going live each day this week and sharing something different with you guys. So yesterday, if you missed it, I came on and showed you the difference between modeling paste and gel medium. So if you missed that one, You can check out the replay by going to Facebook videos on my page, or you can go to my YouTube channel. The video's in both places if you missed our live yesterday. So today we're going to learn how to paint this little pine cone. So I thought this would be something fun to teach you guys going into the winter months. I was actually playing around that you can see this is just on a piece of like journal paper. I was actually playing around with this because I was toying with the idea of putting pine cones in this painting. I ended up not doing it. But you can kind of see how cute that would be if you want to incorporate them into yours when you do this. If you haven't signed up for this, you can sign up for this class. It's only $10 to learn this painting. That is starting next week on November 3rd. Um, so anyways, that's where the inspiration came for this. So I thought I would show you guys today, um, how to do a simple pine cone. Um, so it's not like super realistic, but I think it's a pretty good representation of it. I love the lights and the darks in there. Hey, Kay, we are live right now. Hey, Catherine. Hey, Valerie. So another fun thing we're going to do today is give away some happy mail. So, um, if you guys want to share this video with your friends and then comment and let us know that you did, we are going to pick one winner tomorrow morning, um, based off of the comments, and someone's going to get some happy mail. So this is a little mini canvas that I've done, and you're also going to get a little Be the Light keychain. So that's my original design with, um, our little motto on it is to be the light and to share some Jesus and art, um, and try to bring joy to others around you. Um, so that's, that's what we're doing here. So if you want to get entered to win some happy mail from me Make sure you share the video and then comment in the comments that you did indeed share it, and we will randomly pull a winner from that list. Thank you, Jocelyn. Catherine shared it. Awesome. Um, Allison has put the link, um, in there for the Funky Flowers if you guys do want to join that class as well. Um, and I'll throw— uh, you can just text the word funky. If you don't want to come back to this and you just want the link text you, text the word funky to the number on the screen and we will send you a direct link to sign up for that. So again, that starts on November 3rd, it goes from November 3rd through the 5th. I'm going to be teaching this live over the span of 3 days, um, in a private Facebook group that you will be a member of. And I'm gonna teach it live at 11 AM each day, and then I'm gonna come back in the evenings and do some live Q&As with you guys after each session. So if there's specific questions you had about what I taught that day, we're gonna throw in that added bonus of some live Q&As with me. So you can really pick my brain if you're struggling on a certain area, or if you need me to show something again. So I'm super excited about this. It's only $10 to sign up for, um, this painting workshop with me, and signups do end on Tuesday. So you have a little less than a week to get signed up for that. I know several of you were waiting for Friday, said waiting for payday. So hopefully you guys can get on there, um, tomorrow and get signed up for the fun with that. But today We're gonna paint this little guy. So I am going to switch the screen off of me and I'm going to make, um, my desk full screen so you guys can get a better view of what I'm doing. So let me pull myself off of here, make sure everything's still okay. I'm going to lower the camera so we can get you closer. I got so many cords over here, and we did clean my office today though. Kimmy is my assistant. She helped me get some things organized so that we're all ready for our paint party next week because Y'all, I almost tripped over some cords yesterday and probably would have died with the amount of stuff that was on my floor in my office. So I'm going to scoot this over just a little bit, and I'm going to put this right here. One, for you to see what the happy mail is that's going to get sent out to you, and two, for me to remember to talk about it every once in a while during the live for the new people that jump on. So this is just a, um, I believe it's 5x5 or 6x6, it doesn't matter. But, um, this was just a wood board that you can get at any craft store. I had painted it this kind of blue-gray color. I was actually testing out a color for my cabinets in my living room, and I was thinking about covering it with like a cream color, but kind of— you guys let me know what you think. Yes, you can definitely catch the replay if you have to leave, Debbie. I kind of think it'll be pretty on the gray, don't you think? Let me know, should I paint it like a cream background or leave it the gray background? I could even have it kind of come out of the corner here. And maybe add a few more branches and some snow or something. So if you guys just hopped on, if you want a chance to win some happy mail from me, all you have to do is share this video and, um, comment that you did share, and someone is going to get chosen to win an original piece of art from me as well as my Be the Light keychain. So I'm just going to set that over aside. You guys like the gray? Now I'm getting mixed, mixed opinions here. Okay, I'm gonna let you guys continue to comment and I'm gonna go ahead and get the paint on my palette. So I'm gonna do a burnt umber, any brown you want to. I'm gonna do some black because if you've painted with me before, you know I don't usually like a brown just right out of the bottle. I like to mix some black with it. How many of you— if you'll let me know in the comments— how many of you, is this your first time hanging out and painting with me, or do you paint with me all the time? Let me know in the comments. I had to get myself some paper towels. Yeah, I think the snow will be pretty on the gray too. Thank you, Margaret. Debbie said, shared to my sister and friend who will be new Tribe sisters next enrollment. Woohoo! So in case you don't know, my tribe is getting ready to open, um, November 9th. We only open it a couple times a year, and that time is coming. It's just around the corner. So there's going to be all kinds of fun stuff for you guys hang out and paint along with me over the next 2 weeks. So the first one being that challenge, and then we'll be doing some fun Facebook Lives. I've got a whole agenda ready for the next 2 weeks, which is very organized for me. I'm trying to get myself in order so I'm not so frizzle all the time. But I'm working on creating like 4 different paintings right now for my tribe. So whenever I create, especially when I create multiple things, I kind of start all my projects at the same time and have them all, all over the place. Welcome, Ruth, as a first-timer today. Kelly is a first-timer. Welcome, welcome. Have you guys painted before? Thank you for sharing, Stephanie. Amanda's watching while she's in the dentist chair. Hey, that's, that's good entertainment. Okay, so I've got some, some burnt umber, some black. This is just a dark hunter green. It's called Hauser dark green. And then again, if we're doing what I did in the original here, that is kind of looks like a yellow. It's actually metallic gold. Because I like to use gold as a yellow sometimes in my paintings. And, um, and then of course white. Thank you, Jenny. Hey, Miss Tony. Okay, so we're gonna get started now. What I like to use— I've got a couple brushes here. You can either use a flat. So flat is just a rectangle rectangular-shaped bristle, or you can use a filbert. I have a small one here. I may jump over to my desk and grab a different one if I think I need it, but I'm going to hold that closer. So see the difference between— so the flat has a flat edge, obviously. And the filbert has a curved edge. So that curved edge helps when you're doing these little dabs that I'm going to show you to do. Hey Patricia, thank you Denise. Okay, so I'm going to leave this. I have a little— I don't know what got on here. I'm going to turn that to where that ends up getting covered up. There's like a little squiggly line on there. Can you see that? So yeah, this is, um, I still want to make a painting with pine cones, but I tried to— I was talking about earlier, I tried to fit them in here and it ended up just looking like a hot mess. So I decided not to, but it was really fun to practice painting them, and I think they need to go in something, something someday. But until then, I'm gonna just teach it to you guys here. So I'm getting plenty of black. I'm gonna set this right there as a reference. Pretty— I'm stumbling on— plenty of black, a little bit of burnt umber. So the first thing that we want to do is put this dark base coat down, and we don't even have to be too careful with this. See how this is kind of— look at it as like a shape of a triangle, right? So kind of break things down in your eyes as like, what's the basic shape of that? So we're going to make kind of a rounded triangle, maybe come out a little bit more. On the sides because, you know, the sides of the pine cones are going to be kind of rough, right? So we got our basic shape down, and then I'm going to come out and kind of have a couple brush strokes give us that jagged edge like that. It kind of looks like a tree, right? Like a diagonal tree. So that is step one. And then I'm not gonna wait, I'm gonna go ahead and go in with some of my brown. And I know my palette can be distracting for some people, it bothers them that I leave these colors on here, but I'm just trying not to be wasteful. So I'm just going to take some of my white mix it with my brown, get that nice kind of mocha color here. What do you guys think so far? Following along? Feel like you can kind of make this shape? Not too hard, right? So now we're going to take that same flat brush and I'm just going to start going along and doing these little dabs in between. I'm gonna lift it up when I'm done so you can see a little bit closer, but basically what I'm doing— get a little bit more paint in my brush here. I've got the paint loaded up here. I don't know if that's zooming in good. It's kind of fuzzy, but plenty of paint on my brush and And then I'm literally— I'm not making a stroke, right? So I'm not doing this, I'm doing this. All right, all the way up. Look, it's already starting to look like a pine cone, right? All right, we're gonna let that dry. A little bit. So I'm going to pause on that, and we're going to come over and do some of our greenery. And I might add a little bit more, maybe even have one kind of come out from that corner. I don't know yet. So I like these new liner brushes. I'm going to show you. These are in my Amazon store. And if you see anything that I'm using today, um, like the palette knives, the brushes, whatnot, they are in my Amazon store. And if you want that just text the word Amazon to that phone number and it will send you a link. So these are all different sizes, and I believe, if I'm not wrong, this whole set was under $10. That's what I remember it being. So I'm just going to pick one of the skinnier, longer ones. And I'm going to start with my hunter green. So similar to what I said about my brown, very seldom do I use a green straight out of the bottle. If you paint with me very much, you're going to know that I love color mixing and that I really try— I work really hard at trying to break you guys of the habit of thinking you have to have the exact color I have, because I end up usually not using the exact color out of the bottle. Now, when you sign up for one of my classes or workshops, or if you're in my memberships, we do give you a color list for everything that I use. And the other thing that we do is give you color swatches on the side of that color list. So if you do really want to try to get exactly what I have, You know, there's different brands, and some brands have the exact same colors, but you have those color swatches on there that you can take to the store with you and hold the bottles of paint up to them, so you can try to get as close as you, as you can to those colors. So I'm gonna have some of this kind of peeking behind this pine cone. Hmm, or do I not? Maybe I don't want it to do that. Maybe I'm going to overlap some of it. So I'm just going to pull across this little line here. So it really doesn't matter, like, if you get a little heavy-handed like I did here, or like, let's go back to this. I just made a line there and I don't really want it there anymore. Don't let that stuff stress you out. I'm going to paint over it and you're probably not even going to know that that ever happened. Okay. So I'm going to pull this down a little further and I'm going to start making these little diagonal strokes. So I'm using that line in the middle here as my base, and then I'm coming out— think of it like the letter V. When these lines meet in the middle. It's making a letter V along this stem. I know it's kind of hard to see because it's dark right now, but hopefully you can see in that— these are even a little skinnier. I think I used a skinnier brush on that one. Let me switch. Let me go I'm switching to a 1. Let's get it a little daintier. Debbie said, I have problems with thin lines. I use pens often for those. Yeah, you can use paint pens, but I would highly encourage you, um, Debbie, to practice. So if you guys aren't familiar with a mixed media pad, it's one of my number one products I recommend in my store. It's kind of like this. It's just like a book of paper that you can paint on. It's like a sketchbook for painting. But the reason I want people to get it, and I recommend it to my students, is because you can practice getting these thin lines. Like, it all depends on how hard you push the brush down. So the same brush can make a thick line. Like this, or it can make skinnier lines. But it's about learning to have that control. Another tip that might help you— I'm still not digging this one, y'all. I feel like that wasn't the one I used the other day. I'm trying to find it. Hang on, maybe it was even shorter. We're gonna try this. I'm not getting the same feel. This is like a little spotter brush. Yeah, look how skinny those lines are. That's what I wanted. And that's why I tell people, like, don't worry about the exact brush that I have either, because it depends on how hard you put pressure down, what kind of lines you're going to look like, or what your lines are going to look like. And it's different for everyone. Some people are very, very light-handed and can paint super dainty. I'm actually not one of those people. I can try to if I'm forced, but I tend to be a little heavy-handed. But you can practice these thin, these thin lines if you want to in your mixed media pad. But the more you practice, the better you're going to get at it. Another thing you can do is if you need to support your wrist, if you have problems with like shaking or not being able to control your wrist movement so much, you can just hold your wrist, and that's what you're moving. You're moving your wrist. My fingers are not moving on my brush, right? My wrist is what's moving. Now with a little brush like this too, you have to keep re-dipping. That's normal. You're not doing anything wrong if you can only make a few brush strokes at a time. Look, these little itty-bitty things don't hold. A lot of paint. Now, if you want, sometimes it's easier for me to change the orientation of my, um, painting surface depending on what I'm working on to get those more pointed tips. That's in the way that I'm holding it. So I'm either starting at the tip and gently coming down, getting it a nice skinny line, or If I start from the base and go out, I'm kind of flicking up when I do that, and that's giving it more of that tapered look there. Yeah, Lynn, yeah, same as me. Sometimes turning your canvas can really help. A lot. And I think I'm going to put just a little bit more, um, green over here. It's not going to be on top. I'm going to paint the pine cone on top of it, but I kind of want that filler space in here because we're going to kind of pretend this is just a close-up zoomed part of a tree, right? So if you guys just joined— see some new people have hopped on— if you have not shared the video yet, be sure to share the video and then let us know in the comments that you did, because someone is going to get some happy mail. This is an original piece of art from me along with my Be the Light keychain. So we're going to pick one winner tomorrow morning from this Facebook Live, and we'll do that by going through the comments and looking at all the people who shared it and wrote the word shared, and then we'll randomly pick a winner. So if you'd like some— this is almost how I do palm trees. I may have made that too palm tree looking. But it is the same technique. I don't even think I realized that when I first started showing you guys, and then I was like, wait a second. That looks like a palm. Palms have a little bit more curve to them. I'm giving this one some curve. You can keep adding layers in depending on how thick you want it. Thank you guys for sharing or sprinkling. Sometimes we say sprinkle because Facebook doesn't like it when we say share. So I'm gonna go right in to the white. You see me just mixing some of this in my green over here, and we're gonna start adding. This is real quick. We We're not adding a ton here. This is all just going to give it a little bit more dimension to where that darker color is at the bottom. Then we're going to have like a mid-tone green. Can you already see the difference of just adding that mid-tone? I love it. So pretty. What do you guys think? See how you've got that darker green in the background, then we've put some kind of mid-tone Green on top. So fun! Thank you, thank you. Okay, so then I'm gonna rinse that. Always wipe your brushes off after you rinse them to make sure none of the paint color from your previous color is left in your brush. So I'm gonna go into the white now, just keep dipping, and you can decide how much snow you want on your pine needles. So I'm just quickly dragging that across the pine cone. This is personal preference on how much you want to add, and you can always change your mind. This is what I want people to realize about painting. Just because you put something down on the canvas doesn't mean it has to stay. I put that down and I'm like, mm, maybe it's a little too much white. So I'm just going to go back to my mid-tone, add a few more lines in, break up the white a little bit. Hey, I'm liking that better. And if you get too carried away and you can't even see your dark anymore, you can go back and add some dark in. Thank you, Patty. Okay, let's get back to that Pinecone. I'm gonna go with my filbert brush now because it's got that curved rounded edge to it that I want. And we already made our mid-tone brown in here. I'm going to make one even a little bit lighter than that, but not all the way white. So think of these as like the little part of the pine cone facing you if you were holding a pine cone and looking up at it. Look, even that, like, that quick of a thing, just adding that lighter color, look how immediately it starts making it look like a pine cone. Pretty cool, right? So now I'm gonna go in. I'm not rinsing, I'm just gonna load up my brush with white paint. Yeah, I'm on a Facebook Live right now, babe. Just— you don't have to try to carry everything in at one time. Sophie's home. So you can overlap some of the same brush strokes, or you can break it up a little. This would make a perfect little gift, Marilyn. I think so too. You could even write a little something, like if you left more space, maybe you could write Merry Christmas or someone's last name, make like a personalized little gift for them. So now what I'm going to do before I add the golden, I'm going to go back and I'm going to go into black. So I want to go into black to give a really big contrast between my light colors and my dark colors. And again, it doesn't have to be everywhere, but we're kind of coming underneath some of these shapes. Add in some shadow under here. Maybe break it up a little up at the top. We see how these are just little dab marks that I'm making. Now I want to show you up close what it looks like. Isn't that crazy how, like, if you— and this is what I want people to realize— when you're painting at home and you're really close to the canvas, one, please don't be this close. Try to be 12 to 18 inches away from your canvas because that's what it's going to look like when it's hanging on the wall and when you show it to other people. But isn't that funny, the difference of what it looks like from further away to up close? It just looks like a bunch of little marks, which it is, but it's all about how you put them together, and it looks like pine cone. So I like to look further away. I like to take pictures. So as you guys are working on this, take pictures. I'm fortunate enough to be able to look at the camera while I'm doing it, so when I see something, I'm like, I need I need something there. I can look up and see where I need to add more color, or maybe take some away. And it's one of those things, don't get too carried away with it because you can overwork it. So be okay to stop and, and step away from it as well. Thank you, Deb and Deborah. Okay, last thing. Well, not very last thing. Last thing for the pine cone is adding the gold, and then we're gonna add some snow in the sky. So the gold is just a little accent here or there. Wherever your brush lands, that's where your gold accent's gonna be. And you may like it without the gold, and that is just fine. You do you. What do you guys think? Do you like the gold, or did you like it better before? You're not going to hurt my feelings unless you say it really hateful, then you will. But you don't have to agree with me. You can like the gold or not like the gold. Thank you, Miss Jill. I'm gonna go back with a little more white at the top. You could even make it heavier white on one side if that's kind of where the snow is falling. Maybe it's piled up a little bit more there, or you can just kind of make it more generic and go all the way around. Yeah, bronze would be pretty too. All right, let's add some snow. So I don't know if you've seen me do this before. I'm gonna get a skinnier brush. You're welcome. Judy said she hasn't painted in months and she's so ready to get back. Here's the thing with painting, you know, it's just like everything in our lives, right? Like for me right now, it's trying to get my workouts in, and I'm trying really hard to make that a routine. Sometimes I miss a day, and that's okay. You just forgive yourself, move on to the next day, right? But with painting, you just need to make a little time for it. And I think sometimes— or I do this anyways, I don't know if you guys do— I build things up in my head like, oh, it's going to be such a mess, or, oh, it's going to take me forever. I don't have 3 hours to paint. Like, very rarely do I have that long to paint. So these little lessons that I'm doing with you on Facebook over the next couple weeks, we're trying to keep them to around 30 minutes or so. So it's just a simple little lesson that you can fit in when you can, maybe in two sessions. Maybe you only have 15 or 20 minutes, but you'd be amazed if you just took a little time for yourself to relax and paint and just get lost in the process. That it just helps you, your mental well-being too. So let me show you what I was doing while I was just talking there. All I did was put white paint on the end of my brush and just dab along however much snow you want. So this is an easy technique if you don't want to try to use the bristles, because what happens sometimes, we push down too hard and then it doesn't look like a snowflake. It looks like a big blob, right? So this is my trick. You can't push down too hard on the back of a paintbrush. It just makes a little dot. So that's it. That's what I got for you guys today. I hope you had fun with it. Short and sweet. But a very fun painting. So there's my painted one. Here was my one from my sketchbook. I could easily go back in. This one is very wintery, it's very snowy out, but you know, I could change my mind and go back in there and add some medium and dark tone browns if I wanted to tone down the white a little bit. But yeah, it is just practice. Practice, practice, practice. Maybe you have to make 5 or 6 of them before you do a pine cone that you like, but that's okay. The only way to learn is to try. So last chance, if you guys have not shared this video yet and you want a chance to get entered into the happy mail contest— this is an original piece of art from me— and the Be the Light keychain, just share the video, sprinkle the video, and make sure you tell us in the comments that you did, and we will pick a winner tomorrow morning and announce it in this feed. So this is where it will be announced. We'll come back to this video and announce the winner here. If you want to continue painting with me and you had fun learning that today, this is the next workshop that I'm offering. I'm gonna raise this up a little. So we're doing the Funky Winter Flowers. It starts next week. I'm going to teach you some palette knife— this has got pine needles in it too, but I did them with a palette knife. So you're going to learn some palette knife artwork, um, learn how to use modeling paste and some texture, all kinds of fun techniques, glitter and glam. And this is what we're doing next week. Starts November 3rd. It is only $10 to sign up. We would love to have you join. And the best part is that you're going to get to be a part of a Facebook group of other women doing the same thing that you're doing. So it's a great community to become a part of and hang out with these women for a week and just get lifted up and inspired. And we are going to do a devotional at the beginning of each day of that lesson as well. So hope to have you guys join me. Um, I will be back again tomorrow. Hold on, let me look and see what I have down for tomorrow. Tomorrow we're gonna have a little fun. We're gonna paint— if I can grab it. I already put it in my drawer. I have all this stack of things to paint on. Tomorrow we're gonna paint on burlap. Which is so fun. And I'm gonna do it with palette knife so I can show you how we're actually going to use some modeling paste to prevent the paint from going through the burlap. And I think we're going to do like a little wreath. So that is going to be tomorrow if you want to join me. If, um, you are not already on my text list, let me Oh, I just need to make a new one. Give me just a second. I can't comment from this, so I have to add these little banners. If you want a live alert whenever I go live for the next 2 weeks, just text LIVE ALERT to that phone number that you see on the screen. Um, don't put it in the comments because we won't have any way to text you that way. Um, this is to sign up for text alerts. Thank you, Marla, said she shared multiple times, signed up for the workshop, can't wait. Sandy said love the pinecone, will give it a try. Marla, yes, this will be on replay, so anything I ever do on a Facebook Live or YouTube, you'll be able to go back and watch as soon as it's over. You can just go to videos. Um, Torita said— I don't know if I said your name right— do you get to have access to the video from the workshop after it's over? So yes, um, she is talking about the Funky Flowers. So just so people are not confused, we're talking about this one. Um, you get lifetime access to this, so, uh, to the lessons. So once we teach these live in the Facebook group, they'll stay in a Facebook group for 30 days, but we also put them onto our website and you have a login. So all you have to do is log into our website. It's super organized and easy to follow. I love it. And you'll be able to go back to your videos anytime that you want to and access them, and then you can pause them You can rewind them if you need to see a step 100 times. You can see it 100 times. So yeah, you will have lifetime access to those lessons. And I have done— this is the 4th in a series. So we've done spring, summer, fall, and now winter. And if you missed those other ones, you do have a chance to purchase them when you sign up for this one. But you're also gonna learn some fundamental techniques that you can take from this. And make your own color combination. If you want to make them for different seasons, you can do that too, or maybe even for Christmas. Maybe you want more bright red and green in yours. You can do whatever, whatever you choose. Christina said, how do I share this? Christina, there is a share button underneath the video, and that's all you have to do, and then it'll ask if you want to share it to your page. Alright, y'all, I will see you tomorrow. I don't have a specific time yet. So, um, I'll just send out a text alert when I'm going live, and we'll do our little burlap piece of art. All right, bye.










