Learn To Paint A Sunflower Still Life || The Social Easel
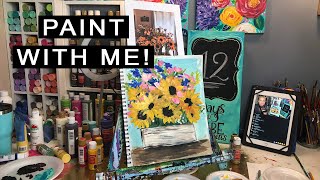
In this 35‑minute live stream, Christie Renee Hawkins, owner of The Social Easel, walks viewers through a step‑by‑step acrylic painting of a bouquet featuring sunflowers, carnations, baby’s breath, and filler flowers. She begins by explaining how to use a printed photograph of a real‑world still life as a loose reference, then sketches a basic outline on a mixed‑media pad. Christie demonstrates inexpensive, craft‑store acrylics and a palette knife to lay down a quick blue‑cream background, followed by building up green foliage with dark and light greens. She adds filler flowers (grass‑like stems, pink carnations, baby’s breath, and purple filler blooms) using angled, round, and liner brushes, emphasizing random brushstrokes to avoid patterning. The tutorial then focuses on the sunflowers: mixing black, burnt umber, dark yellow, and orange for centers and petals, applying multiple thin coats to achieve opacity. Throughout, she offers practical tips—using cheap supplies from Michaels or Hobby Lobby, framing mixed‑media pads, color‑mixing on the palette, letting layers dry, and adapting composition to one’s own reference. Christie engages with live chat, answers beginner questions, and promotes upcoming lessons on brush techniques. The video serves as an encouraging, low‑cost introduction to still‑life acrylic painting for hobbyists.
Chapters
Hey guys, I am back for my second live today. For those of you that haven't joined me before, my name is Christie Hawkins and I'm the owner of The Social Easel, and today we are going to paint from a still life. So this is a picture of a bouquet that I made the other day, and basically I took this from a live version, took a photo of it, printed it off, and and I'm going to use this as my piece to influence my painting. So it doesn't have to be exact. You could crop it in if you want to and only paint like a part of it, but I'm going to use this as my reference. So this is something that you can do if you have— hey, Sheri— if you have a pretty like bouquet of flowers or something like that and you'd like to paint it, I recommend just getting a good picture of it printing it off and kind of using that as your base to start your own painting. So I'm gonna pull you guys up here. I've got the comments going, so we're good there, so I can keep up with you guys. I'm gonna prop that right over here. Hopefully— hey, Miss Connie! You're welcome, Jan. Thank you, Linda. Can you guys see okay? So I'll be careful when I'm painting to try to make sure I'm not blocking what, what I'm teaching you. So I am going to just kind of give myself like a rough sketch of kind of the outline that I want on here. And of course I grab a pencil with the lead all the way down on it. Can you guys see that if I put that up there? So using this as my inspiration piece— scoot that forward just a little— you guys can see that okay. All right, look good. So I'm just gonna go, and it doesn't have to— like, I don't have to worry about all the detail in this. I'm just kind of using this as a base. For what I want my, my image to look like. It doesn't have to be like— this is probably going to be pretty messy. You can barely see that those are mason jars in here, so I'm really not even going to worry about that too much. I could improvise, and what I probably will do, and I want you to realize this when you're creating your own, just because it's in your photo doesn't mean you have to paint it that way. So your painting is a representation of what you see. So we could just fill it in with some greenery down here and then start adding in our flowers. You don't have to see those mason jars. If you want to, you can come back and add those in. So I think the first thing I'm going to do is put a background on there. So I'm just going to get a light blue here. Can you guys see this? I don't think you can. Oh, you can see a little bit. Cory made me this new, new display here for my paint, which is awesome. So it makes it a little easier for me to find what I'm looking for. Hello, Mel. Thank you for sharing. Yeah, if you guys know someone who you think would want to learn a little bit more about painting, be sure to hit that button and let them know that we're live right now. They can always go back and catch the replay if they don't catch it live. So I'm just getting some like pale blues and a little bit of cream, and I'm going to work with palette knife and brushes today. So first thing I'm going to do is just get some of these paints on my palette knife here. So this is just a cream and a light blue. I believe this one's robin's egg blue, and I get that from Michaels. But these are just craft paints. You don't need anything, you know, too expensive or fancy. Just regular craft paints are what I teach all my paintings with. And this is why I love palette knife, because you can just scrape this background in. They're fast, easy backgrounds, and then we can go in and build our flowers around it here. I'm not too worried about this because I know that's all going to be covered up. Thank you, girls. Hey, Linda, Mary. If you are new today, let me know where you're watching from too. I know we have some new people watching. It's always fun to see where everybody's from. I think I'm gonna grab a little bit of brown here for my base that it's gonna go on. Hey, Paula! So I'm painting on a mixed media pad today. This is— if you haven't painted on mixed media pad, this is kind of like a sketchbook for painting, and these are great to do your paintings in. Saves you a lot of space. You don't have to worry about having stacks of canvases everywhere. And if you really like the painting that you do in here, this is an 11 by 14 mixed media pad, and you can just— they've got perforated edges here, and when you're done and it's dry, you can just take it out and then lay it between like two heavy books, whatever, something heavy that you have, because you'll see it kind of warps just a little bit, but but lay it between something heavy and then you can frame it in an 11x14 frame and they look really nice framed. So this is a great alternative to canvas. I believe this one has like 50 or 60 sheets in it, so it lasts quite a while. I'll be right back, I'm going to grab my water. We've got Kansas, just south of Kansas City. I'm gonna move this a little bit closer so I can see. I'm blind. That's a little bit better. New Zealand. Hi, Debbie from New Zealand. Okay, so in here, this is— my box is white. I'm gonna go ahead and I'm actually getting a little bit of cream. I'll grab a little bit of white with it too. And this is gonna be a really loose style of painting, so if you haven't painted with me before, that's kind of my, kind of my style. Just gonna wipe that off, and then I'm gonna grab— I think I'm gonna go with my angled brush, and I'm just gonna get my box on here. And I'm not worried about getting it too specific right now because I can come back and add to it. And what I'm going to do is let this dry a little bit, and then I'll do a little dry brushing over top of this box. Pull this down a little bit further to give it kind of that rough wood texture. I'm gonna try to keep this at about 30 minutes or so. So this will just be a quick little impromptu painting, but hopefully give you some ideas of what you can do with your still lifes. And just to remind you to take a little bit of time for yourself. You don't have to take a whole, you know, hour, 2 hours to paint, but just get away for a little bit. Create yourself a little space where you can throw some stuff up and paint and then put it back away fairly quickly if you need to, if you don't have a space where you can leave it out. So I'm just getting dark green. This is like Hauser dark green. I use DecoArt a lot. And then what's this other one? Desert Cactus. That's one of my favorite ones too. So we've got all this greenery up here. Hey Terry, hey Allison. And what I'm going to do is start filling this in first. Trying to decide how much I want. May do a couple. Now I think I'm just going to fill it in all green. So I'm improvising a little bit. I'm not going to put in like the mason jars here. Hello, Faye from Tennessee, first time. So I'm just getting a little bit of my green, the dark and the light together, and we're just gonna put some filler grass. I'm calling it grass. It's leaves, stems, but you're not really gonna be able to tell. It's just gonna be kind of background. I'm gonna go all the way across and do that. This will be reminiscent of my Market Flowers. That's a painting I did a few years ago, but it doesn't have sunflowers in it. You can have a few stems kind of poking up Go ahead and grab a little bit of my yellow. We'll add a little bit of yellowish tone to some of our green here. Helen, I did not add any gel medium to it today just because I'm doing it in my mixed media pad. You can use your palette knife with regular craft paints. It just— they're a little thinner. But you can definitely still do it. Oh, I'm not going to worry about those. I'll come back and fix anywhere I've got a little bit of paint splatter here. So now this is kind of how I start filling in my florals when I do this. This is all going to dry fairly quickly. And then we're gonna put flowers over top of it, but I just want some background greenery here, just like there is here. It's pretty solid, so I don't want a ton of that background color showing through. And you may see some of these stems down at the bottom, but we're just gonna make this nice and messy. And all my Type A's are panicking right now that I'm doing this. But we're gonna start from the background and kind of fill it forward. And I'm gonna switch to a larger round here. Hey, Sandy! I'm getting a little bit of yellow in with my green just to do a little color mixing. If you don't have the exact colors you want, don't be afraid to to kind of mix your own. I color mix a lot. Very rarely do I just use what's straight out of the bottle. So what I'm doing right now, because this is some of my background colors, I'm kind of tapping in and kind of adding this green fluffy background. And again, I'm just using this as a reference. I'm not trying to get it exact, just trying to get the idea of those fillers in there, and then we can come back and add our flowers over top. And then this has a little bit more yellow right here, so I'm picking up just a little more yellow in my green. So all I'm doing is just kind of dabbing that on. It's getting skinnier towards the top, a little wider Towards the base here. You guys see okay? I'm not blocking you, am I? Maybe just a little bit more kind of coming out the side of our flowers over here. Then let's go in with some dark green. We've kind of got these lighter colors in here, but I want to balance that out with some dark also, so I'm gonna pull some more stems. From the bottom here. Maybe just some dark mixed in here or there. Again, this is mostly going to be covered up. This is going to just look like greenery in the background. You're not really going to be able to see definite shapes. But it gives us that value change so it's not all just one color. Thank you, Sandy. This is a fun one to just kind of practice and play with. I think flowers are a great thing to start with because they can be messy. I'm not trying to get anything exact or perfect here. Now I've got a couple of these taller pink flowers that are shooting out the top, so I'm just going to go ahead— I've already got the dark green on there. These were actually carnations. I've never seen carnations like that before. They were so pretty. And I don't have to do all the flowers. I just want to kind of get the idea of what was going on in my flower arrangement here. Just kind of pull these stems down, get a little bit of green on here and yellow. It's like a little cluster right there. These are like they haven't quite opened yet. And then I've got some leaves over here, and I'm just going to use my round brush, and I'm just going to kind of push down with it. So it's just kind of pushing on not really dragging it too far, but it kind of gives the look of some leaves over here. Switch to this skinnier brush, and I've got this baby's breath up here, so we want some stems for that to go off of. and it doesn't need to be anything very big at all, so I'm just using a smaller brush. You could even use like a liner. Fill this in just a little bit over here, and then I've got some more baby's breath that kind of comes over the side here. Maybe add a little bit of that greenery kind of coming out on my edges. Okay, so let's do some of this baby's breath here. I think I'm gonna switch back to my bigger brush here. This is just a, just a round, just a little bit thicker. I'm gonna get some of the cream and white on here, and we're just gonna start kind of pushing down these little blobs of paint. They're kind of clustered together like the baby's breath is up here. Another little cluster over here. And you'll be able to bounce around and come back and add more as you're going. I just kind of start filling in and kind of move all over while I'm working on these, and I don't want it to look like a pattern, okay? So you see me moving quickly. The reason I do that is because if I move too slow, it becomes too strategic in my head, and then it looks like a pattern, and we don't want that. We want it random. And I've got like a couple baby's breath that are gonna kind of pop up over here. There's another little cluster here in the middle. So they can overlap, they can be messy. They're not perfect little circles. So the thing I love about doing these is it's a bunch of little random brushstrokes that come together, and then once you get it done, it looks like flowers. So it's starting to come together a little bit. Can you see? Let me get some pink for my carnations. Got some Bubblegum Pink here. I think I'm gonna get some brighter. This is Peony Pink. Shake this up a little bit, separated. So it gets really fun when you start adding in the little pops of color. Let's see, I think I want to switch back to my angled brush. I like using the angled brush for flowers because it gives that kind of nice curved edge. To them. So I may even lighten my paint just a little bit, add a little bit of white to it. We're gonna see how this works, but I'm gonna get— well, trying to get that where you can see, but I've got two colors of pink on there. That light is kind of blinding. Can you see that now? So I've got two shades of pink on there, and we're gonna start adding these little carnations in. Let's see, we'll start over on this side, and I'm just kind of dragging my brush because these are kind of like flat. This one opens a little bit. These are open a little bit more on the top. So see how I'm just kind of holding my brush and pushing it down, and it kind of makes the flower shape for me. So I'm letting the brush do the majority of the work. I'm just kind of scooting it around. Got some flat ones back here again, maybe a little bit lighter over here. Hey, Sherri. And I'm gonna get— let's see. I think I want just a little bit— I don't know if you can see this, but there's a slight bit of a yellowish tint inside these carnations that I may want to add. Come on, go in there. Just a little bit. A little more towards the center. And the yellow warms it up a little bit and kind of pulls it forward. So now I've got these background ones. I'm going to start filling in some of these that are more open. And they don't have to connect to anything. We don't have to worry about seeing that stem. We're just kind of getting the idea of these flowers being in here, and I may come back and add some after I get my sunflowers on too. There's a huge cluster of the pink flowers over on this side. Maybe some in the middle. And there are some that are going to be over top of the sunflowers, so we'll come back and add those in. And some kind of peeking over here on our edge. Now I've also got— I don't know what they're called, but I love them— that purple filler that you can buy. So I'm just gonna get a little bit of— what color do I want for that? I'm gonna get straight purple, but I'm probably gonna mix like a little bit of like dark blue or navy with it to give it a little bit contrast. We'll try this one. This is Ultra Blue Deep. That one needs to be shaken up too. Let's see. If I can't get this one shaken good enough, we'll switch. That's good. Okay, so I'm going to use my angled brush again, and I'm going to use like a stippling technique. So I'm going to show you what I'm doing here. I've got like a navy, like a dark marine blue and some purple. So I've got both colors on my brush, and we're going to start adding in some of those little purple filler flowers in there. A little more purple. I'm gonna pick up a little bit of cream with my purple, and it's gonna lighten it, kind of give it more of a lavender look. And then I'm gonna go back to like my yellowish green and add some more of that, and that's kind of faded in the background, and I want a little more of that to show up. So I'm getting some yellow and green on here, maybe a little bit more yellow. Now you can wait for this to dry too. I'm kind of moving quickly, but you could let this dry a little bit before you came and add— added on some more of that filler. And I'm just using the extra and kind of adding it down below so we might see little pops of that green coming out. Alright, so now we've got our sunflowers. Let's I'm going to do black. Did I leave my black in the other room? Let's see what I've got here. All right, hang tight. You guys can check this out and look at it for a little bit while I go grab my black. Okay, so I'm going to use some black and burnt umber. For the center of my sunflowers. They're pretty dark. I'm just gonna go back to my round. If you guys have any questions while I'm painting, just let me know. I'll try to glance over here and answer them for you. All right, so I'm just going to look up here, kind of at my picture down here, figure out my placement for these, and it doesn't have to be exact. I may not even fit them all on here. There's gonna be one up here, but only a little bit of that, that center is gonna show, so I'm just gonna put like a little line here. This one is kind of going sideways, so it's gonna be more of like an oval shape. We've got another one that's kind of opening towards the top. So again, they're not going to be full circles. Now this is a big fat one right here in the middle, so we'll have a couple kind of facing forward like that. Hey, Lynette! This one opens up. It's almost a circle, a little bit more oval shape. Then over here to the side. I think we about got them all. And then one more, not a full center, just like that. I'm gonna go around my edge real quick while I've got this darker color in here. Let me grab a little bit more of my cream. We'll come back and add a little bit more definition to this box in just a minute. Let's go ahead and add— while I'm in these colors, we'll add some darker underneath here for the table. I did palette knife at first, but I think I may come back with brush. We can kind of give a wood grain look here. I'm going to get a little bit of this burnt umber, a little bit of black. Just kind of drag across here. I don't know how I'm doing on time. How long have I been on here with you guys? I don't know if this will tell me my minutes or not. All right, we're at about 35 minutes. I'm a little bit longer than what I wanted, but just want to kind of rough that box up. All right, so I want a clean plate for my yellows so they don't mix with the green. See if this one's open. It's not. This is a dark yellow. Thank you, Paula. We're gonna use a dark yellow, and I think I want to use a tiny bit of orange for my sunflower petals. I'm going to go back to my angled brush. You'll find I really like this brush. If you want to learn more about using the angled brush, I did a live last week and my blog post is up for it, and the link is in the description up above, but it'll bring you back to that video and kind of breaks down how I use my angled brush for a lot of different things. Petals are one of them that I like. So I'm gonna start over here, and I'm gonna start on the back side of this, and I've got a lot of paint in here, but— and I'm just kind of barely dragging down, and it's coming back to the center of my sunflower, and I'm using that pointed edge going out because it naturally tapers and kind of gives me the look of petals. Now I want to do the other side of this. They're gonna overlap that black, but right now this is really, really wet, so I'm gonna let it dry. I'm a little bit, and then we'll come back and add some petals over top of that black. These are going to be a little shorter on this side because it's kind of facing sideways here. So they're going to be longer out this way. These are going to end up covering up. I'm not going to worry about those too much. So I'm switching my angle. So now I'm holding my point down and coming back to center. So this one's going to cover that up. I've got some bigger petals on this one, and most likely I will come back with a second coat on all of these because yellow tends to be see-through. So if you're painting for the first time. This is a very transparent color, so you want to let them dry in between coats. If I kept adding wet paint on wet paint, it would just create a mess for me. So you may have to let them dry in between the coats. Okay, so I'm going to come right up against this edge That one's kind of like a sideways petal. These are going to be shorter because of the way that it's facing. So not all your petals are going to be the same length depending on the angle of your sunflower, and you just kind of play with it as you go. Once we kind of get our base coat on here, then, you know, we can go back with detailing. There's another one back here. You're just gonna see the tops of this mostly. A little bit of yellow around that edge. And if you get— like, that's a little bit more orange than I want. I'm not going to worry about it because I know I can come back. And put more yellow over top of it. Hey Brenda, hey Carla, you are welcome. So again, quick and messy. Some of these petals are kind of draping over the center of this one. Thank you, Carla. Pick up a little bit more yellow here. This one comes out from behind. I'm going to go ahead and do that one really quick. Same thing here. This is going to come over that. We're not going to see that entire center. So getting those sunflowers filled in. See how we're doing here so far. So you kind of get the idea. Obviously I could do this much slower and more detailed, but my main point in doing this with you guys is to just kind of get you used to to kind of take in an idea like that, something that you have around the house, and learning to paint from it and build a composition from it. Paula said, "I'm a beginner. What do you suggest for me to paint on for the fall chapel?" If you don't want to do a palette board, you could do a 10 by 20, which is actually this size. And have like a skinnier chapel, 10 by 20 would be good, or you can use a 16 by 20. Both canvases you can get at— I'm trying to think where that— Michaels has the 10 by 20s, so if you want a 10 by 20, they have those in a value pack. You don't need expensive canvases. You don't need anything fancy, just the value pack of canvases at Hobby Lobby. Michaels, but I know Michaels has the 10 by 20 size if you want a skinnier one. And this black is still wet, so I'm very carefully kind of laying some thick paint over top of that. I'm not pushing down too hard because I don't want to pull in too much of that brown. Carla said Michaels had a sale going. Yeah, sometimes they put theirs on sale. If you're wanting just the normal sizes like 16x20s, 8x10s, 11x14s, all of those, if you have a Hobby Lobby local, those stay $9.99 for a value pack, so you don't even have to wait for a sale on those. I'm going to come back in with some of my pink flowers, kind of overlapped some of these sunflowers in some areas, kind of peeking out there. Let's see if we've got this dry enough. We can start adding some second coats to these flowers, these petals. See how much more that stands out on the second go-round? But I waited for that to dry. Before I added that on there so it didn't get thick and gloppy. And then this one, I'm gonna grab some of this cream with my yellow just to lighten it up a little bit. That petal kind of came in a little bit there. So very quick version doing some sunflowers. Sophie's home. That means it's time for me to be done. Hey, Soph. I'm finishing up a video and then I'll be out there, okay? I timed it almost right. All right, so we're gonna call that done for today so I can jump over and hang out with Sophie now. Kathy, yes, this is acrylic. So just craft paints. Craft Smart, DecoArt, Apple Barrel, Walmart brand. You can get them from anywhere and they're super cheap. So you don't have to get expensive paints or brushes or anything like that. So there is my version of sunflowers from the bouquet that I made last week. If you want to go back and watch this, you can actually watch me do this live. You can either go to Facebook or you can go to my YouTube channel and you can watch me put that whole arrangement together. And then I just took a picture of it, use this as my reference, as an idea for a composition. So this is just a really good thing for you guys to kind of get used to doing. A really good idea for fall designs also. Because we have so many cute fall decorations you can buy. You can place them together, make yourself your own little still life, and then paint from that. So I hope you guys enjoyed that, and I will be back on tomorrow. I'm gonna try to go live every day this week, so I'm gonna go back on tomorrow, and we are gonna talk about the round brush, all the different brushstrokes you can make with a round brush, and the liner brushes. So if you want to kind of know how to use brushes, what, you know, what brushes you need for what style of painting, that's what I'm going and breaking down for you. So I've already done 3 lessons. You can find those in my blog post or YouTube. So you've got 2 different places you can view those. And then we're doing our 4th one tomorrow with the round and liner brush, and we'll be— I'll show you how to do palm trees. And how to get those skinny little lines that a lot of people struggle with. So hope you enjoyed. Brenda, I'm glad that made your day. So yeah, just let your friends know if you had fun watching this. If you want to pass it on to them, that will be awesome, and I'll be back on with you guys tomorrow. All right, bye.










