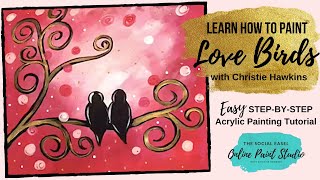
In this casual live‑demo, Christie Renee Hawkins, owner of The Social Easel, walks viewers through a quick Valentine‑themed acrylic painting of lovebirds. She begins by selecting a pink‑heavy palette and introduces a mixed‑media pad for practice. Christie emphasizes loading the brush with enough paint to achieve smooth, gliding strokes and warns against under‑loading, which causes streaky lines. She demonstrates a gradient background by applying darker pinks around the edges and feathering lighter pinks toward the center, using overlapping brushstrokes for a soft, random texture. Christie explains how to recognize dry acrylic (matte) versus wet (shiny) and advises letting paint dry before correcting mistakes. She then adds whimsical, curly‑Q branches, showing how to maintain line continuity and taper brush tips for varied line weight. Next, she constructs simple lovebird shapes using a parenthesis and a circle, encouraging overlapping and size variation for a family‑like composition. After the birds dry, Christie adds accents: white and light pink swirls, hot‑pink highlights, and metallic gold polka‑dot details applied with the back of a brush. She suggests mixed‑media enhancements such as cut‑out hearts, buttons, and Mod Podge for added texture. Throughout, she promotes a relaxed, non‑perfectionist mindset, reminding beginners that acrylic dries fast, can be painted over, and that mistakes can be covered later. The tutorial ends with an invitation for viewers to try the painting over the weekend and a cheerful Valentine’s greeting.
Chapters
Hey guys, how's everybody doing today? Good, I hope. So I wanted to hop on and do a quick little lesson with you guys. So I kind of have a thing for little lovebirds. They're super cute. There's all kinds of different birds you can do. So my name is Christie Hawkins. I'm the owner of The Social Easel and The Social Easel Online Paint Studio, and we have lots going on this month. So let's get to painting. We're gonna paint some birds today. Here is my palette. So lots of pinks. I was just going through my paint and picking out all my favorite pinks, and we're just gonna make this really fun, quick and easy Valentine painting that you can do. So this is my mixed media pad. If you go to— if you're wanting to know where I get my supplies and all that good stuff, I have an Amazon affiliate store where all my favorite supplies are listed. This is one of my essentials, is this mixed media pad, because this is where I do all my practice paintings, and this is where you practice your techniques and all that stuff, so you're not worrying about wasting a canvas or anything like that. So I'm picking up some of my darker pinks first, and I'm gonna go around my edge. I want my focal point to be the middle, and that's where my lovebirds are gonna be. So I am putting dark around the outside, and then I'm gonna go lighter in the middle. And when you're painting, you want to make sure you have plenty of paint on your brush. A lot of people, when they start, they don't put enough paint on there, and they'll start with just like this much paint, and they'll try to make it work, and they can't get it to spread. It's because you don't have enough paint in your brush. So make sure you have enough. It should always be gliding easily for you. If it's not gliding when you're painting and you're having to like force it in like this That means you don't have enough paint on there. So don't be afraid to load your paintbrush up. These are cheap paints, 50 cents a bottle. You're not gonna break the bank by using these paints. They're not like artist acrylic that cost a fortune, so you can have some fun with it. So I'm just gonna transition to a lighter pink now. So when I'm doing this, I am not worried about blending these perfectly. I like the look of the brushstrokes overlapping each other. I like the randomness of it. So, and I try to encourage my students to not, not be so worrisome when you're painting. This is supposed to be relaxing. You are supposed to kind of let go when you're doing this and just enjoy the process. Of painting. Don't worry about trying to make it perfect. There's no such thing. So just have fun with it. And the best thing about acrylic paint is once it dries, you can paint over it. So if you do something you're not happy with, that's fine. Just keep moving. You can come back to it. You can add more. So I've got this nice, pretty, bright background here. All right, now I'm going to pick up some of my light pink. See how it's picking up a little bit? I didn't rinse my brush, so it's picking up a little bit of that color that I had in my brush, maybe picking up a little bit as I'm pulling my brush strokes out here. And I'm just going to keep fanning that edge out. So you guys see how I'm doing that? That way we've got all that variation where you can't really tell where one area stops and the other begins. So I started with a lot of paint on there, and now because I'm kind of feathering it out, I'm just moving that paint around the canvas to give me this lighter area in the middle. I'm gonna pick up a little bit more of that light pink and even a little bit of the white. And this doesn't have to be the exact center of your piece either, so just keep fanning until you've got these nice soft edges here. And I like to have little pops of brighter sections, maybe where a little more light is coming through. So that's our fun little background. Super simple. You can do this with any colors that you want, but I'm going to pull that a little bit closer so you guys can see up close. So the great thing about acrylic paint too, if you are new to painting, is it dries fast. So this is already dry in some of those areas. You can tell when acrylic is dry because it's matte. If it's still wet, you see those shiny spots. That's where it's still wet. So use that as your guide when you're working on your own. My advice is always, if you mess up, don't try to fix it while it's wet because it creates a big mess for you. You want to let it dry and then you can go back and paint over top of it. So I am going in to my black. And this is just a round number 2. Again, when you are starting to paint, a lot of people are afraid to get this much paint in their brush. They'd probably dip it and just have just a little bit of the tip in there. So what happens when you do that, if you just have a little bit in there— well, here, I'm going to show you this because I've already got it loaded. I can make these big bold brush strokes because I have a lot of paint in there. If I just dab just a little, I can barely do anything and it starts getting streaky. Can you guys see that? So don't be afraid to load your brushes up. You got to have enough paint in there to make the lines that you need. So we're just gonna come in and add a little branch It's gonna go across over here, and I think I want to do kind of a whimsical tree here, so I'm going to add some fun little swirls to this. Maybe one that comes off here. So whenever I am adding these little branches, my little curly Q branches, see how I'm coming out of the previous line? So you want to You want everything to continue in from the space it started. That way they're not just jutting out in weird spots. So I'm going to come up here, maybe curve back around that way, and you can just have fun with this. Let your, let your little branches go wherever they want. Maybe have another one kind of come out here. This kind of creates like a little heart shape, and you can have some small curls come off. So you can really just keep going with this however however long you want to, however many curls you want to have in there. So when you are doing the curls, and again, I tell people practice this first before you go straight to your painting so you get comfortable with it, but so I'm pulling in my line, I'm heavy, and then when I am coming to this tip, I kind of lift up on my brush, and when I lift up it kind of gives me that little tapered point there. So I want to add some more over here. So who's excited about trying this? You guys gonna try it this weekend? I am going to I hope you try it, because I want to see what they look like. So I'm trying to decide if I want to add another little guy over here. I'm just going back and thickening up some of my lines. Alright, so I think I'm gonna leave my tree like that for now. I'm gonna come in with a little bit smaller brush, and I recommend getting some smaller brushes too, lots of different sizes, because you can do more. So if I don't like some of the way my little curly-Qs look with the big brush, I can come back in with my small one and get some more detail on there. This one got my bristles kind of messed up on the edge there. So, um, while I am doing this, why don't you guys, um, some other fun things that you guys want to see. And these are simple, like not full-on, like I won't do a start-to-finish painting like I do in my membership group, but fun little paintings like this. Like, what are some things that you want to see or paint or practice, that kind of stuff. All right, so you want to see how to make these little birds. I love these little lovebirds. They're very simple. So the first thing we're gonna do is make a parenthesis. Simple enough, right? Then we're gonna put a little circle and it's gonna connect. It's not gonna go all the way on top of, it's gonna connect and come down here in the middle. So I'm using the brush to rotate around and make that circle for me. So sometimes you just let the brush do the work for you because it's kind of pushing it around in a circle. And then we're going to taper down here and just pull that line back up into our parentheses. You can add a little curve to it if you want, or it can come straight down. Then we're just going to fill it in. So there is lovebird number 1. Then I like to have mine touching or overlapping a little bit. Maybe have one a little bit smaller than the other. That's up to you. And I've taught these little birds and trees so many times. I have some people do them for family, so if you don't want to just do the two, you could have— add some little birds up here for your kids and represent the whole family there. So this would be a cute little thing for you to hang up and do. For Valentine's Day without a lot of work or just easy. Just grab a few of your favorite pinks or reds, some black and white, and you are good to go. So what do you guys think of the lovebirds? Good. So I'm gonna let that dry. I want to come in and add some gold into my tree, and I also want to add some fun little circles that are floating around just to make it more— excuse me— more whimsical. So I'm gonna grab some white and some light pink. Can you guys see that? That light is too bright. So I've just got white and light pink on there, and when I'm adding these circles in, I want to pay attention to where I'm adding them. So for these lighter colors, I obviously don't want go in the middle because it's gonna blend in. So I want these lighter colors to come out here, and I'm just gonna do these little swirls. And you can go back and pick up more of the pink or pick up more of the white. These don't all have to be the same size. We can have some little guys and some big ones. Then I'm gonna come in with some of the brighter colors on the inside here. Maybe add another one there. I'm gonna wipe that off and grab some of this brighter hot pink that I have over here. Start adding some here. Here's where I'm gonna cover up my little mistake I made earlier, and then you're never gonna know that it was there. So these are just fun little swirly circles that we're adding in. You can have some overlap your branches a little bit if you want to. That one blends too much. We need it to be in a little bit lighter area. We'll pick up some of our white over here. So aren't these just fun little circles you can add in there? You can add as many or as few as you want to. Alright, so now I'm gonna grab some of my gold, and this is a shiny metallic gold. It's very pretty, and I want to add some of this in to my black. So I'm not covering the black completely, I'm just kind of accenting it. It doesn't have to be the same everywhere, it can be heavier in some spots. But I waited for my black to completely dry before doing this. And even if you get it outside of that a little bit, that's okay. Add some little floating hearts around here. Or you could turn it into a little mixed media piece. If you guys haven't seen me do any mixed media, maybe I'll do a mixed media lesson with you guys. You could cut out little hearts and paste them all over here with some Mod Podge and add some words if you want. So you don't have to just stick with paint. You can You can break it up and change things up, add some buttons on there. We did that post a little while back about how many of you had the little jar or container of buttons from your grandma. So I bet all of us have some buttons laying around that would be cute added on here. Don't you love that gold? I think it's so pretty. And then I'm gonna grab— I've still got some gold in there, but I'm just gonna dip into my white. I don't want a ton of accent on my birds, maybe just a little, or you could leave them completely black if you wanted. You could always try it with white, and if you get it on there and you don't like it, just let it dry and and then you can paint right back over it again. So I wanna add, of course, some gold little polka dots all over. So here's my trick for polka dots: use the back of your brush, then you get these perfect little dots. Anytime you can add a little gold or bling to something I think it's good. I'm sorry if that's still blurring in and out. We may have to check my connection. I don't know if it's trying to connect to my Wi-Fi or AT&T, but usually we don't have that problem with it doing that. I think it helped when I got closer. So what do you guys think? Just a super fun Valentine's painting. I can't wait to see them. So I love all the hearts. Happy early Valentine's Day. I can't wait to see these. So everybody have a good weekend, and I will talk to you guys on Monday. Bye.